# Atloria (self dogfood)
# What is Atloria
## What Atloria is
Atloria reads a repository and turns it into a customer-facing set of documentation and support
surfaces. The product describes these surfaces as a knowledge base, user manuals, an API explorer,
and AI support. Together, they give readers searchable help, step-by-step guidance, API details,
and cited answers.
A public trial is the no-signup route for submitting a repository URL. An authenticated workspace is
the signed-in area where you manage projects and start project setup.
Use this page to choose how to begin:
| If you need to… | Go to |
|---|---|
| Try documentation generation with a public repository | [Start with a public repository](#start-with-a-public-repository) |
| Sign in with an email address and password | [Sign in and reach the workspace](#sign-in-and-reach-the-workspace) |
| Use an organization's single sign-on route | [Sign in and reach the workspace](#sign-in-and-reach-the-workspace) |
| Choose a repository provider or continue without one | [Choose a repository path in the workspace](#choose-a-repository-path-in-the-workspace) |
| Continue after reaching the dashboard | [What to do next](#what-to-do-next) |
| Learn what you can do after setup | [What can you do with Atloria](https://atloria-selfdogfood-3577.atloria.app/p/atloria-selfdogfood-3577-BDFvUbEgc3/user/what-can-you-do-with-atloria) |
## Before you enter the workspace
The dashboard is the authenticated workspace. The first-project wizard is its starting point for
connecting code to a project. A repository provider is GitHub, GitLab, or Bitbucket. Single sign-on
is the organization route that uses a work email or organization ID.
Prepare one of these starting points:
| Starting point | What to have ready |
|---|---|
| Public trial | A repository URL, or an example repository to select |
| Email sign-in | Your email address and password |
| Single sign-on | Your work email or organization ID |
| First-project wizard | A repository URL, a connected provider, or a decision to create without a repository |
The dashboard fetches projects and contains the onboarding checklist and first-project wizard. After a
successful sign-in, Atloria routes you to `/app` and refreshes the page.
## Choose how to start
From the home page, choose the route that matches your goal.
| If you want to… | Select |
|---|---|
| Try a public repository | **Try it free** |
| Open the sign-in page | **Login** |
| Begin a free account route | **Start free →** |
| Use the product-purpose links | **Product** or **Groundedness** |
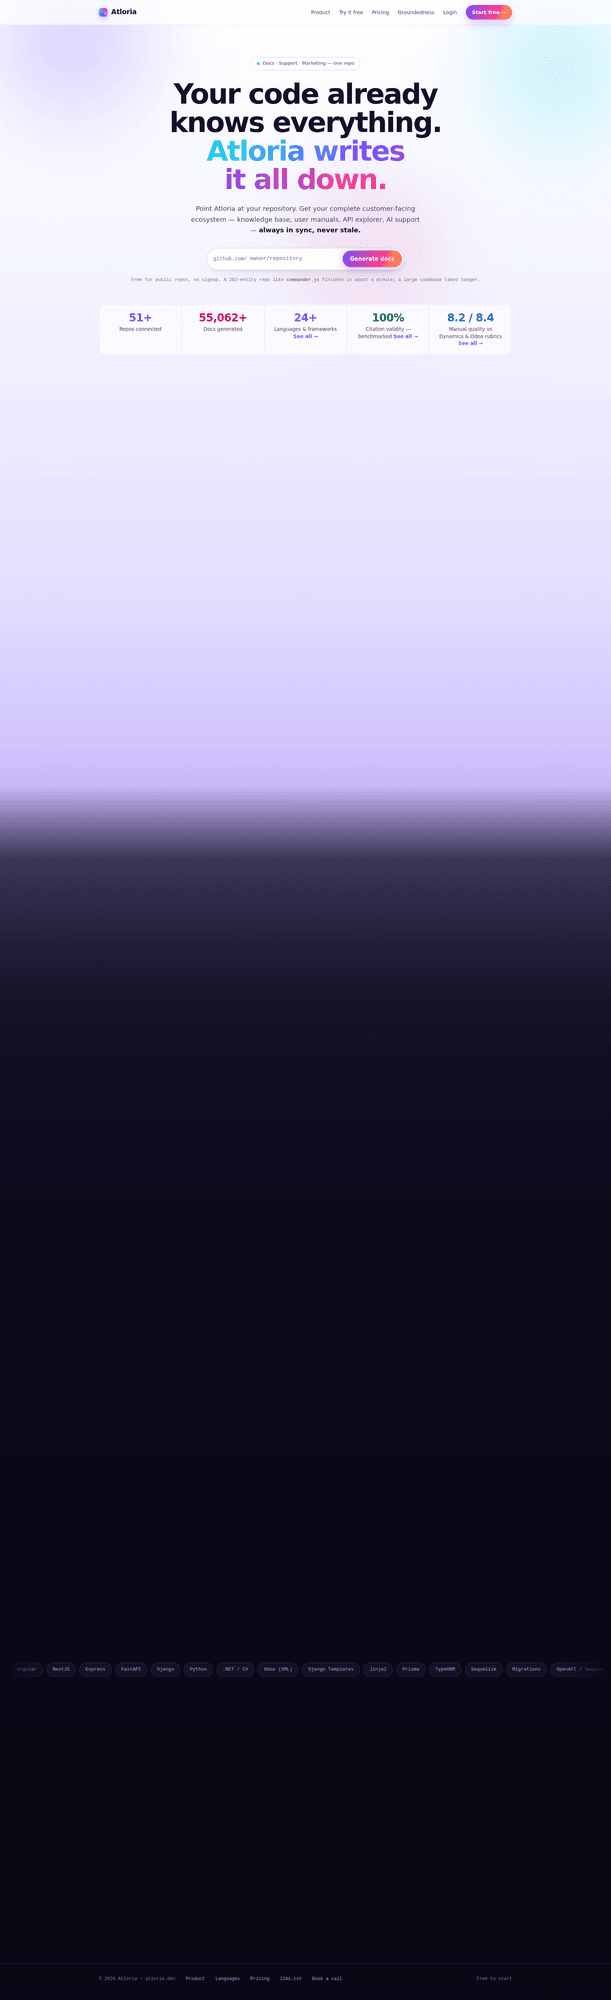
The home page also displays **Pricing** and live product summaries, including repos connected, docs
generated, languages and frameworks, citation validity, and manual quality. Its repository prompt
begins with `github.com/` and sits beside **Generate docs**.
## Start with a public repository
The public trial lets you submit a repository URL without signing up. The repository field accepts a
URL, and the page also offers example repositories that fill the field when selected.
**Prerequisites**
- Have a public repository URL ready, or choose one of the displayed examples.
**Steps**
1. Open **Try it free** from the home page.
2. Enter the URL in **Repository URL**.
3. Select **Generate docs**.
4. When generation completes, select **Open your docs hub →** to open the generated hub.
5. Select **Copy link** when you need the hub address on your clipboard.
**Result:** Atloria starts documentation generation for the repository; after completion, the page
offers **Open your docs hub →** and **Copy link**.
If the request fails, the page displays the returned error message or HTTP status. During a failed
generation, the page displays the generation error returned by the job: “Generation failed: {status.job.error}”.
## Sign in and reach the workspace
The sign-in page is the route for an existing account or an organization that uses single sign-on.
**Prerequisites**
- Have your email address and password, or your work email or organization ID for SSO.
**Steps**
1. Open **Login** from the home page.
2. Enter your email address in **Email address**.
3. Enter your password in **Password**.
4. Select **Sign in**.
5. Choose one sign-in route:
| If you want to… | Actions |
|---|---|
| Sign in with an email address and password | Select **Sign in**. |
| Use your organization's single sign-on | Select **Continue with SSO**. Enter your details in **Work email or organization ID**. Select **Continue with SSO** again. |
**Result:** A successful credentials sign-in routes you to `/app` and refreshes the workspace.
The sign-in page also provides **Sign up** for a new account and **Forgot your password?** for
password recovery.
## Choose a repository path in the workspace
The first-project wizard is the workspace starting point for connecting code to an Atloria project.
It offers separate routes for a valid repository URL, a connected provider, and a project without a
repository.
**Prerequisites**
- Reach the authenticated workspace.
**Steps**
1. In the first-project wizard, choose one route:
| If you want to… | Select |
|---|---|
| Enter a repository URL | Enter the URL, then select **Get Started →** |
| Browse a connected provider | Select **GitHub**, **GitLab**, or **Bitbucket** |
| Create a project without code connected yet | Select **Create without a repository** |
2. In repository browsing, search with **Search repositories...** when you need to narrow the list.
**Result:** The wizard proceeds with the selected repository route or starts a project without a
repository. A valid detected provider allows **Get Started →** to proceed. A connected provider opens
repository browsing; a provider that is not connected opens provider connection first.
## When entry or generation fails
Use the exact message on screen to choose the recovery action.
| What you see | What to do |
|---|---|
| `Invalid email or password` | Check **Email address** and **Password**, then select **Sign in** again. |
| `No SSO connection was found for that email. Check with your administrator.` | Check the work email or organization ID, or contact your administrator. |
| `Could not start SSO. Please try again.` | Select **Continue with SSO** again. |
| `Your organization requires single sign-on. Continue with SSO below.` | Use the SSO field and select **Continue with SSO**. |
| `Single sign-on could not be completed.` | Return to sign-in and retry the SSO route. |
| `Please enter a valid GitHub, GitLab, or Bitbucket repository URL` | Correct the repository URL, then select **Get Started →**. |
| `Failed to load repositories. Please try again.` | Retry repository browsing. |
| `Failed to create project` | The page displays the project-creation error returned by the request. |
| A returned HTTP status | The page displays the returned generation error. |
| A generation error | Read the generation error and correct the reported problem. |
## What to do next
After you choose an entry route, continue with the page that matches your next task:
| Next task | Continue with |
|---|---|
| Complete account access | [Your first day](https://atloria-selfdogfood-3577.atloria.app/p/atloria-selfdogfood-3577-BDFvUbEgc3/user/your-first-day) |
| Learn the dashboard shell | [Understanding the interface](https://atloria-selfdogfood-3577.atloria.app/p/atloria-selfdogfood-3577-BDFvUbEgc3/user/understanding-the-interface) |
| Move between workspace destinations | [Navigation basics](https://atloria-selfdogfood-3577.atloria.app/p/atloria-selfdogfood-3577-BDFvUbEgc3/user/navigation-basics) |
| Create the first project | [Create a project](https://atloria-selfdogfood-3577.atloria.app/p/atloria-selfdogfood-3577-BDFvUbEgc3/user/create-a-project) |
| Explore the product capabilities | [What can you do with Atloria](https://atloria-selfdogfood-3577.atloria.app/p/atloria-selfdogfood-3577-BDFvUbEgc3/user/what-can-you-do-with-atloria) |
| Check access and environment needs | [System requirements](https://atloria-selfdogfood-3577.atloria.app/p/atloria-selfdogfood-3577-BDFvUbEgc3/user/system-requirements) |
| Find general error guidance | [General error messages](https://atloria-selfdogfood-3577.atloria.app/p/atloria-selfdogfood-3577-BDFvUbEgc3/user/general-error-messages) |
The dashboard is titled **Dashboard** and can include project, generation, and chat-answer activity
summaries. It can also display **Get started with Atloria**, including **Connect a repo** and
**Dismiss get started checklist**.
# Who uses Atloria
The administration dashboard is the starting point for choosing an administration area.
## Overview
Use its links to choose the area that matches your work. It brings together links for users,
organizations, documents, projects, operations, AI configuration, system settings, and security and
audit work.
| If you need to… | Go to |
|---|---|
| Manage users or add a user | **Users & Permissions** or **Add New User** |
| Manage organizations | **Organizations** |
| Work with documents | **Documents** |
| Work with projects | **Projects** or **Create Project** |
| Review operations and analytics | **Operations & Analytics** |
| Open AI configuration | **AI Configuration** |
| Open application settings | **System Settings** |
| Review security information | **Security & Audit** |
The detailed work continues on the relevant page: [Users and permissions overview](https://atloria-selfdogfood-3577.atloria.app/p/atloria-selfdogfood-3577-BDFvUbEgc3/user/users-and-permissions-overview),
[Organization overview](https://atloria-selfdogfood-3577.atloria.app/p/atloria-selfdogfood-3577-BDFvUbEgc3/user/organization-overview), [Documents overview](https://atloria-selfdogfood-3577.atloria.app/p/atloria-selfdogfood-3577-BDFvUbEgc3/user/documents-overview),
[Projects overview](https://atloria-selfdogfood-3577.atloria.app/p/atloria-selfdogfood-3577-BDFvUbEgc3/user/projects-overview), [Operations overview](https://atloria-selfdogfood-3577.atloria.app/p/atloria-selfdogfood-3577-BDFvUbEgc3/user/operations-overview),
[AI configuration overview](https://atloria-selfdogfood-3577.atloria.app/p/atloria-selfdogfood-3577-BDFvUbEgc3/user/ai-configuration-overview), [System settings overview](https://atloria-selfdogfood-3577.atloria.app/p/atloria-selfdogfood-3577-BDFvUbEgc3/user/system-settings-overview),
or [Security and audit overview](https://atloria-selfdogfood-3577.atloria.app/p/atloria-selfdogfood-3577-BDFvUbEgc3/user/security-and-audit-overview).
## Before you start
**Prerequisites**
- You are signed in to Atloria.
- Your session is active so the administration dashboard can show the signed-in identity and load
the project count.
- You know which area of administration you need to open.
The subtitle can include your signed-in name and role. The **Your Projects** value appears as a
project count when the project request succeeds; a failed request leaves that value as `—`.
The administration page does not define which roles may open each destination. Use the access you
have been given when selecting an area.
## Open the administration dashboard
Open the administration dashboard before choosing an administration area.
**Prerequisites**
- You are signed in to Atloria.
**Steps**
1. Open the administration dashboard.
**Result:** The administration dashboard is on screen with its administration links and quick
actions.
## Read the administration dashboard
The administration dashboard is a list of destinations rather than an inline editing form. The
administration links are grouped as follows:
| Area | What the destination is for | Control |
|---|---|---|
| Users and access | Manage users, roles, and access control | **Users & Permissions** |
| Organizations | Manage organizations and team structure | **Organizations** |
| Documents | Manage documents and bulk operations | **Documents** |
| Projects | Open project settings and configurations | **Projects** |
| Operations and analytics | Review jobs, AI spend, credits, deflection, and queue health | **Operations & Analytics** |
| AI configuration | Manage AI models, providers, and API settings | **AI Configuration** |
| System settings | Manage application configuration and preferences | **System Settings** |
| Security and audit | Review security logs and the audit trail | **Security & Audit** |
The quick actions provide shorter routes to two areas: **Add New User** opens user management and
**Create Project** opens projects. **System Settings** also appears as a quick action.
The subtitle includes the signed-in name when one is available and adds the role when one is
available. When the project request fails, the value remains `—`. The page does not provide
editable fields, filters, a grid, or a save action. It also
does not show its own validation, confirmation, or error message for the project-count failure.
## Choose an administration area
Select the destination that matches the work you need to do. Each destination opens its own area.
**Prerequisites**
- The administration dashboard is on screen.
**Steps**
1. Select the control for the area you need.
| If you need to… | Select… | Result |
|---|---|---|
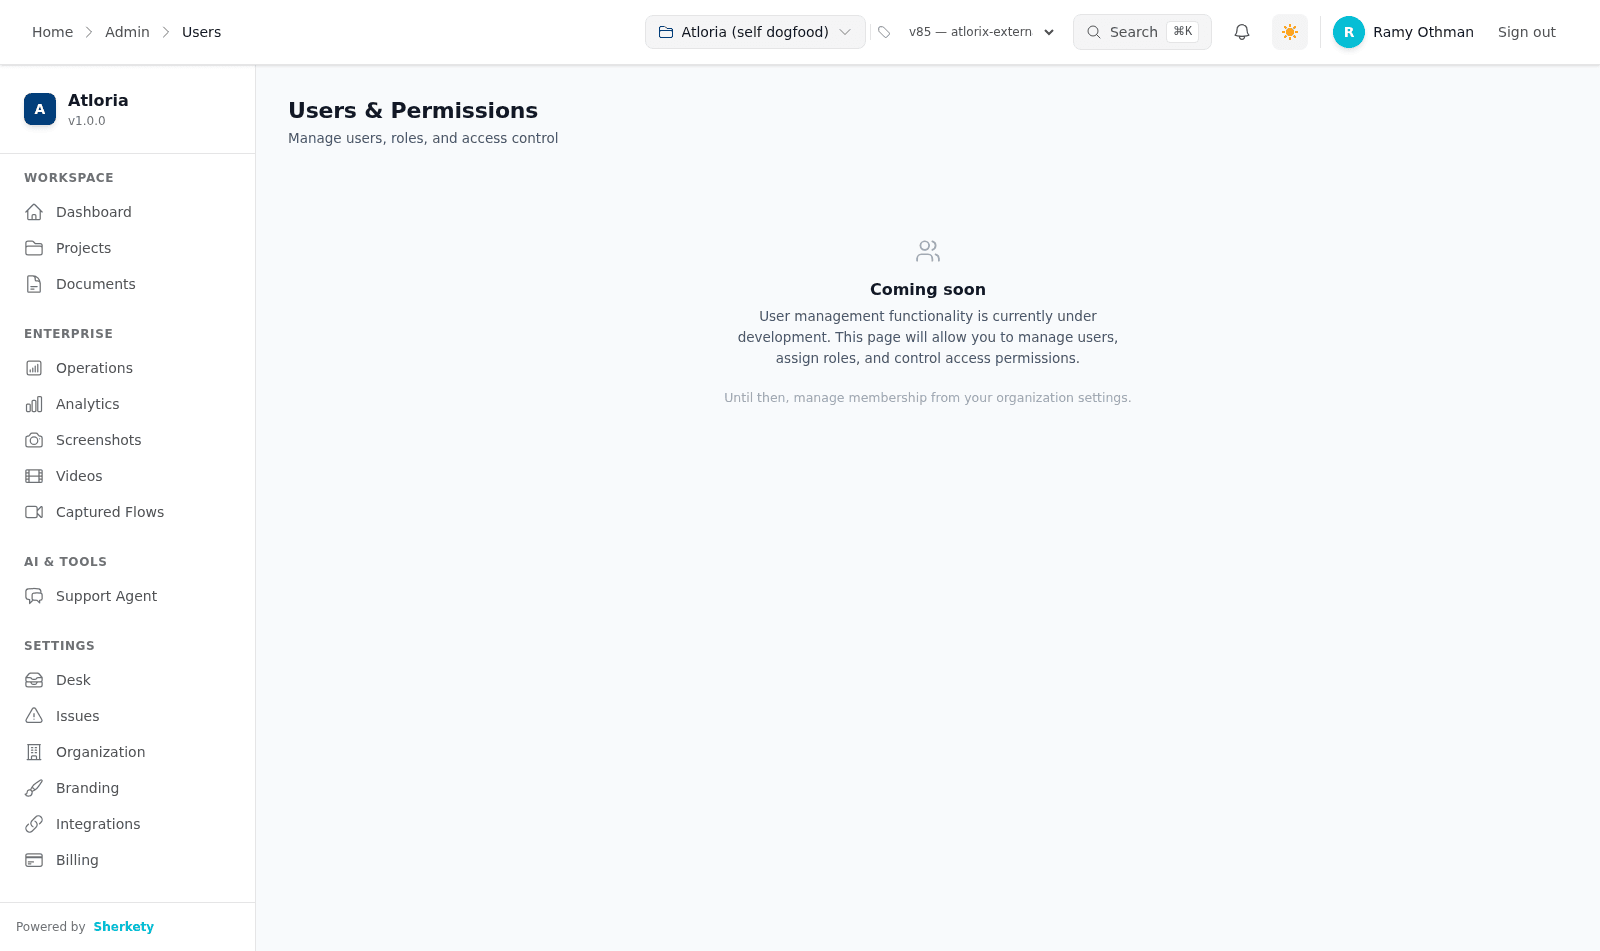
| Manage users or add a user | **Users & Permissions** or **Add New User** | The users area opens. |
| Manage organizations | **Organizations** | The organizations area opens. |
| Work with documents | **Documents** | The documents area opens. |
| Work with projects or create a project | **Projects** or **Create Project** | The projects area opens. |
| Review operations and analytics | **Operations & Analytics** | The operations and analytics area opens. |
| Open AI configuration | **AI Configuration** | The AI configuration destination opens. |
| Open application settings | **System Settings** | The system settings area opens. |
| Review security information | **Security & Audit** | The security and audit area opens. |
2. Check the destination route before continuing with that area's work.
**Result:** The selected administration area is on screen at its destination route.
## When a destination is unavailable
A destination can open with a loading indicator or an error page. These outcomes belong to the
destination, not to the administration dashboard.
| What you see | Destination | Result |
|---|---|---|
| A loading indicator remains on screen | **Documents** | The destination has not presented its working content. |
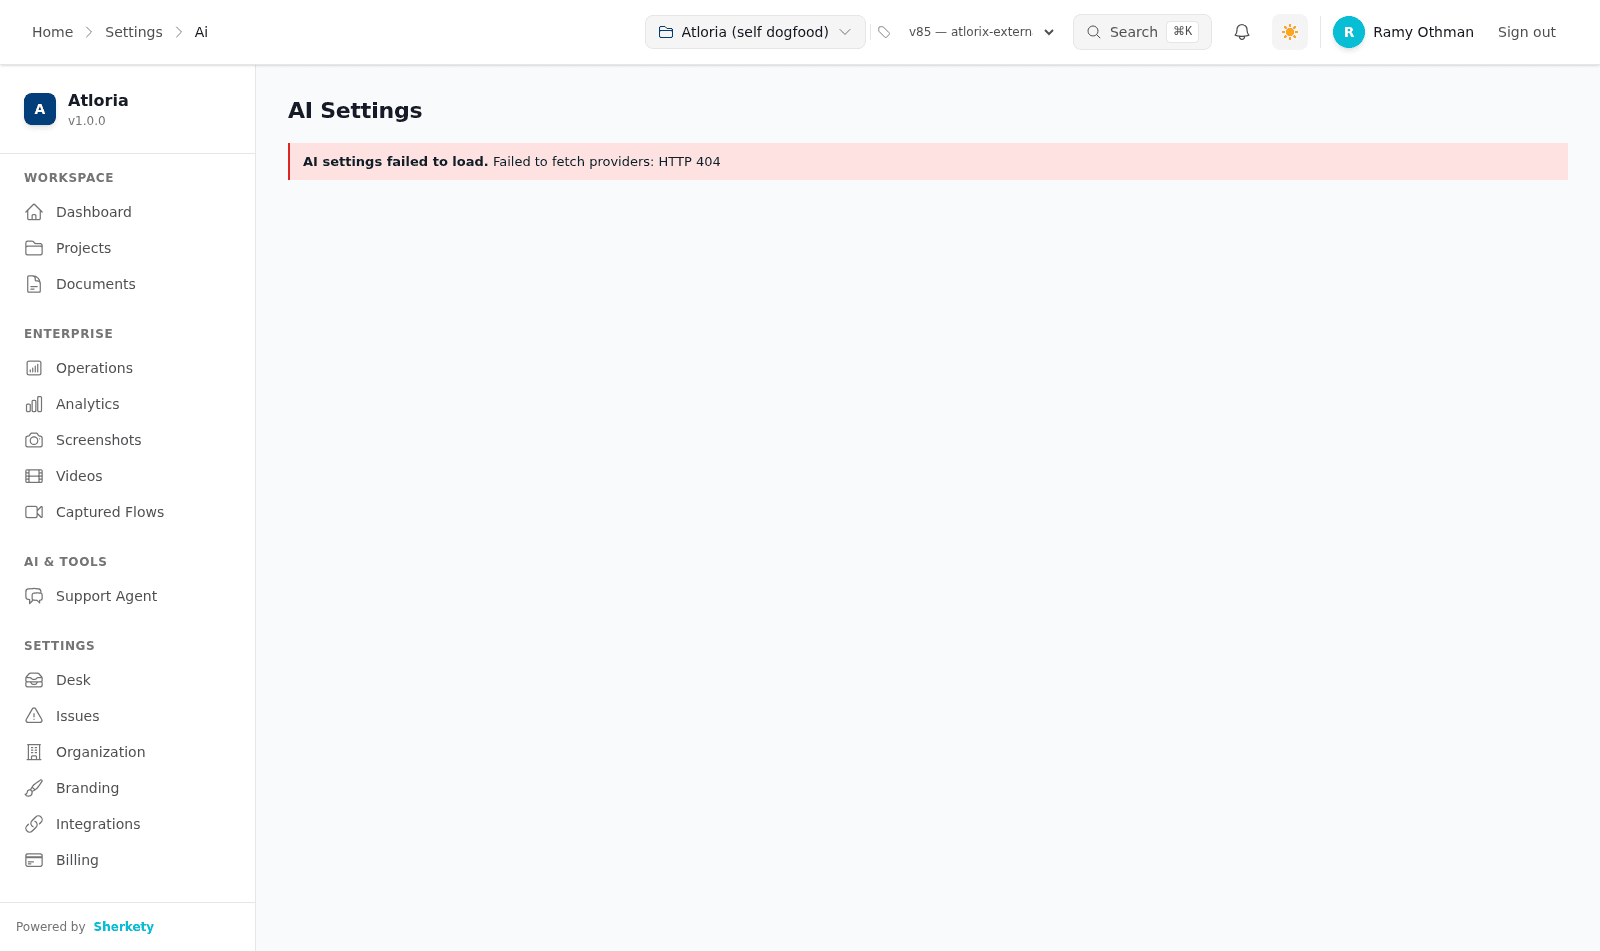
| `404` | **AI Configuration** | The destination is unavailable. |
The administration page itself produced no dialog, stage change, validation message, confirmation
message, or error message. For application-wide error wording, see
[General error messages](https://atloria-selfdogfood-3577.atloria.app/p/atloria-selfdogfood-3577-BDFvUbEgc3/user/general-error-messages).
## Continue in the selected area
After a destination opens, continue with the page that owns that area. Use the link for the area
you selected to continue with its tasks.
| Destination | Continue with |
|---|---|
| Users and permissions | [Users and permissions overview](https://atloria-selfdogfood-3577.atloria.app/p/atloria-selfdogfood-3577-BDFvUbEgc3/user/users-and-permissions-overview) |
| Organizations | [Organization overview](https://atloria-selfdogfood-3577.atloria.app/p/atloria-selfdogfood-3577-BDFvUbEgc3/user/organization-overview) |
| Documents | [Documents overview](https://atloria-selfdogfood-3577.atloria.app/p/atloria-selfdogfood-3577-BDFvUbEgc3/user/documents-overview) |
| Projects | [Projects overview](https://atloria-selfdogfood-3577.atloria.app/p/atloria-selfdogfood-3577-BDFvUbEgc3/user/projects-overview) |
| Operations and analytics | [Operations overview](https://atloria-selfdogfood-3577.atloria.app/p/atloria-selfdogfood-3577-BDFvUbEgc3/user/operations-overview) |
| AI configuration | [AI configuration overview](https://atloria-selfdogfood-3577.atloria.app/p/atloria-selfdogfood-3577-BDFvUbEgc3/user/ai-configuration-overview) |
| System settings | [System settings overview](https://atloria-selfdogfood-3577.atloria.app/p/atloria-selfdogfood-3577-BDFvUbEgc3/user/system-settings-overview) |
| Security and audit | [Security and audit overview](https://atloria-selfdogfood-3577.atloria.app/p/atloria-selfdogfood-3577-BDFvUbEgc3/user/security-and-audit-overview) |
**Result:** You are on the page for the administration area you selected.
# What can you do with Atloria
## What you can do in Atloria
Atloria's main workspace helps you create projects, generate documentation, organize
documents, and monitor documentation work. Use the dashboard for a quick starting point,
Projects for project work, Documents for document organization, and Operations for activity
and job information.
| If you need to… | Start here |
| --- | --- |
| Create a project or start documentation generation | The dashboard or Projects |
| Find, filter, categorize, or reorder documents | Documents |
| Review generation, AI, credits, chat, jobs, or queues | Operations |
## Before you start
You need an authenticated workspace session for the dashboard data and document loading.
Documents also require a selected project. If you are creating a project, prepare a repository
URL when you want Atloria to read a repository, or use **Create without a repository** when you
want to begin without one.
The project wizard lets you choose documentation outputs. The available choices are:
| Output | Use it for |
| --- | --- |
| **User Guides** | Step-by-step guides, tutorials, and screenshots |
| **Technical Docs** | Component trees, entity graphs, and architecture diagrams |
| **API Reference** | OpenAPI specifications, endpoints, and request/response examples |
| **Support Bot** | Not available for selection; it is marked **Soon** |
Project creation also depends on the project name, slug, and branch being available before you
continue from project details. Private repository access can require the **Authentication**
path before the configuration path is available.
## Find the workspace task
Use the following workspace destinations to reach the work you want to do:
| If you want to… | Open |
| --- | --- |
| Start at the workspace dashboard | Dashboard |
| Work with the project list | Projects |
| Work with documents and categories | Documents |
| Review operational information | Operations |
### Choose a starting point
**Prerequisites**
- You know whether you are creating a project, organizing documents, or reviewing activity.
**Steps**
1. Choose one starting point from the table below.
| Your task | Action |
| --- | --- |
| Start from recent projects or the project wizard | Open the dashboard |
| Open the complete project list | Select **View all** from the dashboard when it is available |
| Open a particular project | Select **Open ** for the project you want to open. |
| Open the project list directly | Open Projects |
| Open document work | Open Documents |
| Review operational information | Open Operations |
**Result:** The workspace surface for your task is on screen.
## Understand the workspace surfaces
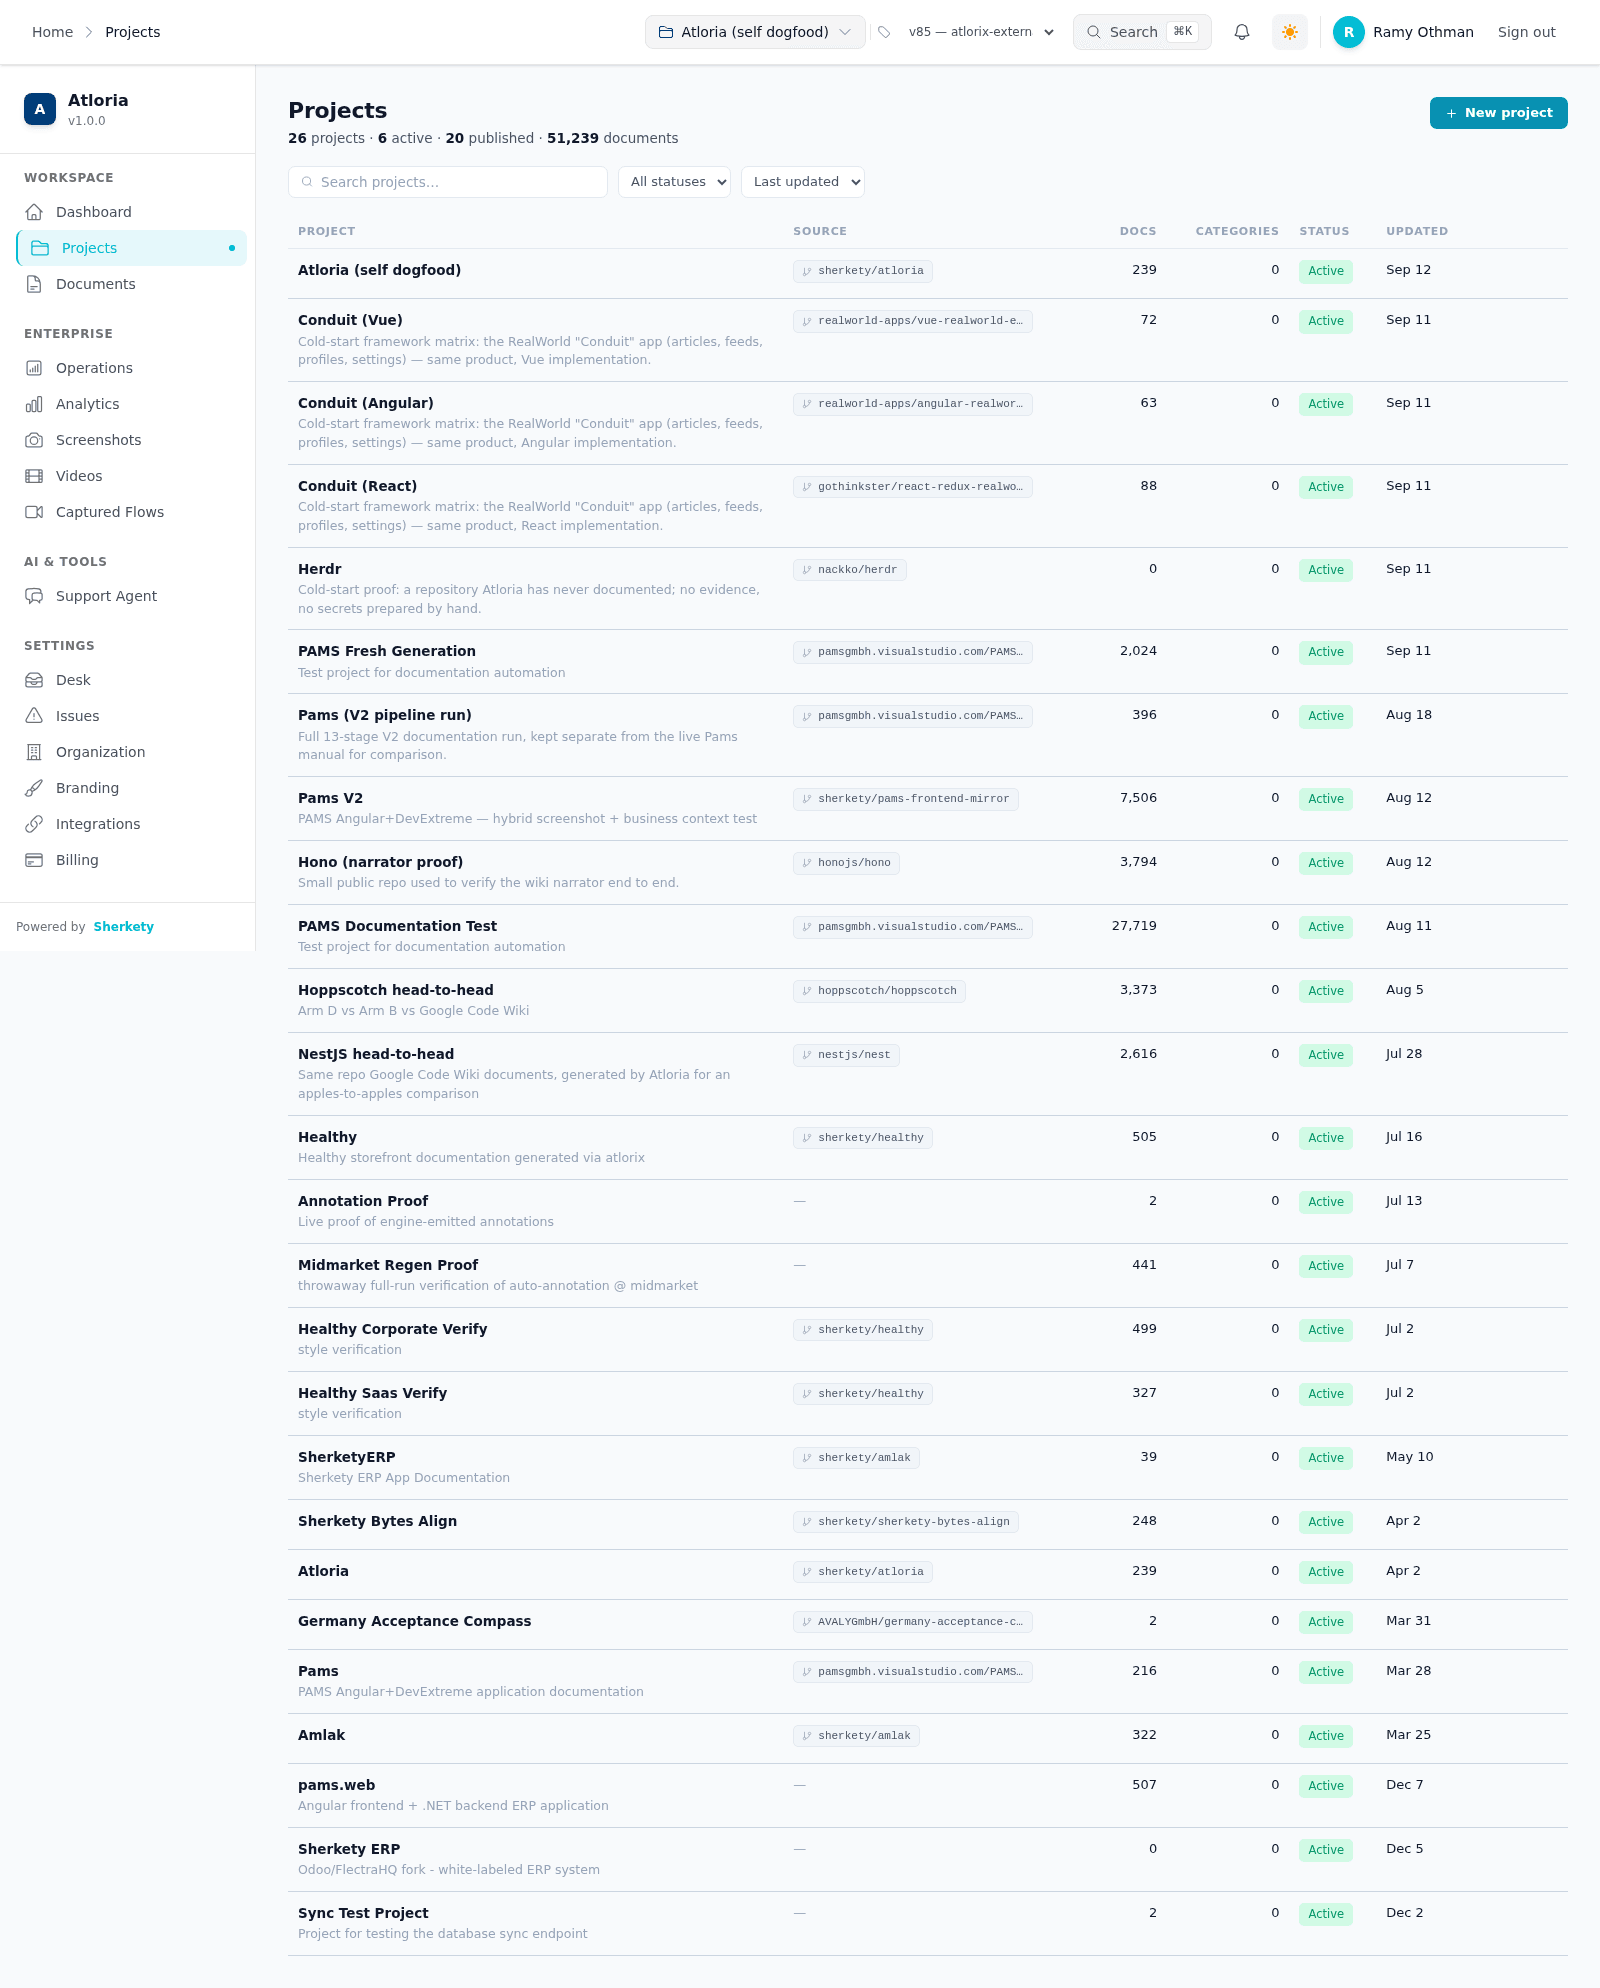
The dashboard presents recent projects with the headers `Project`, `Docs`, `Categories`, and
`Updated`. Projects provides project search, status filtering, sorting, project counts, source,
document and category counts, status, and update information. Documents provides a version
choice, a category tree, and the document list. Operations presents generation success, AI spend,
credits, deflection rate, attention lists, AI usage by model, recent jobs, and queues.
Use the surface that answers the question you have:
| Question | Surface to use |
| --- | --- |
| Which projects are available and when were they updated? | The Projects list |
| Which documents belong to a category or version? | Documents |
| How are generation jobs and recent activity performing? | Operations |
## Create and organize documentation work
### Start project creation or documentation generation
**Prerequisites**
- You have a repository URL, or you intend to create without a repository.
- You have chosen at least one enabled documentation output before generation.
**Steps**
1. Choose how to start the project.
| Starting condition | Action |
| --- | --- |
| You are starting without a repository | Select **Create without a repository** |
| You have entered a valid repository URL | Select **Get Started →** |
2. Choose the documentation outputs.
| Your choice | Action |
| --- | --- |
| Every enabled output | Select **Select All** |
| Specific enabled outputs | Select each output you want |
3. Select **Generate Documentation →** after choosing at least one output.
**Result:** Atloria starts project creation and the selected documentation work.
### Filter and sort projects
**Prerequisites**
- Projects are available in the project list.
**Steps**
1. Enter text in **Search projects…** to filter by project name or description.
2. Choose **All statuses**, **Active**, **Draft**, **Published**, or **Archived** to filter by
status.
3. Choose **Last updated**, **Name A–Z**, **Name Z–A**, or **Date created** to change the order.
**Result:** The project list shows the projects that match the search, status, and sort choices.
### Change document order
**Prerequisites**
- A project is selected for document work.
**Steps**
1. Select **Edit order** to enter document-ordering mode.
2. Drag documents or categories to the required position.
3. Select **Exit edit mode** when the order is complete.
**Result:** Documents are shown in the selected order.
### Clear the category filter
**Prerequisites**
- A category filter is selected in Documents.
**Steps**
1. Select **Clear** to remove the selected category filter.
**Result:** The selected category filter is cleared.
### Draft from an insight
**Prerequisites**
- A manual insight with a **Draft page** action is available.
**Steps**
1. Select **Draft page** beside the manual insight.
**Result:** The selected drafting route is on screen.
## Choose the right branch
The available path changes with your access and current workspace data. Use these rules before
you continue:
**Prerequisites**
- You have access to the workspace and can identify the condition that applies.
**Steps**
1. Choose the situation that matches your workspace.
| Situation | What to do |
| --- | --- |
| You need private repository access | Use **Authentication**, then continue through **Configuration** after access is resolved |
| You have no project selected | Select a project before working with documents |
| No versions exist | Continue with the document list without a version choice |
| The project list is empty | Use the empty-state **New project** action |
| No projects exist for manual insights | Continue with the other Operations information |
| You want the unavailable output | Choose an enabled output instead of **Support Bot** |
**Result:** You are on the path supported by your access, project, version, and output choices.
## When a workspace action fails
Use the exact message on screen to choose the next action.
**Prerequisites**
- A workspace action has displayed one of the messages in the table.
**Steps**
1. Choose the matching message and follow its action in the table.
| What you see | What to do |
| --- | --- |
| `Please enter a valid GitHub, GitLab, or Bitbucket repository URL` | Correct the repository URL before selecting **Get Started →** again. |
| `Could not access repository` | Check the repository access details and test the connection again. |
| `Connection test failed — check your credentials` | Check the credentials before testing the connection again. |
| `Failed to create config` | Review the project setup and retry project creation. |
| `Failed to create project` | Review the project setup and retry project creation. |
| `Projects failed to load.` | Retry loading the Projects page. |
| `Name doesn't match` | Enter the exact project name in the deletion confirmation field. |
| `This action is permanent and cannot be undone` | Continue only when permanent deletion is intended. |
| `Failed to delete category` | Retry the category deletion. |
| `Failed to reorder documents. Please try again.` | Retry document ordering. |
| `Failed to reorder categories. Please try again.` | Retry category ordering. |
| `Operations failed to load.` | Retry loading the Operations page. |
| `Insights failed to load.` | Retry loading manual insights. |
**Result:** You have the recovery action that matches the message on screen.
## Continue to the dedicated task
Use the focused page for the next task:
**Prerequisites**
- You have chosen the task you want to complete next.
**Steps**
1. Choose the focused page for the task you want to complete.
| Next task | Page |
| --- | --- |
| Create a complete project | Create a project |
| Understand project organization | Projects overview |
| Work with the document list | Documents overview |
| Create or edit a document | Create and edit a document |
| Review operational information | Operations overview |
| Follow generation stages | Documentation generation lifecycle |
| Interpret job status | Documentation job status reference |
| Move between workspace destinations | Navigation basics |
**Result:** You have chosen the dedicated task page for the work you want to complete next.
# System requirements
## What you need to use Atloria
Atloria is a product-intelligence platform delivered through a web application.
Workspace access and repository setup are separate steps:
| If you need to… | Go to |
|---|---|
| Understand what Atloria is | [What is Atloria](https://atloria-selfdogfood-3577.atloria.app/p/atloria-selfdogfood-3577-BDFvUbEgc3/user/what-is-atloria) |
| Check the access state before opening the workspace | [Before you start](#before-you-start) |
| Reach the workspace | [Reach the workspace](#reach-the-workspace) |
| Connect a repository | [Connect a repository](#connect-a-repository) |
| Resolve an access or connection problem | [When access or connection fails](#when-access-or-connection-fails) |
| Sign in and complete initial access | [Your first day](https://atloria-selfdogfood-3577.atloria.app/p/atloria-selfdogfood-3577-BDFvUbEgc3/user/your-first-day) |
| Get help with an unresolved problem | [Getting help](https://atloria-selfdogfood-3577.atloria.app/p/atloria-selfdogfood-3577-BDFvUbEgc3/user/getting-help) |
## Before you start
**Prerequisites**
- An authenticated session is a signed-in workspace session.
- You have the repository information needed for the connection you are about to make.
An authenticated session is required to load project data.
With these prerequisites in place, continue to Reach the workspace.
## Reach the workspace
The workspace is the authenticated application area where the dashboard and project work
are available.
**Prerequisites**
- You have an authenticated session.
**Steps**
1. Open the workspace and continue according to the page you reach:
| If you see… | The application does… |
|---|---|
| The authenticated workspace | Shows **Dashboard** and loads project data for the authenticated session. |
| The sign-in page | The workspace is unavailable until the sign-in step finishes. |
**Result:** You are on **Dashboard** when the session is active; otherwise, complete sign-in
before continuing to repository setup.
## Connect a repository
Repository authentication gives Atloria the credentials it needs when a repository is
private or public access does not succeed.
**Prerequisites**
- You are signed in to the workspace.
- You have the repository credentials when public access is unavailable.
**Steps**
The application first tries public repository access without credentials. If that fails, it
tries a connected provider. When those checks do not provide access, the authentication
controls appear.
1. Select **Authentication**.
2. Enter the repository identity in **Username / Token Name**.
3. Enter the repository credential in **Password / Access Token**.
4. Select **Test Connection**.
The **Configuration** tab is also available during repository setup. The authentication
fields are shown when repository authentication is needed.
**Result:** The connection check displays either `Connection successful` or a connection
failure message.
## When access or connection fails
Use the message on screen to choose the next action.
| What you see | What it means | What to do |
|---|---|---|
| `7-day activity unavailable` | The dashboard's seven-day activity request failed. | Continue with the workspace and retry the activity request when the service is available. |
| `Provide credentials to access this repository. Required for private repos.` | The repository needs private-access details before the check can continue. | Open **Authentication** and provide the repository values in **Username / Token Name** and **Password / Access Token**. |
| `Connection test failed — check your credentials` | The repository could not be accessed with the entered details. | Check the values in **Username / Token Name** and **Password / Access Token**, then select **Test Connection** again. |
| `Connection failed` | The repository could not be reached with the current connection details. | Check the repository values and select **Test Connection** again. |
| `Connection successful` | The repository is ready for the next setup step. | Continue with the project configuration. |
## Continue with Atloria
After the environment check, continue with [Your first day](https://atloria-selfdogfood-3577.atloria.app/p/atloria-selfdogfood-3577-BDFvUbEgc3/user/your-first-day) for account
access, [What is Atloria](https://atloria-selfdogfood-3577.atloria.app/p/atloria-selfdogfood-3577-BDFvUbEgc3/user/what-is-atloria) for product orientation, or [Getting help](https://atloria-selfdogfood-3577.atloria.app/p/atloria-selfdogfood-3577-BDFvUbEgc3/user/getting-help)
for product questions and issues.
# Getting help
## Choose the right help surface
Desk is the work area for triaging and following up support threads. Issues is the area for
reviewing reported problems and directing them to an issue list or board.
Use this page when you need to route a request, reply to a support thread, or review reported
issues. For a full explanation of Desk, see [Desk overview](https://atloria-selfdogfood-3577.atloria.app/p/atloria-selfdogfood-3577-BDFvUbEgc3/user/desk-overview). For the complete
Desk procedure, see [Work from Desk](https://atloria-selfdogfood-3577.atloria.app/p/atloria-selfdogfood-3577-BDFvUbEgc3/user/work-from-desk). For Desk states and transitions, see
[Desk states and actions](https://atloria-selfdogfood-3577.atloria.app/p/atloria-selfdogfood-3577-BDFvUbEgc3/user/desk-states-and-actions).
| If you need to… | Go to |
|---|---|
| Choose a queue for a support request | [Open Desk or Issues](#open-desk-or-issues) |
| Reply to a customer or keep a note for your team | [Work a support request in Desk](#work-a-support-request-in-desk) |
| Change a support thread's state | [Desk states and actions](https://atloria-selfdogfood-3577.atloria.app/p/atloria-selfdogfood-3577-BDFvUbEgc3/user/desk-states-and-actions) |
| Review reported problems and their charts | [Review reported issues](#review-reported-issues) |
| Work on one issue record | [Work with an issue](https://atloria-selfdogfood-3577.atloria.app/p/atloria-selfdogfood-3577-BDFvUbEgc3/user/work-with-an-issue) |
| Manage an issue board | [Manage issue boards](https://atloria-selfdogfood-3577.atloria.app/p/atloria-selfdogfood-3577-BDFvUbEgc3/user/manage-issue-boards) |
| Recover from a broader problem | [Common issues and solutions](https://atloria-selfdogfood-3577.atloria.app/p/atloria-selfdogfood-3577-BDFvUbEgc3/user/common-issues-and-solutions) |
## Before you start
**Prerequisites**
- Have a project selected in the project switcher.
- Know whether you are routing a support thread or reviewing a reported issue.
Desk and Issues are both scoped to the selected project. Without a selected project, each surface
shows its project-selection empty state.
## Open Desk or Issues
**Prerequisites**
- A project is selected.
**Steps**
1. Open the navigation and choose one destination.
| If you need to… | Choose |
|---|---|
| Triage or follow up a support request | **Desk** |
| Review reported problems | **Issues** |
2. If you opened Desk, choose the queue or view that matches the work.
| If you need to… | Choose |
|---|---|
| Find requests waiting for a first reply | **Needs first response** |
| Find requests waiting for another reply | **Needs next response** |
| Find requests being investigated | **Investigating** |
| Find requests waiting for the customer | **Waiting for customer** |
| Find requests paused for later | **Paused for later** |
| See work completed today | **Done today** |
| See the triage queue | **Triage** |
| See your threads | **Your threads** |
| See threads without an assignee | **Unassigned** |
**Result:** Desk opens the selected queue or view, or Issues opens its overview.
## Understand the help surfaces
The Desk composer is where you write a customer reply or an internal note. The duplicate dialog
uses a ticket-number field. The Issues overview uses a time-range selector to change the reporting
period.
| Surface | What to use | What it does |
|---|---|---|
| Desk thread composer | **Reply to the customer… (Markdown supported)** | Enter the reply that you plan to send to the customer. |
| Desk thread composer | **Internal note — only your team sees this…** | Enter a note intended for your team. |
| Duplicate dialog | **Ticket # (e.g. 13)** | Enter the ticket number of the canonical thread. |
| Issues overview | **Time range** | Select the reporting period. |
The no-thread and missing-email branches are handled in [Handle empty and unavailable states](#handle-empty-and-unavailable-states).
## Work a support request in Desk
A support thread is the place to respond to a request, keep team-only context, and move the work
through its Desk state.
**Prerequisites**
- Desk is open with a thread selected.
- For a customer reply, the composer contains the reply text before you send it.
**Steps**
1. In **Reply to the customer… (Markdown supported)**, enter the response for the customer.
2. To keep the text for your team instead, select **Internal note** before entering it in
**Internal note — only your team sees this…**.
3. Select **Preview** to review the customer-facing Markdown.
4. Choose the send action that matches the work.
| If you need to… | Choose |
|---|---|
| Send the reply and keep the thread open for follow-up | **Send** |
| Send the reply and mark the thread complete | **Send & done** |
5. Select the next thread state.
| If you need to… | Choose |
|---|---|
| Mark the thread as being investigated | **Investigating** |
| Mark the thread as waiting for the customer | **Waiting for customer** |
| Mark the thread complete | **Done** |
| Reopen a paused thread | **Wake now** |
| Reopen a completed thread | **Reopen** |
6. To postpone the thread, select **Paused** and choose one snooze period.
| If you need to… | Choose |
|---|---|
| Return to the thread in one hour | **1 hour** |
| Return tomorrow morning | **Tomorrow 9:00** |
| Return next week | **Next week** |
7. In the duplicate dialog, enter the canonical ticket number in **Ticket # (e.g. 13)**.
8. Select **Merge into ticket** to merge the current thread into the entered ticket.
9. If you opened the duplicate dialog without merging, select **Cancel**.
When the composer is blank, **Preview**, **Send**, and **Send & done** are unavailable. A paused
thread shows **Wake now**, and a completed thread shows **Reopen**.
**Result:** The reply, internal note, state change, snooze choice, or duplicate merge appears in
the Desk thread view. For the next Desk state or action, continue with [Desk states and actions](https://atloria-selfdogfood-3577.atloria.app/p/atloria-selfdogfood-3577-BDFvUbEgc3/user/desk-states-and-actions).
## Review reported issues
An issue is a reported problem that you review from the Issues overview before opening the detailed
issue list or a board.
**Prerequisites**
- A project is selected.
- Issues is open.
**Steps**
1. Select **Time range** to set the reporting period.
2. Review the overview charts for the selected period.
3. Choose the next action.
| If you need to… | Choose |
|---|---|
| Reload the issue statistics and issue list | **Refresh** |
| Open the complete issue list | **All issues** |
| Open issue boards | **Boards** |
4. In Recent Reports, select **View all** to open the complete issue list.
The overview can display `No activity in this period yet`, `No daily activity yet`, `No priority data yet`, `No resolved tickets yet to analyze`, `No category data yet`, `No audience data yet`,
or `No reported pages yet` when the corresponding view has no data.
**Result:** The Issues overview shows the selected period, or the application opens All issues or
Boards for the next step.
## Handle empty and unavailable states
An empty state tells you which required context to provide before the normal help surface can
appear.
| What you see | What to do |
|---|---|
| `No project selected` on Desk | Use the project switcher, then return to Desk. |
| `Pick a project from the switcher to open the Desk.` | Select a project before opening Desk. |
| `No project selected` on Issues | Use the project switcher, then return to Issues. |
| `Pick a project from the switcher to see its reported issues.` | Select a project before opening Issues. |
| `No thread open` | Select a thread in Desk. |
| `No email on file — the customer can only see this on their tracking page.` | Use an internal note for team-only text, or understand that a customer reply is visible only on the tracking page. |
If an Issues chart has no data, keep the selected period or choose another period from **Time
range**. The chart message identifies which part of the overview has no data.
**Result:** The required project or thread is available, or the relevant empty-state message
remains visible with the next action identified.
## Recover from an error and continue
Desk applies a reply or state change in the thread view first, then reconciles it with the service
response. If the service rejects a transition, Desk restores the earlier thread state; if it
rejects a reply, Desk restores the earlier thread and draft.
| What you see | What to do next |
|---|---|
| `Reply failed — restored your draft` | Review the restored text and try **Send** or **Send & done** again when the thread is ready. |
| `Duplicate merge failed` | Check the ticket number in **Ticket # (e.g. 13)** and try **Merge into ticket** again. |
The Issues overview loads its statistics and issue list together. Refresh the overview with
**Refresh** when you need to request the current statistics and list again.
For the next Desk state or action, continue with [Desk states and actions](https://atloria-selfdogfood-3577.atloria.app/p/atloria-selfdogfood-3577-BDFvUbEgc3/user/desk-states-and-actions).
For a specific issue, continue with [Work with an issue](https://atloria-selfdogfood-3577.atloria.app/p/atloria-selfdogfood-3577-BDFvUbEgc3/user/work-with-an-issue). For board work,
continue with [Manage issue boards](https://atloria-selfdogfood-3577.atloria.app/p/atloria-selfdogfood-3577-BDFvUbEgc3/user/manage-issue-boards). For broader recovery paths, continue
with [Common issues and solutions](https://atloria-selfdogfood-3577.atloria.app/p/atloria-selfdogfood-3577-BDFvUbEgc3/user/common-issues-and-solutions).
**Result:** You have a next action for a failed Desk operation and a destination for continued
Desk, issue, or board work.
# Your first day
## Your first day in Atloria
Your first day covers signing in, completing account access, and reaching the application workspace.
The application workspace is the signed-in area where you continue working in Atloria. Single sign-on
is the organization's identity-provider route for authentication.
After account access, continue with the workspace orientation in [Understanding the interface](https://atloria-selfdogfood-3577.atloria.app/p/atloria-selfdogfood-3577-BDFvUbEgc3/user/understanding-the-interface)
and then learn the main destinations in [Navigation basics](https://atloria-selfdogfood-3577.atloria.app/p/atloria-selfdogfood-3577-BDFvUbEgc3/user/navigation-basics).
| If you need to… | Go to |
|---|---|
| Sign in with an existing account | [Sign in](#sign-in) |
| Create and verify an account | [Create and verify an account](#create-and-verify-an-account) |
| Recover a forgotten password | [Recover account access](#recover-account-access) |
| Use your organization's single sign-on | [Use single sign-on](#use-single-sign-on) |
| Understand the workspace after signing in | [Understanding the interface](https://atloria-selfdogfood-3577.atloria.app/p/atloria-selfdogfood-3577-BDFvUbEgc3/user/understanding-the-interface) |
| Move between application destinations | [Navigation basics](https://atloria-selfdogfood-3577.atloria.app/p/atloria-selfdogfood-3577-BDFvUbEgc3/user/navigation-basics) |
## Before you start
Have the account information you need in front of you before you begin.
| Account route | Information to have ready | Requirement |
|---|---|---|
| Existing account | **Email address** and **Password** | Both fields are required. |
| New account | **Full name**, **Email address**, and **Password** | All three fields are required. |
| New account password | A password with at least 8 characters | The password field has a minimum length of 8 characters. |
**Result:** Your account information is ready for the account-access route you choose.
## Sign in
Sign-in uses an existing account's email address and password and leads to the application workspace
when the credentials are accepted.
**Prerequisites**
- Have the account's email address and password ready.
**Steps**
1. Enter the account email in **Email address**.
2. Enter the account password in **Password**.
3. Select **Sign in**.
If the credentials are accepted, the application workspace opens and the page refreshes.
**Result:** If the credentials are accepted, the application workspace is on screen. If they are not,
use [When account access goes wrong](#when-account-access-goes-wrong).
## Create and verify an account
Account creation records your name and sign-in details; email verification confirms the email route
before you continue to the application.
**Prerequisites**
- Have your name, email address, and a password of at least 8 characters ready.
**Steps**
1. Open the registration page by selecting **Sign up**.
2. Enter your name in **Full name**.
3. Enter your email in **Email address**.
4. Enter a password of at least 8 characters in **Password**.
5. Select **Create account**.
After successful registration and automatic sign-in, the application opens the matching destination
in this table.
| If registration includes… | The application opens… |
|---|---|
| A claim | The claim page |
| A selected plan | The billing page for the selected plan |
| Neither a claim nor a selected plan | The application workspace |
6. Open the link in the verification email message, then use the result in this table.
| If you see… | Do this |
|---|---|
| `Verifying your email…` | Wait for the verification result. |
| `Your email has been verified.` | Select **Go to the app**. |
| `Missing verification token — use the link from your email.` | Open the link in the verification email message. |
The verification result hands you to the application workspace when verification succeeds.
**Result:** The verification result is on screen, or the application workspace opens after successful
verification. For password recovery, continue with [Recover account access](#recover-account-access).
## Recover account access
Password recovery requests a reset link by email and lets you set a new password from the link in the
email message.
**Prerequisites**
- Have access to the email address associated with the account.
- Have the link from the password-reset email message before opening the new-password form.
**Steps**
1. From the sign-in page, select **Forgot your password?**.
2. Enter the account email in **Email address**.
3. Select **Send reset link**.
If an account exists for the address, the page displays `If an account exists for , a reset link has been sent. Check your inbox.`
4. Open the link in the password-reset email message.
5. Enter the new password in **New password**.
6. Enter the same password in **Confirm password**.
7. Select **Reset password**.
If the two password entries differ, the page displays `Passwords do not match` and stops before the
reset request. If the reset succeeds, it displays `Password updated. Redirecting to sign in…` and
redirects to the sign-in page after two seconds.
**Result:** The new-password result is on screen; a successful reset returns you to sign in.
## Use single sign-on
Single sign-on sends an organization's sign-in request through its configured identity provider.
**Prerequisites**
- Use this route when your organization requires single sign-on or when you choose the SSO route.
- Have either your work email or organization ID ready.
**Steps**
1. Select **Continue with SSO** on the sign-in page.
2. Enter your work email or organization ID in **Work email or organization ID**.
3. Select **Continue with SSO** again.
When the organization requires SSO after a failed credential attempt, the page displays
`Your organization requires single sign-on. Continue with SSO below.` and opens the SSO route.
During the handoff, the SSO completion page displays `Signing you in with SSO…`.
**Result:** The SSO handoff is in progress, or its result is on screen. If the handoff stops, use
[When account access goes wrong](#when-account-access-goes-wrong).
## When account access goes wrong
Use the message on screen to choose the next account-access action.
| What appears | What to do |
|---|---|
| `Invalid email or password` | Check **Email address** and **Password**, then select **Sign in** again. |
| `An error occurred. Please try again.` | Try **Sign in** again. |
| `No SSO connection was found for that email. Check with your administrator.` | Check the value in **Work email or organization ID**, or contact your administrator. |
| `Could not start SSO. Please try again.` | Try **Continue with SSO** again. |
| `Registration failed` | Check the registration entries and select **Create account** again. |
| `Registration successful, but login failed. Please try logging in.` | Return to sign in and select **Sign in**. |
| `Missing verification token — use the link from your email.` | Open the link in the verification email message. |
| `Missing reset token. Use the link from your email, or request a new one.` | Open the link in the password-reset email message, or select **request a new one**. |
| `Missing sign-in code. Please start over from the login page.` | Return to the login page and start the SSO route again. |
| `This sign-in link has expired or was already used. Please try signing in again.` | Return to sign in and start the SSO route again. |
For shared message guidance, see [General error messages](https://atloria-selfdogfood-3577.atloria.app/p/atloria-selfdogfood-3577-BDFvUbEgc3/user/general-error-messages). If the
account-access problem continues, see [Getting help](https://atloria-selfdogfood-3577.atloria.app/p/atloria-selfdogfood-3577-BDFvUbEgc3/user/getting-help).
## Continue in the workspace
After successful account access, read
[Understanding the interface](https://atloria-selfdogfood-3577.atloria.app/p/atloria-selfdogfood-3577-BDFvUbEgc3/user/understanding-the-interface) to learn the workspace regions and
[Navigation basics](https://atloria-selfdogfood-3577.atloria.app/p/atloria-selfdogfood-3577-BDFvUbEgc3/user/navigation-basics) to move between destinations.
**Result:** You know the next page to open after account access.
# Understanding the interface
## What the authenticated workspace is
The authenticated workspace is Atloria's application entry surface: the place where you
choose a destination and begin work with projects, documents, operations, and workspace
settings. The Dashboard opens this workspace with a summary of projects, generations, and
chat answers.
The workspace uses three regions. A sticky top bar provides the current context and shell
tools. A sidebar groups destinations. The main content area holds the page you open, such as
the Dashboard and its recent projects.
Use this page to orient yourself before opening a specific work area:
| If you need to… | Go to |
|---|---|
| Choose a destination from the application navigation | [Find a workspace destination](#find-a-workspace-destination) |
| Recognize the top bar, sidebar, and main content area | [Understand the workspace regions](#understand-the-workspace-regions) |
| Open search or review notifications | [Use the top-bar tools](#use-the-top-bar-tools) |
| Work from a smaller screen or with platform access | [Handle viewport and access variations](#handle-viewport-and-access-variations) |
| Continue with project work | [Projects overview](https://atloria-selfdogfood-3577.atloria.app/p/atloria-selfdogfood-3577-BDFvUbEgc3/user/projects-overview) |
| Continue with document work | [Documents overview](https://atloria-selfdogfood-3577.atloria.app/p/atloria-selfdogfood-3577-BDFvUbEgc3/user/documents-overview) |
| Continue with operational work | [Operations overview](https://atloria-selfdogfood-3577.atloria.app/p/atloria-selfdogfood-3577-BDFvUbEgc3/user/operations-overview) |
| Read measurements | [Analytics overview](https://atloria-selfdogfood-3577.atloria.app/p/atloria-selfdogfood-3577-BDFvUbEgc3/user/analytics-overview) |
| Learn the product's purpose | [What is Atloria](https://atloria-selfdogfood-3577.atloria.app/p/atloria-selfdogfood-3577-BDFvUbEgc3/user/what-is-atloria) |
## Before you start
The authenticated workspace is for a signed-in user. Sign in before using its navigation;
the top bar shows the signed-in user's name and the **Sign out** control when a session user is
present.
Platform administration is a separate access branch. When your account has platform-admin
access, the navigation includes the Platform section and its **Organizations** destination.
The Dashboard shell does not ask you to complete input fields or validation groups before
using its navigation. Select a destination to move into the work area that owns the task.
## Find a workspace destination
The sidebar is the navigation list for the authenticated workspace. Each destination is
grouped by the kind of work it supports, so you can choose a reader-facing label instead of
entering a route.
**Prerequisites**
- You are signed in to Atloria.
- You know which kind of work you want to begin.
**Steps**
1. In the sidebar, choose the group that matches your work, then select the destination from
this table.
| If you need to… | Choose a destination |
|---|---|
| Open the application home or manage project and document work | In the Workspace group, select **Dashboard**, **Projects**, or **Documents** |
| To review operational work or media | Select **Operations**, **Analytics**, **Screenshots**, **Videos**, or **Captured Flows** in the Enterprise group |
| Work with the support assistant | In the AI & Tools group, select **Support Agent** |
| Triage work or manage organization settings and payments | In the Settings group, select **Desk**, **Issues**, **Organization**, **Branding**, **Integrations**, or **Billing** |
| Manage platform organizations | In the Platform group, select **Organizations** |
The selected destination becomes the active navigation item. The application uses an exact
match for **Dashboard** and **Settings** roots, and keeps a parent destination active while
you work in one of its deeper pages.
**Result:** The selected workspace page opens, and its destination remains identifiable in
the sidebar.
## Understand the workspace regions
The Dashboard is the workspace's starting view: the top bar keeps shell tools available, the
sidebar keeps destinations together, and the main content area presents the current page.
On a large screen, the sidebar remains visible beside the main content. The Dashboard main
area starts with the Dashboard heading and a summary of projects, generations, and chat
answers. When projects are available, the recent-projects table lists the headers
Project, Docs, Categories, and Updated.
When more than four projects are available, the recent-projects area also provides **View
all**. Use it to open the projects list rather than selecting one of the recent rows.
## Use the top-bar tools
The top bar is the shared control area for search, notifications, workspace context, and the
current session. Use it when you need a cross-workspace command or a quick review of
notifications without changing the destination in the sidebar.
**Prerequisites**
- You are signed in to Atloria.
- You are on an authenticated workspace page.
**Steps**
1. Select the top-bar tool that answers your immediate need.
| If you need to… | Select | What happens |
|---|---|---|
| Open the global command palette | **Search** | The command palette opens. |
| Review notifications | **Notifications** | The notification panel opens; when unread notifications exist, select **Mark all read**. When the list is empty, it displays `No notifications yet`. |
| End the current session | **Sign out** | The application routes you to the login page. |
**Result:** The selected shell tool is open, the notification panel shows its current state,
or the session ends at the login page.
## Handle viewport and access variations
The navigation interaction changes with screen size and platform access. On a large screen,
the sidebar is beside the page. On a smaller screen, open the menu to reach the same navigation
surface. Platform administrators also receive a Platform destination.
**Prerequisites**
- You are signed in to Atloria.
- You know whether you are working on a small screen or with platform-admin access.
**Steps**
1. Use the navigation surface that matches your screen and access, then select the destination
you need.
| If… | Action |
|---|---|
| You are on a small screen | Select **Menu**, then select the destination. |
| The mobile sidebar is open | Select **Close sidebar**, then select the destination. |
| Your account has platform-admin access | Select **Organizations** in **Platform**. |
| You are on a large screen | Select the destination in the sidebar beside the main content. |
**Result:** The appropriate navigation surface is available, and the selected destination
opens without changing the work area you intended to use.
## When dashboard information is unavailable
Dashboard activity and notifications are supporting information around the workspace you are
using. If activity cannot be loaded, the Dashboard displays `7-day activity unavailable`.
If the notification list has no items, the notifications panel displays `No notifications
yet`.
| What you see | What to do |
|---|---|
| `7-day activity unavailable` | Continue with the workspace destination you need. |
| `No notifications yet` | Continue with the current workspace destination. |
## Continue to the next workspace task
The authenticated shell hands you to the destination that owns your next task. Choose the
destination from the sidebar, or use **View all** when you need the complete projects list.
**Prerequisites**
- You know which workspace task you want to continue.
- You are signed in to Atloria.
**Steps**
1. Select the next destination from this table.
| If you want to… | Continue with |
|---|---|
| Work with projects | [Projects overview](https://atloria-selfdogfood-3577.atloria.app/p/atloria-selfdogfood-3577-BDFvUbEgc3/user/projects-overview) |
| Work with documents | [Documents overview](https://atloria-selfdogfood-3577.atloria.app/p/atloria-selfdogfood-3577-BDFvUbEgc3/user/documents-overview) |
| Run or monitor documentation work | [Operations overview](https://atloria-selfdogfood-3577.atloria.app/p/atloria-selfdogfood-3577-BDFvUbEgc3/user/operations-overview) |
| Read measurements | [Analytics overview](https://atloria-selfdogfood-3577.atloria.app/p/atloria-selfdogfood-3577-BDFvUbEgc3/user/analytics-overview) |
| Move between application destinations | [Navigation basics](https://atloria-selfdogfood-3577.atloria.app/p/atloria-selfdogfood-3577-BDFvUbEgc3/user/navigation-basics) |
| Personalize workspace choices | [Personalizing your workspace](https://atloria-selfdogfood-3577.atloria.app/p/atloria-selfdogfood-3577-BDFvUbEgc3/user/personalizing-your-workspace) |
| Open the complete project list from the Dashboard | **View all** |
**Result:** The workspace page for the next task opens, or the complete projects list is
available.
# Navigation basics
## Overview
Navigation basics covers moving between the authenticated workspace destinations.
Use it when you need to leave one work area and open another without changing the work in either area.
| If you need to… | Go to |
|---|---|
| Understand the workspace shell before choosing a destination | [Understanding the interface](https://atloria-selfdogfood-3577.atloria.app/p/atloria-selfdogfood-3577-BDFvUbEgc3/user/understanding-the-interface) |
| Find a destination | Choose a work area |
| Move between destinations | Change work areas |
| Use the mobile navigation | Use conditional navigation |
| Continue work in Projects | [Projects overview](https://atloria-selfdogfood-3577.atloria.app/p/atloria-selfdogfood-3577-BDFvUbEgc3/user/projects-overview) |
| Continue work in Documents | [Documents overview](https://atloria-selfdogfood-3577.atloria.app/p/atloria-selfdogfood-3577-BDFvUbEgc3/user/documents-overview) |
| Continue work in Operations | [Operations overview](https://atloria-selfdogfood-3577.atloria.app/p/atloria-selfdogfood-3577-BDFvUbEgc3/user/operations-overview) |
| Continue work in Analytics | [Analytics overview](https://atloria-selfdogfood-3577.atloria.app/p/atloria-selfdogfood-3577-BDFvUbEgc3/user/analytics-overview) |
| Continue work in Screenshots | [Screenshots overview](https://atloria-selfdogfood-3577.atloria.app/p/atloria-selfdogfood-3577-BDFvUbEgc3/user/screenshots-overview) |
| Continue work in Videos | [Videos overview](https://atloria-selfdogfood-3577.atloria.app/p/atloria-selfdogfood-3577-BDFvUbEgc3/user/videos-overview) |
| Continue work in Desk | [Desk overview](https://atloria-selfdogfood-3577.atloria.app/p/atloria-selfdogfood-3577-BDFvUbEgc3/user/desk-overview) |
| Continue work in Issues | [Issues overview](https://atloria-selfdogfood-3577.atloria.app/p/atloria-selfdogfood-3577-BDFvUbEgc3/user/issues-overview) |
| Continue work in Organization | [Organization overview](https://atloria-selfdogfood-3577.atloria.app/p/atloria-selfdogfood-3577-BDFvUbEgc3/user/organization-overview) |
| Troubleshoot an access problem | [Your first day](https://atloria-selfdogfood-3577.atloria.app/p/atloria-selfdogfood-3577-BDFvUbEgc3/user/your-first-day) |
## Before you start
Prerequisites
- You are signed in to the application.
- If you are using a small viewport, you have access to the mobile menu.
- If you need the platform administration destination, you have platform administrator access.
The available navigation depends on your access and display size. On a small viewport, the sidebar is
replaced by Menu. The Platform section appears only for a platform administrator.
**Steps**
1. Check whether the navigation is displayed as a sidebar or behind Menu.
2. If you need platform administration, check whether **Organizations** is available.
**Result:** You know which navigation controls are available before selecting a destination.
## Find a destination
Navigation groups destinations by the work area they open. Use the question you are answering to choose
the destination rather than searching by route text.
Prerequisites
- You know which work area you need to open.
**Steps**
1. In the navigation, locate the destination that matches your work.
| If you need to… | Select |
|---|---|
| Open the workspace home | **Dashboard** |
| Work with projects | **Projects** |
| Work with documents | **Documents** |
| Review operational work | **Operations** |
| Review measurements | **Analytics** |
| Review images | **Screenshots** |
| Review narrated walkthroughs | **Videos** |
| Review recorded walkthrough steps | **Captured Flows** |
| Work with support conversations | Support Agent |
| Work from the support inbox | **Desk** |
| Review reported problems | **Issues** |
| Manage organization information | **Organization** |
| Manage workspace appearance | **Branding** |
| Manage connected services | **Integrations** |
| Manage the subscription | **Billing** |
| Manage organizations as a platform administrator | **Organizations** |
2. Check the destination description associated with your selection when you need to distinguish between
similar work areas.
| Select | Opens |
|---|---|
| **Dashboard** | Workspace home |
| **Projects** | Project workspace |
| **Documents** | Document workspace |
| **Operations** | Operational work |
| **Analytics** | Measurements and reports |
| **Screenshots** | Screenshot gallery |
| **Videos** | Video walkthroughs |
| **Captured Flows** | Recorded walkthrough steps |
| Support Agent | Support conversations |
| **Desk** | Support inbox |
| **Issues** | Reported problems |
| **Organization** | Organization information |
| **Branding** | Workspace appearance |
| **Integrations** | Connected services |
| **Billing** | Subscription management |
| **Organizations** | Platform administration |
**Result:** You have identified the destination and what it opens.
## Understand the navigation screen
The navigation screen is the set of work-area links around the workspace surface. The desktop sidebar
contains navigation sections, and its links use the destination labels shown in the tables above.
The active destination follows your current location. **Dashboard** is active only on the workspace home.
When you work deeper in a destination, that destination remains active.
On the workspace home, the visible workspace grid uses **Project**, Docs, **Categories**, and
**Updated** as its column headers.
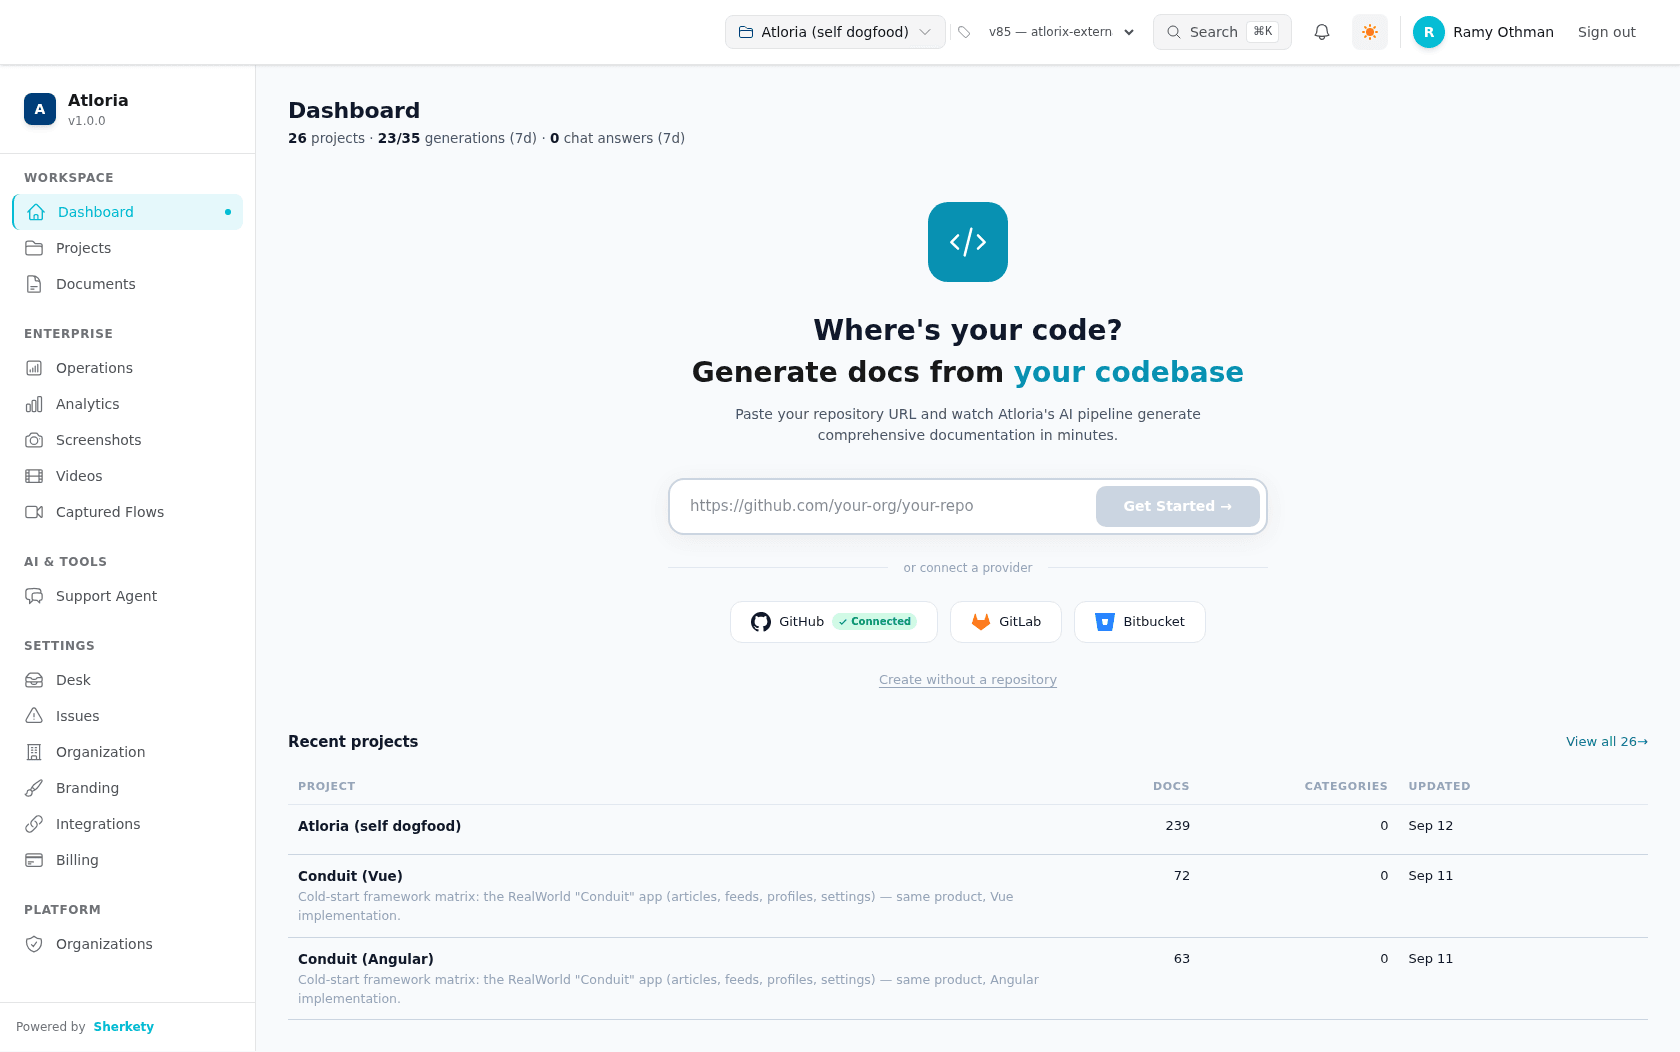
The workspace home rendered 13 buttons and four grid columns. Its stable product controls included
**Search⌘K**, **Sign out**, **Get Started →**, **GitLab**, **Bitbucket**, and
**Create without a repository**. Its icon controls included **Switch to dark mode** and
**Notifications**.
The mobile navigation uses the same destination list in a drawer. Select Menu to open the drawer,
then select Close sidebar to close it.
## Move between destinations
Use this procedure when you need to change work areas from the application navigation.
Prerequisites
- You are signed in.
- You know the destination you want to open.
**Steps**
1. In the navigation, select **Projects**, or select another destination control from the destination table.
2. Check the workspace heading against the destination you selected.
3. Select another destination when you need to change work areas.
**Result:** The selected destination is open, and the navigation identifies the current work area from
the route.
## Use conditional navigation
Some navigation choices depend on how you access the application or on your platform permissions.
Prerequisites
- You are signed in.
**Steps**
1. Choose the applicable route:
| If… | Select |
|---|---|
| You are using a small viewport | Menu |
| You are a platform administrator and need platform administration | **Organizations** |
2. If the mobile sidebar is open, select Close sidebar.
**Result:** You use the available navigation for your viewport and access level.
## When navigation cannot be reached
If a navigation action does not reach its destination, check whether sign-in has completed.
| What you see | What it means | What to do |
|---|---|---|
| The sign-in screen remains open | Navigation is unavailable until sign-in completes. | Complete sign-in before selecting a work area. |
| The destination is not in the navigation | The available navigation does not include that destination for your access or display condition. | Review the conditional choices in this section. |
## Continue from the destination
After you open a destination, use the matching overview page for the work you want to perform.
| Destination | Continue with |
|---|---|
| **Projects** | [Projects overview](https://atloria-selfdogfood-3577.atloria.app/p/atloria-selfdogfood-3577-BDFvUbEgc3/user/projects-overview) |
| **Documents** | [Documents overview](https://atloria-selfdogfood-3577.atloria.app/p/atloria-selfdogfood-3577-BDFvUbEgc3/user/documents-overview) |
| **Operations** | [Operations overview](https://atloria-selfdogfood-3577.atloria.app/p/atloria-selfdogfood-3577-BDFvUbEgc3/user/operations-overview) |
| **Analytics** | [Analytics overview](https://atloria-selfdogfood-3577.atloria.app/p/atloria-selfdogfood-3577-BDFvUbEgc3/user/analytics-overview) |
| **Screenshots** | [Screenshots overview](https://atloria-selfdogfood-3577.atloria.app/p/atloria-selfdogfood-3577-BDFvUbEgc3/user/screenshots-overview) |
| **Videos** | [Videos overview](https://atloria-selfdogfood-3577.atloria.app/p/atloria-selfdogfood-3577-BDFvUbEgc3/user/videos-overview) |
| **Desk** | [Desk overview](https://atloria-selfdogfood-3577.atloria.app/p/atloria-selfdogfood-3577-BDFvUbEgc3/user/desk-overview) |
| **Issues** | [Issues overview](https://atloria-selfdogfood-3577.atloria.app/p/atloria-selfdogfood-3577-BDFvUbEgc3/user/issues-overview) |
| **Organization** | [Organization overview](https://atloria-selfdogfood-3577.atloria.app/p/atloria-selfdogfood-3577-BDFvUbEgc3/user/organization-overview) |
| **Branding** | [Personalizing your workspace](https://atloria-selfdogfood-3577.atloria.app/p/atloria-selfdogfood-3577-BDFvUbEgc3/user/personalizing-your-workspace) |
| **Integrations** | [Configure integrations](https://atloria-selfdogfood-3577.atloria.app/p/atloria-selfdogfood-3577-BDFvUbEgc3/user/configure-integrations) |
| **Billing** | [Configure billing](https://atloria-selfdogfood-3577.atloria.app/p/atloria-selfdogfood-3577-BDFvUbEgc3/user/configure-billing) |
# Personalizing your workspace
Use this page to choose how a project's published documentation appears to readers and to
invite people to its organization. You can also review the organization member list and continue
to the settings area for more specialized administration.
## What workspace personalization is
Workspace personalization has two parts: project branding changes the appearance of published
documentation, while organization settings provide the team roster and invite form.
Use the route that matches what you need:
| If you need to… | Go to |
|---|---|
| Change the appearance of published documentation | [Customize published documentation](#customize-published-documentation) |
| Invite a team member or review members | [Invite and review organization members](#invite-and-review-organization-members) |
| Configure domains, access, segmentation, or developer settings | [Continue to the owning settings work](#continue-to-the-owning-settings-work) |
| Get help with a settings problem | [Getting help](https://atloria-selfdogfood-3577.atloria.app/p/atloria-selfdogfood-3577-BDFvUbEgc3/user/getting-help) |
## Before you start
You need a signed-in session and a selected project before Branding can load project branding.
Organization needs an access token and an organization identifier before it can load members.
Keep the following information available:
| Task | Have ready | Why it matters |
|---|---|---|
| Project appearance | The project to personalize | Branding applies to the selected project. |
| Organization invitation | The invitee's email address and role | The invitation is sent to the address you enter. |
| Branding changes | The appearance choices you want to apply | You can review the choices in the live preview before saving. |
Branding fields do not carry a required marker. The organization invite email is required.
## Find the settings surface
Use **Branding** for project appearance and **Organization** for invitations and member review.
**Prerequisites**
- Sign in to Atloria.
- Select a project before opening **Branding**.
**Steps**
1. Open the application settings area.
2. Choose one destination:
| If you need to… | Select |
|---|---|
| Personalize published-documentation appearance | **Branding** |
| Invite or review organization members | **Organization** |
3. Continue with the destination you selected:
| Destination | Choose |
|---|---|
| **Branding** | **Site info**, **Media**, **Colors**, **Top menu**, **Typography**, **White-label**, **Domain**, **Access**, **Segmentation**, or **Developers** |
| **Organization** | Single Sign-On, Provisioning (SCIM), or **Audit Log** |
**Result:** The selected settings surface is open.
## Understand the settings screen
The Branding screen groups project appearance choices behind tabs. The Organization screen
combines an invitation area with the member list.
In Branding, the **Site info** tab contains **Site name** and **Tagline**. The other tabs carry
the following areas:
| Tab | Area |
|---|---|
| **Media** | Logo and Favicon upload surfaces |
| **Colors** | Page theme, quick presets, and color choices |
| **Top menu** | Header layout and header customization |
| **Typography** | Font, color mode, reader theme switch, and dark-mode logo |
| **White-label** | Powered-by setting, footer, and custom CSS |
| **Domain** | Domain settings |
| **Access** | Access settings |
| **Segmentation** | Segmentation settings |
| **Developers** | Developer settings |
The Branding screen also has **Live preview** and the **Preview device** control. The preview
shows how readers will see the published documentation. The Organization screen has **Invite a
team member** above **Members**. Its member table uses **Name**, **Email**, **Role**, **Status**,
and **Joined**.
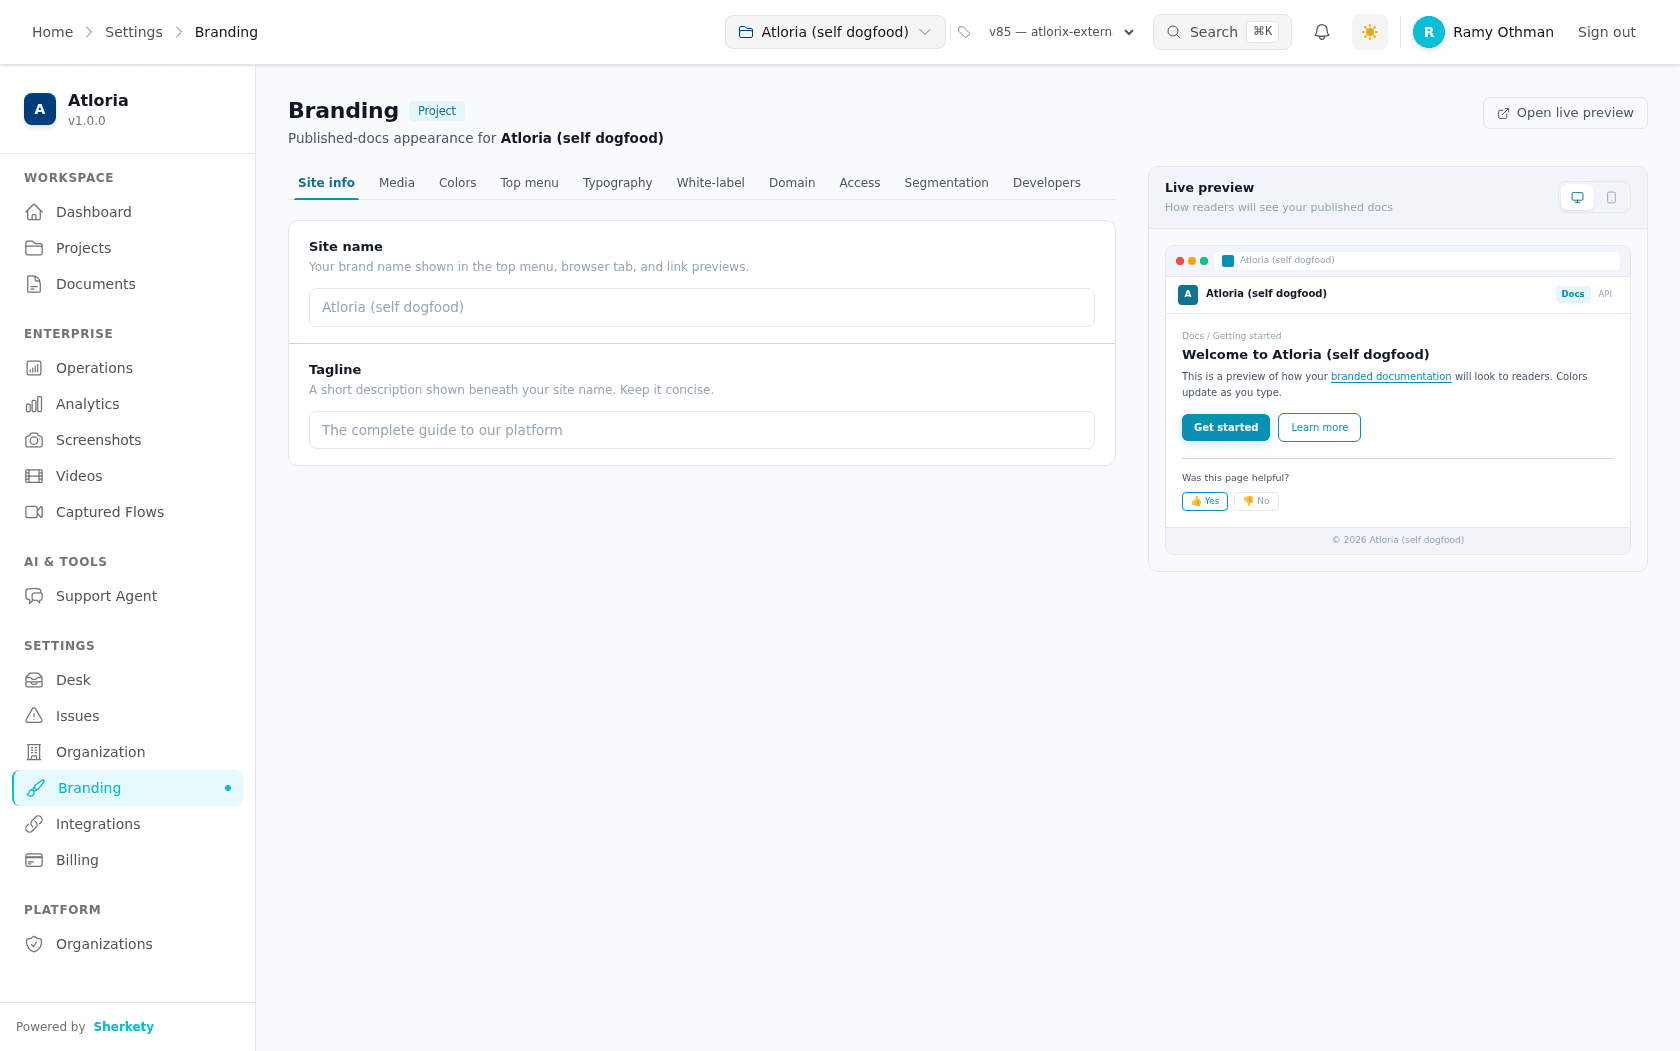
The **Branding** destination is open. The page shows **Site name** and **Tagline**
as visible labelled fields. It also shows the settings tabs, **Open live preview**, **Get started**,
**Learn more**, **👍 Yes**, **👎 No**, **Discard**, and **Save changes**. The page is ready for use
when its loading indicator is no longer visible.
## Customize published documentation
Use this procedure when you want to change the appearance of a project's published
documentation without changing its content.
**Prerequisites**
- Open **Branding** for the project you want to personalize.
- Decide which appearance choices you want to change.
**Steps**
1. In **Site info**, enter the project's reader-facing name in **Site name**.
2. In **Site info**, enter the short description in **Tagline**.
3. Select **Colors** and choose the appearance values you need:
| To change… | Use |
|---|---|
| The page background and chrome | **Page theme** |
| Buttons, links, active states, and the scroll bar | **Primary color** |
| Hover states, gradients, and secondary highlights | **Accent color** |
| A named color combination | **Quick presets** |
4. Select **Top menu** and choose a **Header layout**.
5. Adjust **Background**, **Text color**, **Height**, **Border color**, and **Border style**.
6. Select **Typography** to choose **Font** and **Color mode**. Use **Allow readers to switch
theme** when readers should have a light/dark choice, and use **Dark-mode logo** when the
dark appearance needs a separate logo.
7. Select **White-label** to set **Hide "Generated by Atloria"**, **Custom footer**, or
**Custom CSS**.
8. Review **Live preview**.
9. Choose how to finish:
| If you want to… | Select |
|---|---|
| Keep the appearance choices | **Save changes** |
| Remove the unsaved choices | **Discard** |
Use these limits while entering values:
| Value | Limit or choice |
|---|---|
| **Site name** | Up to 60 characters |
| **Tagline** | Up to 120 characters |
| **Height** | 40 to 72 |
| **Custom footer** | Up to 2,000 characters |
| **Custom CSS** | Up to 50 KB, with server-side sanitization |
**Result:** The selected appearance choices remain in the Branding form after **Save changes**;
after **Discard**, the unsaved choices are removed and the form returns to its earlier values.
When the project has a published slug and URL ID, select **Open live preview** to open the
published preview in a new browser tab. Use **Reset to defaults** in **Top menu** when you want
to restore that menu configuration before saving.
## Invite and review organization members
Use this procedure when you need to add a person to the organization or review who belongs to
it.
**Prerequisites**
- Open **Organization** for an account with an organization identifier.
- Have the invitee's email address.
> **Warning:** Selecting **Send invite** sends an invitation to the address you enter.
**Steps**
1. In **Invite a team member**, enter the invitee's address in the required email field.
2. Choose **Viewer**, **Contributor**, **Maintainer**, or **Admin** in the role selector.
3. Select **Send invite**.
4. In **Members**, read the column headings **Name**, **Email**, Role, **Status**, and Joined.
The **Status** column can show **Active** or **Suspended** for a member row.
**Result:** The invitation confirmation appears below the form, and the member list is available
under its column headings.
## Handle settings branches and errors
Use the message you see to choose the next action.
| What you see | What it means | What to do |
|---|---|---|
| `Pick a project to brand` | Branding has no selected project. | Select a project before opening **Branding**. |
| `Loading branding…` | Branding data is still loading. | Wait for the Branding form to appear. |
| `Low contrast against white — buttons with white text may be hard to read` | The selected primary color has low contrast against white. | Choose a higher-contrast **Primary color**. |
| `Branding saved` | The Branding update completed. | Continue reviewing the published appearance. |
| `Changes discarded` | The unsaved Branding choices were removed. | Continue with the earlier values or make another change. |
| `Custom CSS was rejected — see the White-label tab` | The custom CSS was refused by the server. | Open **White-label** and review **Custom CSS**. |
| `Save failed: unknown error` | The save request failed without a more specific message. | Review the form and try **Save changes** again. |
| `Upload failed: unknown error` | The asset upload failed without a more specific message. | Try the upload again from the relevant media area. |
| `Only admins and maintainers can invite members.` | The current organization role cannot invite members. | Ask an administrator or maintainer to send the invitation. |
| `Request failed — please try again.` | The invitation request could not be completed. | Review the address and try **Send invite** again. |
| `Invitation sent to — they'll get an email with a join link.` | The invitation was sent to the entered address. | Wait for the invitee to use the join link. |
| `Loading members…` | The member list is still loading. | Wait for the member list to appear. |
## Continue to the owning settings work
After you finish the selected task, continue according to your next task:
| Next task | Continue with |
|---|---|
| Configure detailed Branding settings | [Configure Branding](https://atloria-selfdogfood-3577.atloria.app/p/atloria-selfdogfood-3577-BDFvUbEgc3/user/configure-branding) |
| Review organization administration | [Organization overview](https://atloria-selfdogfood-3577.atloria.app/p/atloria-selfdogfood-3577-BDFvUbEgc3/user/organization-overview) |
| Configure Single Sign-On or Provisioning (SCIM) | [Manage organization access](https://atloria-selfdogfood-3577.atloria.app/p/atloria-selfdogfood-3577-BDFvUbEgc3/user/manage-organization-access) |
| Resolve a settings problem that remains | [Getting help](https://atloria-selfdogfood-3577.atloria.app/p/atloria-selfdogfood-3577-BDFvUbEgc3/user/getting-help) |
The Branding tabs **Domain**, **Access**, **Segmentation**, and **Developers** remain available
for their respective settings. The Organization links **Single Sign-On**, **Provisioning (SCIM)**,
and **Audit Log** lead to their specialized administration surfaces.
**Result:** You have either kept or discarded the project appearance changes, reviewed the
organization member list, or reached the page that owns the next settings task.
# Basic terminology
The application uses distinct terms for project settings, document records, queues, threads, and
replies.
## What these terms mean
The three application surfaces are Project, Document, and Desk. A Project surface contains the
identity, repository, and documentation-generation settings for a project. A Document record is
the reader-facing page for a document's content, metadata, and available viewer actions. Desk is
the workspace for sorting support threads into queues, opening a thread, and composing a reply or
internal note.
| If you need to… | Go to |
|---|---|
| Understand project identity, repository, and documentation-generation settings | [Understand project terms](#understand-project-terms) |
| Read or act on a document record | [Understand document terms](#understand-document-terms) |
| Work with queues, threads, and replies | [Understand Desk terms](#understand-desk-terms) |
| Move between the application's main destinations | [Navigation basics](https://atloria-selfdogfood-3577.atloria.app/p/atloria-selfdogfood-3577-BDFvUbEgc3/user/navigation-basics) |
| Understand the project workspace | [Projects overview](https://atloria-selfdogfood-3577.atloria.app/p/atloria-selfdogfood-3577-BDFvUbEgc3/user/projects-overview) |
| Manage project settings | [Manage project settings](https://atloria-selfdogfood-3577.atloria.app/p/atloria-selfdogfood-3577-BDFvUbEgc3/user/manage-project-settings) |
| Organize and open documents | [Documents overview](https://atloria-selfdogfood-3577.atloria.app/p/atloria-selfdogfood-3577-BDFvUbEgc3/user/documents-overview) |
| Create or edit a document | [Create and edit a document](https://atloria-selfdogfood-3577.atloria.app/p/atloria-selfdogfood-3577-BDFvUbEgc3/user/create-and-edit-a-document) |
| Understand the Desk surface | [Desk overview](https://atloria-selfdogfood-3577.atloria.app/p/atloria-selfdogfood-3577-BDFvUbEgc3/user/desk-overview) |
| Work from Desk | [Work from Desk](https://atloria-selfdogfood-3577.atloria.app/p/atloria-selfdogfood-3577-BDFvUbEgc3/user/work-from-desk) |
| Review Desk states and actions | [Desk states and actions](https://atloria-selfdogfood-3577.atloria.app/p/atloria-selfdogfood-3577-BDFvUbEgc3/user/desk-states-and-actions) |
## Before you look up a term
Use the surface name as your first clue when you look up a term. Identify whether your work
concerns project settings, a document record, or a support thread before choosing a terminology
group.
## Find the relevant surface
Use this procedure when you know the work you need to do but are unsure which terminology group
applies.
**Prerequisites**
- Know whether you are working with project settings, a document record, or a support thread.
**Steps**
1. Choose the matching destination from the table below.
| If you are working with… | Continue to… |
|---|---|
| Project identity, repository, or documentation-generation settings | [Understand project terms](#understand-project-terms) |
| A document's content or viewer actions | [Understand document terms](#understand-document-terms) |
| Queues, threads, replies, or Desk statuses | [Understand Desk terms](#understand-desk-terms) |
2. Open the matching destination from the application's navigation.
| If you chose… | Open… |
|---|---|
| Project or Document | The record from its application destination |
| Desk | the Desk workspace |
**Result:** You are using the terminology group for the surface you need to understand.
## Understand project terms
The **Project Name**, **Description**, and **Slug** identify the project. **Repository URL** and
**Default Branch** identify the source location and branch used for documentation work.
| Label | What it identifies |
|---|---|
| **Project Name** | The project's displayed name |
| **Description** | The project's descriptive text |
| **Slug** | The URL-friendly identifier for the project |
| **Repository URL** | The project repository |
| **Default Branch** | The branch used for documentation generation |
| **Let documentation create records in this application** | Whether documentation may create records in the application |
The **Manual Style** choice has four options:
| If you want the documentation style named… | Select |
|---|---|
| Enterprise | **Enterprise** |
| Mid-market | **Mid-market** |
| Corporate | **Corporate** |
| SaaS | **SaaS** |
Project settings appear when the Settings tab is active. The project surface can also show the
following status messages:
| Situation | Message |
|---|---|
| The project is loading | `Loading project…` |
| The project cannot be loaded | `Project failed to load.` |
| The project record is absent | `Project not found` |
| The latest project change is saved | `Saved` |
| A project change is being saved | `Saving…` |
| Changes are waiting to be saved | `Unsaved changes` |
## Understand document terms
The Document record page presents the document viewer rather than input fields. Use the document
editing page when you need to change the document.
| Action | What it does |
|---|---|
| **Copy link** | Copies the current document URL |
| **Print** | Opens the browser print flow |
| **Edit** | Opens the document editing route |
When the document contains headings, the viewer includes a table of contents. The viewer can show
these loading and error messages:
| Situation | Message |
|---|---|
| The document is loading | `Loading document…` |
| The document cannot be loaded | `Document failed to load.` |
| The document record is absent | `Document not found` |
Continue with [Documents overview](https://atloria-selfdogfood-3577.atloria.app/p/atloria-selfdogfood-3577-BDFvUbEgc3/user/documents-overview) to learn how documents are organized,
or use [Create and edit a document](https://atloria-selfdogfood-3577.atloria.app/p/atloria-selfdogfood-3577-BDFvUbEgc3/user/create-and-edit-a-document) when your task is to change a
document.
## Understand Desk terms
The queue labels are **Needs first response**, **Needs next response**, **Investigating**,
**Waiting for customer**, **Paused for later**, and **Done today**. The view labels are **Triage**,
**Your threads**, and **Unassigned**.
| If you need to… | Use |
|---|---|
| Find threads waiting for an initial reply | **Needs first response** |
| Find threads waiting for another reply | **Needs next response** |
| Review active investigation work | **Investigating** |
| Review threads waiting for the customer | **Waiting for customer** |
| Review threads paused for later | **Paused for later** |
| Review threads completed today | **Done today** |
| Review the triage view | **Triage** |
| Review your threads | **Your threads** |
| Review threads without an assignee | **Unassigned** |
Within a thread, **Draft with AI** creates a draft from a knowledge-gap card. The composer uses
**Internal note** for team-only notes, **Attach** for attachments, **Preview** for a customer-view
preview, **Send** for a reply, and **Send & done** for a reply that also completes the thread.
| Situation | What appears |
|---|---|
| A knowledge gap is available in the applicable queue | **Draft with AI** |
| The composer is in team-only mode | **Internal note** |
| Attachments are unavailable | **Attach** is disabled |
| A reply has text to preview | **Preview** |
| A reply is ready to send | **Send** and **Send & done** |
| The selected queue has no threads or knowledge gaps | `Nothing here` and `This queue is clear.` |
| A queue has no threads but new work can arrive | `New threads land in Triage and Needs first response.` |
| No thread is open | `No thread open` |
| The open thread has no reporter email outside internal-note mode | `No email on file — the customer can only see this on their tracking page.` |
The knowledge-gap cards appear in **Triage** or **Needs first response** when gap data exists. The
no-email warning appears when the open thread has no reporter email and the composer is not in
internal-note mode.
Continue with [Desk overview](https://atloria-selfdogfood-3577.atloria.app/p/atloria-selfdogfood-3577-BDFvUbEgc3/user/desk-overview) for the Desk surface, [Work from Desk](https://atloria-selfdogfood-3577.atloria.app/p/atloria-selfdogfood-3577-BDFvUbEgc3/user/work-from-desk)
for the working procedure, or [Desk states and actions](https://atloria-selfdogfood-3577.atloria.app/p/atloria-selfdogfood-3577-BDFvUbEgc3/user/desk-states-and-actions) for status
transitions.
# Projects overview
## Projects at a glance
A project is the workspace entry for documentation work. Use it to reach project documentation
and relationship views.
| If you need to… | Go to |
| --- | --- |
| Understand how project work is organised | Projects overview |
| Create a project | [Create a project](https://atloria-selfdogfood-3577.atloria.app/p/atloria-selfdogfood-3577-BDFvUbEgc3/user/create-a-project) |
| Change project configuration | [Manage project settings](https://atloria-selfdogfood-3577.atloria.app/p/atloria-selfdogfood-3577-BDFvUbEgc3/user/manage-project-settings) |
| Work with documents | [Documents overview](https://atloria-selfdogfood-3577.atloria.app/p/atloria-selfdogfood-3577-BDFvUbEgc3/user/documents-overview) |
| Follow documentation generation | [Documentation generation lifecycle](https://atloria-selfdogfood-3577.atloria.app/p/atloria-selfdogfood-3577-BDFvUbEgc3/user/documentation-generation-lifecycle) |
| Work with project versions | [Project versions](https://atloria-selfdogfood-3577.atloria.app/p/atloria-selfdogfood-3577-BDFvUbEgc3/user/project-versions) |
| Review project changes and audit information | [Project changes and audit](https://atloria-selfdogfood-3577.atloria.app/p/atloria-selfdogfood-3577-BDFvUbEgc3/user/project-changes-and-audit) |
Open **Projects** to reach the project list. From there, continue into the project work you need.
## Before you start
Know which project you need and which documentation task you want to complete next. Use the focused
pages linked below when your task is project creation, project configuration, document work,
generation, versioning, or audit.
## Find and open a project
The project list is the starting point for locating project work.
**Prerequisites**
- You know which project you need to work with.
**Steps**
1. Open **Projects**.
**Result:** The project list is on screen.
## Understand the project screen
The project screen is where you choose whether to continue into documentation work or relationship
views. Use the focused destination that matches the work you want to complete.
## Use the documentation surfaces
| If you need to… | Go to |
| --- | --- |
| Work with documents | [Documents overview](https://atloria-selfdogfood-3577.atloria.app/p/atloria-selfdogfood-3577-BDFvUbEgc3/user/documents-overview) |
| Work with project versions | [Project versions](https://atloria-selfdogfood-3577.atloria.app/p/atloria-selfdogfood-3577-BDFvUbEgc3/user/project-versions) |
| View relationships | The graph surface |
## Know what to do next
Choose the focused page that matches the work you want to complete:
| Next task | Page |
| --- | --- |
| Create a project | [Create a project](https://atloria-selfdogfood-3577.atloria.app/p/atloria-selfdogfood-3577-BDFvUbEgc3/user/create-a-project) |
| Change project settings | [Manage project settings](https://atloria-selfdogfood-3577.atloria.app/p/atloria-selfdogfood-3577-BDFvUbEgc3/user/manage-project-settings) |
| Work with documents | [Documents overview](https://atloria-selfdogfood-3577.atloria.app/p/atloria-selfdogfood-3577-BDFvUbEgc3/user/documents-overview) |
| Follow documentation generation | [Documentation generation lifecycle](https://atloria-selfdogfood-3577.atloria.app/p/atloria-selfdogfood-3577-BDFvUbEgc3/user/documentation-generation-lifecycle) |
| Review project versions | [Project versions](https://atloria-selfdogfood-3577.atloria.app/p/atloria-selfdogfood-3577-BDFvUbEgc3/user/project-versions) |
| Review project changes and audit information | [Project changes and audit](https://atloria-selfdogfood-3577.atloria.app/p/atloria-selfdogfood-3577-BDFvUbEgc3/user/project-changes-and-audit) |
# Create a project
## Create a project
A project is the documentation workspace you create from a repository or without a repository.
Use the project-creation wizard to choose the documentation types you want to produce.
| If you need to… | Go to |
|---|---|
| Open the creation surface | [Open the project-creation surface](#open-the-project-creation-surface) |
| Check the fields and wizard stages | [Recognize the wizard stages and fields](#recognize-the-wizard-stages-and-fields) |
| Enter details and choose documentation | [Enter project details and choose documentation](#enter-project-details-and-choose-documentation) |
| Choose a repository route or provider | [Choose repository access](#choose-repository-access) |
| Resolve a message or blocked action | [When creation or generation goes wrong](#when-creation-or-generation-goes-wrong) |
| Continue after generation | [Continue after the project is created](#continue-after-the-project-is-created) |
| Understand the project area | [Projects overview](https://atloria-selfdogfood-3577.atloria.app/p/atloria-selfdogfood-3577-BDFvUbEgc3/user/projects-overview) |
| Configure a created project | [Manage project settings](https://atloria-selfdogfood-3577.atloria.app/p/atloria-selfdogfood-3577-BDFvUbEgc3/user/manage-project-settings) |
| Follow generation stages | [Documentation generation lifecycle](https://atloria-selfdogfood-3577.atloria.app/p/atloria-selfdogfood-3577-BDFvUbEgc3/user/documentation-generation-lifecycle) |
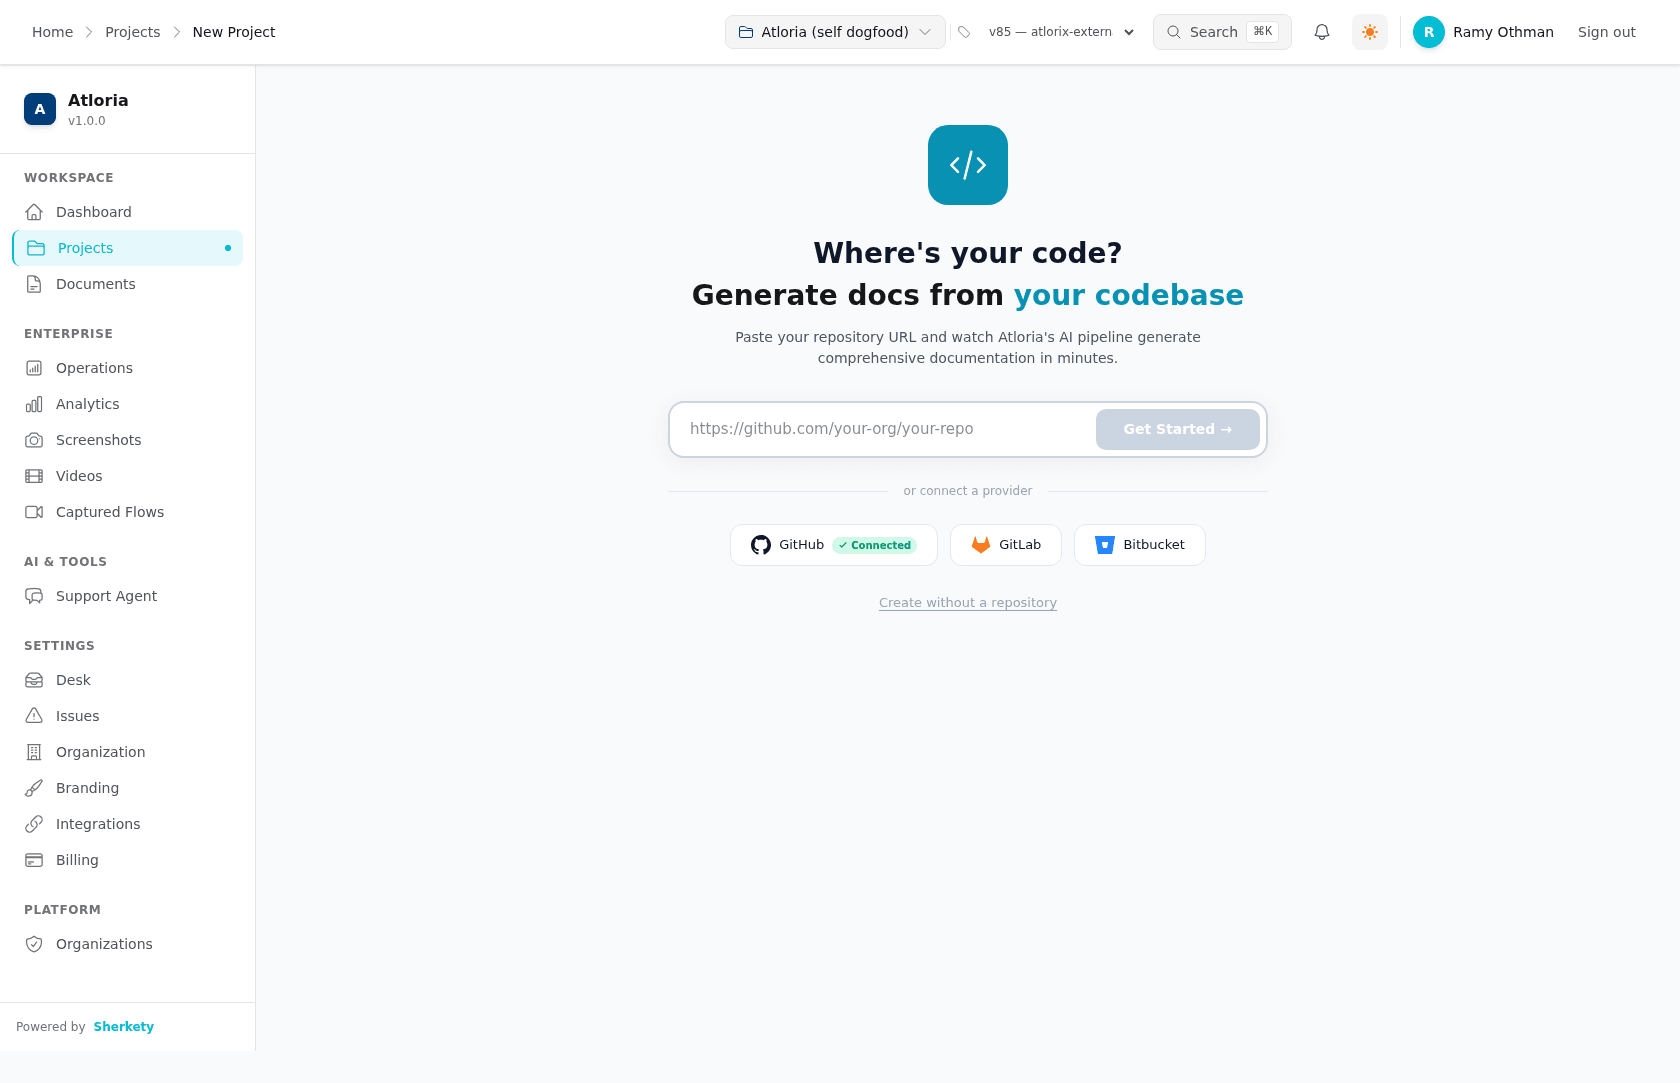
## Before you start
**Prerequisites**
Have the information that matches the route you plan to use.
| Have this ready | Why it matters here |
|---|---|
| A GitHub, GitLab, or Bitbucket repository URL | The wizard accepts these repository types on the initial screen. |
| A project name and URL-friendly slug | The project details route requires both values before you continue. |
| The branch to use | A repository route requires a non-blank branch before you continue. |
| Provider or repository credentials | The Authentication tab can require **Username / Token Name** and **Password / Access Token** when repository access needs authentication. |
| Optional source paths | **Frontend Path** and **Backend Path** help describe the codebase structure. |
| Optional screenshot details | **Site URL**, **Login URL**, **Site Email**, and **Site Password** configure screenshot access. |
| At least one enabled documentation type | **Generate Documentation →** is unavailable until a type is selected. |
## Open the project-creation surface
Use this procedure when you are starting a new project from the Projects area.
**Prerequisites**
- You know whether you are using a repository or continuing without one.
**Steps**
1. Open **Projects**.
2. Select **New project**.
3. On the new-project screen, review the repository choices and choose the route that matches your starting point:
| If you want to… | Select |
|---|---|
| Start with a repository URL | **Get Started →** |
| Use a connected GitHub account | **GitHubConnected** |
| Use GitLab | **GitLab** |
| Use Bitbucket | **Bitbucket** |
| Continue without a repository | **Create without a repository** |
Opening the new-project route starts a fresh wizard and clears the selected project and saved wizard state.
**Result:** The wizard remains on the initial screen until you select a repository route or **Create without a repository**.
## Recognize the wizard stages and fields
The project-creation wizard is a sequence of repository access, project details, documentation types, and generation stages.
The fields and actions change with the route you choose.
| Stage or route | What you can use there |
|---|---|
| Initial repository choice | **Get Started →**, **GitHubConnected**, **GitLab**, **Bitbucket**, or **Create without a repository** |
| Authentication | **Username / Token Name**, **Password / Access Token**, **Test Connection**, and provider OAuth controls when authentication is required |
| Configuration | **Project Name**, **Slug**, **Branch**, **Frontend Path**, **Backend Path**, **Site URL**, **Login URL**, **Site Email**, and **Site Password** |
| Branch picker | Branch search, **Cancel**, and **Select Branch** |
| Repository browser | Repository search, repository selection, filters, **Retry**, **Back**, and **Continue →** |
| Documentation types | **Select All**, **Deselect All**, **User Guides**, **Technical Docs**, **API Reference**, **Support Bot**, **Back**, and **Generate Documentation →** |
| Generation | Progress, generation status, and completion destinations such as **Go to Project**, **View Documentation**, and **View Technical Docs** |
The Configuration tab is always available. Authentication is the repository-access step, and its tab appears when a repository needs authentication.
When a repository is present, **Branch** must contain a value. The project details route also requires non-blank **Project Name** and **Slug** before **Continue** becomes available.
The live initial screen has no labelled form fields or password field. Begin with the repository choice, then use the fields that appear on the route you select.
**Result:** You know which stage you are entering and which fields and actions belong to that stage.
## Enter project details and choose documentation
Use this procedure after you have chosen a repository route, or after you have selected **Create without a repository**.
**Prerequisites**
- You have a project name and slug.
- If you are using a repository, you have selected or entered its branch.
**Steps**
1. In **Project Name**, enter the name for the project when the field is shown.
2. In **Slug**, enter the URL-friendly identifier when the field is shown.
3. In **Branch**, enter the branch to use when a repository is present.
4. Enter optional project details:
| If you want to provide… | Enter it in… |
|---|---|
| A frontend source location | **Frontend Path** |
| A backend source location | **Backend Path** |
| The application address | **Site URL** |
| The sign-in address | **Login URL** |
| The sign-in email | **Site Email** |
| The sign-in password | **Site Password** |
5. Select **Continue →**.
6. Choose documentation types:
| Choice | Status and action |
|---|---|
| **User Guides** | Enabled; select it to include user guides. |
| **Technical Docs** | Enabled; select it to include technical documentation. |
| **API Reference** | Enabled; select it to include an API reference. |
| **Support Bot** | Unavailable; it is shown with **Soon**. |
| All enabled types | Select **Select All**. |
| All currently selected enabled types | Select **Deselect All**. |
7. Select **Generate Documentation →**.
**Result:** The project is created and the wizard moves to the generation stage.
## Choose repository access
Use this procedure when your project uses a repository.
**Prerequisites**
- You have a supported GitHub, GitLab, or Bitbucket repository route.
- You have provider access or repository credentials when the repository requires authentication.
**Steps**
1. Choose one repository route:
| If you want to… | Action |
|---|---|
| Use a repository URL | Enter the URL, then select **Get Started →**. |
| Browse a connected provider | Select **GitHubConnected**, **GitLab**, or **Bitbucket**. |
| Skip repository access | Select **Create without a repository**. |
2. If the selected provider is not connected, select **Authorize GitHub**, **Authorize GitLab**, or **Authorize Bitbucket**.
3. If repository credentials are requested, enter **Username / Token Name**.
4. Enter **Password / Access Token**.
5. Select **Test Connection**.
6. Select **Configure** to continue to project configuration.
7. Search for a repository in the repository browser.
8. Select a repository.
9. Choose a branch:
| If you want to… | Action |
|---|---|
| Enter a branch directly | Select **Continue →**, then enter it in **Branch**. |
| Choose from the branch list | Select **Select Another Branch**, search for and select the branch, then select **Select Branch** and **Continue →**. |
Select **Back** to return from the repository browser to the previous wizard stage.
**Result:** The selected repository and branch are available to the project configuration route.
## When creation or generation goes wrong
Use the message on screen to choose the matching correction.
| Message | What to do |
|---|---|
| `Please enter a valid GitHub, GitLab, or Bitbucket repository URL` | Enter a supported repository URL. |
| `Please select or enter a branch to continue` | Enter a branch or use **Select Another Branch**. |
| `Connection successful` | Continue with project configuration. |
| `Connection test failed — check your credentials` | Review **Username / Token Name** and **Password / Access Token**, then select **Test Connection** again. |
| `Failed to load branches. You may not have access to this repository.` | Check repository access and try the branch picker again. |
| `Failed to load repositories. Please try again.` | Select **Retry**. |
| `No repositories found. Try a different search.` | Change the repository search. |
| `Popup was blocked. Please allow popups for this site.` | Allow pop-ups for the site, then start provider authorization again. |
| `Authorization was not completed. Please try again.` | Start provider authorization again. |
| `Failed to verify connection. Please try again.` | Try provider authorization again. |
| `Failed to start authorization. Please try again.` | Try provider authorization again. |
| `Failed to start generation` | Select **Retry** when it is available. |
| `Generation failed` | Select **Retry**. |
| `Generation was cancelled` | Select **Retry**. |
| `Project Created` | Select **Go to Project** or **Try Different Settings**. |
| `Documentation Ready!` | Continue with the available documentation destinations. |
If the project slug conflicts with an existing project, the wizard retries with a generated suffix.
## Continue after the project is created
When the selected generation work completes, the generation stage is the hand-off to the created project and its documentation destinations.
**Prerequisites**
- The project has been created.
- The selected documentation work has reached its completion screen.
**Steps**
1. Review the completion heading **Documentation Ready!**.
2. Choose the destination that matches your next task:
| If you want to… | Select |
|---|---|
| Open the created project's documentation | **View Documentation** |
| Open technical documentation after selecting **Technical Docs** or **API Reference** | **View Technical Docs** |
| Open the created project | **Go to Project** |
3. For project-level configuration, continue with [Manage project settings](https://atloria-selfdogfood-3577.atloria.app/p/atloria-selfdogfood-3577-BDFvUbEgc3/user/manage-project-settings).
4. For generation stages and status transitions, continue with [Documentation generation lifecycle](https://atloria-selfdogfood-3577.atloria.app/p/atloria-selfdogfood-3577-BDFvUbEgc3/user/documentation-generation-lifecycle).
5. For the project area and its related surfaces, continue with [Projects overview](https://atloria-selfdogfood-3577.atloria.app/p/atloria-selfdogfood-3577-BDFvUbEgc3/user/projects-overview).
The generation stage starts the selected documentation jobs and shows their progress.
**Result:** The created project or one of its documentation destinations is open, and the selected documentation jobs are running or showing their progress.
# Manage project settings
Use this page to maintain a project's information and its documentation settings. A webhook is a
project trigger; a snippet is reusable content; and a changelog draft is a release-note entry that
you review before publishing.
## Project settings at a glance
Project settings are the project-level surfaces for maintaining project information and the
configuration used around project documentation. A project is the primary work container that
connects documentation work with related versions, changes, and technical documentation surfaces.
| If you need to… | Go to |
|---|---|
| Prepare or change the project's name, repository details, documentation style, or Site URL | [Update project information and documentation settings](#update-project-information-and-documentation-settings) |
| Create, edit, or remove reusable content | [Manage reusable snippets](#manage-reusable-snippets) |
| Choose webhook triggers or a regeneration schedule | [Configure webhooks and scheduled regeneration](#configure-webhooks-and-scheduled-regeneration) |
| Review or publish changelog drafts | [Manage changelog drafts and publishing](#manage-changelog-drafts-and-publishing) |
| Understand the areas and conditional fields on the screen | [Understand the settings screen](#understand-the-settings-screen) |
| Start with a new project | Create a project |
| Continue with administrative project settings | Project settings administration |
| Review project changes and audit information | Project changes and audit |
## Prerequisites
Have a saved project and an authenticated application session before changing settings. The project
must load before its settings can be initialized. The Site URL field appears after its configuration
has loaded, and webhook and changelog areas depend on the configuration and data returned for the
project.
Prerequisites
- Have the project identifier ready so you can open the project route.
- Use an authenticated application session.
- Decide whether you are changing project information, maintaining a snippet, configuring webhooks,
or managing changelog drafts.
## Find project settings
Use the project record route for the main settings surface. Use a dedicated route when you are going
straight to snippets, webhooks, or changelog work.
Prerequisites
- Have a saved project.
- Use an authenticated application session.
**Steps**
1. **Open** **Projects**.
2. **Open** the project record whose settings you need to maintain.
3. Choose one route for the task:
| If you need to… | **Open** |
|---|---|
| Maintain reusable content | **Snippets** |
| Configure webhook triggers or schedules | **Webhooks & Triggers** |
| Manage changelog drafts and publishing | **Changelog & Release Notes** |
**Result:** The project settings surface for the selected task is open.
## Understand the settings screen
The main settings surface groups project information, documentation generation, project information,
published URL, publishing, documentation review, Git Sync, **Webhooks & Triggers**, technical docs,
reusable snippets, changelog, and related settings areas. The dedicated settings
surfaces provide the snippet editor, webhook configuration, and changelog draft controls.
| Area | Fields or controls | When it appears |
|---|---|---|
| Project information | **Project Name**, **Description**, **Slug**, **Repository URL**, **Default Branch**, and **Site URL (for screenshots)** | On the project settings surface; the Site URL field appears after its configuration has loaded |
| Documentation generation | **Manual Style** and **Let documentation create records in this application** | On the project settings surface |
| Published URL | A read-only published URL with **Copy** and **Open** | When the project is public and has a full public URL |
| **Webhooks & Triggers** | Webhook URLs, triggers, scheduled regeneration, deliveries, and **Save configuration** | When the panel is open and its configuration or delivery data is available |
| **Snippets** | A snippet list and an editor with **Name (reference key)**, **Title (optional)**, and **Content (markdown)** | The editor appears while a snippet is being created or edited |
| **Changelog** & release notes | Drafts, published entries, **Auto-publish daily drafts**, and draft editing controls | Configuration appears when changelog configuration exists; title and body fields appear while a draft is being edited |
The **Webhooks & Triggers** panel starts closed. Select its header to open the settings body. When
**Enable scheduled regeneration** is selected, **Cron expression** and **Timezone** appear. The
recent-delivery table appears when delivery records exist.
## Update project information and documentation settings
Use this procedure when the project's identity, repository details, documentation style, or
documentation-generation setting changes. **Project Name**, **Description**, and **Slug** save as a debounced
group; **Repository URL**, **Default Branch**, and Site URL use separate debounced updates.
Prerequisites
- **Open** the project settings surface.
- Have the intended project name, description, slug, repository URL, branch, and Site URL ready.
**Steps**
1. In the basic information area, enter the project name in **Project Name**.
2. Enter the project description in **Description**.
3. Enter the URL-friendly project identifier in **Slug**.
4. Enter the source repository address in **Repository URL**.
5. Enter the branch used for documentation generation in **Default Branch**.
6. Enter the live application URL in **Site URL (for screenshots)**.
7. Choose one value from **Manual Style**:
| If you need to use… | Select |
|---|---|
| The enterprise writing style | **Enterprise** |
| The mid-market writing style | **Mid-market** |
| The corporate writing style | **Corporate** |
| The **SaaS** writing style | **SaaS** |
8. Select **Let documentation create records in this application** when documentation work may
create records in the application.
**Result:** The selected project and documentation settings are updated through their respective
debounced saves. Select **Snippets** to continue with reusable content.
## Manage reusable snippets
Maintain reusable content from the snippet settings surface by creating, editing, validating,
saving, cancelling, or removing a snippet.
Prerequisites
- **Open** **Snippets** from the project's settings areas.
- Have the reference key and markdown content ready.
**Steps**
1. Select **New snippet** to open the editor.
2. Enter the reference key in **Name (reference key)**.
3. Enter an optional heading in **Title (optional)**.
4. Enter the reusable text in **Content (markdown)**.
5. Choose one path:
| If you need to… | Select |
|---|---|
| Create the snippet or save its changes | **Save** |
| Close the editor without saving current changes | **Cancel** |
| **Open** the existing snippet for editing | **Edit** |
| Remove the existing snippet | **Delete** |
6. If you selected **Delete**, confirm the browser prompt asking whether to delete the selected
snippet and, when it is referenced, warning about the pages that use it.
**Result:** **Save** closes the editor and reloads the list after a successful create or update;
**Cancel** closes the editor without saving; a successful removal reloads the list. Select
**Webhooks & Triggers** to continue with project triggers and schedules.
## Configure webhooks and scheduled regeneration
Use webhooks and scheduled regeneration to control project triggers and the timing used for
documentation regeneration.
Prerequisites
- **Open** **Webhooks & Triggers** from the project's settings areas.
- Have the trigger conditions and schedule you want to use ready.
**Steps**
1. Select **Webhooks & Triggers** to open the settings body.
2. In **Trigger on**, select the event options that apply:
| If you need to trigger on… | Select |
|---|---|
| A tag being created | **Tag creation** |
| A push to a branch | **Push to branch** |
| A GitHub or GitLab release | **GitHub/GitLab release** |
3. When you select **Push to branch**, enter its branch pattern in the text field beside the
checkbox.
4. When you select **Tag creation**, enter its tag pattern in the text field beside the checkbox.
5. Select **Enable scheduled regeneration** when the project needs a recurring schedule.
6. Choose one value from **Cron expression**:
| If you need to use… | Select | Schedule value |
|---|---|---|
| No schedule selection yet | **Select schedule...** | |
| Weekly regeneration on Monday at 8am | **Weekly (Mon 8am)** | `0 8 * * 1` |
| Regeneration on the 1st and 15th | **Bi-weekly (1st & 15th)** | `0 8 1,15 * *` |
| Monthly regeneration on the 1st at 8am | **Monthly (1st at 8am)** | `0 8 1 * *` |
| Your own cron expression | **Custom cron** | `custom` |
7. Choose one value from **Timezone**:
| If the schedule uses… | Select |
|---|---|
| Coordinated Universal Time | **UTC** |
| Eastern time | **Eastern (ET)** |
| Central time | **Central (CT)** |
| Mountain time | **Mountain (MT)** |
| Pacific time | **Pacific (PT)** |
| London time | **London (GMT)** |
| Berlin time | **Berlin (CET)** |
| Dubai time | **Dubai (GST)** |
8. Select **Generate new webhook secret** when the project needs a replacement secret.
9. Select **Save configuration** to save the trigger and schedule settings.
**Result:** The selected trigger and schedule values are sent as the project configuration. Select
**Changelog & Release Notes** to continue with release-note drafts.
## Manage changelog drafts and publishing
Use the changelog surface to edit a draft, save its text, publish it, discard it, or configure daily
auto-publishing.
Prerequisites
- **Open** **Changelog & Release Notes** from the project's settings areas.
- Have a draft available when you need to edit, publish, or discard one.
**Steps**
1. Select the checkbox for **Auto-publish daily drafts** when daily drafts should be published
automatically after their 24-hour window.
2. Select **Edit** on the draft you want to change.
3. Enter the revised title in **Title**.
4. Enter the revised release note in **Body (markdown)**.
5. Choose one path for the draft:
| If you need to… | Select |
|---|---|
| **Save** the draft changes | **Save** |
| Close the editor without saving current text | **Cancel** |
| Make the draft public | **Publish** |
| Remove the draft | **Discard** |
| Continue editing | **Edit** |
6. If you select **Discard**, confirm the prompt displaying
`Discard this draft? Changes from today may re-open a new one.`.
**Result:** The draft is saved, published, discarded, or left unchanged according to the path you
selected. If a message appears, use the troubleshooting table before continuing.
## When a settings change goes wrong
Use the message on screen to choose the corrective action. The messages below are the messages
defined for these settings surfaces.
| What you see | What it means | What to do |
|---|---|---|
| `Project failed to load.` | The project page could not load the project. | Return to the project route and retry the load. |
| `Name must be a slug: lowercase letters/digits, then letters/digits/hyphen/underscore (max 64 chars).` | The snippet reference key does not meet the accepted format. | Correct **Name (reference key)** and select **Save** again. |
| A deletion prompt naming the selected snippet and warning about pages that use it | The page is asking you to confirm snippet deletion. | Confirm only when you intend to remove the snippet. |
| `Save failed` | A snippet or webhook save did not complete. | Review the fields and select **Save** or **Save configuration** again. |
| `Delete failed` | A snippet removal did not complete. | Return to the snippet list and retry **Delete**. |
| `New secret generated. Copy it now — it won't be shown again.` | A new webhook secret was generated. | **Copy** the secret before leaving the settings surface. |
| `Failed` | Webhook secret generation did not complete. | Retry **Generate new webhook secret**. |
| `Discard this draft? Changes from today may re-open a new one.` | The page is asking you to confirm discarding a draft. | Confirm only when you intend to discard the draft. |
## What to do next
When the next task is outside project settings, continue to the page that owns that work:
- Return to **Projects** overview to choose another project workspace.
- Continue to Project changes and audit to inspect changes and audit
information.
- Continue to Project settings administration for the
dedicated administrative settings task.
# Project versions
## Project versions at a glance
A documentation version is a complete snapshot of your documentation at a point in your
codebase. Use version history to keep releases distinct, compare two snapshots to see what
changed, and review regenerated or carried-forward content before publishing.
| If you need to… | Go to |
|---|---|
| Check the versions belonging to a project | [Find version history](#find-version-history) |
| Understand the counts and actions on a version row | [Understand the version history screen](#understand-the-version-history-screen) |
| Inspect regenerated content before publishing | [Review a version before publishing](#review-a-version-before-publishing) |
| See which documents changed between snapshots | [Compare two versions](#compare-two-versions) |
| Change a version's status or handle approval | [Manage version status and follow-up actions](#manage-version-status-and-follow-up-actions) |
| Work with project changes | [Project changes and audit](https://atloria-selfdogfood-3577.atloria.app/p/atloria-selfdogfood-3577-BDFvUbEgc3/user/project-changes-and-audit) |
| Review version screenshots | [Review version screenshots](https://atloria-selfdogfood-3577.atloria.app/p/atloria-selfdogfood-3577-BDFvUbEgc3/user/review-version-screenshots) |
| Understand the generation flow | [Documentation generation lifecycle](https://atloria-selfdogfood-3577.atloria.app/p/atloria-selfdogfood-3577-BDFvUbEgc3/user/documentation-generation-lifecycle) |
| Read the published result | [Published documentation](https://atloria-selfdogfood-3577.atloria.app/p/atloria-selfdogfood-3577-BDFvUbEgc3/user/published-documentation) |
Choose the task above, then prepare with **Before you start**.
## Before you start
**Prerequisites**
- Open the project whose versions you need to inspect.
- Have at least two versions when you need to compare them.
- Check the version's status, the snapshot's lifecycle state, before choosing an action. The available status values are Draft,
Active, Published, Deprecated, and Archived.
- Use an administrator role for **Approve** and **Reject**.
- Check whether a version is already scheduled before choosing **Schedule go-live…**.
- Check whether flagged documents exist before publishing from the review surface.
- Check whether screenshot coverage is below 80% when the review surface presents a warning.
Once these conditions are clear, continue to [Find version history](#find-version-history).
## Find version history
Version history is the project view where you inspect saved documentation snapshots and choose
whether to review, compare, or continue with a version action.
**Steps**
1. Open the project whose documentation snapshots you need.
2. Select **Versions** in the project workspace.
3. Select **Compare versions** to open the comparison surface when at least two versions are
available.
4. Select **Back to versions** on the review or comparison surface to return to version history.
**Result:** The project's version history is on screen and ready for you to read the table.
## Understand the version history screen
The version history screen is a list of documentation snapshots with their status, creation
details, document counts, screenshot counts, category counts, and source information.
The table uses these columns:
| Column | What it tells you |
|---|---|
| Version | Which snapshot the row represents |
| Status | The snapshot's current lifecycle state |
| Created | Who created the snapshot and when |
| Docs | The number of documents in the snapshot |
| Screenshots | The number of screenshots in the snapshot |
| Categories | The number of categories in the snapshot |
| Source | The commit hash or branch associated with the snapshot |
The header includes **Generate new version**. Select it when you need a new snapshot from the
project's current documentation source. The row actions depend on the version's status; use the
status column before selecting one. Continue to the review or comparison procedure when the row
requires closer inspection.
## Review a version before publishing
A pre-publish review is the checkpoint for deciding how regenerated content and carried-forward
content should enter the next published snapshot.
A flagged document is a document that needs a choice between keeping the previous edits, using the
new AI version, or discarding the flagged content.
**Prerequisites**
- Open a version's review surface.
- Check the Needs review items before selecting a publishing action.
- Check the **Screenshots** summary. A warning appears when coverage is below 80% and at least one
screenshot exists.
**Steps**
1. Select **View diff** on a flagged document when a regenerated version is available.
2. Select **Hide diff** to close the side-by-side comparison.
3. Choose one action for each flagged document:
| If you need to… | Select |
|---|---|
| Keep the previous edited content | **Keep edits** |
| Replace it with the regenerated content | **Use AI version** |
| Remove the flagged content | **Discard** |
4. Select **Keep all edits** or **Use all AI** when the same decision applies to every flagged
document.
5. Choose one next action:
| If you need to… | Select |
|---|---|
| Address the screenshot summary before publishing | **Manage screenshots →** |
| Leave the version in draft form | **Save as draft** |
| Ask a reviewer to approve the version | **Request approval** |
6. Select the publish action labelled with the version number when there are no flagged documents
to resolve.
**Result:** The review surface reflects your document decisions, screenshot status, and selected
publishing path. Continue to [Compare two versions](#compare-two-versions) when you need to inspect
changes between snapshots.
## Compare two versions
Comparison shows how the documents in two documentation snapshots differ, so you can inspect the
change before choosing a publishing or follow-up action.
**Prerequisites**
- Have at least two versions available.
**Steps**
1. Open the comparison surface.
2. In **Select version A…**, choose the first version.
3. In **Select version B…**, choose the second version.
4. Select **Compare**.
5. Filter the results with **Filter documents by change status**:
| If you need to see… | Option |
|---|---|
| Every result | `All` |
| Documents added in the selected change | `Added` |
| Documents removed in the selected change | `Removed` |
| Documents modified in the selected change | `Modified` |
| Documents unchanged in the selected change | `Unchanged` |
6. Select **View →** on a document row to open its difference.
7. Select **Close** to leave the difference view.
**Result:** The comparison table is filtered to the change status you selected, or the selected
document difference is open for inspection. Continue to [Manage version status and follow-up
actions](#manage-version-status-and-follow-up-actions) when you are ready to act on the version.
## Manage version status and follow-up actions
Version status tells you where a snapshot is in its publication lifecycle: Draft is newly
generated, Active is the current working version, Published is publicly accessible, Deprecated is
marked for removal, and Archived is read-only and hidden.
**Prerequisites**
- Open a version row and read its status.
- Use an administrator role for **Approve** and **Reject**.
- Keep a Draft or Published version unscheduled before selecting **Schedule go-live…**.
**Steps**
1. Choose the action that matches the version's status or the work you need to complete:
| If you need to… | Select |
|---|---|
| Activate a Draft or Published version | **Activate** |
| Schedule a Draft or Published version that has no scheduled activation | **Schedule go-live…**, then choose a future date and time and select **Schedule** |
| Leave the schedule dialog without scheduling | **Cancel** |
| Ask for approval on a Draft version | **Request approval** |
| Approve a pending version | **Approve** |
| Reject a pending version | **Reject**, enter a reason, then select **Confirm reject** |
| Publish a Draft or Active version | **Publish** |
| Mark a Published version for removal | **Deprecate** |
| Make an Active, Published, or Deprecated version read-only and hidden | **Archive** |
| Permanently remove a version that is not Active | **Delete** |
**Result:** The version history reflects the lifecycle action you selected, or the schedule,
approval, or deletion dialog remains available for the next decision. If a message appears, use
[When version work goes wrong](#when-version-work-goes-wrong).
## When version work goes wrong
Use the exact message on screen to choose the correction.
| Message | When it appears | What to do |
|---|---|---|
| `A reason is required to reject.` | **Reject** is selected without a reason | Enter a reason before selecting **Confirm reject**. |
| `Pick a valid date and time.` | The scheduled value is not a valid date and time | Enter a valid value in the schedule field. |
| `Scheduled time must be at least 2 minutes in the future.` | The scheduled time is too soon | Choose a time at least two minutes ahead. |
| `Mark this job as completed?` | **Mark complete** is selected on a stuck generation job | Confirm only when the job is ready to be marked complete. |
| `Failed to request approval` | An approval request fails | Check the version state and try the approval action again. |
| `Failed to approve` | Approval fails | Check the approval state and try again. |
| `Failed to reject` | Rejection fails | Check the rejection reason and approval state, then try again. |
| `Failed to schedule` | Scheduling fails | Check the date and time, then try again. |
| `Failed to cancel schedule` | Cancelling a schedule fails | Reopen the version history and check whether the schedule remains. |
| `Action failed` | A version action fails without a more specific message | Check the version status before retrying. |
| `Resolve failed` | A flagged document decision fails | Reopen the review and check the flagged document. |
| `Bulk resolve failed` | A bulk flagged-document decision fails | Reopen the review and resolve the documents individually. |
| `Publish failed` | Publishing from review fails | Reopen the review and check whether flagged documents remain. |
| `Review failed to load. Reload the page to try again.` | Review data does not load | Reload the review page. |
| `Approval requested. A reviewer will be notified.` | **Request approval** succeeds | Wait for the reviewer to act before publishing. |
| `Screenshot coverage is below 80%. Consider capturing missing screenshots before publishing.` | Screenshot coverage is below the threshold | Select **Manage screenshots →** before publishing. |
| `Compare failed` | The comparison request fails | Check both selected versions and try **Compare** again. |
| `Failed to generate changelog` | Changelog generation fails | Return to the comparison and try the changelog action again. |
When the correction is complete, continue to [What to do next](#what-to-do-next).
## What to do next
After you inspect a version, continue with the page that owns the next piece of work:
- Select **View changes** to continue with [Project changes and audit](https://atloria-selfdogfood-3577.atloria.app/p/atloria-selfdogfood-3577-BDFvUbEgc3/user/project-changes-and-audit).
- Select **Manage screenshots →** to continue with [Review version screenshots](https://atloria-selfdogfood-3577.atloria.app/p/atloria-selfdogfood-3577-BDFvUbEgc3/user/review-version-screenshots).
- For generation and status flow, continue with [Documentation generation lifecycle](https://atloria-selfdogfood-3577.atloria.app/p/atloria-selfdogfood-3577-BDFvUbEgc3/user/documentation-generation-lifecycle).
- For the public result, continue with [Published documentation](https://atloria-selfdogfood-3577.atloria.app/p/atloria-selfdogfood-3577-BDFvUbEgc3/user/published-documentation).
- To locate the project first, use [Projects overview](https://atloria-selfdogfood-3577.atloria.app/p/atloria-selfdogfood-3577-BDFvUbEgc3/user/projects-overview).
The lifecycle descriptions distinguish the outcomes: Published is publicly accessible, Deprecated
is marked for removal, and Archived is read-only and hidden.
# Project changes and audit
Use this page to inspect proposed documentation changes, review their details, and read
project activity in the audit trail.
## Project changes and audit
A project change request is a proposed documentation change that you inspect before it
is closed or merged. The project audit trail is the event list for project activity. Use
the change request when you need to review proposed content; use the audit trail when you
need to inspect recorded project events.
| If you need to… | Go to |
|---|---|
| Review a proposed documentation change | [Review a documentation change](#review-a-documentation-change) |
| Inspect conflicts, statuses, or messages | [Handle statuses, conflicts, and messages](#handle-statuses-conflicts-and-messages) |
| Read project events or export them | [Review project audit events](#review-project-audit-events) |
| Continue after a merged change | [Know what happens next](#know-what-happens-next) |
| Review versions | [Project versions](https://atloria-selfdogfood-3577.atloria.app/p/atloria-selfdogfood-3577-BDFvUbEgc3/user/project-versions) |
| Review audit information elsewhere | Audit reference |
## Before you start
You need access to a project and a reachable project-specific route before you can inspect
its changes or audit trail. The changes list uses the signed-in session, and the audit
page loads events for the selected project.
These surfaces do not include form fields or required markers. Use the action filter on
the project audit page; use the Audit reference page for broader audit guidance.
## Find a project change or audit trail
Use the project list to open the project whose documentation changes or activity you need
to inspect. The project-specific changes route redirects to the project dashboard's
Changes tab. An existing change row opens its detail route.
**Prerequisites**
- You have access to a project.
- You know whether you are looking for a proposed documentation change or an audit event.
**Steps**
1. Open the project list.
2. Choose the project surface that matches your task:
| If you need to… | Open |
|---|---|
| Review a proposed documentation change | The project Changes surface |
| Inspect project activity | The project Audit Trail |
3. In the Changes surface, select a **Change row** to open its detail route.
4. On the detail route, select **Back to Changes** to return to the Changes surface.
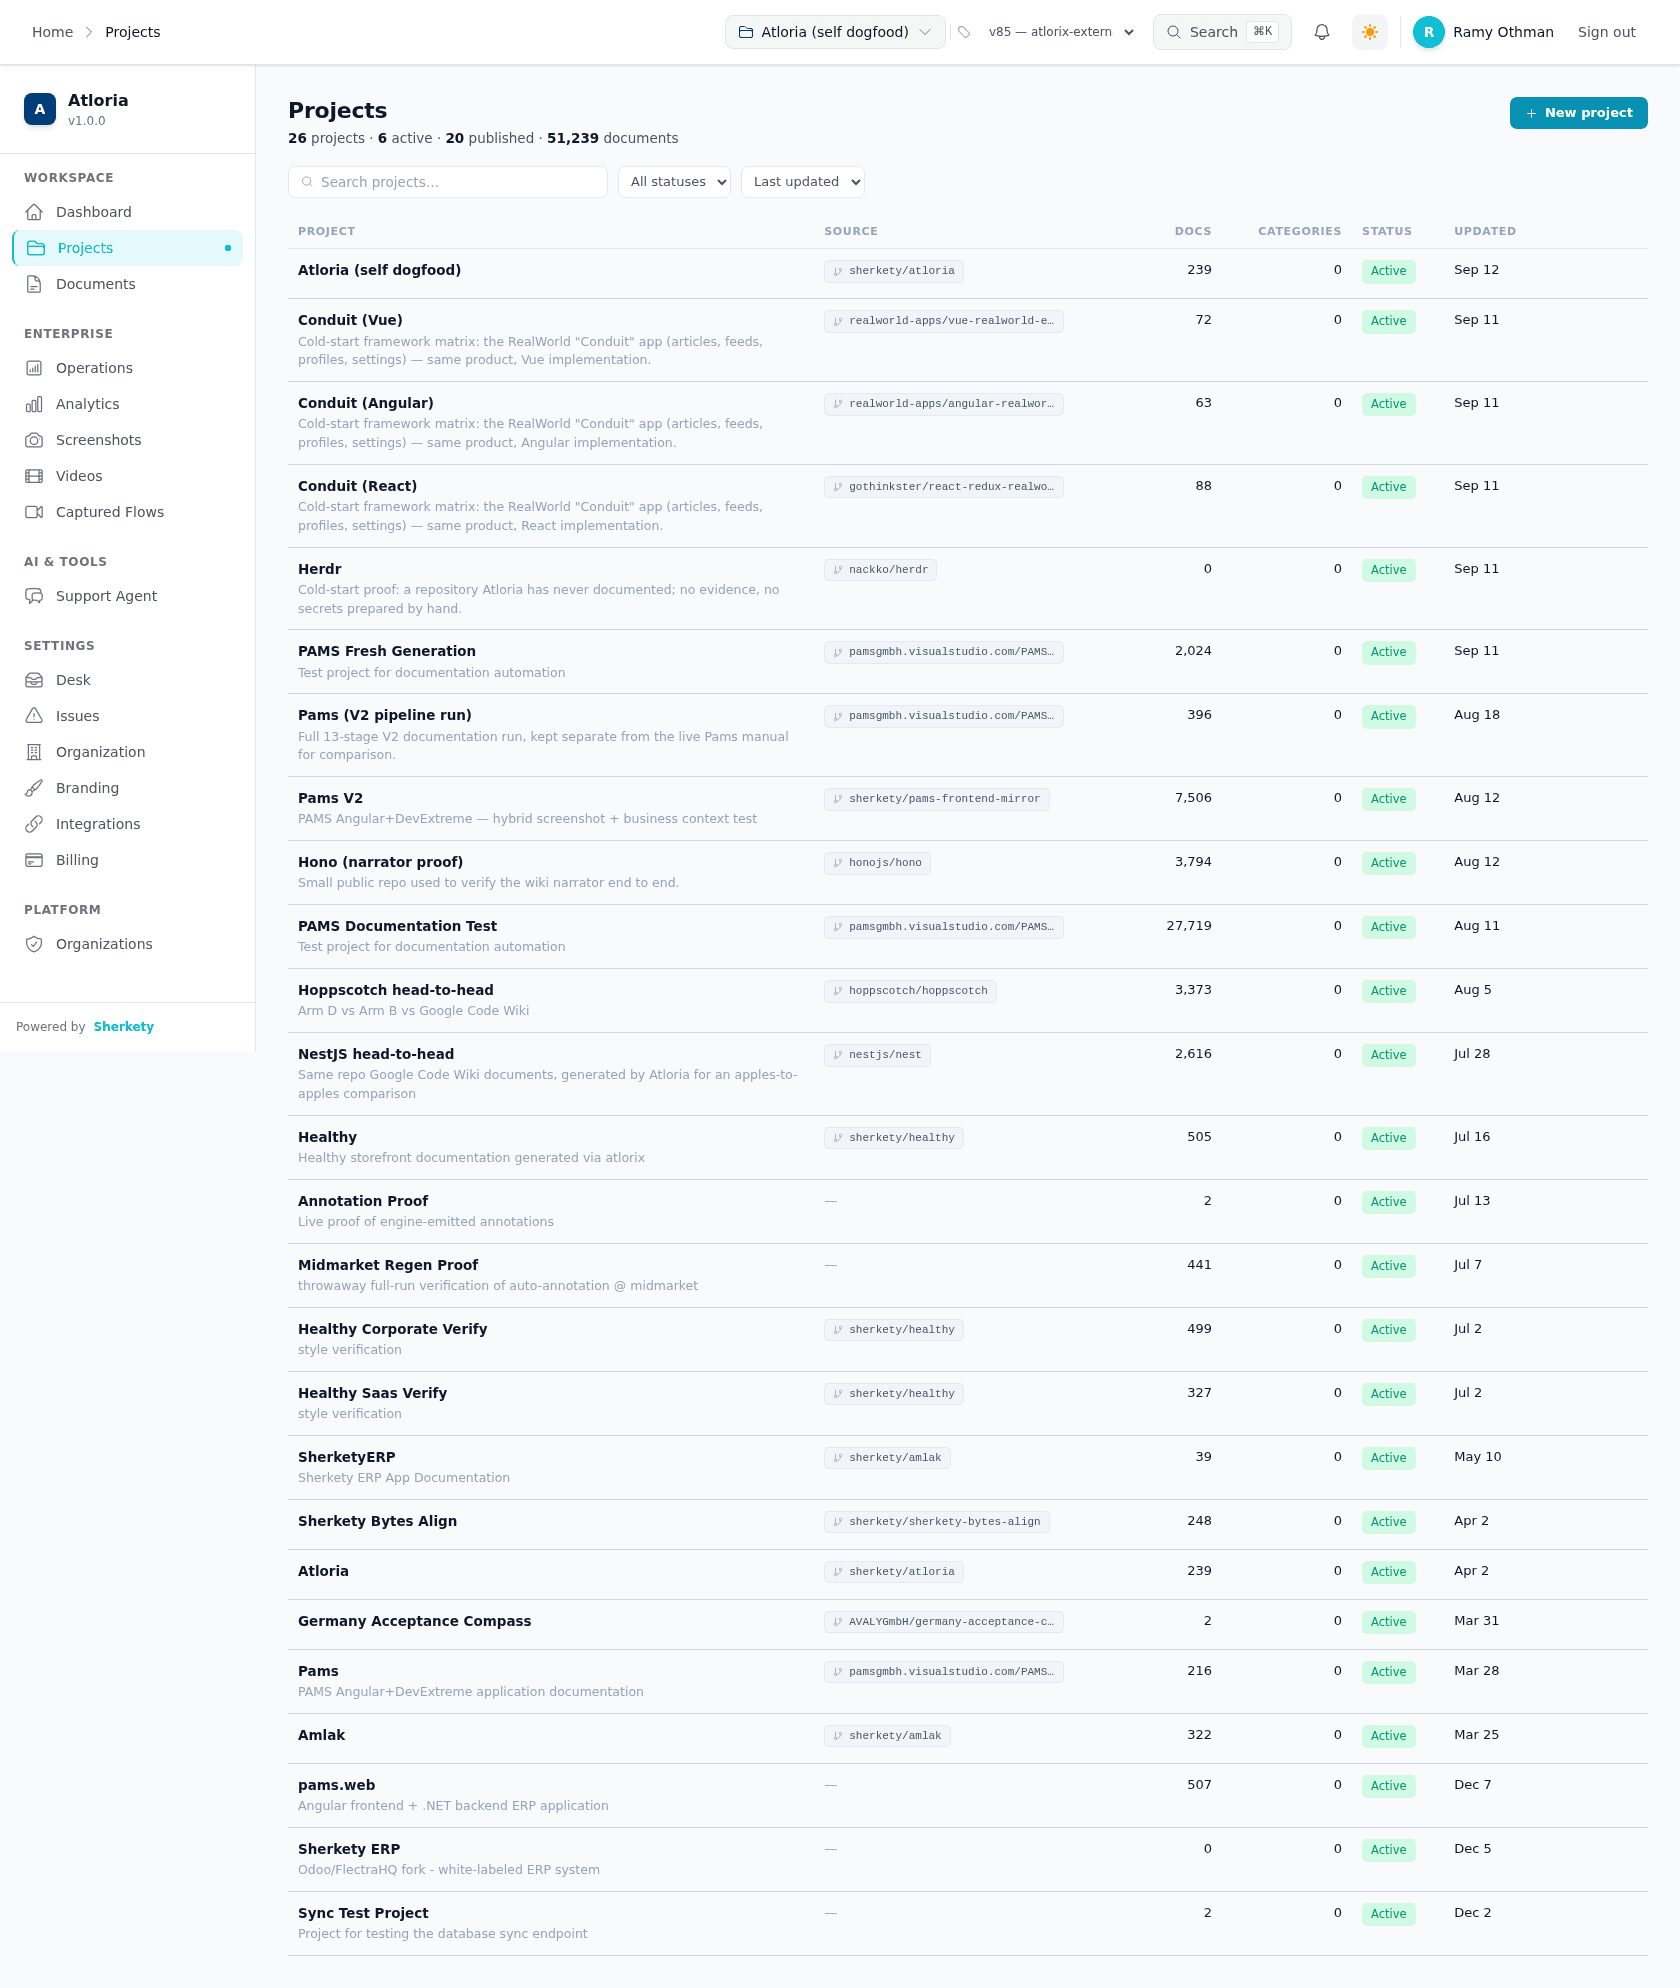
**Result:** The selected project Changes surface, change detail route, or Audit Trail is
on screen.
## Review a documentation change
Use the change request's summary to identify the proposal and its activity entries to
follow its history. A diff is the file-by-file view of additions, deletions, sections,
hunks, and lines; use it to inspect the affected documentation.
A conflict section places the current text beside the proposed text so you can choose
which text to keep.
**Prerequisites**
- You have opened a change request from the Changes surface.
**Steps**
1. Read the change title, kind, status, commit range, file count, and conflict count in
the detail header.
2. Read the activity entries for Created, Conflicts detected, and Merged when they are
present.
3. Review each affected file in the diff.
4. Compare the current and proposed text in each conflict section when conflicts are
present.
5. Choose one resolution for each conflict section.
| If you want to… | Select |
|---|---|
| Keep the current page text | **Keep mine** |
| Use the proposed page text | **Use proposed** |
| Change the proposed text before applying it | **Edit inline** |
6. Select **Apply resolution** after choosing a resolution for every section.
7. Choose the action that matches the proposal:
| If… | Select |
|---|---|
| The proposal is open and has no conflicts, and you need to inspect the rendered preview | **Open preview** |
| The proposal should not be merged | **Close** |
| The proposal is open and has no conflicts, and it is ready to merge | **Approve & merge** |
**Result:** The change detail remains on screen with its summary, activity, affected files,
diff, and the review controls available for its current status.
## Review project audit events
The project audit trail is a chronological event list for project activity. Use it to
read the time, actor, action, entity, and details associated with each returned event.
**Prerequisites**
- You have opened the project Audit Trail.
**Steps**
1. Select an action in **All Actions** to filter the event list.
2. Read the Time, Actor, Action, Entity, and Details columns.
3. Select an audit event row to expand its metadata.
4. Move through the event pages when the event list has more than one page:
| If you need to… | Select |
|---|---|
| Return to the previous page | **Previous** |
| Open the next page | **Next** |
5. Select **Export CSV** to request a CSV export of the project audit trail.
**Result:** The project audit trail shows the selected event view, expanded metadata, page
range, or export control.
## Handle statuses, conflicts, and messages
The Changes surface groups requests by status, and the detail surface changes its actions
when a request is open, conflicted, preparing, merging, merged, or failed. Match the
status on screen to its available path.
| When the screen shows… | The available path is… |
|---|---|
| Open | **Open preview**, **Close**, and **Approve & merge** are available when there are no conflicts. |
| Merged | **View on Versions** is available to continue to the project versions. |
| Closed | Review these requests in the Closed filter. |
| A conflict | **Close**, **Refresh diff**, and conflict-resolution cards are available. |
| Preparing | Wait while the branch is being prepared. |
| Merging | Wait while the merge is in progress; the Merging control is disabled. |
| Failed | **Retry merge** is available only when the failure is retryable. |
Match each message to the situation that produces it.
| Situation | Message |
|---|---|
| Change-list error | `Failed to load change requests` |
| Change-list loading | `Loading change requests...` |
| Change-list empty state | `When your docs are edited, regenerated, or updated by an agent, the proposed changes appear here for review before they land.` |
| Detail loading | `Loading change request…` |
| Detail loading error | `Failed to load change request` |
| Preview cannot be shared | `Publish this project to share a rendered preview of the change.` |
| Preview-link error | `Failed to create preview link` |
| Conflict banner | `Conflicts to resolve — your docs changed since this was proposed. Resolve each section below, then merge.` |
| Conflict choice required | `Choose a resolution for every section` |
| File has no line changes | `No line-level changes in this file.` |
| Change has no diff | `No diff available for this change request.` |
| Audit export error | `Export failed` |
| Audit loading | `Loading...` |
| Audit has no events | `No audit events` |
## Know what happens next
After you finish reviewing a change request, the next destination depends on the action
you select. A merged request offers **View on Versions**. The audit trail remains the place
to inspect project events, while the Audit reference page covers audit information more broadly.
| After you… | Continue to… |
|---|---|
| Review a merged change | [Project versions](https://atloria-selfdogfood-3577.atloria.app/p/atloria-selfdogfood-3577-BDFvUbEgc3/user/project-versions) |
| Need broader audit guidance | Audit reference |
| Need the project list again | [Projects overview](https://atloria-selfdogfood-3577.atloria.app/p/atloria-selfdogfood-3577-BDFvUbEgc3/user/projects-overview) |
| Encounter a general application error | General error messages |
**Result:** You know which follow-on page to open for version review, audit reference
information, project navigation, or general error guidance.
# Documents overview
## Documents overview
A document is a principal record that you create and edit inside a project. The
**Documents** destination is the project workspace where you organize those records,
narrow the list, and open a saved document for the next task.
| If you need to… | Go to |
|---|---|
| Check the project and list conditions before working | [Before you start](#before-you-start) |
| Locate a saved document by category, text, type, status, or order | [Find documents](#find-documents) |
| Understand the cards, list headings, views, and pages | [Understand the document list](#understand-the-document-list) |
| Open a document from the list | [Open a saved document](#open-a-saved-document) |
| Create or edit a document | [Create and edit a document](https://atloria-selfdogfood-3577.atloria.app/p/atloria-selfdogfood-3577-BDFvUbEgc3/user/create-and-edit-a-document) |
| Compare revisions | [Compare document revisions](https://atloria-selfdogfood-3577.atloria.app/p/atloria-selfdogfood-3577-BDFvUbEgc3/user/compare-document-revisions) |
| Translate a document | [Translate a document](https://atloria-selfdogfood-3577.atloria.app/p/atloria-selfdogfood-3577-BDFvUbEgc3/user/translate-a-document) |
| Review document states and actions | [Document changes](https://atloria-selfdogfood-3577.atloria.app/p/atloria-selfdogfood-3577-BDFvUbEgc3/user/document-changes) |
| Read published documentation | [Published documentation](https://atloria-selfdogfood-3577.atloria.app/p/atloria-selfdogfood-3577-BDFvUbEgc3/user/published-documentation) |
## Before you start
**Prerequisites**
- Select a project before working with its categories and documents.
The Documents list and category sidebar depend on the selected project. Without one,
the page shows **No project selected** and **Select a project to view categories**.
With a project selected, the category sidebar loads the categories for that project.
If the project has versions, the page also provides **Version**. Its selected option
comes from the current version context.
With a project selected, continue to [Find documents](#find-documents).
## Find documents
A category is a group used to organize related documents. Use the category sidebar and
the document-list controls to narrow the list until the document you need is visible.
**Prerequisites**
- Have a project selected.
- Know enough about the document to choose a category, search text, type, status, or
sort order.
**Steps**
1. In the category sidebar, select **All Documents** to search across the project, or
select a category to limit the list.
2. If you selected a category, select **Clear** in the category filter indicator to
remove that category filter.
3. In **Search documents...**, enter text from the document you need.
4. Select one type filter: **All**, **Manual**, or **Generated**.
5. Select one status filter: **All**, **Draft**, **Published**, or **Archived**.
6. Open the sort menu and select the option that matches the way you want to locate the
document.
| If you need to… | Select |
|---|---|
| Keep the project's defined order | **Custom Order** |
| Start with the most recently changed documents | **Recently Updated** |
| Start with the least recently changed documents | **Least Recently Updated** |
| Start with the newest documents | **Newest First** |
| Start with the oldest documents | **Oldest First** |
| Scan titles from A to Z | **Title (A-Z)** |
| Scan titles from Z to A | **Title (Z-A)** |
**Result:** The list shows the documents matching the category, search text, type, and
status choices, in the selected order.
Continue with the document-list presentation before opening a result.
## Understand the document list
The document list is the working surface for choosing a saved record. It can show cards
or a list. The first list heading identifies the document, followed by **Type**,
**Status**, **Category**, and **Updated**.
The page also provides **Card view** and **List view**, plus **Previous page** and
**Next page** when the document list spans more than one page. **Edit order** changes
the surface to an ordering mode for categories and documents; select it only when you
need to change their order.
The fields **Version**, **Search documents...**, and **Search...** have no required
marker. **Search...** belongs to the category sidebar and is shown
when a project is selected and the category sidebar has loaded.
| What you see | What it means |
|---|---|
| **Search...** in the category sidebar | Narrow the category list. |
| **Search documents...** above the document results | Narrow the document results by search text. |
| Cards | Each document is presented as a selectable card. |
| The first heading identifies the document; the following headings are **Type**, **Status**, **Category**, and **Updated** | Each visible row is organized by those document details. |
| **Edit order** mode | Categories and documents are presented for reordering. |
| An empty result | The empty-state behaviour depends on whether a search is active. |
When the document you need is visible, continue with [Open a saved document](#open-a-saved-document).
## Open a saved document
Opening a saved document takes you from the organized list to that document's record
view. Use this procedure when the document already exists.
**Prerequisites**
- Have a project selected.
- Locate the document card or list entry.
**Steps**
1. Select the document card or list entry.
**Result:** The document opens in its detail page. If the list shows an empty or error
branch instead, continue with [Handle list branches](#handle-list-branches).
If you need a new record instead, select **New Document** in the document list. The
creation and editing procedure is described in [Create and edit a document](https://atloria-selfdogfood-3577.atloria.app/p/atloria-selfdogfood-3577-BDFvUbEgc3/user/create-and-edit-a-document).
## Handle list branches
The list changes according to the project, category, search, and document results you
have. Follow the alternative that matches what is on screen.
### Select a project
**Prerequisites**
- The Documents destination is open.
**Steps**
1. If the page shows **No project selected** or **Select a project to view categories**,
select a project before using the category sidebar or document list.
**Result:** The category sidebar and document list can load for the selected project.
### Create the first category
**Prerequisites**
- A project is selected.
- The category sidebar shows `No categories yet.`.
**Steps**
1. Select **Add Category**.
**Result:** The category-creation path opens.
### Recover from an empty category search
**Prerequisites**
- A project is selected.
- The category sidebar shows `No matches.`.
**Steps**
1. Change the text in **Search...** or clear the category search.
**Result:** The category list shows the categories matching the revised search.
### Recover from an empty document result
**Prerequisites**
- The document list shows no result after a search.
**Steps**
1. Change the text in **Search documents...** or remove the active filters.
**Result:** The document list shows the results matching the revised search and filters.
### Leave edit-order mode
**Prerequisites**
- Edit-order mode is active.
**Steps**
1. Use the ordering surface for category or document order.
2. Select **Edit order** to return to the normal document list.
**Result:** The normal document-list controls are on screen.
If an operation displays an error or warning, continue to [When the list does not load or an action fails](#when-the-list-does-not-load-or-an-action-fails).
## When the list does not load or an action fails
Use the message on screen to identify which part of the Documents destination needs
attention.
### Recover when the category list does not load
**Prerequisites**
- A project is selected.
**Steps**
1. Follow the action for the message that appears.
| Message | Action |
|---|---|
| `Loading...` | Wait for the category list to finish loading. |
| `Authentication required` | Sign in and return to the Documents destination. |
| `Failed to load categories` | Reload the category sidebar. |
| `project-not-found` | Select a project that exists in the current workspace. |
**Result:** The category sidebar shows the categories for the selected project.
### Recover after reordering fails
**Prerequisites**
- A reorder action has displayed an error.
**Steps**
1. Follow the action for the message that appears.
| Message | Action |
|---|---|
| `Failed to reorder documents. Please try again.` | Leave the document order unchanged, then repeat the document reorder action. |
| `Failed to reorder categories. Please try again.` | Leave the category order unchanged, then repeat the category reorder action. |
**Result:** The requested document or category order is submitted again.
### Respond to the delete confirmation
**Prerequisites**
- The delete dialog is open for the document you intend to review.
**Steps**
1. Read `Are you sure you want to delete this document?`.
2. Read `⚠️ This action cannot be undone.`.
3. Choose the action that matches your intention.
| If you want to… | Select |
|---|---|
| Close the dialog without confirming the deletion | **Cancel** |
| Confirm the deletion after checking the document shown in the dialog | **Delete Document** |
**Result:** The dialog closes without confirmation when you select **Cancel**, or the
document deletion is confirmed when you select **Delete Document**.
## Know what to do next
After you open a saved document, continue with the page that matches the work you need
to do:
| If you need to… | Continue with… |
|---|---|
| Create a document or edit its content | [Create and edit a document](https://atloria-selfdogfood-3577.atloria.app/p/atloria-selfdogfood-3577-BDFvUbEgc3/user/create-and-edit-a-document) |
| Compare document revisions | [Compare document revisions](https://atloria-selfdogfood-3577.atloria.app/p/atloria-selfdogfood-3577-BDFvUbEgc3/user/compare-document-revisions) |
| Translate an existing document | [Translate a document](https://atloria-selfdogfood-3577.atloria.app/p/atloria-selfdogfood-3577-BDFvUbEgc3/user/translate-a-document) |
| Review document states and actions | [Document changes](https://atloria-selfdogfood-3577.atloria.app/p/atloria-selfdogfood-3577-BDFvUbEgc3/user/document-changes) |
| Read the published result | [Published documentation](https://atloria-selfdogfood-3577.atloria.app/p/atloria-selfdogfood-3577-BDFvUbEgc3/user/published-documentation) |
Opening a saved document takes you to its detail page. The detail page owns the controls
and messages for that route. The creation, revision comparison,
translation, changes, and published-documentation pages own their respective follow-on
work.
# Create and edit a document
## Create and edit a document
A document is a documentation record that lives inside a project. Create one when you need a
new piece of documentation, then open its editor to change the content or its settings.
Changes to the title, content, document type, slug, category, or audiences are saved to the
record automatically.
| If you need to… | Go to |
|---|---|
| Check what you need before creating a document | [Before you start](#before-you-start) |
| Reach the document workspace | [Find the document area](#find-the-document-area) |
| Create a blank document or use a template | [Create the document](#create-the-document) |
| Change document content or settings | [Edit content and save the record](#edit-content-and-save-the-record) |
| Choose a different creation or editing route | [Handle the available branches](#handle-the-available-branches) |
| Fix a validation or saving problem | [When creation or saving goes wrong](#when-creation-or-saving-goes-wrong) |
| Continue with revisions, translation, or publishing | [What to do next](#what-to-do-next) |
| Understand how documents are organised | [Documents overview](https://atloria-selfdogfood-3577.atloria.app/p/atloria-selfdogfood-3577-BDFvUbEgc3/user/documents-overview) |
| Review document changes | [Document changes](https://atloria-selfdogfood-3577.atloria.app/p/atloria-selfdogfood-3577-BDFvUbEgc3/user/document-changes) |
| Compare revisions | [Compare document revisions](https://atloria-selfdogfood-3577.atloria.app/p/atloria-selfdogfood-3577-BDFvUbEgc3/user/compare-document-revisions) |
| Translate a document | [Translate a document](https://atloria-selfdogfood-3577.atloria.app/p/atloria-selfdogfood-3577-BDFvUbEgc3/user/translate-a-document) |
| Read published documentation | [Published documentation](https://atloria-selfdogfood-3577.atloria.app/p/atloria-selfdogfood-3577-BDFvUbEgc3/user/published-documentation) |
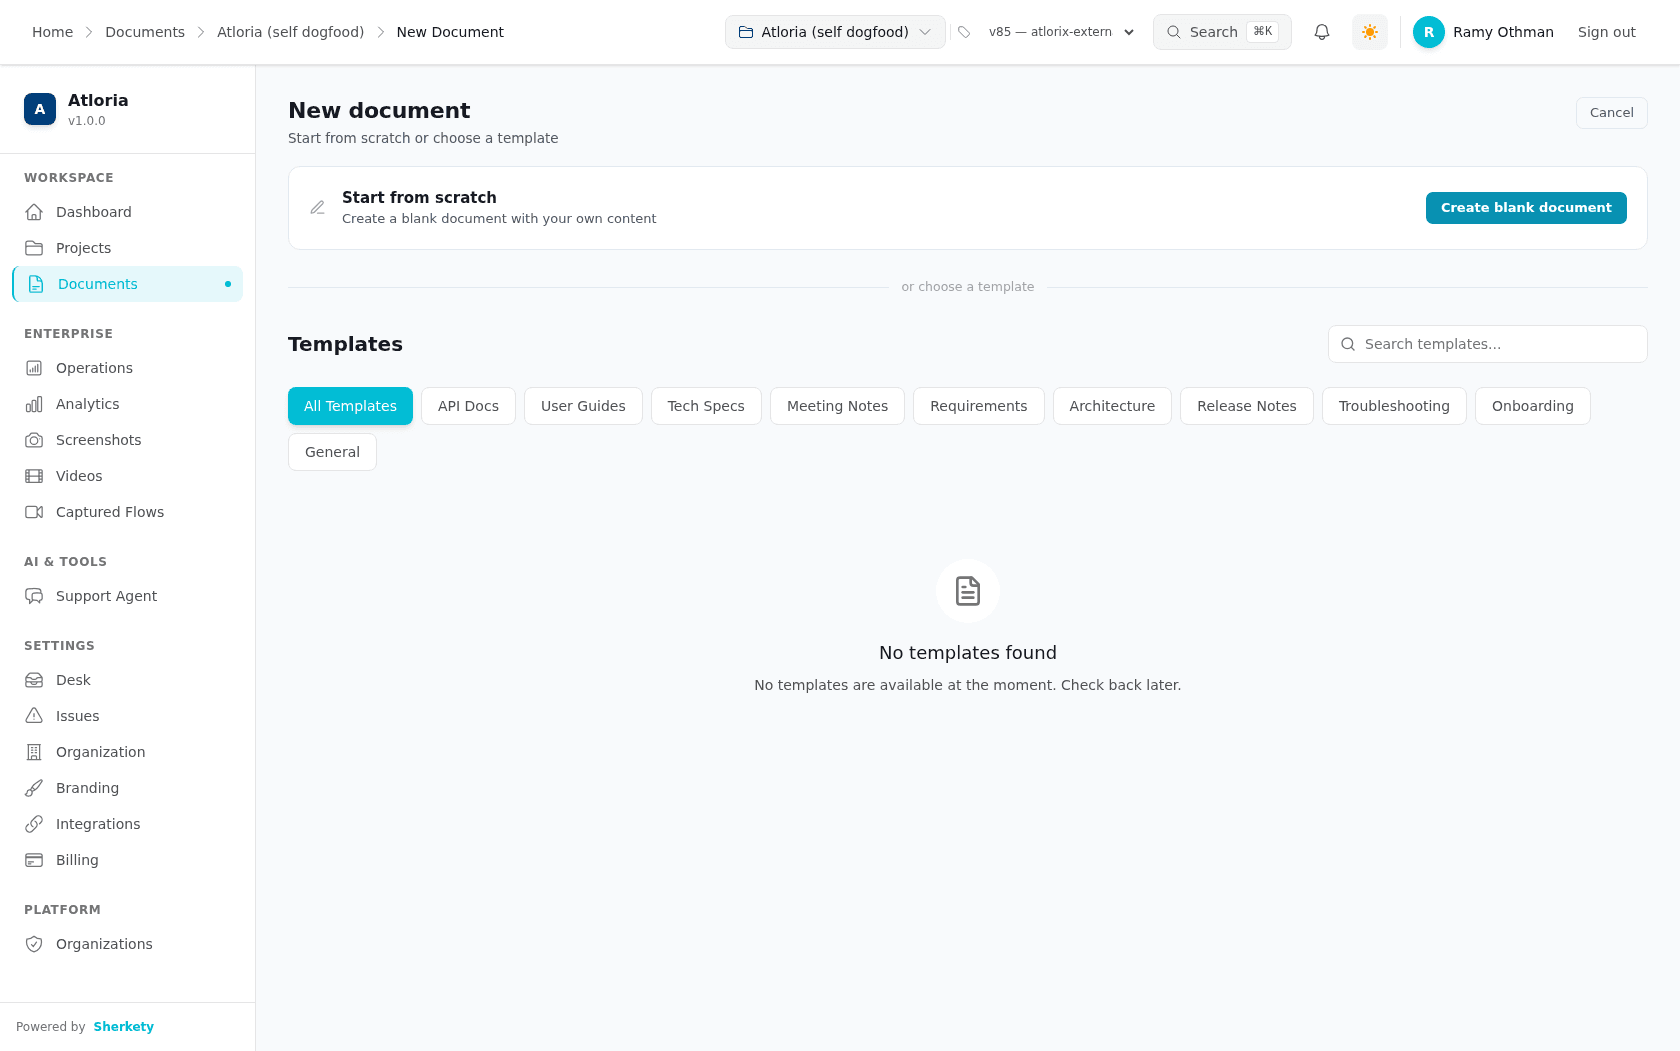
## Before you start
Prerequisites
Have a project available for the document. The project supplies the context in which its
categories and documentation are organised.
Collect the following information before you begin:
| Information | What to prepare |
|---|---|
| Project | The project in which the document belongs |
| Category | An optional category, or the root level when no category is needed |
| Title | The name readers will use for the document |
| Slug | A lowercase, hyphenated URL-friendly identifier |
| Document Type | One of `Manual`, `Generated`, `Hybrid`, `Wiki`, `API Guide`, `User Manual`, or `SOP` |
| Audiences | At least one of `TECHNICAL`, `USER`, `API`, or `INTERNAL` |
| Content | The documentation text to place in the document |
You must be signed in to create a document. The **Project** list uses the available projects.
The **Category** list becomes available after you select a project; it includes
`No category (root level)` for a document at the root level. The **Audiences** choices must
contain at least one selection when you create the record.
## Find the document area
The Documents area is where you manage and organise documentation. Use it when you are starting
a new record or looking for a saved document to edit.
Prerequisites
You have a signed-in session and know whether you are creating a new document or changing a
saved one.
**Steps**
1. Open **Documents**.
2. Select **New Document** to start a record.
3. Select an existing document when you need to edit its saved content.
**Result:** You are at the new-document selection surface or at the editor for the saved document
you selected.
## Create the document
Use the creation form to enter a title, URL identifier, type, audience, and documentation content.
Choose a blank form when you want to enter the record yourself, or start from a template when
prepared content is a suitable starting point.
Prerequisites
You have a project available and the document information listed in [Before you start](#before-you-start).
**Steps**
1. Choose the route that matches how you want to begin.
| If you want to… | Select |
|---|---|
| Enter a blank document | **Create blank document** |
| Start with prepared content | A template in **All Templates** |
2. In **Project**, select the project for the document.
3. In **Category**, select a category, or select `No category (root level)`.
4. In **Title**, enter the document name.
5. In **Slug**, enter a lowercase, hyphenated identifier.
6. In **Document Type**, select `Manual`, `Generated`, `Hybrid`, `Wiki`, `API Guide`,
`User Manual`, or `SOP`.
7. In **Audiences**, select at least one of `TECHNICAL`, `USER`, `API`, or `INTERNAL`.
8. In **Content**, enter the documentation text.
9. Select **Create document**.
If you leave **Title**, Slug, or **Project** empty, the page displays
`Title, slug, and project are required.`
If you clear every audience, the page displays `At least one audience is required.`
If the session has no user, the page displays `No user found. Please log in again.`
**Result:** The record is created and the page routes to its edit page. While the record is being
created, the button reads `Creating...`. If creation fails, the page displays `Failed to create document`.
## Edit content and save the record
The edit page is the workspace for changing a document's content and metadata. Its main editor
holds the document text, while the settings area holds the document type, slug, category, and
audience choices.
Prerequisites
You have opened a saved document in its edit page.
**Steps**
1. Select **Untitled Document** at the top of the editor and enter the new document title.
2. In **Content**, change the documentation text.
3. Select **Settings**, then change **Document type**, **Slug**, or **Category** as needed.
4. In **Target audiences**, select or clear the audiences that should receive the document.
5. Read the save status as `Unsaved`, wait for `Saving...`, and wait for `✓ Saved`.
6. Select **Done** when you have finished editing.
The content editor provides controls for headings, lists, quotes, tables, links, images, code
blocks, front matter, directives, and other editor functions. In the editor, the content area
uses the placeholder `Start writing your document...` when it is empty.
**Result:** The edited record shows `✓ Saved`. Keep the editor open for the available branches,
or select **Done** to return to the Documents area.
If an update fails, the page displays `Failed to save document` and the status returns to
`Unsaved`.
## Handle the available branches
The creation and editing routes change what you see according to the project, document, and
editing state. Collaborative mode handles content separately from the page's metadata save.
Use the branch that matches the state shown on your page.
Prerequisites
You are at the new-document selection page or have opened a saved document in the editor.
**Steps**
1. Choose the branch that matches what you need to do.
| If you need to… | Action | What you see next |
|---|---|---|
| Start from prepared content | Select a template in **All Templates**. | The form is prefilled with the template's title, slug, content, type, and audiences. |
| Wait for projects | Wait for `Loading projects…` to finish. | Select **Project** when the list is ready. |
| Create the first project | Select **Create project** and create a project. | You can create the document inside the project. |
| Select the project | Select **Project**. | The category list begins loading. |
| Wait for categories | Wait for `Loading categories...` to finish. | Select **Category** when the list is ready. |
| Use the root level | In **Category**, select `No category (root level)` when the page shows `No categories available`. | The document remains at the root level. |
| Edit collaboratively | Select **Collaborate**. | Continue editing in collaborative mode. |
| Preview for an audience | Select **Preview mode**, then choose audiences in **View as:**. | The document is shown for the selected audiences. |
| Copy or open a published address | Use **Public URL** to copy or open the address. | The page displays `URL copied to clipboard!` after copying. |
| Send a published public edit for review | Select **Propose change →**. | The page displays `You are editing a published page. Saving creates a change request for review — the live page keeps serving until it is merged.` |
**Result:** You are using the creation or editing route that matches the project and document
state, with the applicable fields and actions visible.
## When creation or saving goes wrong
Use the message on screen to choose the corrective action.
| What you see | What it means | What to do |
|---|---|---|
| `Loading projects…` | The project list is still loading. | Wait for the list to finish loading. |
| `No project yet.` | No project is available for the document. | Select **Create project** and create a project first. |
| `Select a project first to see categories` | A project has not been selected. | Select a project in **Project**. |
| `Loading categories...` | Categories for the selected project are loading. | Wait for the category list to finish loading. |
| `No categories available` | The selected project has no categories. | Leave **Category** at `No category (root level)`. |
| `No user found. Please log in again.` | The signed-in user is unavailable to the creation request. | Sign in again, then retry creation. |
| `Title, slug, and project are required.` | One or more required creation values are empty. | Complete **Title**, Slug, and **Project**. |
| `At least one audience is required.` | No audience is selected. | Select at least one audience in **Audiences**. |
| `Failed to create document` | The creation request failed. | Check the values and retry **Create document**. |
| `Loading document…` | The saved document is still loading. | Wait for the editor to load. |
| `Failed to load document` | The document request failed while loading. | Return to **Documents** and open the document again. |
| `Document failed to load.` | The editor could not load the document. | Select **Back to documents**, then open the document again. |
| `Saving...` | An update is being sent. | Wait for the status to change. |
| `Unsaved` | The latest change has not finished saving. | Wait for `✓ Saved` before leaving the editor. |
| `Failed to save document` | The update request failed. | Retry the edit and wait for `✓ Saved`. |
## What to do next
After the record is saved, continue according to the outcome you need:
| If you need to… | Continue with |
|---|---|
| Review the record's states and available actions | [Document changes](https://atloria-selfdogfood-3577.atloria.app/p/atloria-selfdogfood-3577-BDFvUbEgc3/user/document-changes) |
| Compare versions or revisions | [Compare document revisions](https://atloria-selfdogfood-3577.atloria.app/p/atloria-selfdogfood-3577-BDFvUbEgc3/user/compare-document-revisions) |
| Translate the document | [Translate a document](https://atloria-selfdogfood-3577.atloria.app/p/atloria-selfdogfood-3577-BDFvUbEgc3/user/translate-a-document) |
| Read the public version | [Published documentation](https://atloria-selfdogfood-3577.atloria.app/p/atloria-selfdogfood-3577-BDFvUbEgc3/user/published-documentation) |
**Result:** You have a saved document record and a clear next document task.
# Compare document revisions
A document revision comparison lets you inspect the changes between two saved
versions of a document. Use it when you need to review what changed before
returning to the document record or continuing with document changes.
| If you need to… | Go to |
|---|---|
| Confirm what must exist before comparing | [Before you start](#before-you-start) |
| Reach the comparison surface | [Find and open the comparison](#find-and-open-the-comparison) |
| Identify the selectors and comparison views | [Understand the comparison screen](#understand-the-comparison-screen) |
| Compare two saved versions | [Compare two selected versions](#compare-two-selected-versions) |
| Review totals or the complete revision history | [Review statistics and the version timeline](#review-statistics-and-the-version-timeline) |
| Resolve a loading, empty, or failed state | [When comparison does not load](#when-comparison-does-not-load) |
| Continue after reviewing changes | [After reviewing the revisions](#after-reviewing-the-revisions) |
| Find and open a document | [Documents overview](https://atloria-selfdogfood-3577.atloria.app/p/atloria-selfdogfood-3577-BDFvUbEgc3/user/documents-overview) |
| Create the saved revisions you need | [Create and edit a document](https://atloria-selfdogfood-3577.atloria.app/p/atloria-selfdogfood-3577-BDFvUbEgc3/user/create-and-edit-a-document) |
| Review broader document states and actions | [Document changes](https://atloria-selfdogfood-3577.atloria.app/p/atloria-selfdogfood-3577-BDFvUbEgc3/user/document-changes) |
| Continue to published documentation | [Published documentation](https://atloria-selfdogfood-3577.atloria.app/p/atloria-selfdogfood-3577-BDFvUbEgc3/user/published-documentation) |
## Before you start
A saved revision is a version of the document that you can select as the earlier
or later side of a comparison.
**Prerequisites**
- Know which document you want to review.
- Have saved revisions available for that document.
- Have the earlier revision available for **From version**.
- Have the later revision available for **To version**.
If the document has no saved revisions, the comparison surface shows
`Nothing to compare yet` and `This document has no saved revisions to compare.`
The page also tells you `Edit and save the document to create its first revision.`
With one revision, **To version** can contain that revision while **From version**
remains empty. With at least two revisions, the page initially selects the
second-latest revision for **From version** and the latest revision for
**To version**.
## Find and open the comparison
The comparison surface belongs to an existing document record. From the document
record, open the comparison surface.
### Return to the document
Use this procedure when you have finished reviewing the differences or when you
need to leave an empty or failed comparison state.
**Prerequisites**
- Have the comparison surface open.
**Steps**
1. Select **Go back**.
**Result:** The document record opens.
## Understand the comparison screen
The comparison screen is a workspace for choosing revisions and changing how
their differences are displayed.
| Area | What you can do |
|---|---|
| Revision selectors | Each selector starts with `Select version…`; choose the earlier revision in **From version** and the later revision in **To version**. |
| View mode | Choose **Unified**, **Side-by-side**, or **Timeline**. |
| Statistics | Select **Stats** to show **Lines added**, **Lines removed**, and **Lines modified** when comparison statistics are available. |
| Difference content | Read a unified difference, separate `FROM` and `TO` panes, or the consecutive changes in the timeline. |
In **Timeline** mode, the revision selectors are hidden because the timeline
covers the revision history. In the other view modes, the selectors remain
available. When either revision selection is empty, the comparison area shows
`Pick two versions` and `Select two versions above to compare them.`
The comparison surface uses difference lines and comparison panes rather than a
data grid. It does not provide document-editing controls such as text, date,
checkbox, radio, or upload fields, or a save or submit action.
## Compare two selected versions
Use this procedure to inspect the differences between an earlier and a later
saved revision.
**Prerequisites**
- Have the comparison surface open.
- Have two saved revisions available.
**Steps**
1. In **From version**, open the version list.
2. Select the earlier revision.
3. In **To version**, open the version list.
4. Select the later revision.
5. Select one comparison view.
| If you want to… | Select |
|---|---|
| Read changes in one continuous difference view | **Unified** |
| Read the earlier and later content in separate panes | **Side-by-side** |
| Review each consecutive change across the revision history | **Timeline** |
6. Read the difference content in the selected view.
If the two selected revisions have no textual differences, the unified view
shows `No textual changes between these versions.`
**Result:** The selected comparison view shows the differences between the
chosen revisions, or shows the no-change message when their text is the same.
## Review statistics and the version timeline
Use this procedure when you want a summary of the changes or want to review all
consecutive revision pairs.
**Prerequisites**
- Have the comparison surface open.
- Have comparison statistics or at least two saved revisions available for the
view you want to use.
**Steps**
1. Choose the review you need.
| If you want to… | Do this |
|---|---|
| Read a summary of the comparison | Select **Stats**, then read **Lines added**, **Lines removed**, and **Lines modified**. |
| Review consecutive revision pairs | Select **Timeline**, then read the changes from newest to oldest. |
2. If you selected **Timeline**, read the loading or empty-history message when it
appears.
The timeline compares each consecutive revision pair. If the timeline has not
loaded, it shows `Loading full version history…`. If there is no version history,
it shows `No version history yet`, `Edit and save the document a few times to
build up a timeline.`, and `Changes between saved versions will appear here,
newest first.`
**Result:** The statistics panel or timeline gives you the selected summary of the
changes available for the document.
## When comparison does not load
Use the message on screen to choose the next action.
| What you see | Meaning | What to do |
|---|---|---|
| `Loading revisions…` | The revision list is loading. | Wait for the revision selectors to appear. |
| `Comparison failed to load.` | The comparison request failed. | Select **Back to document**. |
| `Failed to load revisions` | The revision list could not be loaded. | Select **Back to document**. |
| `Failed to load comparison` | The selected comparison could not be loaded. | Select **Back to document**. |
| `Nothing to compare yet` | The document has no saved revisions. | Edit and save the document to create a revision. |
| `This document has no saved revisions to compare.` | There are no saved revisions for this document. | Edit and save the document to create its first revision. |
| `Pick two versions` | One or both revision selections are empty. | Choose a value in **From version** and **To version**. |
| `Select two versions above to compare them.` | The comparison needs two selected versions. | Choose both revisions before reading the difference. |
| `No textual changes between these versions.` | The selected revisions contain no textual differences. | Review the revision metadata or choose another pair. |
| `Loading full version history…` | The timeline is loading consecutive comparisons. | Wait for the timeline to finish loading. |
| `No version history yet` | The document has no timeline history to display. | Edit and save the document a few times to build up a timeline. |
| `Edit and save the document a few times to build up a timeline.` | More saved revisions are needed for a timeline. | Save additional document revisions. |
| `Changes between saved versions will appear here, newest first.` | The timeline has no changes to show. | Save additional document revisions. |
| `This revision has no textual differences from the previous one.` | A timeline revision matches the previous revision's text. | Continue reviewing the timeline or choose another comparison pair. |
| `Back to document` | The available recovery or return action. | Select **Back to document**. |
## After reviewing the revisions
The comparison result is a review point. After reviewing the change or resolving
the displayed state, return to the document record for the next document action.
**Prerequisites**
- Have reviewed the relevant difference view or resolved the displayed state.
**Steps**
1. Select **Go back**.
2. Continue from the document record.
**Result:** The document record is open for the next document task. For the
document's broader states and actions, continue with [Document changes](https://atloria-selfdogfood-3577.atloria.app/p/atloria-selfdogfood-3577-BDFvUbEgc3/user/document-changes).
For published reader-facing routes, continue with [Published documentation](https://atloria-selfdogfood-3577.atloria.app/p/atloria-selfdogfood-3577-BDFvUbEgc3/user/published-documentation).
# Translate a document
## Overview
A document translation is the language-specific version of an existing document. Use the
translation editor to edit the translated title or content and save the result as a draft or a
published variant.
| If you need to… | Go to |
|---|---|
| Understand the source and translation panes | [Understand the translation editor](#understand-the-translation-editor) |
| Edit a title or translation | [Edit and save a translation](#edit-and-save-a-translation) |
| Handle a new, stale, or machine-translated variant | [Handle translation branches](#handle-translation-branches) |
| Resolve a message that stops the task | [When translation fails or is incomplete](#when-translation-fails-or-is-incomplete) |
| Return to the project translations list | [Know what happens next](#know-what-happens-next) |
| Find documents before opening a translation | [Documents overview](https://atloria-selfdogfood-3577.atloria.app/p/atloria-selfdogfood-3577-BDFvUbEgc3/user/documents-overview) |
| Continue with reader-facing published content | [Published documentation](https://atloria-selfdogfood-3577.atloria.app/p/atloria-selfdogfood-3577-BDFvUbEgc3/user/published-documentation) |
| Review document states and actions | [Document changes](https://atloria-selfdogfood-3577.atloria.app/p/atloria-selfdogfood-3577-BDFvUbEgc3/user/document-changes) |
## Before you start
**Prerequisites**
- Have the existing document record available.
- Know the target language. The editor receives it through the `lang` query parameter.
- Wait for the document-language pair to load before editing.
The editor loads only when a document ID and a non-empty target language are available. After the
pair loads, the existing variant title and content fill the editable fields when there are no
unsaved edits.
With the document and language ready, find and open the translation editor.
## Find and open the document
The project translations list shows documents for a selected language and opens the corresponding
language-specific editor.
**Steps**
1. Open the project translations list.
2. Select the language whose document variant you want to edit.
3. Select the document in the language's page list.
4. Check that the translation editor shows the selected document and language.
**Result:** The editor opens for the selected document and language. Select **Translations** in the
header to return to the project's translations tab.
## Understand the translation editor
The translation editor places the source beside the editable language variant so you can compare
the two versions while working.
| Area | What you use it for |
|---|---|
| **Source** pane | Read the source title and source content. |
| **Translation** pane | Edit the translated title and translated content. |
| Status strip | Check whether a variant is a draft, published, machine-translated, or stale. |
| Header actions | Return to **Translations**, queue **AI translate**, **Save draft**, **Unpublish** a published variant, or select **Save & publish**. |
The source content is displayed in a read-only textarea. The translation title is an editable text
field, and the translation content is an editable textarea. Keep directive lines such as
`:::tabs` and `::include{…}` and code blocks exactly as they appear in the source.
The status strip changes with the loaded variant. A variant can show its status, a
`machine-translated` indicator when it was produced by machine translation, and a
`stale — the source changed since this translation was saved` indicator when the source changed
after the translation was saved. When no variant exists, the strip says `No variant yet — write
one or use AI translate.`
**Result:** You can compare the source pane with the editable translation pane and choose the action
that matches the variant's status.
## Edit and save a translation
Editing a translation changes the language variant while leaving the source pane available for
comparison.
**Prerequisites**
- The translation editor is open for the document and target language.
- The translation content is ready to save.
**Steps**
1. In the **Translation** pane, enter the translated title in the title field.
2. In the **Translation** pane, enter the translated document in the content field and leave
directive lines and code blocks unchanged.
3. Choose one save action:
| If you need to… | Select |
|---|---|
| Keep the variant as a draft | **Save draft** |
| Make the variant serve readers in the target language | **Save & publish** |
4. Check the notice that appears after the save action.
**Result:** A draft save displays `Draft saved.` A published save displays the individually quoted
notice `Published — the variant now serves readers in this language.`
If the content field is empty when you save, the editor displays `Translation content is empty`.
Add translated content before selecting a save action.
## Handle translation branches
The status shown in the editor tells you which translation path applies to the current variant.
| What you see | What to do |
|---|---|
| `No variant yet — write one or use AI translate.` | Enter a translation yourself or select **AI translate**. |
| `machine-translated` | Review the machine-produced title and content before saving or publishing. |
| `stale — the source changed since this translation was saved` | Compare the source and translation, then update the translation before publishing it. |
| A published status | Select **Unpublish** when the variant must return to draft status. |
| `Translating…` | Wait until the AI translation request finishes. |
| `Saving…` | Wait until the save request finishes. |
| `Publishing…` | Wait until the publish request finishes. |
To queue a machine translation:
**Steps**
1. Select **AI translate**.
2. Check that `AI translation queued — directives and code blocks are preserved verbatim…` appears.
3. Check that the updated variant replaces the previous content.
**Result:** The editor displays `AI translation complete and published (directive check passed).`
when the directive check passes. It displays `AI translation saved as DRAFT — the directive-preservation check flagged it for review.`
when the check flags the translation. If the polling period ends first, it displays `Still translating in the background — reload the page later.`
To return a published variant to draft status:
**Steps**
1. Select **Unpublish** when the status is published.
2. Check that the editor reloads the document-language pair and displays the resulting notice.
**Result:** The editor displays `Variant unpublished (draft).`
## When translation fails or is incomplete
Use the message text to identify what stopped the translation task and what to do next.
| Message | Meaning | Next action |
|---|---|---|
| `Missing ?lang= parameter.` | The editor has no target language in the address. | Open the editor from a language-specific project translation list. |
| `Loading translation editor…` | The translation pair is still loading. | Wait for the editor to finish loading. |
| `Translation editor failed to load.` | The pair could not be loaded or was not found. | Return to the project translations list and open the document again. |
| `Translation content is empty` | The content field has no non-whitespace content. | Enter translated content before saving. |
| `Save failed` | The save request failed without a more specific API message. | Check the content and try the save action again. |
| `AI translate failed to queue` | The machine-translation request could not be queued. | Try **AI translate** again after the editor is ready. |
| `Unpublish failed` | The unpublish request failed without a more specific API message. | Check the current status and try **Unpublish** again. |
| `Save failed` fallback; API errors may replace it. | The save request failed without a more specific API message. | Check the content and try the save action again. |
| `AI translate failed to queue` fallback; API errors may replace it. | The machine-translation request could not be queued. | Try **AI translate** again after the editor is ready. |
| `Unpublish failed` fallback; API errors may replace it. | The unpublish request failed without a more specific API message. | Check the current status and try **Unpublish** again. |
| `AI translation complete and published (directive check passed).` | The AI translation completed and passed the directive check. | Check the published variant. |
| `AI translation saved as DRAFT — the directive-preservation check flagged it for review.` | The AI translation was saved as a draft for review. | Review the translation before publishing it. |
| `Published — the variant now serves readers in this language.` | The variant was published. | Check the published variant. |
| `Translating…` | AI translation is in progress. | Check the editor for the completed or draft result. |
| `Saving…` | A save request is in progress. | Check the editor for the save notice. |
| `Publishing…` | A publish request is in progress. | Check the editor for the publication notice. |
| `Translating…`, `Saving…`, `Publishing…` | One of the header actions is in progress. | Check the editor after the action finishes. |
| `Still translating in the background — reload the page later.` | The editor stopped polling before the updated variant arrived. | Reload the page later. |
## Know what happens next
The translation editor keeps the source document and its language variant together while you work.
After saving, the status and notice tell you whether the variant is a draft or published.
1. Select **Translations** to return to the project's translations tab.
2. If the result is a draft, continue reviewing and editing it in the translation editor.
3. If the result is published, continue to [Published documentation](https://atloria-selfdogfood-3577.atloria.app/p/atloria-selfdogfood-3577-BDFvUbEgc3/user/published-documentation)
to work with the reader-facing variant.
**Result:** You return to the project's translations list or leave the editor with the saved variant
in its displayed status.
# Document states and actions
## Document states and actions
A document record brings together the title, type, URL identifier, category, audiences, and
content that make one piece of documentation available to work on or read.
The record shows one of these state labels: `Published`, `Draft`, `In review`, or `Outdated`.
It also identifies the document type as `Manual` or `Generated` when those types apply.
Choose an action on an existing record. The editor lets you manage its settings,
content, audience view, comments, history, collaboration, and publication. The viewer lets you
copy the link, print the document, or open the editor.
| If you need to… | Go to |
|---|---|
| Find a document and understand where it sits | [Documents overview](https://atloria-selfdogfood-3577.atloria.app/p/atloria-selfdogfood-3577-BDFvUbEgc3/user/documents-overview) |
| Create or edit its content | [Create and edit a document](https://atloria-selfdogfood-3577.atloria.app/p/atloria-selfdogfood-3577-BDFvUbEgc3/user/create-and-edit-a-document) |
| Compare revisions | [Compare document revisions](https://atloria-selfdogfood-3577.atloria.app/p/atloria-selfdogfood-3577-BDFvUbEgc3/user/compare-document-revisions) |
| Translate the document | [Translate a document](https://atloria-selfdogfood-3577.atloria.app/p/atloria-selfdogfood-3577-BDFvUbEgc3/user/translate-a-document) |
| Choose an action for its current state | [Before you choose an action](#before-you-choose-an-action) |
| Locate fields and panels | [Understand the document record](#understand-the-document-record) |
| Use the available actions | [Choose and use a document action](#choose-and-use-a-document-action) |
| Read publication and access guidance | [Published documentation](https://atloria-selfdogfood-3577.atloria.app/p/atloria-selfdogfood-3577-BDFvUbEgc3/user/published-documentation) |
| Administer records or access | [Administer documents](https://atloria-selfdogfood-3577.atloria.app/p/atloria-selfdogfood-3577-BDFvUbEgc3/user/administer-documents) and [Document access reference](https://atloria-selfdogfood-3577.atloria.app/p/atloria-selfdogfood-3577-BDFvUbEgc3/user/document-access-reference) |
## Before you choose an action
A document record is ready for an action after it has loaded and you can see its current state and
settings. The available controls depend on the record and project conditions below.
| Check before acting | What it changes |
|---|---|
| The document has loaded | The editor receives the record values and the content editor becomes available. |
| The document is public and has a slug and URL ID | The `Published` area and **Public URL** controls appear. |
| Audiences have loaded and at least one audience exists | **Preview mode** becomes available. |
| Review is required, and the document is published and public | The primary action is **Propose change →**. |
| Review does not apply | The primary action is **Done**. |
| The document is a draft | The publication action is **Publish**. |
| The document is not a draft | The publication action is **Unpublish**. |
| Collaborative mode is enabled and a current user is available | The collaborative editor is used instead of the standard editor. |
These conditions determine which action is available. Check the state badge and visible controls
before selecting an action; do not assume that every record has the same action strip.
With these checks in mind, open the record from **Documents**.
## Find and open a document record
The **Documents** destination is where you start when you need to open an existing document record.
From there, open the editor or viewer that matches your work.
Prerequisites
- You have access to the **Documents** destination.
- You know which saved document you need to open.
**Steps**
1. Open **Documents**.
2. Select the document record you need to inspect or change.
3. Choose the reader-facing destination that matches your task.
| If you need to… | Select or open |
|---|---|
| Change content or settings | **Edit** |
| Read the document | Open the document viewer |
| Copy the viewer address | **Copy link** |
| Print the document | **Print** |
**Result:** The selected document record or viewer is open, with its state and available actions
ready for inspection.
## Understand the document record
Read the record's fields before choosing an action so that you change the intended identity,
organization, audience targeting, or content.
| Area | What you find there |
|---|---|
| **Title** | An editable text field containing the document title. Its empty-field hint is `Untitled Document`. |
| **Document type** | A select with the visible options **MANUAL**, **GENERATED**, **HYBRID**, **WIKI**, and **API GUIDE**. |
| **Slug** | The URL-friendly identifier. Its empty-field hint is `document-slug`. |
| **Category** | The document organization category, including `No category (root level)`. |
| **Target audiences** | A checkbox list populated from the available audiences. |
| **View as** | A multiple-select list for choosing audiences in preview mode. |
| **Public URL** | A read-only URL shown when the document is public and has both a slug and URL ID. |
| **Content** | The editable document area. Its content is included in automatic saving outside collaborative and propose modes. |
The settings rail starts open. Use **Settings** to close or reopen it. When the public conditions
are met, the rail also contains the `Published` area, the read-only **Public URL**, and controls to
copy or open that URL. When audiences are available, use **Preview mode** to reveal **View as**.
The viewer shows the document title, type badge, state badge, author, update time, reading time,
and the document content. Its right-side table of contents appears when the document has headings.
**Result:** You can identify the field, panel, state, or audience view that applies before you use
an action.
## Choose and use a document action
Document actions answer different reader needs: inspect history, change the working view, manage
collaboration, publish or unpublish, request a review, or leave the editor.
Prerequisites
- The document record is open.
- The action's condition in [Before you choose an action](#before-you-choose-an-action) is true.
**Steps**
1. Choose the action that matches your goal.
| If you need to… | Select |
|---|---|
| Review earlier versions | **History** |
| Show or hide document settings | **Settings** |
| Show or hide discussion | **Comments** |
| Enable or leave collaborative editing | **Collaborate** or **Collaborating** |
| Publish a draft | **Publish** |
| Remove publication from a non-draft document | **Unpublish** |
| Send a published public edit for review | **Propose change →** |
| Return from editing when review does not apply | **Done** |
| Switch the editor to an audience view | **Preview mode** |
| Return from the audience view to editing | **Edit mode** |
| Copy the public URL from settings | **Copy URL** |
| Open the public URL from settings | **Open in new tab** |
| Save the document as a reusable template | **Save as Template** |
| Open additional document settings | **Advanced settings** |
| Copy the current viewer address | **Copy link** |
| Start browser printing | **Print** |
| Open the editor from the viewer | **Edit** |
2. Check the visible status after the action. Editing changes move through `Unsaved`, `Saving...`,
and `✓ Saved`; publication changes use the action's busy or completed label.
3. Follow the outcome from the selected action.
| If… | Do this |
|---|---|
| A change request opens | Review the change request on its review page. |
| The action is **Done** | Confirm that the Documents list is open. |
**Result:** The selected safe view or settings action is open, or the document has moved into the
publication or change-request path shown by the selected action.
## Handle conditional states and branches
The document state and project setup decide which branch you follow. Use the visible state badge,
the `Published` area, and the available action label to select the applicable path.
| Current condition | Use this branch | What appears or changes |
|---|---|---|
| The document is a draft | Select **Publish** | The publication operation runs and can open the published-document dialog. |
| The document is not a draft | Select **Unpublish** | The publication operation changes to the unpublish path. |
| The document is published, public, and review is required | Select **Propose change →** | The current content is submitted as a change request and the editor routes to the request. |
| The document is not in that review-gated condition | Select **Done** when finished | The editor returns to the Documents list. |
| The document is public and has a slug and URL ID | Use **Copy URL** or **Open in new tab** | The **Public URL** area is available in settings. |
| Audiences are loaded and available | Select **Preview mode**, then choose audiences in **View as** | The content can be viewed for the selected audiences. |
| Collaborative mode is active | Use **Collaborating** | The standard editor is replaced by the collaborative editor. |
| Collaborative mode is inactive | Use **Collaborate** | The editor changes to collaborative editing mode. |
The settings rail does not provide a separate state selector. Publication controls determine
the publication action. The viewer is for reading and navigation; its actions are **Copy link**,
**Print**, and **Edit** rather than document editing fields.
**Result:** You have selected the branch that matches the document's state and project conditions,
and the corresponding control or panel is on screen.
## When an action does not complete
Use the exact message on screen to identify where the action stopped. Then follow the corrective
step in the table.
| Message | What it indicates | What to do |
|---|---|---|
| `Loading document…` | The editor is still loading the document. | Wait for the document surface to finish loading. |
| `Document failed to load.` | The editor did not load the document. | Return to **Documents** and open the record again. |
| `Unsaved` | A document change is waiting to be saved. | Keep the record open while the save begins. |
| `Saving...` | The automatic save is in progress. | Wait for the save status to change. |
| `✓ Saved` | The automatic save completed. | Continue with the next document action. |
| `Failed to save document` | The document update did not complete and the record remains unsaved. | Review the fields you changed and try again. |
| `Failed to save settings` | The settings update did not complete. | Reopen **Settings**, review the settings, and try again. |
| `Failed to open change request` | The review request did not open. | Confirm that the review-gated branch applies, then try **Propose change →** again. |
| `Publishing...` | Publication is in progress. | Wait for the publication result. |
| `Published!` | The publication operation completed. | Continue with the public URL or close the publication dialog. |
| `Unpublishing...` | Unpublication is in progress. | Wait for the unpublication result. |
| `Unpublished!` | The unpublication operation completed. | Continue working with the document as a non-draft record. |
| `Document Published!` | The document has been published and the publication dialog is open. | Use the **Public URL** shown in the dialog, then select `Close` or `Open in New Tab`. |
| `Your document is now publicly accessible` | The published document has a public reader URL. | Copy or open the displayed URL. |
| `URL copied to clipboard!` | The public URL copy action completed. | Paste the URL where you need to share it. |
A service error can replace the fallback messages for save, settings, change-request, publish, or
unpublish actions. Use the exact text shown and return to the owning page if the action still does
not complete.
**Result:** You can match the message on screen to the action that stopped and choose the next
available corrective step.
## What happens next
Continue with the page that owns the next document job:
- Use [Create and edit a document](https://atloria-selfdogfood-3577.atloria.app/p/atloria-selfdogfood-3577-BDFvUbEgc3/user/create-and-edit-a-document) for creating a record or
editing its content in detail.
- Use [Compare document revisions](https://atloria-selfdogfood-3577.atloria.app/p/atloria-selfdogfood-3577-BDFvUbEgc3/user/compare-document-revisions) to inspect differences between
revisions.
- Use [Translate a document](https://atloria-selfdogfood-3577.atloria.app/p/atloria-selfdogfood-3577-BDFvUbEgc3/user/translate-a-document) to create or manage a translated version.
- Use [Published documentation](https://atloria-selfdogfood-3577.atloria.app/p/atloria-selfdogfood-3577-BDFvUbEgc3/user/published-documentation) for the reader-facing published route.
- Use [Administer documents](https://atloria-selfdogfood-3577.atloria.app/p/atloria-selfdogfood-3577-BDFvUbEgc3/user/administer-documents) for administrative document management.
- Use [Document access reference](https://atloria-selfdogfood-3577.atloria.app/p/atloria-selfdogfood-3577-BDFvUbEgc3/user/document-access-reference) for document access guidance.
**Result:** You know which page owns the next document action.
# Published documentation
## Published documentation at a glance
Published documentation is the reader-facing version of a project’s documentation.
Use it to choose an audience, read a document, inspect technical content, use the API
surface, review changes, or get developer access.
| If you need to… | Go to |
|---|---|
| Understand the available public routes | Find the right published route |
| Identify fields and controls on a route | Understand the reader surface |
| Read a document or use a reader action | Use the published surface |
| Interpret a sign-in, empty, pending, or access state | Handle route and access branches |
| Respond to an error | When the route does not work |
| Continue with document administration or issue work | [Document changes](https://atloria-selfdogfood-3577.atloria.app/p/atloria-selfdogfood-3577-BDFvUbEgc3/user/document-changes) or [Work with an issue](https://atloria-selfdogfood-3577.atloria.app/p/atloria-selfdogfood-3577-BDFvUbEgc3/user/work-with-an-issue) |
| Review versions or get general help | [Project versions](https://atloria-selfdogfood-3577.atloria.app/p/atloria-selfdogfood-3577-BDFvUbEgc3/user/project-versions) or [Getting help](https://atloria-selfdogfood-3577.atloria.app/p/atloria-selfdogfood-3577-BDFvUbEgc3/user/getting-help) |
A public route is a reader-facing address for one part of a project’s documentation.
The public route family includes the project, audience, document, API, browse, changelog,
developer, issue, preview, technical, entity, and version routes.
The developer access area is the public area for sign-in links and API keys. The **Changelog**
is the public area for release notes and documentation updates. The API surface is where
readers review API content. A public issue is an existing report that can receive a reply.
## Before you open a route
Use a published route when you have the project identifier and, where required, the
audience, document, version, change-request, entity, or ticket value for that route.
The route determines which public surface opens.
| Reader goal | Reader action |
|---|---|
| Open the project | Have the published project destination. |
| Browse an audience | Have the published audience destination. |
| Read a document | Have the published document destination. |
| Review API content | Select **API**. |
| Browse collections | Have the published collections destination. |
| Read release notes and documentation updates | Select **Changelog**. |
| Get a developer sign-in link or manage API keys | Select the developer access area. |
| Review a public issue | Have the public issue destination. |
| Open a preview | Have the published preview destination. |
| Read technical documentation | Select **Technical**. |
| Read a technical entity | Have the technical entity destination. |
| Review a version | Have the published version destination. |
| Browse a version audience | Have the published version audience destination. |
| Read a version document | Have the published version document destination. |
## Find the right published route
Choose the public route by the result you want rather than by the name of the screen.
**Prerequisites**
- Have the project identifier for the published project.
- Have the audience, document, version, entity, change-request, or ticket value when the selected route requires one.
**Steps**
1. Choose the route that matches your goal.
| If you want to… | Open |
|---|---|
| Browse a project’s audiences | Have the published project destination. |
| Open an audience’s documents | Have the published audience destination. |
| Read one document | Have the published document destination. |
| Review API content | Select **API**. |
| Browse collections | Have the published collections destination. |
| Read release notes and documentation updates | Select **Changelog**. |
| Get a developer sign-in link or manage API keys | Select the developer access area. |
| Review a public issue | Have the public issue destination. |
| Read technical content | Select **Technical**. |
| Open a versioned document | Have the published version document destination. |
**Result:** The selected reader-facing route opens.
For document organization and opening from the Documents destination, see [Documents
overview](https://atloria-selfdogfood-3577.atloria.app/p/atloria-selfdogfood-3577-BDFvUbEgc3/user/documents-overview). For version review and comparison, see [Project
versions](https://atloria-selfdogfood-3577.atloria.app/p/atloria-selfdogfood-3577-BDFvUbEgc3/user/project-versions).
## Understand the reader surface
The reader surface combines document content with navigation, route-specific controls,
and forms for developer access, changelog subscriptions, and public issue replies.
### Fields and route-specific forms
| Field label | Type | Required | Where it appears |
|---|---|---:|---|
| **Work email** | Email | Yes | Developer access area sign-in |
| **Key name** | Text | No | Developer access area API-key form |
| **Email** | Email | Yes | Changelog subscription |
| **Add a reply** | Text area | No | Public issue page |
The document surface provides **Report an issue** and **Download as PDF**. The developer
access area provides **Email me a sign-in link**, **Sign out**, **Delete my account**, **Copy key**,
**Revoke**, **Create key**, and **Open the API playground**. The changelog provides
**Subscribe**, **RSS feed**, **JSON feed**, and **All**. A public issue provides **Send**.
### Reader navigation labels
The public navigation can include **Technical**, **API**, the developer access area, and
**Changelog**. The rendered route also provides **Search docs…** and controls titled
**Search documentation**, **Download PDF**, and **Switch theme — System**.
## Use the published surface
### Open and read a document
Use a document route when you need the published content itself.
**Prerequisites**
- Have the published document destination.
**Steps**
1. Open the published document destination.
2. Read the document content.
3. Select **Download as PDF** when you need a PDF copy of the page.
4. Select **Report an issue** when the published page needs a report.
**Result:** The document page remains available for reading, PDF download, or issue reporting.
### Request developer access
Use the developer access area when you need a sign-in link or an API key.
**Prerequisites**
- Have the published project's developer access destination.
**Steps**
1. Open the published project's developer access destination.
2. In **Work email**, enter your work email address.
3. Select **Email me a sign-in link**.
The page can display `Check your inbox — we sent you a one-time sign-in link. It expires in 15 minutes.`
4. If the sign-in link is rejected, request a new link after the page displays `That sign-in link is invalid or has expired. Request a new one below.`
5. After you sign in, enter an optional name in **Key name**.
6. Select **Create key**.
7. Select **Copy key** when the new key is displayed.
**Result:** The developer access area shows the account and API-key controls available for your signed-in state.
### Subscribe to changelog updates
Use the changelog subscription when you want release notes and documentation updates by email.
**Prerequisites**
- Have the published project's Changelog destination.
- Have the email address for the subscription.
**Steps**
1. Open the published project's Changelog destination.
2. In **Email**, enter the subscription email address.
3. Select **Subscribe**.
The page can display `Check your inbox — confirm the email to finish subscribing.`
**Result:** The changelog page displays the subscription status.
### Review API content
Use the API surface when you need to review published API content.
**Prerequisites**
- Have the published project destination.
**Steps**
1. Select **API**.
**Result:** The API surface opens.
### Reply to a public issue
Use a public issue route when you need to add information to an existing report.
**Prerequisites**
- Have the address of the public issue page.
**Steps**
1. Open the public issue page using its address.
2. In **Add a reply**, enter the reply text.
3. Select **Send**.
**Result:** The issue page processes the reply request.
## Handle route and access branches
The same route can show different content depending on the sign-in phase, available
records, key state, subscription state, or issue-reply state.
| Situation | What appears |
|---|---|
| The developer access area is signed out or has sent a link | The sign-in form or link-sent message |
| The developer access area is signed in and the account is available | The signed-in bar, checklist, API keys, and usage |
| No API keys exist | `No keys yet — create one to start calling the API.` |
| A key is active | **Revoke** |
| A key is revoked | `Revoked` |
| The changelog subscription is pending | `Check your inbox — confirm the email to finish subscribing.` |
| Changelog tags are available | **All** and tag buttons |
| A reply is sending or contains no trimmed text | **Send** is disabled |
| The document has an authenticated session and an id | **Edit this page** |
## When the route does not work
Use the exact message on screen to choose the next action.
| What you see | What to do |
|---|---|
| `Loading document...` | Wait for the document page to finish loading. |
| `Document Not Found` | Check the document route values. |
| `This document is not accessible.` | Check the public document address or use the project’s published route. |
| `That sign-in link is invalid or has expired. Request a new one below.` | Request a new sign-in link. |
| `Couldn't subscribe. Check the address and try again.` | Check the address in **Email**, then select **Subscribe** again. |
| `Couldn't load the changelog. Try again later.` | Open the changelog again later. |
| `This link can't verify you're the reporter — reply from the device you reported from, or email us.` | Reply from the device used to report the issue, or email the support address provided to you. |
| `Couldn't send your reply. Please try again.` | Check the reply text and select **Send** again. |
| **Project Not Found** with `Invalid project URL format` and `Error Code: 404` | Check the project route format. |
## Continue from published documentation
After reading a public document, continue with the page that owns the next task:
- [Documents overview](https://atloria-selfdogfood-3577.atloria.app/p/atloria-selfdogfood-3577-BDFvUbEgc3/user/documents-overview) explains document organization and opening.
- [Create and edit a document](https://atloria-selfdogfood-3577.atloria.app/p/atloria-selfdogfood-3577-BDFvUbEgc3/user/create-and-edit-a-document) covers source-document creation and editing.
- [Document changes](https://atloria-selfdogfood-3577.atloria.app/p/atloria-selfdogfood-3577-BDFvUbEgc3/user/document-changes) covers document states and available actions.
- [Project versions](https://atloria-selfdogfood-3577.atloria.app/p/atloria-selfdogfood-3577-BDFvUbEgc3/user/project-versions) covers version review and comparison.
- [Work with an issue](https://atloria-selfdogfood-3577.atloria.app/p/atloria-selfdogfood-3577-BDFvUbEgc3/user/work-with-an-issue) covers issue work beyond a public reply.
- [Getting help](https://atloria-selfdogfood-3577.atloria.app/p/atloria-selfdogfood-3577-BDFvUbEgc3/user/getting-help) routes general support needs.
- [Basic terminology](https://atloria-selfdogfood-3577.atloria.app/p/atloria-selfdogfood-3577-BDFvUbEgc3/user/basic-terminology) defines shared product terms.
# Operations overview
## Operations at a glance
Operations is the hub for reviewing active documentation work and deciding what to do next.
Use it when you need to see generation results, AI usage, credit usage, chat-answer activity,
attention items, or recent jobs in one place. The hub sits after work starts and before you
open a status, history, or analytics detail page.
| If you need to… | Go to |
|---|---|
| See the current generation, AI-spend, credit, and chat-answer summary | [Understand the Operations hub](#understand-the-operations-hub) |
| Review insight groups for a project | [Find the work area you need](#find-the-work-area-you-need) |
| Start or resume work from a project or repository | [Start or resume documentation work](#start-or-resume-documentation-work) |
| Interpret an empty or unavailable area | [When a work area is empty or unavailable](#when-a-work-area-is-empty-or-unavailable) |
| Follow a job after reviewing the hub | [Know what to open next](#know-what-to-open-next) |
| Review projects | [Projects overview](https://atloria-selfdogfood-3577.atloria.app/p/atloria-selfdogfood-3577-BDFvUbEgc3/user/projects-overview) |
| Create a project | [Create a project](https://atloria-selfdogfood-3577.atloria.app/p/atloria-selfdogfood-3577-BDFvUbEgc3/user/create-a-project) |
| Start documentation work | [Run documentation work](https://atloria-selfdogfood-3577.atloria.app/p/atloria-selfdogfood-3577-BDFvUbEgc3/user/run-documentation-work) |
| Interpret job statuses | [Documentation job status reference](https://atloria-selfdogfood-3577.atloria.app/p/atloria-selfdogfood-3577-BDFvUbEgc3/user/documentation-job-status-reference) |
| Follow generation stages | [Documentation generation lifecycle](https://atloria-selfdogfood-3577.atloria.app/p/atloria-selfdogfood-3577-BDFvUbEgc3/user/documentation-generation-lifecycle) |
| Follow synchronization states | [Synchronization job states](https://atloria-selfdogfood-3577.atloria.app/p/atloria-selfdogfood-3577-BDFvUbEgc3/user/synchronization-job-states) |
| Review job history | [Job History](https://atloria-selfdogfood-3577.atloria.app/p/atloria-selfdogfood-3577-BDFvUbEgc3/user/job-history) |
| Review measurements after work runs | [Analytics overview](https://atloria-selfdogfood-3577.atloria.app/p/atloria-selfdogfood-3577-BDFvUbEgc3/user/analytics-overview) |
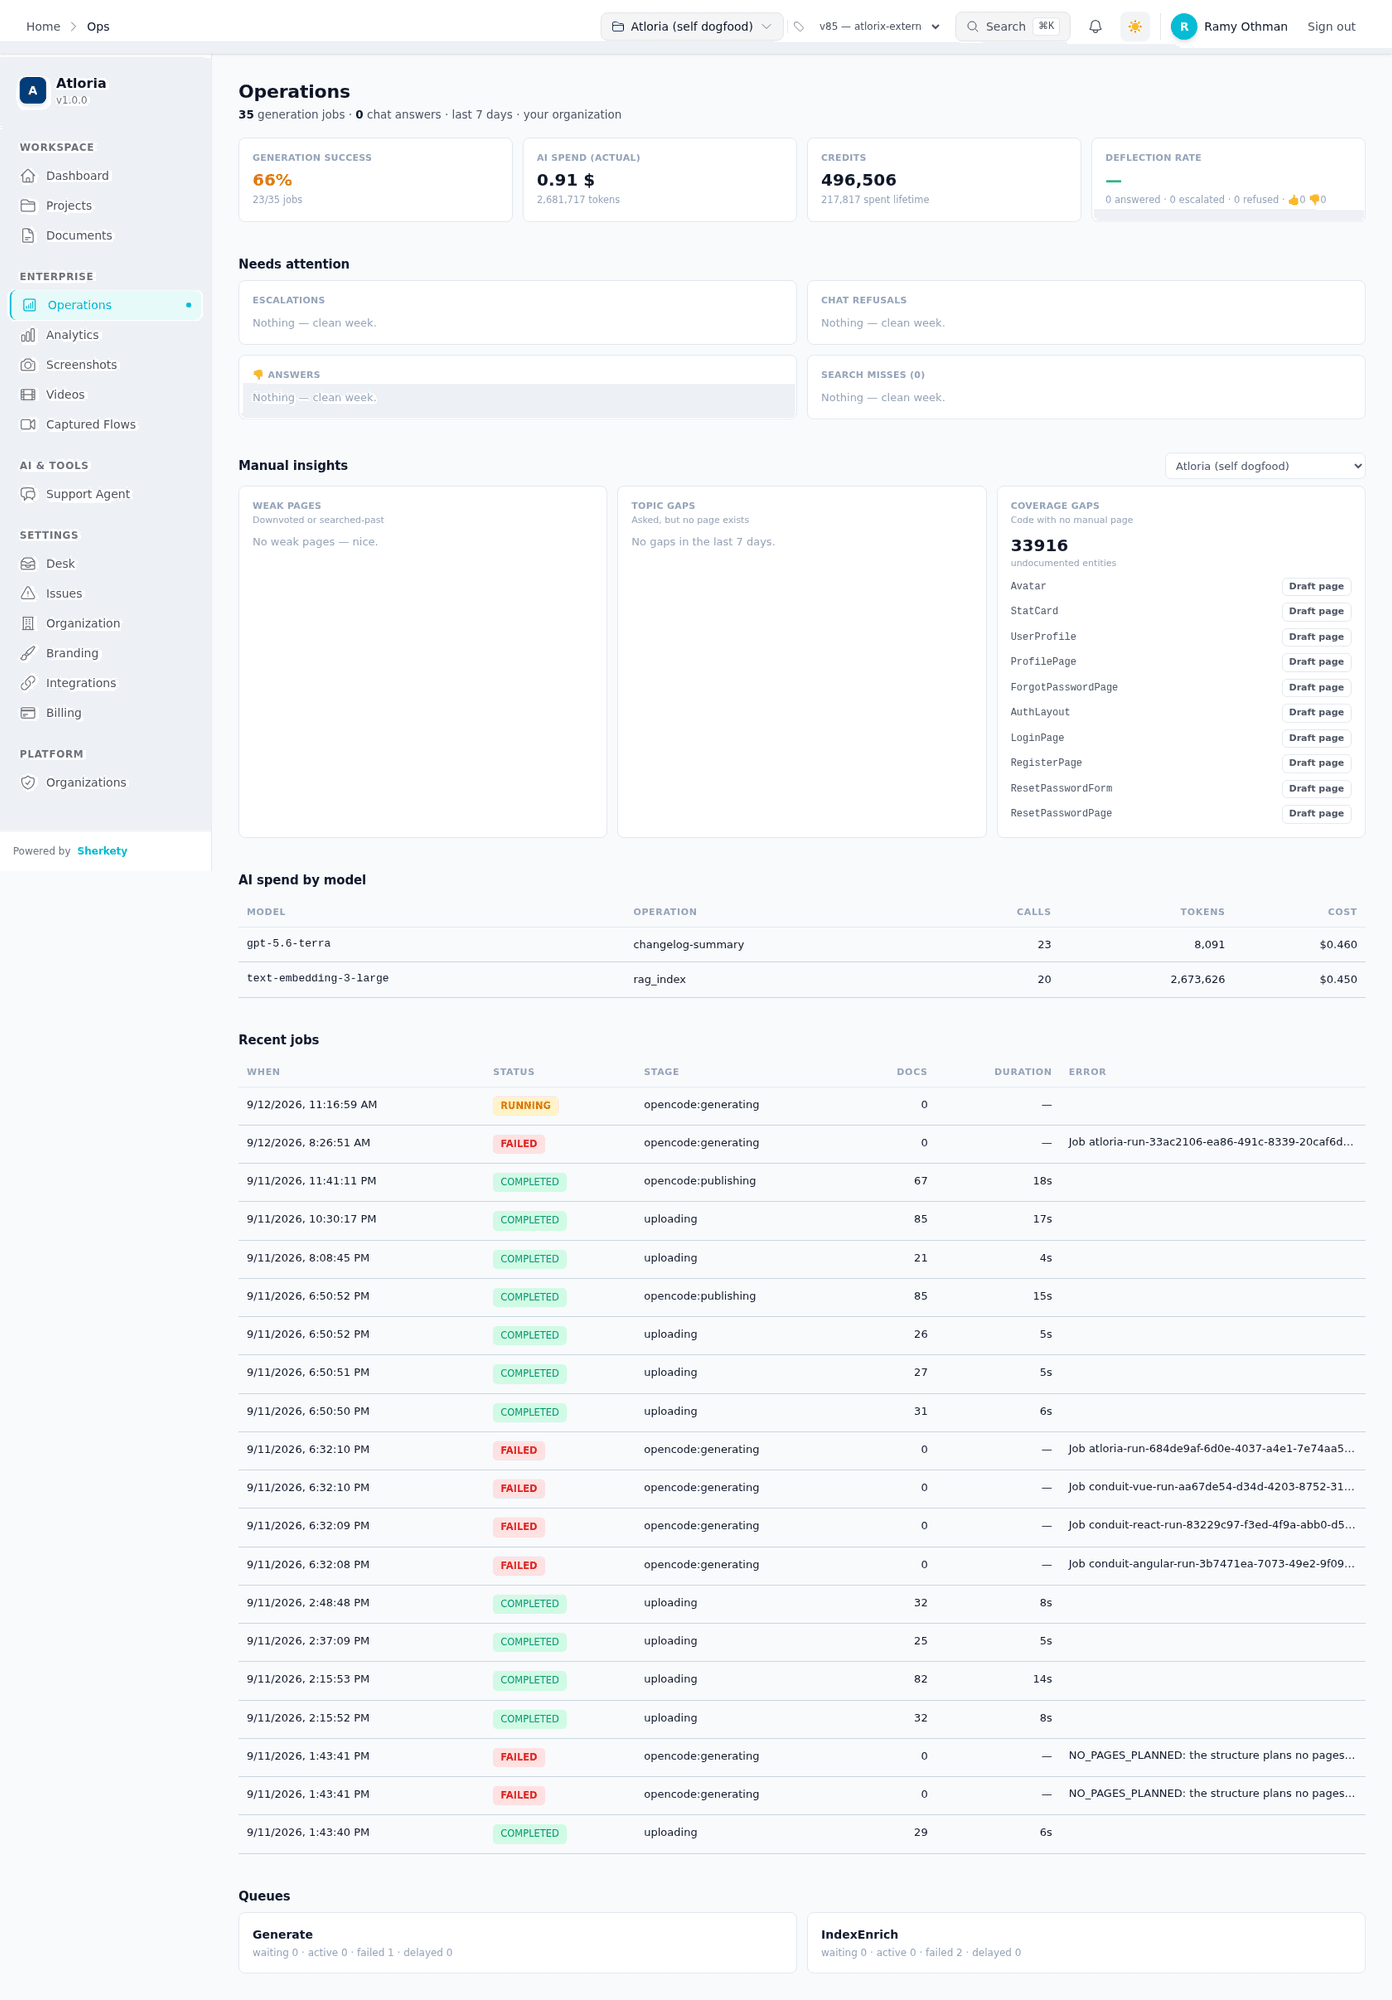
## Before you start
An authenticated session gives you access to the Operations data for your organization.
Manual insights is the project-specific area for reviewing weak pages, topic gaps, and coverage
gaps. It first loads the organization's projects, then loads insights for the selected project.
When no project is selected, the first project returned becomes the initial selection.
**Prerequisites**
- Be signed in to Atloria.
- Have at least one project available if you need Manual insights.
- Know which project's insights you want to review when more than one project is available.
## Find the work area you need
Use Operations to open a project-specific insight view. The application navigation includes Home,
Ops, and Operations.
### Open Operations
**Steps**
1. Select **Operations** in the application navigation.
2. Confirm that the page heading is **Operations**.
**Result:** The Operations hub is on screen.
### Choose a project for Manual insights
The Project selector is a list of projects, not a fixed list of labels. Each option uses the
project name for display and the project record's ID as its value. The list appears when more
than one project is available.
**Steps**
1. In Manual insights, open **Project selector**.
2. Select the project whose insight groups you want to review.
**Result:** The Manual insights area loads for the selected project.
If no projects are available and there is no loading error, Manual insights has no content to
show. Use the project work area to create or open a project instead.
## Understand the Operations hub
The Operations hub is a read-only summary of current documentation activity, attention signals,
AI usage, recent jobs, and queue counts. Needs attention groups collect the attention signals that
may need follow-up. Read the summary first, then use the detailed groups to decide which work area
to open.
| Area | What to read |
|---|---|
| Generation success | The generation success rate and the completed-versus-total job count. |
| AI spend (actual) | Actual spend and the token count for the displayed period. |
| Credits | Current credits and lifetime spend. |
| Deflection rate | Answered, escalated, refused, positive-feedback, and negative-feedback counts. |
| Needs attention | Escalations, Chat refusals, 👎 answers, and Search misses. |
| AI spend by model | Model, Operation, Calls, Tokens, and Cost. |
| Recent jobs | When, Status, Stage, Docs, Duration, and Error. |
| Queues | Waiting, active, failed, and delayed counts for each displayed queue. |
The attention cards can contain up to six entries each. The model table can be empty, and the
recent-jobs table shows the operational rows returned for the page. Work from the headers and
values currently visible in these tables.
## Start or resume documentation work
The Dashboard is the starting area for project work. Its summary shows the project count,
generation count for the last seven days, and chat answers for the last seven days. Its Recent
projects table shows Project, Docs, Categories, and Updated for the first three
projects.
### Open an existing project
**Steps**
1. In Recent projects, select the project row you want to open.
**Result:** Atloria opens that project's page.
When more than four projects are available, the link beginning `View all` appears beside Recent
projects. Select it to open the full project list.
### Start a project from a repository or without one
**Prerequisites**
- Decide whether you are connecting a repository or creating the project without one.
- If you are connecting a repository, have its URL available.
**Steps**
1. In the repository scene, choose one route from the table.
| If you want to… | Select |
|---|---|
| Enter a repository URL | **Project repository URL** |
| Continue with a recognized repository URL | **Get Started →** |
| Connect GitHub | **GitHub** |
| Connect GitLab | **GitLab** |
| Connect Bitbucket | **Bitbucket** |
| Create without connecting a repository | **Create without a repository** |
**Result:** The wizard follows the route you selected and remains in the project-creation work
area until you complete its next step.
## When a work area is empty or unavailable
Use the exact message on screen to decide whether to wait, correct a repository URL, or move to
the work area that supplies the missing project context.
| What you see | What it means | What to do |
|---|---|---|
| `Loading operations…` | Operations data is still loading. | Wait for the hub to finish loading. |
| `Operations failed to load.` | The Operations request failed. | Review the displayed error text and retry from the Operations page. |
| `Loading insights…` | Manual insights are loading for the selected project. | Wait for the insight groups to load. |
| `Insights failed to load.` | The Manual insights request failed. | Review the displayed error text and retry after confirming the project selection. |
| `Nothing — clean week.` | A Needs attention group has no rows. | Continue with the other groups on the hub. |
| `No AI usage in the last 7 days.` | No AI model rows are available for the displayed period. | Use the other summary and job information on the hub. |
| `No weak pages — nice.` | The Weak pages group has no rows. | Continue with the other insight groups. |
| `No gaps in the last 7 days.` | The Topic gaps group has no rows. | Continue with the other insight groups. |
| `No code snapshot for this project yet.` | The project has no code snapshot for Coverage gaps. | Continue with the project work area. |
| `Please enter a valid GitHub, GitLab, or Bitbucket repository URL` | The repository URL is not recognized as a supported repository URL. | Enter a valid GitHub, GitLab, or Bitbucket repository URL. |
## Know what to open next
After you review Operations, continue with the page that matches the decision you need to make.
| If you need to… | Open |
|---|---|
| Start or monitor documentation jobs | [Run documentation work](https://atloria-selfdogfood-3577.atloria.app/p/atloria-selfdogfood-3577-BDFvUbEgc3/user/run-documentation-work) |
| Understand a job's displayed status | [Documentation job status reference](https://atloria-selfdogfood-3577.atloria.app/p/atloria-selfdogfood-3577-BDFvUbEgc3/user/documentation-job-status-reference) |
| Follow generation from its first state to its outcome | [Documentation generation lifecycle](https://atloria-selfdogfood-3577.atloria.app/p/atloria-selfdogfood-3577-BDFvUbEgc3/user/documentation-generation-lifecycle) |
| Follow synchronization work | [Synchronization job states](https://atloria-selfdogfood-3577.atloria.app/p/atloria-selfdogfood-3577-BDFvUbEgc3/user/synchronization-job-states) |
| Review completed operational work | [Job History](https://atloria-selfdogfood-3577.atloria.app/p/atloria-selfdogfood-3577-BDFvUbEgc3/user/job-history) |
| Measure results after work runs | [Analytics overview](https://atloria-selfdogfood-3577.atloria.app/p/atloria-selfdogfood-3577-BDFvUbEgc3/user/analytics-overview) |
**Steps**
1. Review the summary and detailed tables on Operations.
2. Select the destination that matches the work you need to continue.
**Result:** The next work area is on screen for the decision you made from the Operations hub.
# Run documentation work
## Overview
A documentation generation run is a project job that creates a documentation version and reports
its progress until it completes, fails, or is cancelled. Use this page when you need to start a
run, monitor work already in progress, or decide what to do after the result appears.
| If you need to… | Go to |
|---|---|
| Prepare the project and choose run options | [Before you start](#before-you-start) |
| Open the correct work surface | [Find the work surface](#find-the-work-surface) |
| Start a new run | [Start a documentation generation run](#start-a-documentation-generation-run) |
| Check progress or refresh job history | [Monitor and manage a run](#monitor-and-manage-a-run) |
| Respond to a status, empty state, or error | [Handle status branches and errors](#handle-status-branches-and-errors) |
| Continue after the run changes state | [Know what happens next](#know-what-happens-next) |
| Understand the Operations hub | [Operations overview](https://atloria-selfdogfood-3577.atloria.app/p/atloria-selfdogfood-3577-BDFvUbEgc3/user/operations-overview) |
| Read each job status | [Documentation job status reference](https://atloria-selfdogfood-3577.atloria.app/p/atloria-selfdogfood-3577-BDFvUbEgc3/user/documentation-job-status-reference) |
| Follow the ordered generation stages | [Documentation generation lifecycle](https://atloria-selfdogfood-3577.atloria.app/p/atloria-selfdogfood-3577-BDFvUbEgc3/user/documentation-generation-lifecycle) |
## Before you start
A project is the context for both starting a generation run and reviewing its jobs. Sign in before
opening the project work surfaces. The project must have an identifier so you can open its jobs
route, and the project information used by generation must already be saved.
**Prerequisites**
- Have a signed-in session with access to the project.
- Know the project to generate or monitor.
- Have the branch, optional version label, screenshot choice, video choice, and page limit ready
if you need to change the run settings.
The generation form treats **Version label** and **Max pages** as optional. The choices for
rebuilding, fixing findings, or capturing from the application appear only when the available
preview reports pages. An unavailable **Fix findings only** or **Capture from the app** choice is
disabled.
| If you want to… | Choose or provide… |
|---|---|
| Use a repository source | A value in **Generate from** or the selected branch |
| Identify this version later | A value in **Version label** |
| Limit the number of pages | A positive value in **Max pages** |
| Include updated page images | **Include screenshots** |
| Add narrated walkthroughs | **Generate narrated videos** |
| Choose how to generate | Select the generation method. |
## Find the work surface
**Operations** is the hub for operational activity. A project's **Activity & Jobs** view is the
project-specific place to monitor generation runs and refresh their history.
1. Select **Operations** in the application navigation.
2. Open the project's jobs route to reach **Activity & Jobs**.
3. Select **Configure & run documentation generation →** when the jobs view shows that no
generation runs exist and you need to move to project settings.
**Result:** The work surface is ready for either the project generation form or continued monitoring
in the selected project's **Activity & Jobs** page.
While the Operations page is loading, it can show `Loading operations…`.
The Operations surface can show these job-table headers:
| Timing and state | Work and output | Cost and detail |
|---|---|---|
| **When**, **Status**, **Stage**, **Duration** | **Operation**, **Docs** | **Model**, **Calls**, **Tokens**, **Cost**, **Error** |
Work from the headers and messages visible in your list.
## Start a documentation generation run
A generation run starts work for the selected project and source. Choose the source and optional
settings before committing the start action.
**Prerequisites**
- You are signed in and have opened the project generation form.
- The project information and source branch are available.
- The form is not loading and another generation is not already running.
**Steps**
1. Choose the source branch using one option from this table.
| If you need to… | Action |
|---|---|
| Use the selected branch | Enter the branch in **Generate from**. |
| Choose another branch | Select **Select Another Branch**, enter text in **Search branches**, then select the branch. |
2. Enter a value in **Version label** when you want to identify the new version.
3. Select **Include screenshots** to include updated screenshots.
4. Select **Generate narrated videos** to record narrated walkthrough videos.
5. Enter a positive page count in **Max pages** when you want to cap the number of pages.
6. Select one available generation option from this table.
| If you need to… | Select… |
|---|---|
| Rebuild the documentation | The available rebuild option |
| Fix recorded findings | The available fix option |
| Include application content | **Capture from the app** |
7. Select **Generate** to start the generation.
When the form is loading or a generation is already in progress, **Generate** is disabled. If the
start request fails, the error condition can show `Failed to start generation`.
**Result:** The generation form changes to its progress phase and shows the current stage and
progress for the run.
## Monitor and manage a run
**Activity & Jobs** is the project list of generation runs. An active run is a **Running** or
**Pending** job with progress information; a **Completed** or **Failed** job can be expanded for
its outcome or failure details.
**Prerequisites**
- You have opened the project's **Activity & Jobs** page.
- The project has loaded its job history.
**Steps**
1. Read the status shown for each job row.
2. Select **Refresh** in the page header to request the latest job history.
3. Select **Refresh job history** in the Recent Jobs area when that control is available.
4. Select a **Completed** or **Failed** job row to expand its details.
5. Read the progress area on a **Running** or **Pending** job, including its stage and percentage.
The page can show `Loading runs…` while the first list request is in progress. A project with no
jobs shows `No generation runs yet`.
`Every documentation generation run for this project lands here.`
**Result:** The page shows the latest available job history, and an expanded row or progress area
shows the information for the run you selected.
## Handle status branches and errors
Each job status changes which operation is available. Use the status and the exact message on
screen to choose the safe next action.
| What you see | What to do |
|---|---|
| A **Running** or **Pending** job | Select **Cancel** once. The control changes to **Are you sure?**; select it only when you intend to cancel the run. |
| A completed, failed, or cancelled job with generated documents | Select **Delete N Docs** once, then select **Confirm Delete?** only when you intend to remove those documents. |
| A completed, failed, or cancelled job without generated documents | Select **Delete Job** once, then select **Confirm Delete?** only when you intend to remove the job. |
| An error phase with a retry option | Select **Retry Generation** to return to the configuration phase. |
| `Version Generated!` | Review the document and category counts, then continue to the project's versions. |
| `Generation was cancelled` | Treat the run as cancelled and return to configuration or start a separate run. |
| `Job Failed` | Read the failure details in the expanded row before choosing a recovery action. |
| `Jobs failed to load.` | Check the project jobs page again. |
| `Failed to load job history: {error.message}` | Select **Refresh job history** to request the history again; read the changing error details after the prefix. |
| `Showing the last successful load — refreshing failed ({error.message}).` | Continue using the displayed rows, then select **Refresh job history** again; read the changing error details in parentheses. |
| `Operations failed to load.` | Return to **Operations** and reload the operational surface. |
| `Insights failed to load.` | Continue with job monitoring; the insights area is separate from the job list. |
| Queues are absent or unavailable | Continue with the job tables and status rows that are present. |
| Needs-attention data is absent | Continue with the available Operations sections. |
| Manual insights has no project selector | Use the currently selected project. |
**Result:** You have either kept the run available for monitoring, returned it to configuration,
or completed the status-specific action shown on screen.
## Know what happens next
The completion phase is the handover from generation work to version review. It shows the document
and category counts for the generated version. An active run remains available in **Activity & Jobs**
for continued monitoring.
After `Version Generated!`, open the project's versions to review the new version. Use
[Documentation job status reference](https://atloria-selfdogfood-3577.atloria.app/p/atloria-selfdogfood-3577-BDFvUbEgc3/user/documentation-job-status-reference) when you need the
meaning of a status, and [Documentation generation lifecycle](https://atloria-selfdogfood-3577.atloria.app/p/atloria-selfdogfood-3577-BDFvUbEgc3/user/documentation-generation-lifecycle)
when you need the ordered stages.
**Result:** You know whether to review the project's versions, continue monitoring **Activity &
Jobs**, or use the status and lifecycle reference pages.
# Documentation job status reference
## Documentation job statuses at a glance
A documentation job status tells you where a documentation generation run stands and which
follow-up action belongs next. Use this page when you need to read a status on a project’s
**Activity & Jobs** surface or in **Operations**.
| If you need to… | Go to |
|---|---|
| Find the project job list | [Find the job status](#find-the-job-status) |
| Understand a status, progress value, or result column | [Interpret the status and progress details](#interpret-the-status-and-progress-details) |
| Refresh the list or respond to a completed, failed, or active run | [Respond to a job's status](#respond-to-a-jobs-status) |
| Resolve a loading, empty, refresh, or failure message | [When status information does not load](#when-status-information-does-not-load) |
| Start documentation work | [Run documentation work](https://atloria-selfdogfood-3577.atloria.app/p/atloria-selfdogfood-3577-BDFvUbEgc3/user/run-documentation-work) |
| Follow the generation stages | [Documentation generation lifecycle](https://atloria-selfdogfood-3577.atloria.app/p/atloria-selfdogfood-3577-BDFvUbEgc3/user/documentation-generation-lifecycle) |
| Review the wider operational hub | [Operations overview](https://atloria-selfdogfood-3577.atloria.app/p/atloria-selfdogfood-3577-BDFvUbEgc3/user/operations-overview) |
| Review past operational work | [Job History](https://atloria-selfdogfood-3577.atloria.app/p/atloria-selfdogfood-3577-BDFvUbEgc3/user/job-history) |
The project **Activity & Jobs** surface is the canonical list for a project’s background
documentation runs. The **Operations** surface also presents recent jobs with their status,
stage, document count, duration, and error information. A documentation generation lifecycle
has its own stage sequence; use [Documentation generation lifecycle](https://atloria-selfdogfood-3577.atloria.app/p/atloria-selfdogfood-3577-BDFvUbEgc3/user/documentation-generation-lifecycle)
when you need that sequence rather than a status lookup.
## Before you check a job status
Before reading a status, decide whether you are checking one project’s activity or the wider
recent-job view in **Operations**.
**Prerequisites**
- Know the project whose runs you want to review when using the project job surface.
- Open **Activity & Jobs** for the project whose runs you want to review.
- Open **Operations** when you need the recent-job view.
With the view identified, locate the job in the next section.
## Find the job status
Choose the project surface for one project’s activity or **Operations** for the recent-job table.
**Steps**
1. Choose one view:
| If you want to… | Open |
|---|---|
| Review runs for one project | Open the project’s **Activity & Jobs** view |
| Review recent jobs across the operational view | Open **Operations** |
2. In the project view, use **Recent Jobs** to locate the run’s status.
3. In **Operations**, use **Recent jobs** and read the value in its **Status** column.
4. Select **Refresh** to request the current list again.
While the project list is being refreshed, the action label changes to `Refreshing…`.
**Result:** The selected job list is on screen, and you can read the status from the project
**Recent Jobs** area or the **Status** column in **Recent jobs**.

## Interpret the status and progress details
Read the current status on the project surface as **Completed**, **Failed**, **Running**, **Pending**,
or **Cancelled**.
| Status | What the status tells you | Details available on the surface |
|---|---|---|
| **Completed** | The run finished successfully. | The row can expand to a completion summary. |
| **Failed** | The run finished with a failure. | The row can expand to failure details. |
| **Running** | The run is active. | The list counts it as in progress and can show progress details. |
| **Pending** | The run is active but has not moved into the running work. | The list counts it as in progress and can show progress details. |
| **Cancelled** | The run was cancelled. | The status remains available for review, and delete controls can be available. |
**Running** and **Pending** are the active statuses. An active row can show the current stage
and percentage. When live progress is available, it can also show the current item, elapsed
time, and estimated remaining time. When live progress is not available, the row uses the job’s
basic stage and percentage instead.
The **Operations** view presents recent jobs in a table. Read **When** for the recorded time,
**Status** for the job status, **Stage** for the current stage, **Docs** for the document count,
**Duration** for the elapsed run time, and **Error** for error text.
In **Operations**, **Completed** uses the success chip and **Failed** uses the error chip. Other
status values use the warning fallback in that table.
With the status and its details read, choose the action that matches the row’s current state.
## Respond to a job's status
The actions available for a row depend on its status. Choose an action that matches the row’s current state.
### Refresh the job list
**Prerequisites**
The project job list is open.
**Steps**
1. Select **Refresh**.
The label changes to `Refreshing…` while the list is loading.
**Result:** The project job list remains on screen with the refreshed loading state, then returns
to the list when loading finishes.
### Cancel an active job
**Prerequisites**
The job is **Running** or **Pending**, and the row provides **Cancel**.
**Steps**
1. Select **Cancel** on the active job row.
2. Select **Are you sure?** to confirm the cancellation.
While cancellation is being processed, the action label is `Cancelling...`.
**Result:** The active job has received the cancellation request, and its status can be reviewed
again in the job list.
### Delete documents from a finished job
**Prerequisites**
The job is **Completed**, **Failed**, or **Cancelled**, and the row provides **Delete <n> Docs**
or **Delete Job**.
**Steps**
1. Select one control on the row:
| If the job has… | Select |
|---|---|
| Created documents | **Delete <n> Docs** |
| No created documents | **Delete Job** |
2. Select **Confirm Delete?** when the confirmation label appears.
The action label is `Delete Docs` when the job has created documents; otherwise it is
`Delete Job`.
**Result:** The delete request has been sent for the selected finished job.
### Continue from a completed result
**Prerequisites**
The job is **Completed**, and its row can expand.
**Steps**
1. Open the completed job row.
2. Select one available action:
| If you need to… | Select |
|---|---|
| Review flagged documents before publishing | **Review & Publish** |
| Open documentation when a published URL is available | **View Published Documentation** |
| Open documentation through the project fallback | **View Documentation** |
| Copy the public documentation address | **Copy Public URL** |
| Start another generation | **Generate Again** |
**Result:** The selected completion action opens its corresponding documentation, review,
address-copy, or generation path.
If the list instead shows a loading or failure message, use the table in the next section.
## When status information does not load
The job surfaces use different messages for initial loading, an empty project list, an empty
history, a failed refresh, and a failed job. Match the message on screen to the action in the
table.
| Message | When it appears | What to do |
|---|---|---|
| `Loading runs…` | The project list is loading before any runs are available. | Wait for the list to finish loading. |
| `No generation runs yet` | The project has no generation runs in the empty project state. | Select **Configure & run documentation generation →** to go to the generation configuration path. |
| `Jobs failed to load.` followed by the error message | The project list has an error and no jobs to display. | Select **Refresh** and try the list again. |
| `Failed to load job history:` followed by the error message | **Recent Jobs** has an error and no jobs to display. | Select the available refresh action and try again. |
| `Showing the last successful load — refreshing failed` followed by the error message | A refresh failed while jobs are already on screen. | Continue using the last successful list, then select **Refresh** again. |
| `Job Failed` followed by the error stage and error text when present | An expanded failed row is showing failure details. | Read the error stage and error text in the expanded row. |
| `Documentation Generated Successfully!` | An expanded completed result is showing its completion summary. | Continue with the completion action that matches your next task. |
| `Your documentation has been created and is ready to view` | The completion summary is available. | Select **View Published Documentation** or **View Documentation** when the corresponding action is present. |
| `Enriching documents with screenshots` | Screenshot enrichment progress is active in the completion summary. | Read the progress count while the documents update. |
When a stalled run’s progress remains quiet past the inactivity threshold, the project surface
describes it as reconciled to **Failed**. Read the failed row’s details rather than treating it
as an active run.
After resolving the status message, continue with the work that follows from the run’s state.
## What to do next
After you interpret the status, continue according to the work you need to do:
- Start or monitor documentation work in [Run documentation work](https://atloria-selfdogfood-3577.atloria.app/p/atloria-selfdogfood-3577-BDFvUbEgc3/user/run-documentation-work).
- Follow the generation stages in [Documentation generation lifecycle](https://atloria-selfdogfood-3577.atloria.app/p/atloria-selfdogfood-3577-BDFvUbEgc3/user/documentation-generation-lifecycle).
- Review the wider operational work areas in [Operations overview](https://atloria-selfdogfood-3577.atloria.app/p/atloria-selfdogfood-3577-BDFvUbEgc3/user/operations-overview).
- Review past operational work in [Job History](https://atloria-selfdogfood-3577.atloria.app/p/atloria-selfdogfood-3577-BDFvUbEgc3/user/job-history).
If a stalled run is shown as **Failed**, use the failed-row details and then follow the generation
or history path that matches your next task.
# Documentation generation lifecycle
## Documentation generation lifecycle
A documentation generation run is the background work that creates documentation for a project.
Use this page to find a run, follow its stages, and choose the next action from its status.
| If you need to… | Go to |
|---|---|
| Understand the run's stages and statuses | [Understand the lifecycle and screen](#understand-the-lifecycle-and-screen) |
| Open a project run or the organisation-wide activity view | [Find a generation run](#find-a-generation-run) |
| Refresh progress or stop an active run | [Monitor and manage a run](#monitor-and-manage-a-run) |
| Interpret a completed, failed, or cancelled run | [Handle status branches](#handle-status-branches) |
| Start documentation generation | `run-documentation-work` |
| Review status meanings | `documentation-job-status-reference` |
| Review the full run history | `job-history` |
| Open the organisation-wide activity view | `operations-overview` |
| Review published output | `published-documentation` |
| Resolve shared errors | `general-error-messages` |
## Before you start
A project context identifies which generation runs you are reviewing. The project jobs page takes
the project identifier in its route, while manual insights on Operations use the projects
returned for your organisation.
**Prerequisites**
- Know the project whose generation activity you need to inspect.
- Have access to the project jobs route or the `Operations` page.
- For manual insights, have at least one project returned by the project list.
## Find a generation run
A generation run appears either in one project's job history or in the organisation-wide
**Operations** view.
**Prerequisites**
- Have the project identifier when opening a project-specific list.
**Steps**
1. Open the route that matches the work you need to review.
| If you need to… | Open |
|---|---|
| Review one project's generation runs | [Job history](https://atloria-selfdogfood-3577.atloria.app/p/atloria-selfdogfood-3577-BDFvUbEgc3/user/job-history) |
| Review organisation-wide generation activity | [Operations overview](https://atloria-selfdogfood-3577.atloria.app/p/atloria-selfdogfood-3577-BDFvUbEgc3/user/operations-overview) |
2. On the project jobs page, use the link back to the project when you need the project's main
page.
**Result:** The selected project jobs list or the organisation-wide operations view is on screen.
## Understand the lifecycle and screen
The jobs screen is a list of generation runs with loading, empty, active, completed, and failed
states. An active run reports progress; an expanded completed or failed row provides more detail.
The page requests up to 50 runs for the selected project and listens for progress, completion,
failure, cancellation, and screenshot-progress updates for active runs.
The five displayed stages are shown in this order:
```mermaid
flowchart LR
A[Cloning Repository] --> B[Analyzing Code]
B --> C[Generating Docs]
C --> D[Uploading to Database]
D --> E[Publishing Documents]
```
| What you see | Meaning |
|---|---|
| `Loading runs…` | The project job list is loading. |
| `No generation runs yet` | The project has no generation runs to list. |
| `Configure & run documentation generation →` | The empty state offers the route into generation configuration. |
| `Waiting to start...` | A pending job has no current stage yet. |
| `Starting...` | An active job has no live stage yet. |
| `Completed` | The run completed. |
| `Failed` | The run failed. |
| `Running` | The run is active. |
| `Pending` | The run is waiting to start. |
| `Cancelled` | The run was cancelled. |
The jobs page and Operations page do not ask you to enter values. The Operations page can show
a project selector when more than one project is returned; each option uses the returned project
name.
## Monitor and manage a run
Use this procedure while a run is listed and you need current progress or need to stop an active
run.
**Prerequisites**
- Have the project jobs list open.
- For cancellation, the run has status `Running` or `Pending` and **Cancel** is available.
**Steps**
1. On the project jobs page, select **Refresh**, or in Recent Jobs, select **Refresh job history**.
2. If the active job shows **Cancel**, select **Cancel**.
3. Select **Are you sure?** to confirm the cancellation.
**Result:** The list is refreshed, or the active run is cancelled and its status changes to
`Cancelled`.
## Handle status branches
A job status tells you which part of the generation work is available for review and which controls
you can use next.
**Prerequisites**
- Have the project jobs list open.
- Know the status shown on the job row.
**Steps**
1. Select a job row with status `Completed` or `Failed` to expand its details.
2. Review the expanded result for a completed run or the failure details for a failed run.
3. Use the status-specific control shown on the row.
| Status and condition | Control and outcome |
|---|---|
| `Completed`, `Failed`, or `Cancelled`, with created documents | Select **Delete Docs** once to arm deletion, then select **Confirm Delete?**. |
| `Completed`, `Failed`, or `Cancelled`, with no created documents | Select **Delete Job** once to arm deletion, then select **Confirm Delete?**. |
| `Running` or `Pending` | Monitor the progress display or use **Cancel**. |
Completed and failed rows also support regeneration after review. Continue with
`run-documentation-work` for the generation task.
**Result:** The selected row is expanded for review, remains active for monitoring, or shows its
status-specific action state.
## When the run goes wrong
Use the message on screen to decide whether to wait for loading, refresh the relevant surface, or
inspect the failed job's details.
| What you see | What it means | What to do |
|---|---|---|
| `Jobs failed to load.` | The jobs request failed while no job rows were available. | Refresh the project jobs page with **Refresh**. |
| `Operations failed to load.` | The operations request failed. | Reopen **Operations** or refresh **Operations**. |
| `Loading insights…` | Manual insights are loading for the selected project. | Wait for the insights panels to load. |
| `Insights failed to load.` | The manual-insights request failed. | Reopen the **Operations** page. |
| `Job Failed` | The selected job has failed. | Expand the failed row and read its error detail. |
| A failed job's error detail | The job's error text is displayed below `Job Failed`. | Use that text when following up. |
**Prerequisites**
- Have the message on screen.
- For a job message, have the project jobs list open.
- For an Operations message, have access to **Operations**.
**Steps**
1. Follow the alternative that matches the message.
| If you see… | Do this |
|---|---|
| `Jobs failed to load.` | Select **Refresh** on the project jobs page. |
| `Operations failed to load.` | Reopen **Operations**. |
| `Loading insights…` | Wait for the manual insights panels to load. |
| `Insights failed to load.` | Reopen **Operations**. |
| `Job Failed` | Select the failed job row and read its error detail. |
| A failed job's error detail | Use the displayed error text when following up. |
2. If `Loading operations…`, `Loading runs…`, `Starting...`, or `Waiting to start...` appears,
wait for the current loading or job state to update.
**Result:** You have refreshed the project jobs page, reopened **Operations**, waited for the
current state to update, or read the failed job's error detail and know the next action.
## Know what happens next
After you review the run, continue with the page that owns the next task or reference.
| Next need | Continue with |
|---|---|
| Start a generation run | `run-documentation-work` |
| Interpret a status | `documentation-job-status-reference` |
| Review previous runs | `job-history` |
| Review organisation-wide activity | `operations-overview` |
| Review published output | `published-documentation` |
| Resolve shared errors | `general-error-messages` |
The empty jobs state points to **Configure & run documentation generation →**. After a run completes
or fails, the jobs list refreshes so the updated status and run details appear in the list.
# Synchronization job states
## Synchronization job states
A synchronization job state tells you where a background synchronization run is in its lifecycle.
The lifecycle uses five states: Pending, Running, Completed, Failed, and Cancelled. A job can
start in Pending, move into Running, and finish in Completed or Failed. Cancelling a pending job
moves it to Cancelled.
| If you need to… | Go to |
|---|---|
| Prepare the project context before checking a run | [Before you start](#before-you-start) |
| Reach the project's job history | [Find a synchronization job](#find-a-synchronization-job) |
| Interpret the information on a job row | [Read the job history](#read-the-job-history) |
| Use a state-dependent control | [Act on an available job state](#act-on-an-available-job-state) |
| Compare active, completed, failed, cancelled, and empty outcomes | [Handle different job outcomes](#handle-different-job-outcomes) |
| Resolve a load or completion problem | [When a job does not load or finish](#when-a-job-does-not-load-or-finish) |
| Continue after the current state | [Know what comes next](#know-what-comes-next) |
| Read the wider status reference | Documentation job status reference |
| Follow the generation flow | Documentation generation lifecycle |
| Review the broader operations area | Operations overview |
## Before you start
The job history is the list of runs belonging to a project, so you need the project context before
you inspect a run.
The page uses the project context, and the controls available for a job depend on that job's
current state.
**Prerequisites**
- Know which project contains the synchronization job.
- Open the project job route with the project's identifier.
- For an active job, expect the progress area and a cancellation control only when cancellation
is available for that job.
With the project identified, find its job history.
## Find a synchronization job
Use the project's job history to reach saved runs and refresh the list before inspecting a run.
**Prerequisites**
- Know the project whose jobs you need to inspect.
**Steps**
1. Open the project's jobs page.
2. Select **Refresh**, then wait for the job list to reload.
**Result:** The project's **Activity & Jobs** page shows the most recent job information returned for
that project.
Use this list to read the job history.
## Read the job history
A job row summarizes the run's current state, timing, progress, document count, stage, and any
error information so you can decide what to do next.
**Prerequisites**
- Open the project's job history.
**Steps**
1. Read the status badge to identify whether the job is **Pending**, **Running**, **Completed**,
**Failed**, or **Cancelled**.
2. Read the created time, duration, document count, progress, current stage, and error information
shown for the row.
3. Select a completed or failed job row to open its details.
**Result:** You can identify the job's lifecycle state and read the progress or outcome details
available for that state.
| Information | What it tells you | When it appears |
|---|---|---|
| **Pending**, **Running**, **Completed**, **Failed**, or **Cancelled** | The job's lifecycle state | On the job status badge |
| Created time | When the run was created | On every job row |
| Duration | How long the run took | When the recorded duration is greater than zero |
| Documents | The number of created and updated documents | When the total is greater than zero |
| Progress | The run's percentage and progress bar | While the job is **Running** or **Pending** |
| Current stage | The stage currently being processed | While the job is active |
| Error | The recorded error text | On a failed job when an error is present |
Select a completed or failed job row to expand it. A completed job opens its completion summary.
A failed job opens **Job Failed**, followed by the error stage and error text when those values are
present.
When you know the job's state, choose the control for that state.
## Act on an available job state
State-dependent controls let you refresh the list, request cancellation for an active job, or
remove documents associated with a finished job.
**Prerequisites**
- Open a project's job history.
- Use an active job when **Cancel** is available.
**Steps**
1. Select the action that matches the job's state:
| If you need to… | Select… |
|---|---|
| Refresh the job list | **Refresh** |
| Cancel an active job | **Cancel**, then **Are you sure?** |
| Delete a finished job with no created documents | **Delete Job**, then **Confirm Delete?** |
| Delete a finished job with created documents | **Delete <n> Docs**, then **Confirm Delete?** |
While cancellation is in progress, the control reads **Cancelling...**.
**Result:** The selected state-dependent request is issued from the job row, subject to the job's
lifecycle state and available action.
After the action, handle the outcome shown for the job.
## Handle different job outcomes
The job outcome determines which information you can open and which action belongs next.
**Prerequisites**
- Have the project's job history open.
**Steps**
1. Use the job's status to choose one path:
| If the job is… | Read or select… |
|---|---|
| **Pending** | Read its basic progress information while it waits to start. |
| **Running** | Read its current stage and progress while it is active. |
| **Completed** | Open the row to read its completion summary. |
| **Failed** | Open the row to read **Job Failed**, the error stage, and the error text. |
| **Cancelled** | Read the final cancelled status. |
| Empty | Select **Configure & run documentation generation →** to reach the configuration route. |
| Unavailable | Read the load message and follow the recovery direction in [When a job does not load or finish](#when-a-job-does-not-load-or-finish). |
**Result:** You use the information and controls that belong to the job's current outcome.
If the page shows a load, failure, empty, or stalled message, use the matching response below.
## When a job does not load or finish
Use the message on screen to identify whether the page is loading, empty, unavailable, failed, or
stalled.
**Prerequisites**
- Have the project job history open.
**Steps**
1. Read the message in the first column, then follow the matching instruction in the **What to do** column.
| What you see | What it means | What to do |
|---|---|---|
| `Loading runs…` | The job list is loading. | Wait for the list to finish loading. |
| `No generation runs yet` | No generation runs are listed for the project. | Select **Configure & run documentation generation →**. |
| `Every documentation generation run for this project lands here.` | The empty state explains where future runs appear. | Start from the configuration route. |
| `Jobs failed to load.` followed by the error message | The page has no job list to show because loading failed. | Refresh the page or use **Refresh** when it is available. |
| `Job Failed` followed by the error stage and error when present | The selected job finished with a failure. | Read the error stage and error text shown below the message. |
| `Stalled runs are automatically reconciled to “Failed” once their progress goes quiet past the inactivity threshold, so a run can never sit “in progress” indefinitely.` | A stalled run is reconciled to **Failed**. | Treat the run as failed and read its failure details. |
**Result:** You have a response for the message shown on the job history page.
Once the message is resolved, continue from the job's current state.
## Know what comes next
The next action depends on the state the job reaches: continue monitoring an active run, inspect a
completion summary after **Completed**, or read the failure details after **Failed**.
| Current state or event | Next place to continue |
|---|---|
| **Pending** | Continue monitoring until the job starts, completes, fails, or is cancelled. |
| **Running** | Continue monitoring its stage and progress. |
| **Completed** | Open the completion summary or review the [Documentation job status reference](https://atloria-selfdogfood-3577.atloria.app/p/atloria-selfdogfood-3577-BDFvUbEgc3/user/documentation-job-status-reference). |
| **Failed** | Read the failure details, then follow the [Documentation generation lifecycle](https://atloria-selfdogfood-3577.atloria.app/p/atloria-selfdogfood-3577-BDFvUbEgc3/user/documentation-generation-lifecycle). |
| **Cancelled** | Review the job history for the next run. |
| Operational aggregate needed | Open [Operations overview](https://atloria-selfdogfood-3577.atloria.app/p/atloria-selfdogfood-3577-BDFvUbEgc3/user/operations-overview). |
# Job history
## What job history is
Job history is the project record of documentation runs. A documentation run is one piece of
documentation work; its status tells you whether it is **Completed**, **Failed**, **Running**,
**Pending**, or **Cancelled**, while its progress, timing, and output are what you review after
it starts.
The page is headed `Activity & Jobs` and groups the project's runs under `Recent Jobs`.
Each run can carry its status, stage information, timestamps, duration, document counts, and
failure details. Completed runs can also provide a route to the project's documentation.
Completed summaries can show **Documents Created**, **Documents Updated**, **Categories Created**,
**Screenshots Captured**, and **Duration**.
| If you need to… | Go to |
|---|---|
| Open the project's run list | [Open a project's job history](#open-a-projects-job-history) |
| Read progress, counts, or failure details | [Read a run's details](#read-a-runs-details) |
| Cancel active work or remove generated documents | [Act on a job](#act-on-a-job) |
| Choose a response to the current status | [Choose the right path for the run status](#choose-the-right-path-for-the-run-status) |
| Start or monitor documentation work | [Run documentation work](https://atloria-selfdogfood-3577.atloria.app/p/atloria-selfdogfood-3577-BDFvUbEgc3/user/run-documentation-work) |
| Interpret a documented job status | [Documentation job status reference](https://atloria-selfdogfood-3577.atloria.app/p/atloria-selfdogfood-3577-BDFvUbEgc3/user/documentation-job-status-reference) |
| Follow the full generation lifecycle | [Documentation generation lifecycle](https://atloria-selfdogfood-3577.atloria.app/p/atloria-selfdogfood-3577-BDFvUbEgc3/user/documentation-generation-lifecycle) |
| Return to the operational work area | [Operations overview](https://atloria-selfdogfood-3577.atloria.app/p/atloria-selfdogfood-3577-BDFvUbEgc3/user/operations-overview) |
| Open reader-facing documentation after a completed run | [Published documentation](https://atloria-selfdogfood-3577.atloria.app/p/atloria-selfdogfood-3577-BDFvUbEgc3/user/published-documentation) |
## Before you start
You need access to a project before you can open its job history. The page uses the project's
identifier to load that project's runs, and it is a review surface rather than an editing form.
The page loads the list automatically. If no runs exist, it presents an empty state instead of
an editable list. The page does not provide editable fields, **Generate Again**, screenshot
cancellation, or a published-URL action on this surface.
## Open a project's job history
Use this procedure when you need to review the runs belonging to a saved project.
**Prerequisites**
- You are signed in.
- You know the project you want to review.
**Steps**
1. From the project page, open the project's job history.
2. Read the page heading `Activity & Jobs`.
3. While the first load is in progress, read "Loading runs…".
4. Select **Refresh** when you need to reload the list.
5. Select the icon-only **Refresh job history** control when you are working from the
"Recent Jobs" heading.
If the project has no runs, the page shows "No generation runs yet" and
"Every documentation generation run for this project lands here."
**Result:** The project's job list is loaded, or the page shows the empty state for a project
with no generation runs.
## Read a run's details
A job-history row is a summary of one documentation run. Its status tells you which details and
actions are available; its progress and counts tell you how far the work has gone and what it
produced.
A completed run shows "Completed" and provides its completion summary.
A failed run shows "Failed" and provides failure details.
An active run can show "Running" or "Pending"; a cancelled run shows "Cancelled".
The completed summary reports "Documents Created" and "Documents Updated".
It also reports "Categories Created", "Screenshots Captured", and "Duration".
| Look at… | What it tells you |
|---|---|
| `Completed` | The run finished successfully. |
| `Failed` | The run stopped with failure details available in its expanded area. |
| `Running` | The run is active and can show progress information. |
| `Pending` | The run is waiting to start or continue. |
| `Cancelled` | The run was cancelled. |
| Overall percentage | The run's progress. |
| Current stage and stage percentage | The current part of the work and its progress within that stage. |
| Current item | The item currently being processed when one is available. |
| Created, updated, and completed times | When the run was created, updated, and completed. |
| Duration | How long the run took when a value is available. |
| "Documents Created" | The number included in the completed output. |
| "Documents Updated" | The number included in the completed output. |
| "Categories Created" | The number included in the completed output. |
| "Duration" | The completed output's duration. |
Use this procedure to inspect a completed or failed run.
**Prerequisites**
- The project job list is open.
- A completed or failed run is present.
**Steps**
1. Select the completed or failed job row to expand its details.
2. For a completed run, read "Documentation Generated Successfully!" and
"Your documentation has been created and is ready to view". Read `Documents Created`,
`Documents Updated`, `Categories Created`, `Screenshots Captured`, and `Duration` in the
completed summary.
3. For a failed run, read "Job Failed", then read the failure stage and failure text when
they are shown.
**Result:** The selected row shows its available progress, output, completion, or failure
details.
## Act on a job
The available action depends on the run's status. Use the action that matches the work you need
to do, and stop at a confirmation label before submitting a cancellation or deletion.
**Prerequisites**
- The project job list is open.
- The required status-specific row is present.
**Steps**
1. Choose one action and, where required, complete its confirmation:
| If you need to… | Select first | Then |
|---|---|---|
| Open the documentation from a completed result | **View Documentation** | — |
| Start cancelling a running or pending job | **Cancel** | Select **Are you sure?** only when you intend to submit the cancellation. |
| Remove a completed, failed, or cancelled job's generated documents | **Delete Job** or the displayed Delete <count> Docs action | Select **Confirm Delete?** only when you intend to remove the generated documents. |
**Result:** A completed result opens **View Documentation**, an active job reaches its
cancellation confirmation, or a terminal job reaches its deletion confirmation.
## Choose the right path for the run status
The status is the run's current position in documentation work. Use the status shown on the row
to choose what to inspect or do next.
**Prerequisites**
- The job list is open.
- You can read the status shown on the run row.
**Steps**
1. Choose the path that matches the status:
| If the row says… | Continue by… |
|---|---|
| `Completed` | Expanding the row to read the completion summary and select **View Documentation**. |
| `Failed` | Expanding the row to read "Job Failed", the failure stage, and the failure text. |
| `Running` | Reading the progress bar, stage, percentage, and available current-item details; select **Cancel** if you intend to stop the job. |
| `Pending` | Reading the available progress information; select **Cancel** if you intend to stop the waiting job. |
| `Cancelled` | Reviewing the available row information and deletion action. |
| No rows | Reading "No generation runs yet" and using the project's documentation generation settings to start work. |
| A stalled run shown as `Failed` | Following the `Failed` path and reading its failure details. |
**Result:** You follow the status-specific path without treating a waiting, active, failed,
completed, or cancelled run as another state.
## When the history does not load
The page uses different messages for an empty first load and for a refresh that fails while
existing rows remain visible. Read the message before deciding whether to reload or continue
with the rows already on screen.
| What you see | What to do |
|---|---|
| "Jobs failed to load." | Check the page access and reload the project job history. |
| "Failed to load job history:" | Read the message that follows the colon, then reload the job history. |
| "Showing the last successful load — refreshing failed (" | Continue with the rows already displayed, then try **Refresh** again. |
The page keeps existing rows visible when a later refresh fails. A stalled run is presented as
"Failed" after the inactivity threshold rather than remaining in progress indefinitely.
## What to do next
After you review a run, continue according to the result you need.
**Prerequisites**
- You have read the selected run's status and available details.
**Steps**
1. Choose the next destination:
| If you need to… | Continue with… |
|---|---|
| Open the project's documentation from a completed result | Select **View Documentation**. |
| Return to the current project | Select **Back to project**. |
| Need a status definition | [Documentation job status reference](https://atloria-selfdogfood-3577.atloria.app/p/atloria-selfdogfood-3577-BDFvUbEgc3/user/documentation-job-status-reference) |
| Need the sequence of generation stages | [Documentation generation lifecycle](https://atloria-selfdogfood-3577.atloria.app/p/atloria-selfdogfood-3577-BDFvUbEgc3/user/documentation-generation-lifecycle) |
| Start or monitor operational work | [Run documentation work](https://atloria-selfdogfood-3577.atloria.app/p/atloria-selfdogfood-3577-BDFvUbEgc3/user/run-documentation-work) |
| Open the wider operations area | [Operations overview](https://atloria-selfdogfood-3577.atloria.app/p/atloria-selfdogfood-3577-BDFvUbEgc3/user/operations-overview) |
| Continue with reader-facing documentation | [Published documentation](https://atloria-selfdogfood-3577.atloria.app/p/atloria-selfdogfood-3577-BDFvUbEgc3/user/published-documentation) |
**Result:** You are on the documentation, project, lifecycle, status, or operations guidance
that matches the result you reviewed.
# Platform and developer tools
## Platform and developer tools
Platform and developer tools are the routes for platform administration, developer
references, code-parser availability, marketing-page generation, and automatic project
claiming.
| If you need to… | Go to… |
|---|---|
| Search for an organization and open its record | [Find an organization](#find-an-organization) |
| Change a plan or repair SSO | [Manage plan and SSO settings](#manage-plan-and-sso-settings) |
| Create and review a marketing page | [Generate and review a marketing page](#generate-and-review-a-marketing-page) |
| Check the code-parser status or review interface examples | [Use the parser and developer reference surfaces](#use-the-parser-and-developer-reference-surfaces) |
| Continue organization administration | [Manage organization access](https://atloria-selfdogfood-3577.atloria.app/p/atloria-selfdogfood-3577-BDFvUbEgc3/user/manage-organization-access) |
| Review security and audit access | [Security and audit access](https://atloria-selfdogfood-3577.atloria.app/p/atloria-selfdogfood-3577-BDFvUbEgc3/user/security-and-audit-access) |
| Follow generation stages | [Documentation generation lifecycle](https://atloria-selfdogfood-3577.atloria.app/p/atloria-selfdogfood-3577-BDFvUbEgc3/user/documentation-generation-lifecycle) |
| Continue work on a claimed project | [Projects overview](https://atloria-selfdogfood-3577.atloria.app/p/atloria-selfdogfood-3577-BDFvUbEgc3/user/projects-overview) |
| Resolve a shared application error | [General error messages](https://atloria-selfdogfood-3577.atloria.app/p/atloria-selfdogfood-3577-BDFvUbEgc3/user/general-error-messages) |
These tools sit alongside the main project and operations work areas. Use the platform
routes when you administer an organization, the marketing-page route when you turn
existing project documentation into a page, and the developer routes when you need a
reference surface or an automatic handoff.
## Before you start
You need a signed-in session before these routes can load their data. Platform
organization administration requires platform-administrator access. The organization
list uses the access token from that session, and the organization detail page loads
the organization and its SSO information with the same access token.
Before changing an organization, have the organization record open and decide which
plan or SSO setting you need to change. Keep the audit reason ready: plan changes and
SSO changes each require one. The organization’s current SSO configuration determines
whether its SSO fields are available, and its current SSO status determines whether
**Disable SSO** is available.
Before generating a marketing page, open the Marketing Pages area with a current
project selected. The wizard uses that project for the generation job. Decide the
audience, voice, and page sections before you reach the confirmation step.
## Find an organization
An organization record is the place where platform administrators review and change
one organization’s plan and SSO settings.
**Prerequisites**
- You are signed in with platform-administrator access.
- You know part of the organization name, slug, or organization ID, or you know which
plan to filter.
**Steps**
1. In the platform organization list, enter text in **Search name, slug, or org ID**.
2. Choose a plan from the plan filter when you want to narrow the list.
| If you need to… | Choose… |
|---|---|
| See every plan | `All plans` |
| Find free organizations | `FREE` |
| Find professional organizations | `PRO` |
| Find business organizations | `BUSINESS` |
3. Select **Search**.
4. Select the organization row you want to inspect.
If no row matches, the page displays “No organizations match”. Clear the search or plan
filter, then select **Search** again.
**Result:** The organization record opens.
## Understand the organization record
The organization record has a Plan panel for subscription settings and a Single Sign-On
panel for repairing an organization’s SSO configuration.
The Plan panel contains the organization’s current plan information, an audited reason,
a trial override area, and a base-plan area. The trial-plan choices are `FREE`, `PRO`,
and `BUSINESS`. The base-plan choices are `Choose…`, `FREE`, `PRO`, and `BUSINESS`.
The Single Sign-On panel can contain **IdP SSO URL**, **IdP EntityID / issuer**, **Allowed
domains (comma-separated)**, and **Reason (audited)**. When SSO is not configured, the
panel displays `No SAML configuration for this org.`. When SSO is enabled, **Disable SSO**
appears. **Set base plan** remains unavailable until a base plan is selected.
## Manage plan and SSO settings
Use this procedure when you need to change an organization’s plan or repair its SSO
configuration. Each change carries an audit reason.
**Prerequisites**
- You have platform-administrator access.
- The organization record is open.
- You know the reason to record for the change.
**Steps**
1. In the Plan panel, enter the audit reason in **Reason (required — audited)**.
2. Choose one plan action.
| If you need to… | Do this… |
|---|---|
| Grant a trial override | Choose `FREE`, `PRO`, or `BUSINESS`, set **Trial duration** from `1` to `365` days, then select **Grant trial**. |
| Remove an existing override | Select **Clear override**. |
| Set the base plan | Choose `FREE`, `PRO`, or `BUSINESS` in **Base plan**, then select **Set base plan**. |
3. Choose one SSO action.
| If you need to… | Do this… |
|---|---|
| Save an SSO repair | Enter the provider address in **IdP SSO URL**, the provider identifier in **IdP EntityID / issuer**, comma-separated domains in **Allowed domains (comma-separated)**, and the reason in **Reason (audited)**. Select **Save SSO config**. |
| Disable enabled SSO | Select **Disable SSO**, then enter the requested reason. |
If you submit a plan change without a reason, the page displays `A reason is required
(it is audited).`. If you submit an SSO change without its reason, it displays `A reason
is required for SSO changes.`.
**Result:** A successful plan change displays `Plan updated.`. A successful SSO repair
displays `SSO config saved.`. A successful disable action displays `SSO disabled.`.
## Generate and review a marketing page
A marketing page is a generated page assembled from the documentation in the current
project. Configure its audience, voice, and sections before reviewing its variants.
**Prerequisites**
- A current project is selected.
- You know the audience the page addresses.
- You know which sections the page needs.
**Steps**
1. In Marketing Pages, select **Generate new page**.
2. Enter the intended audience in **Target Audience**.
3. Choose one **Brand Voice** option.
| If you want the page to sound… | Choose… |
|---|---|
| Professional | `Professional` |
| Bold | `Bold` |
| Empathetic | `Empathetic` |
| Technical | `Technical` |
| Casual | `Casual` |
4. Select **Next: Choose Sections**.
5. Select the sections to include.
| If you need to include… | Select… |
|---|---|
| The main hero area | `Hero` |
| Pain-point identification | `Problem` |
| A product feature grid | `Features` |
| A step-by-step workflow | `How It Works` |
| Testimonials and logos | `Social Proof` |
| Pricing tiers | `Pricing` |
| Frequently asked questions | `FAQ` |
| A final call to action | `CTA` |
6. Select **Next: Confirm**.
7. Review the generation summary.
8. Select **Generate Page**.
9. Follow the progress display through its stages: `Setting up`, `Researching
documentation`, `Writing marketing copy`, `Creating visuals`, `Building the page`,
and `Final touches`.
10. When the page is complete, select **Review Variants**.
11. Select a variant.
12. Select **Preview Full Page**.
13. In the variant list, select **Select** for the variant you want to use.
The wizard requires at least one section before **Next: Confirm** can continue. If no
project is selected, submitting the wizard does not start a job. A failed generation
displays `Generation Failed` and `An unexpected error occurred.` when no more specific
error is available. If no variants are available, the variant screen displays `No
variants available.`. If there is no page to preview, the preview screen displays `No
page to preview.`.
**Result:** The generated page reaches the variant review area, where you can select a
variant and open its full-page preview.
## Use the parser and developer reference surfaces
The Code Parser route is a placeholder for future code-analysis work. The Kit route is
a reference sheet for interface primitives, and the claim route performs an automatic
handoff after a trial project is claimed.
The Code Parser page displays **Code Parser**, `Coming soon`, and `Parse and analyze code to
generate documentation automatically.`. The page has no upload or analysis action.
The Kit reference sheet demonstrates buttons, chips, segmented controls, tabs, tables,
menus, modals, notes, and empty states. Its demonstrations include **Open modal**,
**Open menu**, **Success toast**, and **Error toast**. The demonstration messages include
`Documentation published`, `Generation failed — job 4821`, `Deleted (not really)`, and
`Nothing was deleted — this is the kit page.`.
The claim route starts automatically after sign-in. On success, it sends you to the
claimed project. If the trial cannot be claimed, it displays **Claim failed.** and one
of these messages: `This trial project could not be claimed — it may have expired or
already been claimed.`, `Claim failed.`, or `Something went wrong while claiming the
project. Please try again.`.
## When a platform tool goes wrong
Use the message on screen to choose the next action.
| What you see | Meaning | Next action |
|---|---|---|
| `Not authorized.` | The platform request was refused for access reasons. | Use an account with platform-administrator access. |
| `Failed to load organizations.` | The organization list could not load. | Return to the platform list and try the request again. |
| `A reason is required (it is audited).` | A plan action has no audit reason. | Enter **Reason (required — audited)**, then submit the plan action again. |
| `A reason is required for SSO changes.` | An SSO change has no audit reason. | Enter **Reason (audited)**, then select **Save SSO config** again. |
| `No SAML configuration for this org.` | The organization has no SAML configuration in the SSO panel. | Use the organization’s SSO settings to configure SSO before repairing it here. |
| `Generation Failed` | The marketing-page generation reached a failed state. | Read the message below the heading, then return to the dashboard. |
| `No variants available.` | The variant screen has no variants to select. | Return to the dashboard. |
| `No page to preview.` | The preview screen has no page to display. | Return to the variant list. |
| **Claim failed.** | The automatic trial-project claim did not complete. | Use the available recovery route. |
| `This trial project could not be claimed — it may have expired or already been claimed.` | The trial project is unavailable for claiming. | Start the claim flow again with an available trial project. |
| `Claim failed.` | The claim operation failed without a more specific message. | Follow the claim flow again. |
| `Something went wrong while claiming the project. Please try again.` | The claim request encountered an unexpected problem. | Try the claim flow again. |
## What to do next
After opening an organization, continue with [Manage organization access](https://atloria-selfdogfood-3577.atloria.app/p/atloria-selfdogfood-3577-BDFvUbEgc3/user/manage-organization-access)
for organization administration or [Security and audit access](https://atloria-selfdogfood-3577.atloria.app/p/atloria-selfdogfood-3577-BDFvUbEgc3/user/security-and-audit-access)
for security and audit work. After a marketing-page generation, follow [Documentation
generation lifecycle](https://atloria-selfdogfood-3577.atloria.app/p/atloria-selfdogfood-3577-BDFvUbEgc3/user/documentation-generation-lifecycle) for its stages, then continue
in [Projects overview](https://atloria-selfdogfood-3577.atloria.app/p/atloria-selfdogfood-3577-BDFvUbEgc3/user/projects-overview). For shared application failures, use
[General error messages](https://atloria-selfdogfood-3577.atloria.app/p/atloria-selfdogfood-3577-BDFvUbEgc3/user/general-error-messages).
# Analytics overview
## What analytics summarizes
Analytics brings together activity from your published documentation, the events that
record changes and exports, follow-up insights, and ways to export the information for
further use. The workspace groups these views under **Dashboard**, **Audit Trail**,
**Needs Attention**, and **Export Center**.
Use the page according to the question you are answering:
| If you need to… | Go to |
|---|---|
| See reader activity and content patterns | [Understand the analytics workspace](#understand-the-analytics-workspace) |
| Review recorded project events | [Understand the analytics workspace](#understand-the-analytics-workspace) |
| Turn an insight into tracked work | [Understand the analytics workspace](#understand-the-analytics-workspace) |
| Export analytics or documentation | [Export analytics and documentation](#export-analytics-and-documentation) |
| Inspect project measurements step by step | [Read project analytics](https://atloria-selfdogfood-3577.atloria.app/p/atloria-selfdogfood-3577-BDFvUbEgc3/user/read-project-analytics) |
| Look up analytics sections and export details | [Analytics reference](https://atloria-selfdogfood-3577.atloria.app/p/atloria-selfdogfood-3577-BDFvUbEgc3/user/analytics-reference) |
| Administer analytics and reporting | [Administer analytics](https://atloria-selfdogfood-3577.atloria.app/p/atloria-selfdogfood-3577-BDFvUbEgc3/user/administer-analytics) |
## Before you open analytics
The workspace is project-specific. Select the project whose activity you want to review
before using it.
**Prerequisites**
- You have a project context selected.
- You know whether you are reviewing reader activity, recorded events, follow-up work, or
an export.
If you open the project-scoped analytics route, the application loads that project and
then opens the enterprise analytics workspace. If no project is selected, the page shows
**Select a project** and the hint **Analytics covers the published docs of one project at
a time.**
## Open the analytics workspace
Use the project-scoped route or the direct enterprise route to open the workspace.
**Prerequisites**
- A project context is selected.
**Steps**
1. Open the project's analytics link.
2. Choose the section that matches the information you need.
**Result:** The analytics workspace is open with **Dashboard**, **Audit Trail**,
**Needs Attention**, and **Export Center** available as section choices.
## Understand the analytics workspace
Use these views to read published-document activity, review recorded events, manage
follow-up work, and prepare exports.
| Surface | Use it to… | Information or controls |
|---|---|---|
| **Dashboard** | Review reader activity and content patterns | **7d**, **30d**, **90d**, **1y**; page views; unique visitors; average time on page; average scroll depth; bounce rate; searches; daily traffic; top documents; top searches; devices; traffic sources; countries; content insights |
| **Audit Trail** | Review recorded project activity | An action filter, event details, paging, **Export CSV**, **Export JSON** |
| **Needs Attention** | Follow up on content problems and reader feedback | Task queue, status and assignee choices, reader feedback, and non-terminal task actions |
| **Export Center** | Prepare analytics and documentation files | Analytics report options, scheduled reports, recent exports, and documentation export formats |
### Read the Dashboard
The Dashboard summarizes activity for the selected period. Its measurements include page
views, unique visitors, average time on page, average scroll depth, bounce rate, and
searches. It also summarizes daily traffic, top documents, top searches, devices, traffic
sources, countries, trending documents, scroll depth, content gaps, ghost documents, and
reader feedback.
**Steps**
1. Select **Dashboard**.
2. Select a period in the time-period selector:
| If you need to… | Select |
|---|---|
| Review the last week | **7d** |
| Review the last 30 days | **30d** |
| Review the last 90 days | **90d** |
| Review the last year | **1y** |
3. Review the measurement cards and content sections for the selected period.
**Result:** The Dashboard displays the selected period's activity summaries.
### Review the Audit Trail
The Audit Trail records project events such as publishing, document updates and edits,
webhooks, reviews, exports, and scheduled-report activity.
**Steps**
1. Select **Audit Trail**.
2. Choose an action from the filter.
3. Select an event row to expand its details.
4. Use **Previous** or **Next** to move through pages of events.
**Result:** The Audit Trail shows the events that match the selected action and page.
The list uses 20 events per page.
### Follow up from Needs Attention
Needs Attention is the action queue for insights that have become tracked work. Its tasks
can be assigned and moved through statuses, while reader feedback provides context for
content improvement. The tab can also include an open-task count.
**Steps**
1. Select **Needs Attention**.
2. Filter the queue by status or assignee.
3. Select **+ Create task** beside an insight that is not already tracked.
4. Select **Resolve** or **Dismiss** for a task that is not terminal.
**Result:** The insight is tracked, or the selected task moves to the action you chose.
## Export analytics and documentation
The Export Center prepares analytics files, scheduled report definitions, recent export
history, and documentation downloads. Analytics reports use the overview, top documents,
top searches, devices, and sources sections.
Selecting **Export Center** loads the scheduled reports and export history for the project.
**Prerequisites**
- A project context is selected.
- For documentation exports, a project version is available in the version selector.
**Steps**
1. Select **Export Center**.
2. Choose the export you need:
| If you need to… | Choose |
|---|---|
| Download analytics for a time range | In **Period**, choose **Last 7 days**, **Last 30 days**, **Last 90 days**, or **Last year**. |
| Choose an analytics file type | In **Format**, choose **PDF** or **CSV**. |
| Choose the raw CSV table | After selecting **CSV**, choose **Page views** or **Search queries** in **Table**. |
| Create a recurring report | Select **+ New report**, then complete **Name**, **Frequency**, **Time (UTC)**, **Format**, **Period (days)**, and **Recipients (comma or space separated)**. |
| Download documentation | Select a version, then select **Download .zip** or **Generate PDF** in the required format card. |
| Set PDF export options | Select **Table of Contents**, **Cover Page**, **A4**, or **Letter** in the PDF card. |
3. Select **Download** for the analytics export, **Create report** for a new scheduled
report, or **Download .zip** or **Generate PDF** for the format you selected.
**Result:** The selected export starts, or the scheduled report appears in the scheduled
reports list.
### Choose a scheduled report frequency
The scheduled-report form uses a weekly, daily, or monthly schedule and records the time
in UTC.
**Steps**
1. Select **+ New report**.
2. In **Frequency**, choose a schedule:
| If you need to… | Select |
|---|---|
| Run the report every day | **Daily** |
| Run the report each week | **Weekly**, then choose **Day of week** |
| Run the report each month | **Monthly**, then choose **Day of month** |
3. Select **Create report**.
**Result:** The scheduled report uses the selected frequency and UTC time.
## Handle empty and conditional surfaces
Some analytics content changes according to the selected project, the export format, the
report frequency, and whether the workspace has data to show.
| What you select or encounter | What appears |
|---|---|
| No project selected | **Select a project** and **Analytics covers the published docs of one project at a time.** |
| The primary analytics request fails | **Analytics couldn’t be loaded.** and **Retry** appear after loading finishes. |
| **CSV** in **Format** | **Table** appears with **Page views** and **Search queries**. |
| **PDF** in **Format** | The PDF export description and the download action remain available. |
| **Weekly** in **Frequency** | **Day of week** appears. |
| **Monthly** in **Frequency** | **Day of month** appears. |
| A task is terminal | The task does not offer **Resolve** or **Dismiss**. |
## When analytics does not load or an action fails
Use the message text to identify the action that needs attention. Do not repeat an action
until you know whether the message describes validation, a failed request, or a completed
export.
| What you see | Meaning and next action |
|---|---|
| `Analytics couldn’t be loaded.` | Select **Retry** to request the analytics data again. |
| `Couldn't create task: ...` | The task was not created; review the insight and try **+ Create task** again. |
| `Update failed` | The task update did not complete; review the task and retry the status or assignee change. |
| `Please enter a name for the report` | Enter a value in **Name** before selecting **Create report** or **Save changes**. |
| `Please add at least one recipient email` | Add at least one address in **Recipients (comma or space separated)** before saving the report. |
| `Failed to save: ...` | The scheduled-report save did not complete; review the form and try again. |
| `Delete this scheduled report? This cannot be undone.` | Confirm that you want to remove the report before continuing. |
| `Delete failed: ...` | The scheduled report was not deleted; return to the report list and try **Delete** again. |
| `Export failed: ...` | The analytics export did not complete; review the selected period, format, and table, then select **Download** again. |
| `Failed to export audit log` | The audit export did not complete; try the other audit export format. |
Successful actions use these messages:
| Action | Message |
|---|---|
| Create a task | `Task created — track it in Needs Attention` |
| Start a documentation download | `Markdown download started`, `Html download started`, or `Pdf download started` |
| Download an analytics export | `PDF export downloaded` or `CSV export downloaded` |
| Save a scheduled report | `Scheduled report updated` or `Scheduled report created` |
| Run a scheduled report | `Report run — check your inbox` or `Run finished with status: ...` |
| Delete a scheduled report | `Scheduled report deleted` |
| Export the audit log | `Audit log exported as CSV` or `Audit log exported as JSON` |
When a scheduled report already exists, use **Run now**, **Edit**, or **Delete**. In the
report form, use **Cancel** to close it without saving, or **Save changes** when editing an
existing report.
## Continue with project analytics
Use the page that matches the work you want to do next:
| Next task | Page |
|---|---|
| Open project analytics and inspect the available measurements | [Read project analytics](https://atloria-selfdogfood-3577.atloria.app/p/atloria-selfdogfood-3577-BDFvUbEgc3/user/read-project-analytics) |
| Review analytics sections and export-oriented information | [Analytics reference](https://atloria-selfdogfood-3577.atloria.app/p/atloria-selfdogfood-3577-BDFvUbEgc3/user/analytics-reference) |
| Manage administrative analytics controls and reporting | [Administer analytics](https://atloria-selfdogfood-3577.atloria.app/p/atloria-selfdogfood-3577-BDFvUbEgc3/user/administer-analytics) |
| Review administrative analytics and operational status | [Operations and analytics reference](https://atloria-selfdogfood-3577.atloria.app/p/atloria-selfdogfood-3577-BDFvUbEgc3/user/operations-and-analytics-reference) |
# Read project analytics
## What project analytics is
Project analytics is the workspace for reviewing how readers use your published documentation.
It sits in the Analytics area after operational work, so you use it to inspect the measurements
that result from published documentation.
Use this page according to what you need to do:
| If you need to… | Go to |
|---|---|
| Understand what the analytics views summarize | [Analytics overview](https://atloria-selfdogfood-3577.atloria.app/p/atloria-selfdogfood-3577-BDFvUbEgc3/user/analytics-overview) |
| Inspect the measurements step by step | [Read project analytics](#before-you-start) |
| Look up analytics sections and export information | [Analytics reference](https://atloria-selfdogfood-3577.atloria.app/p/atloria-selfdogfood-3577-BDFvUbEgc3/user/analytics-reference) |
Start with [Before you start](#before-you-start).
## Before you start
Project analytics shows information for one selected project at a time. Published documentation
is the subject of the analytics view.
**Prerequisites**
| Have this ready | Why it matters here |
|---|---|
| A selected project | The analytics surface uses the current project context. |
| Published documentation for that project | The page summarizes activity across the project's published documentation. |
| The question you want to answer | The available sections separate dashboard measurements, audit information, follow-up work, and exports. |
If no project is selected, the page shows `Select a project` and the message
`Analytics covers the published docs of one project at a time.`
With a project selected, continue to [Open project analytics](#open-project-analytics).
## Open project analytics
Project-scoped analytics is a route that leads to the enterprise Analytics workspace rather than
displaying a separate analytics screen.
**Prerequisites**
- You have a project context selected.
**Steps**
1. Open the project-scoped analytics route, or select **Analytics** in the main navigation.
| If you need to… | Open |
|---|---|
| Open analytics from a project link | The project-scoped analytics route |
| Open the enterprise workspace directly | Select **Analytics** |
2. Confirm the **Analytics** page opens.
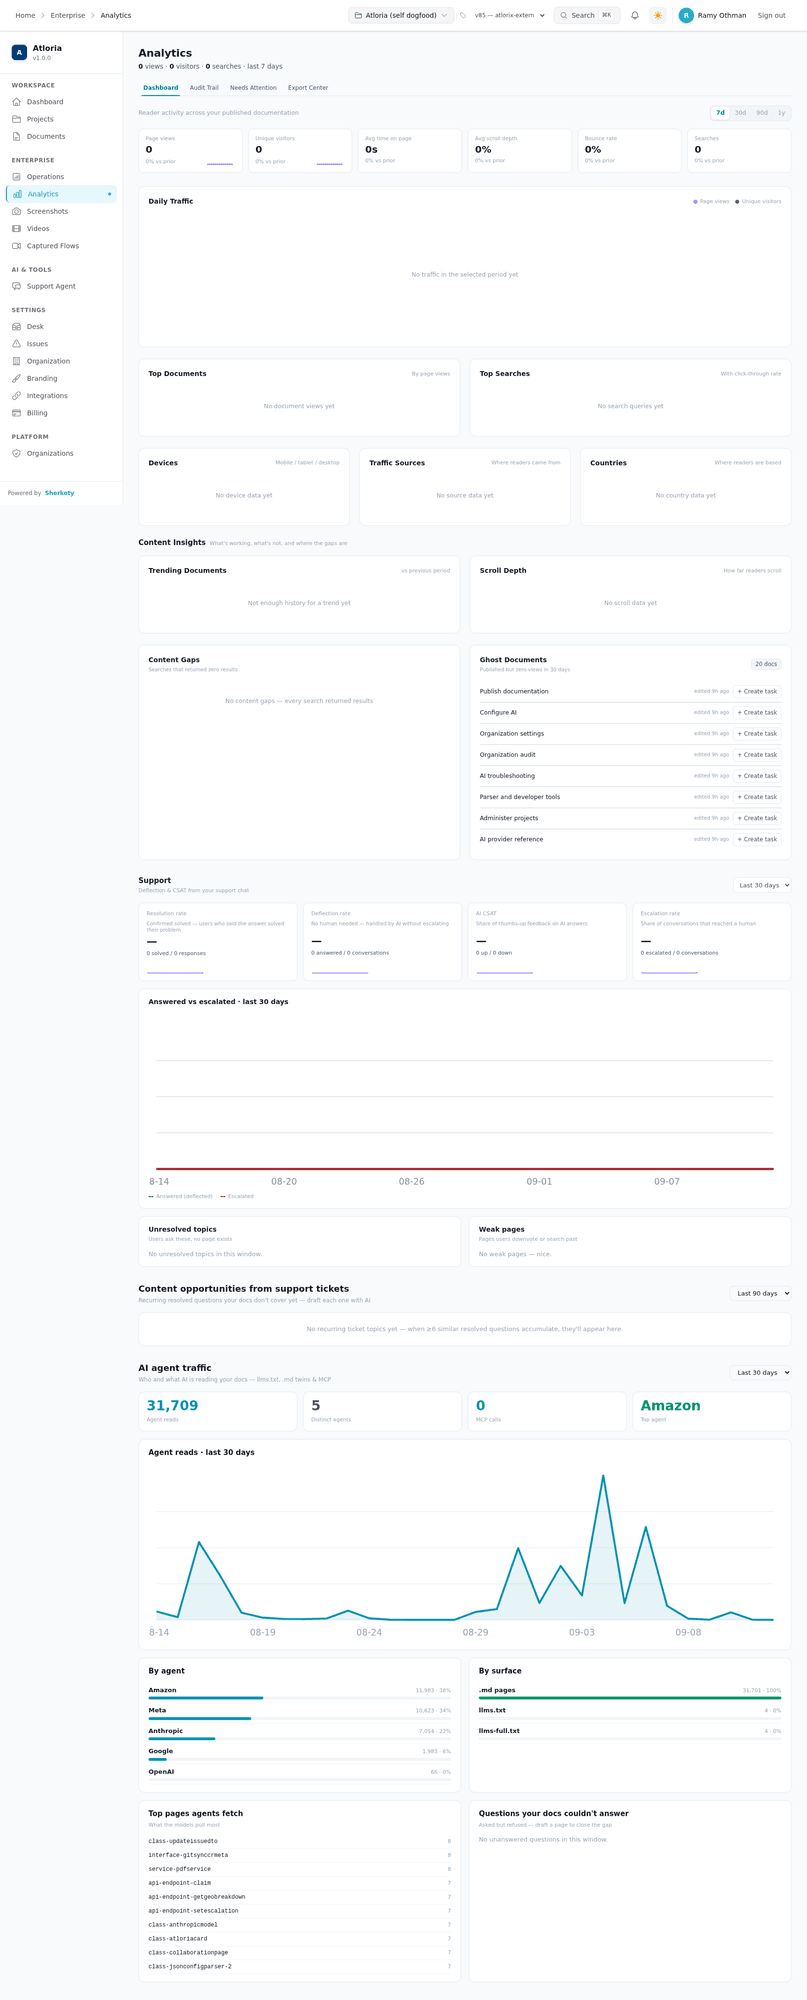
**Result:** The Analytics workspace opens with **Dashboard**,
**Audit Trail**, **Needs Attention**, and **Export Center** available.
Next, use [Understand the analytics screen](#understand-the-analytics-screen) to locate the area
you need.
## Understand the analytics screen
The analytics screen groups measurements and related work into four sections. Select a section
according to the information you are reviewing.
| Section | Use it to… | Areas or measurements named on the screen |
|---|---|---|
| **Dashboard** | Review documentation usage, traffic, and content patterns | **Page views**, **Unique visitors**, **Avg time on page**, **Avg scroll depth**, **Bounce rate**, **Searches**, **Daily Traffic**, **Top Documents**, **Top Searches**, **Devices**, **Traffic Sources**, **Countries**, **Content Insights**, **Trending Documents**, **Scroll Depth**, **Content Gaps**, and **Ghost Documents** |
| **Audit Trail** | Open the project activity view | Review audit events and export the audit log as CSV or JSON |
| **Needs Attention** | Open the follow-up work view | Create tasks from content insights and review task-update results |
| **Export Center** | Open the analytics and documentation export view | Use analytics and documentation export actions and review scheduled-report results |
The main view also presents **+ Create task** controls in the content-insight area.
The following messages can appear when you use task, export, report, or audit actions:
| When it appears | Message |
|---|---|
| A task is created | `Task created — track it in Needs Attention` |
| A task cannot be created | `Couldn't create task: ...` |
| A task update fails | `Update failed` |
| A documentation download starts | ` download started` |
| An analytics export finishes | ` export downloaded` |
| An analytics export fails | `Export failed: ...` |
| A report name is missing | `Please enter a name for the report` |
| A report has no recipient email | `Please add at least one recipient email` |
| A scheduled report is updated | `Scheduled report updated` |
| A scheduled report is created | `Scheduled report created` |
| Saving a scheduled report fails | `Failed to save: ...` |
| A scheduled report runs successfully | `Report run — check your inbox` |
| A scheduled report finishes with another status | `Run finished with status: ...` |
| Running a scheduled report fails | `Run failed: ...` |
| A scheduled-report deletion is requested | `Delete this scheduled report? This cannot be undone.` |
| A scheduled report is deleted | `Scheduled report deleted` |
| Deleting a scheduled report fails | `Delete failed: ...` |
| The audit log is exported as CSV | `Audit log exported as CSV` |
| The audit log is exported as JSON | `Audit log exported as JSON` |
| Audit-log export fails | `Failed to export audit log` |
When you are ready to change the period, continue to [Choose the measurement period](#choose-the-measurement-period).
## Choose the measurement period
The time-period selector changes the period used by the Dashboard measurements.
**Prerequisites**
- The Analytics workspace is open.
**Steps**
1. Select **Dashboard**.
2. Select the period that matches the question you are answering:
| If you need to… | Select |
|---|---|
| Review the most recent short period | **7d** |
| Review the recent month | **30d** |
| Review the recent quarter | **90d** |
| Review the recent year | **1y** |
3. Review the measurement cards and content areas for the selected period.
**Result:** The Dashboard is set to the selected period and its measurement areas are available
for review.
If the view does not load, use [Handle unavailable analytics](#handle-unavailable-analytics).
Otherwise, continue to [Continue from project analytics](#continue-from-project-analytics).
## Handle unavailable analytics
Two conditions change what you can do from the analytics screen: a project context may be missing,
or the analytics data may fail to load.
**Steps**
1. Follow the path that matches the message on screen:
| If you see… | Do this |
|---|---|
| `Select a project` | Choose a project from the header project selector. |
| `Analytics couldn't be loaded.` | Select **Retry**. |
2. Confirm the Analytics view returns.
**Result:** A project context is available, or the failed analytics load has been retried.
After the view returns, continue to [Continue from project analytics](#continue-from-project-analytics).
## Continue from project analytics
After reviewing the available measurements, continue to the page that owns the next question.
- For the meaning and purpose of the analytics views, open [Analytics overview](https://atloria-selfdogfood-3577.atloria.app/p/atloria-selfdogfood-3577-BDFvUbEgc3/user/analytics-overview).
- For analytics sections and export-oriented information, open [Analytics reference](https://atloria-selfdogfood-3577.atloria.app/p/atloria-selfdogfood-3577-BDFvUbEgc3/user/analytics-reference).
# Analytics reference
## Analytics at a glance
Analytics is the area for reviewing activity in published documentation and working with
analytics and documentation exports. The Analytics surface brings together the dashboard,
audit activity, tracked work, reports, and export options. Audit activity is the record of actions
such as publishing, editing, webhooks, exports, and scheduling. Tracked work is selected insight
turned into a task that can be assigned and moved through a status.
| If you need to… | Go to |
|---|---|
| Read usage measures and content insights | [Understand dashboard measures and insights](#understand-dashboard-measures-and-insights) |
| Review audit activity or tracked work | [Review audit activity and tracked work](#review-audit-activity-and-tracked-work) |
| Export analytics or documentation | [Export analytics and documentation](#export-analytics-and-documentation) |
| Create or manage recurring reports | [Create and manage scheduled reports](#create-and-manage-scheduled-reports) |
| Resolve a load or data-availability problem | [Handle unavailable data and errors](#handle-unavailable-data-and-errors) |
| Understand the wider Analytics area | [Analytics overview](https://atloria-selfdogfood-3577.atloria.app/p/atloria-selfdogfood-3577-BDFvUbEgc3/user/analytics-overview) |
| Open project analytics and inspect measurements | [Read project analytics](https://atloria-selfdogfood-3577.atloria.app/p/atloria-selfdogfood-3577-BDFvUbEgc3/user/read-project-analytics) |
| Continue with project change history | [Project changes and audit](https://atloria-selfdogfood-3577.atloria.app/p/atloria-selfdogfood-3577-BDFvUbEgc3/user/project-changes-and-audit) |
| Continue with published documentation | [Published documentation](https://atloria-selfdogfood-3577.atloria.app/p/atloria-selfdogfood-3577-BDFvUbEgc3/user/published-documentation) |
The dashboard includes **Top Documents**, **Top Searches**, **Devices**, and **Traffic Sources**
alongside the main measures. These areas help you read how published documentation is being used
before you choose a follow-up task.
## Before you start
Analytics uses one project context at a time. Select the project whose published documentation you
want to inspect before you read the measures or export data.
**Prerequisites**
- Select a project in the application header.
- Select **Analytics** in the main navigation.
If no project is selected, the page presents an empty state asking you to select a project. Select
**Analytics** in the main navigation to open the Analytics destination.
## Find Analytics and choose a section
Use this procedure when you need to move from the Analytics destination to the part of the surface
that answers your question.
**Prerequisites**
- A project is selected.
**Steps**
1. Select **Analytics** in the main navigation.
2. Select the tab that matches your task.
| If you need to… | Select |
|---|---|
| Read usage measures and content insights | **Dashboard** |
| Review recorded activity | **Audit Trail** |
| Export analytics or documentation | **Export Center** |
| Review tracked tasks and reader feedback | **Needs Attention** |
3. On **Dashboard**, select the time period you want to review: `7d`, `30d`, `90d`, or `1y`.
**Result:** The selected Analytics section is on screen, with the dashboard period set when you
choose **Dashboard**.
## Understand dashboard measures and insights
The dashboard combines summary measures, traffic views, content insights, and reader feedback
signals for published-document activity.
**Prerequisites**
- A project is selected.
- **Dashboard** is selected.
**Steps**
1. Read the summary measures.
| Measure | What it presents |
|---|---|
| **Page views** | Views of published documentation |
| **Unique visitors** | Distinct visitors represented in the period |
| **Avg time on page** | Average time spent on a page |
| **Avg scroll depth** | Average depth reached while reading |
| **Bounce rate** | The bounce-rate percentage for the selected period |
| **Searches** | Searches recorded in the period |
2. Read the activity and traffic panels.
| Panel | What it presents |
|---|---|
| **Daily Traffic** | Traffic across the selected period |
| **Top Documents** | Documents ordered by page views |
| **Top Searches** | Search queries with click-through rate |
| **Devices** | Mobile, tablet, and desktop activity |
| **Traffic Sources** | Where readers came from |
| **Countries** | Where readers are based |
3. Read the content-insight panels.
| Panel | What it presents |
|---|---|
| **Trending Documents** | Documents moving up or down against the previous period |
| **Scroll Depth** | How far readers scroll, including the completion rate |
| **Content Gaps** | Searches that returned zero results |
| **Ghost Documents** | Published documents with zero views in 30 days |
4. Select another dashboard period when you want to compare a different time window.
5. Read the panel message when a panel is loading or has no data.
| Panel state | Message |
|---|---|
| Document views | `No document views yet` |
| Searches | `Loading searches…`; `No search queries yet` |
| Devices, sources, or countries | `No device data yet`; `No source data yet`; `No country data yet` |
| Trends | `Loading trends…`; `Not enough history for a trend yet` |
| Scroll data | `Loading scroll data…`; `No scroll data yet` |
| Content gaps | `Loading gaps…`; `No content gaps — every search returned results` |
| Ghost documents | `Loading ghost docs…`; `Every published doc has readers — nicely done` |
**Result:** The dashboard is filtered to the selected period, and its measures and insight panels
are available for review.
To review recorded activity or tracked work, select **Audit Trail** or **Needs Attention**.
## Review audit activity and tracked work
### Review the audit trail
Use this procedure to inspect recorded activity.
**Prerequisites**
- A project is selected.
**Steps**
1. Select **Audit Trail**.
2. Choose an audit action in the action selector.
3. Select the audit export that matches your file format.
| If you need… | Select |
|---|---|
| A CSV audit file | **Export CSV** |
| A JSON audit file | **Export JSON** |
The export messages are:
- `Audit log exported as CSV; Audit log exported as JSON`.
- `Failed to export audit log`.
**Result:** The audit view is filtered to the selected action, or the selected audit export is
started and its message appears.
### Review tracked work and reader feedback
Use this procedure to work with insights that have become tracked tasks and to read reader feedback.
**Prerequisites**
- A project is selected.
- **Needs Attention** is available in the Analytics tabs.
**Steps**
1. Select **Needs Attention**.
2. Filter the task queue by status using the status selector.
3. Filter the task queue by assignee using the assignee selector.
4. Read each task's status, assignee, and insight type.
5. Select **Resolve** when the task is complete.
6. Select **Dismiss** when the task is not to be pursued.
7. Read **Reader feedback**.
| Feedback area | What it presents |
|---|---|
| **Helpfulness Rate** | The percentage of readers who found the documentation helpful |
| **Lowest-Rated Docs** | Documents needing improvement |
| **Recent Negative Feedback** | Recent negative comments |
8. Read the queue or feedback state when no records are available.
| State | Message |
|---|---|
| Task queue loading | `Loading tasks…` |
| No tasks for all statuses | `No tasks yet — create them from Dashboard insights: ghost docs, content gaps, ticket topics, and low-rated pages.` |
| No tasks for one status | `No {status} tasks.` |
| Audit list loading or empty | `Loading audit events…`; `No audit events` |
| Feedback loading or empty | `Loading feedback…`; `No feedback yet` |
| No low-rated documents | `All docs are doing well — no low-rated pages` |
When a task action succeeds or fails, the page uses `Task created — track it in Needs Attention`,
`Couldn't create task: {error}`, and `Update failed`.
**Result:** The selected task queue or feedback information is on screen, and the task status or
reader-feedback branch is clear.
To export analytics, audit activity, or documentation, select **Export Center**.
## Export analytics and documentation
Use this procedure when you need a file containing analytics information, audit activity, or the
documentation itself.
**Prerequisites**
- A project is selected.
- **Export Center** is selected.
**Steps**
1. In Analytics Reports, choose a **Period**: **Last 7 days**, **Last 30 days**, **Last 90 days**,
or **Last year**.
2. Choose an export **Format**: **PDF** or **CSV**.
3. If you choose **CSV**, choose a **Table**: **Page views** or **Search queries**.
4. Select **Download**.
The analytics export reports `{format} export downloaded` after a successful export, and
`Export failed: {error}` when the export fails.
5. Review Recent exports.
6. In Documentation Exports, choose the version in the version selector.
7. Select the export that matches your purpose.
| If you need to… | Select |
|---|---|
| Download documents as an MDX ZIP archive | **Download .zip** in Markdown Archive |
| Download a self-contained offline HTML site | **Download .zip** in Static HTML Site |
| Generate a paginated document | **Generate PDF** in PDF Document |
8. For PDF Document, choose its options.
| If you need… | Select |
|---|---|
| A contents list | **Table of Contents** |
| A cover page | **Cover Page** |
| A paper size | **A4** or **Letter** |
Documentation exports use **Download .zip** for the Markdown and HTML packages and
**Generate PDF** for the PDF package. The page reports `{format} download started` for a documentation
download. The audit export actions use `Audit log exported as CSV`, `Audit log exported as JSON`,
or `Failed to export audit log`.
**Result:** The selected analytics, audit, or documentation export action is started, and the
corresponding message appears.
To configure a recurring report, continue with Scheduled reports.
## Create and manage scheduled reports
A scheduled report is a recurring analytics report configured with a name, schedule, format,
period, and recipients.
### Create a scheduled report
Use this procedure to configure a recurring report.
**Prerequisites**
- A project is selected.
- **Export Center** is selected.
**Steps**
1. Select **+ New report** in Scheduled reports.
2. Enter the report name in **Name**.
3. Choose Daily, Weekly, or Monthly in **Frequency**.
4. Choose the delivery hour in **Time (UTC)**.
| If you choose… | Choose… |
|---|---|
| Weekly | A value in **Day of week** |
| Monthly | A value in **Day of month** |
| Daily | No day selector |
5. Choose **PDF** or **CSV** in **Format**.
6. Choose `7`, `30`, or `90` in **Period (days)**.
7. Enter at least one address in **Recipients (comma or space separated)**.
8. Select **Create report**.
If **Name** is empty, the page uses `Please enter a name for the report`. If no recipient is
entered, it uses `Please add at least one recipient email`.
**Result:** The scheduled report form closes after a successful save and the page uses
`Scheduled report created`. If saving fails, it uses `Failed to save: {error}`.
### Manage an existing scheduled report
Use this procedure when a scheduled report already appears in Scheduled reports.
**Prerequisites**
- A scheduled report is listed in Scheduled reports.
**Steps**
1. Select **Run now** to run the listed report.
2. Read `Report run — check your inbox` after a successful run.
3. Select **Edit** to change the report settings.
4. Select **Save changes** to save the edited settings.
5. Read `Scheduled report updated` after a successful edit.
6. Select **Delete** to remove the scheduled report.
7. Confirm the deletion in the confirmation prompt.
8. Read `Scheduled report deleted` after a successful deletion.
A failed run uses `Run failed: {error}`. A failed save uses `Failed to save: {error}`. A failed
deletion uses `Delete failed: {error}`.
**Result:** The scheduled report is run, updated, or deleted according to the action you selected.
If an action stops before completing, use [Handle unavailable data and errors](#handle-unavailable-data-and-errors).
## Handle unavailable data and errors
Use this troubleshooting reference when Analytics does not present the expected data or when a
report action stops before completing.
| What you see | What it means | What to do |
|---|---|---|
| `Analytics couldn't be loaded.` and **Retry** | The Analytics overview load did not complete. | Select **Retry**. |
| The project-selection empty state | No project is selected for Analytics. | Select a project in the application header. |
| `Loading…` or another loading message | The corresponding Analytics data is still being requested. | Wait for the panel to finish loading. |
| `No versions` | No documentation version is available in the version selector. | Use the Analytics information that is available, or continue with the page that owns project versions. |
| `Please enter a name for the report` | The scheduled report has no name. | Enter a value in **Name**. |
| `Please add at least one recipient email` | The scheduled report has no recipient address. | Enter an address in **Recipients (comma or space separated)**. |
| `Export failed: {error}` | The analytics export did not complete. | Review the message and retry the export action. |
| `Failed to save: {error}` | The scheduled-report save did not complete. | Review the report fields and select **Create report** or **Save changes** again. |
| `Run failed: {error}` | The scheduled report did not run successfully. | Review the report and select **Run now** again. |
| `Delete failed: {error}` | The scheduled report was not deleted. | Select **Delete** again if the report is still listed. |
## What to do next
When you have finished reading the Analytics surface, continue with the page that owns the next
task:
- Read the broader Analytics concepts in [Analytics overview](https://atloria-selfdogfood-3577.atloria.app/p/atloria-selfdogfood-3577-BDFvUbEgc3/user/analytics-overview).
- Open and inspect project measurements in [Read project analytics](https://atloria-selfdogfood-3577.atloria.app/p/atloria-selfdogfood-3577-BDFvUbEgc3/user/read-project-analytics).
- Continue project activity review in [Project changes and audit](https://atloria-selfdogfood-3577.atloria.app/p/atloria-selfdogfood-3577-BDFvUbEgc3/user/project-changes-and-audit).
- Continue documentation work in [Published documentation](https://atloria-selfdogfood-3577.atloria.app/p/atloria-selfdogfood-3577-BDFvUbEgc3/user/published-documentation).
**Result:** You know which page to open for the next project, document, or Analytics task.
# Screenshots overview
## What screenshot coverage is
Screenshot coverage is the set of visual records associated with a documentation
version. It lets you review which version routes have a current screenshot, which
screenshots were carried forward, and which routes need attention before publishing.
Use this map to choose the next place to work:
| If you need to… | Go to |
|---|---|
| Choose a documentation version and review its screenshot coverage | [Choose a version and status view](#choose-a-version-and-status-view) |
| Understand the gallery, list columns, and preview entry | [Read the gallery and screenshot list](#read-the-gallery-and-screenshot-list) |
| Review or maintain screenshots for a version | [Review version screenshots](https://atloria-selfdogfood-3577.atloria.app/p/atloria-selfdogfood-3577-BDFvUbEgc3/user/review-version-screenshots) |
| Understand Fresh, Carried, Stale, and Missing | [Screenshot status reference](https://atloria-selfdogfood-3577.atloria.app/p/atloria-selfdogfood-3577-BDFvUbEgc3/user/screenshot-status-reference) |
| Review the project versions around the screenshot list | [Project versions](https://atloria-selfdogfood-3577.atloria.app/p/atloria-selfdogfood-3577-BDFvUbEgc3/user/project-versions) |
| Continue after the version is ready to publish | [Published documentation](https://atloria-selfdogfood-3577.atloria.app/p/atloria-selfdogfood-3577-BDFvUbEgc3/user/published-documentation) |
Coverage is calculated from the number of **Fresh** and **Carried** screenshots in the
version summary. The summary also counts **Stale** and **Missing** screenshots, so the
status distribution explains why a version is or is not ready for publishing.
## Before you review screenshots
Before you review screenshot coverage, select the project whose documentation version
you want to inspect. The enterprise surface uses the selected project from the header.
The version list then loads and selects the active version when one is available.
If you plan to use the screenshot maintenance actions, the project also needs a
configured site URL. The screenshot dialog uses that URL with the selected route to
prepare the page address.
| Before you start | Why it matters |
|---|---|
| A project is selected | The enterprise surface uses the project context for its version and screenshot list. |
| A documentation version is available | The screenshot list is fetched for the selected version. |
| A site URL is configured | The screenshot dialog can prepare the address for the selected route. |
When no project is selected, the page shows `No project selected`. When the filtered
enterprise list has no rows, it shows `No screenshots found`. On the version-scoped
surface, an empty filter shows `No screenshots match this filter`. With a project and
version selected, continue to choose the status view.
## Choose a version and status view
Use the version and status controls to move from the project context to the screenshot
rows you need to review.
**Prerequisites**
- A project is selected.
- A documentation version is available.
**Steps**
1. In the enterprise screenshot surface, select the version from the version selector.
The screenshot list reloads for that version, and the current selection, status
filter, and page number reset.
2. Select the status view that matches the work you need to do.
| If you need to… | Select |
|---|---|
| Review every listed route on the version-scoped surface | **All** |
| Review current screenshots | **Fresh** |
| Review screenshots carried from an earlier version | **Carried** |
| Review screenshots whose source may have changed | **Stale** |
| Find routes without a screenshot | **Missing** |
3. If you are using the version-scoped surface, use **Back** to return to the previous
project-version page.
4. In the enterprise surface, choose **10** or **15** to set the number of rows per
page.
5. Select a row checkbox when you need to identify one or more routes for a later
review or maintenance action.
**Result:** The screenshot list shows the selected version and status subset, with the
available rows per page and selected rows visible on screen.
## Read the gallery and screenshot list
After the status view is selected, the screenshot gallery is a visual strip of
screenshots that already have an image.
The list below it connects each screenshot to the route and document it represents.
The version-scoped list provides the same route, document, and status relationship in a
more compact form.
The enterprise surface can show these list columns:
| Column | Use it to… |
|---|---|
| Route path | Identify the application route represented by the screenshot. |
| Document | Identify the documentation page associated with the route. |
| Status | See whether the screenshot is **Fresh**, **Carried**, **Stale**, or **Missing**. |
| Age | See how long ago an available screenshot was taken. |
| Staleness | See the source-change notice for a screenshot whose code may have changed. |
The version-scoped list shows **Route**, **Document**, and **Status**. Select a row to
open **Screenshot details**. In the enterprise gallery, select a thumbnail to open
its preview. The preview can show the image, route, document, status, and date, along
with the available next actions.
When no screenshot has an image, the gallery does not appear. A preview for a route
without an image shows `No screenshot captured yet`. The version-scoped details modal
shows `No screenshot captured` when its selected row has no image.
## Continue to review and maintain coverage
After you identify a route in the list or gallery, choose the next action according to
its status. The
maintenance actions belong to [Review version screenshots](https://atloria-selfdogfood-3577.atloria.app/p/atloria-selfdogfood-3577-BDFvUbEgc3/user/review-version-screenshots);
the meanings of the statuses belong to [Screenshot status reference](https://atloria-selfdogfood-3577.atloria.app/p/atloria-selfdogfood-3577-BDFvUbEgc3/user/screenshot-status-reference).
| If the row is… | Available action |
|---|---|
| **Fresh**, **Carried**, **Valid**, **Stale**, **Warning**, or **Critical** | **View** |
| **Carried**, **Stale**, **Valid**, or **Warning** | **Recapture** |
| **Missing** | **Capture** or **Upload** |
| Selected in the preview with an image and record identifier | **Annotate** |
From a preview, the available controls include **Annotate**, **Recapture**, **Upload
replacement**, **Remove from doc**, and **Close**. For selected rows, the enterprise
surface provides **Recapture**, **Remove placeholders**, and **Mark not needed**. The
version-scoped surface provides **Remove placeholders** and **Clear**.
### Save a screenshot from a route
**Prerequisites**
- A project is selected.
- A site URL is configured.
- A screenshot row is available for the action.
**Steps**
1. In the screenshot dialog, enter the page address in **URL to capture**.
2. Select **Preview**. The dialog starts with `Enter a URL and click Preview` and
shows `Taking screenshot…` while the page loads.
3. Select **Save this screenshot** after the preview is available. Before a preview
loads, the footer says `Preview a URL first, then save`.
4. Choose the action for the preview outcome.
| Preview outcome | Action |
|---|---|
| The dialog shows `Preview failed` | Select **Try again**. |
| The preview loads | Continue to step 5. |
5. Confirm that the dialog shows `Screenshot captured` and `Saved to your project`.
After a preview loads, the footer says `Preview loaded — click Save to use this screenshot`.
**Result:** The screenshot is saved to the project and the dialog shows the saved
screenshot state.
When every placeholder is current, the enterprise surface shows `All screenshots are
fresh — ready to publish.` and provides **Publish v**. Continue to [Published
documentation](https://atloria-selfdogfood-3577.atloria.app/p/atloria-selfdogfood-3577-BDFvUbEgc3/user/published-documentation) when the version is ready for that step.
**Result:** You have identified the version, status, and next page for the screenshot
work you need to do.
# Review version screenshots
## Review screenshots for a project version
A project version is the set of documentation content you are preparing for review. Screenshot
review is the check you make before publishing a documentation version to confirm
that its screenshot placeholders have usable images. Coverage is the percentage used to decide
whether the version's screenshot set needs attention. Use review when a version is ready, when
coverage is below 80%, or when a route's image is missing, stale, or needs replacement.
Screenshot management brings the version's visual records together so you can correct them before
the version moves on to publishing.
| If you need to… | Go to |
|---|---|
| See the screenshot summary during version review | [Finish the version review](#finish-the-version-review) |
| Open the version's screenshot list | [Open the version's screenshots](#open-the-versions-screenshots) |
| Understand the screenshot states | [Screenshot status reference](https://atloria-selfdogfood-3577.atloria.app/p/atloria-selfdogfood-3577-BDFvUbEgc3/user/screenshot-status-reference) |
| Review the broader screenshot feature | [Screenshots overview](https://atloria-selfdogfood-3577.atloria.app/p/atloria-selfdogfood-3577-BDFvUbEgc3/user/screenshots-overview) |
| Manage the project version around the screenshot list | [Project versions](https://atloria-selfdogfood-3577.atloria.app/p/atloria-selfdogfood-3577-BDFvUbEgc3/user/project-versions) |
| Continue with the published result | [Published documentation](https://atloria-selfdogfood-3577.atloria.app/p/atloria-selfdogfood-3577-BDFvUbEgc3/user/published-documentation) |
## Before you start
Before you begin, select the project and version whose route images you want to review. A status is
the label that tells you the condition of a screenshot, such as `Fresh`, `Stale`, or `Missing`.
**Prerequisites**
| Have or know | Why it matters |
|---|---|
| A selected project | The selected project supplies the versions and screenshot list. |
| A documentation version | The selected version supplies the screenshots to review. |
| The project's site URL | Have the site address ready for the route you select. |
| The route or document you need to review | The list identifies each screenshot by its route path and document. |
| The version's current status and coverage | Coverage tells you whether missing or stale images need attention before publishing. |
The version selector lists one option for each version available to the selected project. Each
option shows the version number and its lower-case status. The selector chooses the active version
first when one is available; otherwise, it chooses the first version in the returned list.
The available version choices, their values, and the number of choices depend on the selected
project's version list.
## Open the version's screenshots
If you are already checking the version, open screenshot management from version review. Use the
enterprise screenshot surface when you need the full list and its maintenance actions.
**Prerequisites**
- A project is selected.
- A project version is available.
**Steps**
1. On the version review page, select **Manage screenshots →**.
Screenshot management opens for the project version.
2. In the version selector, choose the version number and status you need to inspect.
The list changes to that version's screenshot placeholders.
**Result:** The screenshot list is open for the project version you are reviewing.
## Understand the screenshot screen
Screenshot management is a working list of route images attached to one documentation version.
Staleness tells you whether a route may have changed and needs a fresh image.
Use the status view to narrow the list, **Rows per page** to choose how many rows to see, and
the table to identify the route, document, status, age, and staleness information.
Use these controls and areas:
| What you need to do | What you use | What appears |
|---|---|---|
| Choose the documentation version | The version selector | One option per available version, showing its version number and lower-case status |
| Narrow the list | The status filter | `All`, `Fresh`, `Carried`, `Stale`, and `Missing` |
| Set the number of rows | **Rows per page** | `10` or `15` |
| Select rows | **Select all on page** or a row checkbox | A selected-row count and bulk actions when at least one row is selected |
| Inspect a listed screenshot | **View** | Opens route and status details |
| Correct a missing screenshot | **Capture** or **Upload** | Add an image to the missing row |
| Refresh an existing image | **Recapture** | Available for carried, stale, warning, or valid rows |
After you identify the status and available action, continue with [Review and update a screenshot](#review-and-update-a-screenshot).
When you open a preview, you can select **Close**. When the image is available, you can also select
**Annotate**, **Recapture**, **Upload replacement**, or **Remove from doc**. Without a selected
project, you see `No project selected` and a direction to select a project from the header. When
the filtered list has no rows, you see `No screenshots found`.
## Review and update a screenshot
Use this procedure when a row needs inspection or when its image must be replaced. Choose the
action that matches the row's status; the list does not offer the same row actions for every state.
**Prerequisites**
- A project is selected.
- The screenshot list is open for the version you want to maintain.
- Have the project's site URL ready before selecting **Capture**.
**Steps**
1. In the row you need to inspect, select **View**.
Check the details before choosing a correction.
2. Read the staleness analysis before choosing a correction.
A preview without an image says `No screenshot captured yet`. Read the matching message:
`Route component unchanged — likely valid.` for a current route,
`No screenshot has been captured for this route yet.` for a missing image. For a changed route,
choose a fresh image.
3. Choose the action that matches your correction.
| If you need to… | Select |
|---|---|
| Add callouts to an available image | **Annotate** |
| Refresh the route image | **Recapture** |
| Upload an image file | **Upload** or **Upload replacement** |
| Remove the screenshot placeholder | **Remove from doc** |
| Leave without changing the image | **Close** or **Cancel** |
4. If you selected **Recapture**, review the page address in the URL field.
The field is labelled `Enter the URL to capture…` and accepts the address to preview.
5. If you selected **Recapture**, select **Preview**.
The preview loads before the replacement can be saved.
6. If you selected **Recapture**, select **Save this screenshot**.
The success state says `Screenshot captured` and `Saved to your project`.
7. If you selected **Upload** or **Upload replacement**, choose the replacement image through the
file picker.
**Result:** The selected screenshot is reviewed or updated.
After updating a screenshot, use its status to choose a bulk action or recover from a message.
## Handle status and bulk-action branches
Screenshot status tells you which correction route is available. Use the status shown in the row,
not the route name, to choose the next action.
| Status or selection | Actions available |
|---|---|
| `Missing` | **View** is not listed; use **Capture** or **Upload**. |
| `Fresh` | Use **View** to inspect the current image. |
| `Carried` | Use **View** or **Recapture** to inspect or refresh the carried image. |
| `Stale` | Use **View** or **Recapture** to inspect the changed route and refresh its image. |
| `Valid` | Use **View** or **Recapture** to inspect or refresh the image. |
| `Warning` | Use **View** or **Recapture** to inspect or refresh the image. |
| At least one row selected | Use **Recapture**, **Remove placeholders**, or **Mark not needed** from the bulk-actions bar. |
**Prerequisites**
- The screenshot list is open.
- For a bulk action, at least one row is selected.
**Steps**
1. Select the row checkbox for each screenshot you want to handle together.
The bulk-actions bar appears with the selected count.
2. Choose one bulk action.
| If you need to… | Select |
|---|---|
| Refresh the selected routes | **Recapture** |
| Remove the selected placeholders | **Remove placeholders** |
| Keep the selected routes out of the required screenshot work | **Mark not needed** |
3. Review the resulting list before continuing with version review.
The selected rows are cleared after the bulk request, and the list reloads.
**Result:** The selected rows reflect the bulk action, and the list is ready for another review.
When a message appears, follow the matching row below.
## Recover after an error
Read the message you see, then choose the matching action below.
| What you see | What to do |
|---|---|
| `Loading review data…` | Wait for the review data to finish loading. |
| `Review failed to load.` / `Reload the page to try again.` | Reload the page. |
| `No project selected` | Select a project from the header dropdown. |
| `No screenshots found` | Choose another status view or confirm that the selected version has screenshot placeholders. |
| `Preview failed` | Select **Try again** after correcting the URL. |
| `Enter a URL and click Preview` | Enter the page address, then select **Preview**. |
| `Preview a URL first, then save` | Preview the address before selecting **Save this screenshot**. |
| `Preview loaded — click Save to use this screenshot` | Select **Save this screenshot**. |
| `Screenshot coverage is below 80%.` / `Consider capturing missing screenshots before publishing.` | Select **Capture** for missing screenshots before publishing. |
**Prerequisites**
- The message you need to address is visible.
**Steps**
1. Read the message and find its matching action in the table.
2. Select the named recovery control, such as **Try again**, or reload the page when the message
instructs you to do so.
3. Return to the screenshot row and review its status again.
**Result:** The message has a matching corrective action, and the screenshot row is ready for review.
When the screenshot summary is ready, continue with [Finish the version review](#finish-the-version-review).
## Finish the version review
When screenshot coverage is ready, return to the version review actions. Resolve flagged documents
before publishing. When screenshot coverage is below 80% and placeholders exist, you see
`Screenshot coverage is below 80%.` and `Consider capturing missing screenshots before publishing.`
**Prerequisites**
- You have reviewed the screenshot summary for the version.
- You know whether missing or stale screenshots still need attention.
**Steps**
1. Choose the next version action.
| If you need to… | Select |
|---|---|
| Leave the version in draft form | **Save as draft** |
| Send the version for another person's review | **Request approval** |
| Publish a version with no flagged documents | **Publish v** |
After selecting **Request approval**, you see `Approval requested. A reviewer will be notified.`
**Result:** The version is saved as a draft, sent for approval, or published through the action you
selected.
## Message inventory
| Message | Owning screen |
|---|---|
| `Source code may have changed. UI could look different now.` | `Screenshots` |
# Screenshot status and review information
Screenshot status information tells you which documentation-version screenshots
are current, carried forward, outdated, or still absent. Use it to decide which
screenshots need review or follow-up action.
| If you need to… | Go to |
|---|---|
| Review a version's screenshots end to end | [Review version screenshots](https://atloria-selfdogfood-3577.atloria.app/p/atloria-selfdogfood-3577-BDFvUbEgc3/user/review-version-screenshots) |
| Understand the screenshot gallery and versions | [Screenshots overview](https://atloria-selfdogfood-3577.atloria.app/p/atloria-selfdogfood-3577-BDFvUbEgc3/user/screenshots-overview) |
## Before you start
Select a project and version before reviewing its screenshot coverage.
**Prerequisites**
- A project is selected in the header.
- A documentation version is available for that project.
- You know which status or screenshot route you need to review.
The page requests screenshot data only after a project and version are selected.
The version selector chooses an active version first; when no active version is
available, it chooses the first available version. The available rows and status
counts come from the selected project and version.
## Find screenshots to review
Use this procedure when you need to locate screenshots in the selected version.
**Prerequisites**
- A project and documentation version are selected.
**Steps**
1. In the version selector, select the documentation version you want to review.
2. In the status filters, select the status that matches the review you need.
3. In the page-size area, select the number of rows to display on each page.
4. Select the checkbox beside a row when you need to include that screenshot in a bulk action.
5. Select **Select all on page** when you need to include every displayed row.
If no row matches the selected filter, the page shows **No screenshots found** and
the message `Placeholders appear here as soon as a document declares one.`
**Result:** The list shows the screenshots matching your selected version and
status filter, with selected rows marked.
## Understand the status screen
The status screen compares a version's screenshot placeholders with the screenshots
currently available for those routes.
The summary can show counts for **Fresh**, **Carried**, **Stale**, and **Missing**,
along with a coverage percentage.
| What you are checking | Where to read it |
|---|---|
| The route represented by a placeholder | Route path |
| The document that declares it | Document |
| The current screenshot state | Status |
| Find out how recent the image is | Age |
| Whether the source may have changed | Staleness |
| The overall counts and percentage | The summary and coverage bar |
The status values **Fresh**, **Carried**, **Stale**, **Missing**, **Valid**,
**Warning**, and **Critical** describe the available review states. A row with a
stale, warning, or critical state shows Code may have changed in its staleness
column. A carried or valid row shows **Valid** there.
When no project is selected, the page shows **Screenshots**, **No project
selected**, and `The project dropdown in the header sets the project for every
enterprise surface.` When the list is loading, it shows `Loading screenshots…`.
The page does not show the screenshot list while it is loading. When the filtered
list has no rows, it shows **No screenshots found** instead of the table.
## Open and review a screenshot
A screenshot preview is the detail view for one qualifying row. Use it to inspect
the information attached to that row before deciding what to do with it.
**Prerequisites**
- The screenshot row is visible in the selected version and filter.
**Steps**
1. In the row's action area, select **View**.
2. Identify the route, document, status, and capture date for the screenshot.
3. In Staleness analysis, check whether the route is likely valid, missing a
screenshot, or may have changed.
4. Select **Close** to return to the screenshot list.
The preview can also offer **Annotate**, **Recapture**, **Upload replacement**,
**Remove from doc**, and **Close**. **Annotate** is available when the preview has
an image asset and an id. **View** is available for fresh, carried, valid, stale,
warning, and critical rows.
**Result:** The screenshot's review details are visible.
## Choose the action for the screenshot status
Use this procedure to choose a follow-up action without treating every status the
same way.
**Prerequisites**
- You have reviewed the row's Status and Staleness information.
| If the row is… | Use |
|---|---|
| **Missing** | **Capture** or **Upload** |
| **Carried**, **Stale**, **Warning**, or **Valid** | **Recapture** |
| **Fresh** or **Critical** | **View** |
| Selected with other rows | Bulk **Recapture**, **Remove placeholders**, or **Mark not needed** |
**Steps**
1. Choose the action for the selected row or rows:
| If you need to… | Select |
|---|---|
| Add an image for a missing row | **Capture** or **Upload** |
| Refresh a carried, stale, warning, or valid image | **Recapture** |
| Apply one action to selected rows | **Recapture**, **Remove placeholders**, or **Mark not needed** |
| Remove one placeholder from the preview | **Remove from doc** |
The bulk action bar appears when at least one row is selected. During bulk
recapture, the page shows `Recapturing screenshots`, a count of completed items,
and `Cancel remaining`.
**Result:** The appropriate action is selected for the selected status and rows.
## Add an image or markup
Use **Capture** when a route needs a new image. An annotation is explanatory
markup added to an existing screenshot; use **Annotate** to add it.
### Add a screenshot image
**Prerequisites**
- A screenshot row has **Missing** status.
- The project Site URL is configured.
**Steps**
1. Enter the address you want to preview.
2. Select **Preview** to load the page image.
3. Choose what to do after the preview step:
| If you need to… | Select |
|---|---|
| Save the loaded image | **Save this screenshot** |
| Leave without saving | **Cancel** |
The modal starts with a URL derived from the selected route and project Site URL.
Before a preview begins, it shows `Enter a URL and click Preview`; while the
preview is loading, it shows `Taking screenshot…`.
Before a preview is loaded, its footer says `Preview a URL first, then save`.
After a preview loads, it says `Preview loaded — click Save to use this screenshot`.
After saving, the modal shows `Screenshot captured` and `Saved to your project`.
**Result:** After a successful save, `Screenshot captured` and `Saved to your project`
appear.
### Annotate a screenshot
**Prerequisites**
- A preview has an image asset and an id.
**Steps**
1. In the preview footer, select **Annotate**.
2. In the annotation tool control, select **Select**, **Box**, **Arrow**, **Mask**, or **Marker**.
3. Select an annotation color.
4. Drag across the screenshot to draw the selected annotation.
5. For a selected non-marker annotation, enter an optional label.
6. For a selected mask annotation, select **Blur (vs solid bar)** when the mask should use the blur setting.
7. Choose one action for the selected annotation.
| If you need to… | Select |
|---|---|
| Remove the selected annotation | **Delete** |
| Save the annotations currently shown | **Save (N)** |
| Leave the editor without saving | **Cancel** |
**Result:** The selected annotation is deleted, saved, or left unchanged according
to your choice.
## Troubleshoot a stopped action
Match the message you see to the corrective action in the table.
| What you see | What it means | What to do |
|---|---|---|
| `No Site URL configured. Go to Project Settings → Basic Information → Site URL to set it.` | The project setting needed for capture is absent. | Configure the Site URL in project settings. |
| `Failed to load preview. Check the URL and try again.` or `Preview failed` | The preview request did not load the requested URL. | Check the URL and select **Try again**. |
| `Failed to save screenshot` | Saving the screenshot did not complete. | Return to the preview and try **Save this screenshot** again. |
| `Upload failed` | The image upload did not complete. | Try **Upload** again with the intended image file. |
| `Action failed` | A bulk action did not complete. | Recheck the selected rows and retry the bulk action. |
| `Remove failed` | Removing the placeholder did not complete. | Return to the preview and retry **Remove from doc**. |
| `No screenshot has been captured for this route yet.` | No image exists for this row. | Select **Capture** or **Upload** for the route. |
| `Source code may have changed. UI could look different now.` | The image may no longer match the current page. | Select **Recapture** and review the new image. |
| `Route component unchanged — likely valid.` | The route has no reported source change. | Continue reviewing the screenshot or close the preview. |
## What to do next
After status review, use the page that owns the next task:
- Use [Review version screenshots](https://atloria-selfdogfood-3577.atloria.app/p/atloria-selfdogfood-3577-BDFvUbEgc3/user/review-version-screenshots) for the
end-to-end task of reviewing screenshots attached to a project version.
- Use [Screenshots overview](https://atloria-selfdogfood-3577.atloria.app/p/atloria-selfdogfood-3577-BDFvUbEgc3/user/screenshots-overview) for the gallery and its
relationship to project versions.
- Use [Project versions](https://atloria-selfdogfood-3577.atloria.app/p/atloria-selfdogfood-3577-BDFvUbEgc3/user/project-versions) for version context and selection.
# Videos overview
## Videos at a glance
A narrated video is a page walkthrough that combines a video, optional captions, chapters, and
interactive step markers. The **Videos** destination is where you choose the project whose videos
you want to view; a public video opens in a chaptered player.
| If you need to… | Go to |
| --- | --- |
| Open the project video list | [Find the Videos destination](#find-the-videos-destination) |
| Choose a project | [Find the Videos destination](#find-the-videos-destination) |
| Identify the player and its controls | [Understand the video surface](#understand-the-video-surface) |
| Select chapters or captions while reviewing | [Review a video](#review-a-video) |
| Follow the complete review procedure | [Review a video](https://atloria-selfdogfood-3577.atloria.app/p/atloria-selfdogfood-3577-BDFvUbEgc3/user/review-a-video) |
| Read the available video actions | [Video reference](https://atloria-selfdogfood-3577.atloria.app/p/atloria-selfdogfood-3577-BDFvUbEgc3/user/video-reference) |
| Open a public player with a video ID | Public video viewer |
The signed-in **Videos** destination is available in the application navigation. A public viewer
opens when you provide a video ID. Its available controls are **Chapters**, **Captions on**,
**Captions off**, **Download**, and **Jump to this step**.
## Before you start
Before opening the project video list, select the project whose narrated walkthroughs you want to
view. A public player uses a video ID instead of the project selector.
| Before you start | What it determines |
| --- | --- |
| A current project | The project video area can load the project's videos. |
| A signed-in session with an access token | The project video list can be requested. |
| A selected video | The player, editor, and video actions can appear. |
| A video URL | The player and share, embed, and download actions can appear. |
| A captions URL | The captions control can appear. |
| Chapters | The chapter list and chapter buttons can appear. |
| Hotspots | Interactive step markers can appear while playback is near their time. |
| A video ID | The public viewer can request one video. |
## Find the Videos destination
The **Videos** destination is the signed-in entry point for videos belonging to the selected project.
| Control | Options |
| --- | --- |
| **Select a project from the header dropdown** | The list holds returned project names; each appears under **Recent** or **All Projects**. |
**Prerequisites**
- You are signed in.
- You know which project you want to view.
**Steps**
1. Select **Videos** in the application navigation.
2. Open **Select a project from the header dropdown**.
3. Use **Search projects…** to narrow the project options.
4. Select a returned project-name option under **Recent** or **All Projects**.
| If you are starting with… | Use… |
| --- | --- |
| A project you selected recently | **Recent** |
| A project outside the recent list | **All Projects** |
| A known public video ID | The public video viewer |
5. If the search returns no match, refine the search text after `No projects found` appears.
**Result:** The Videos destination opens with the selected project as the context for the project
video surface.
Continue to the video surface to identify the player and the controls available for that video.
## Understand the video surface
The video surface is the place where you play a selected walkthrough and, when its data supplies
the related features, use chapters, captions, hotspots, sharing, embedding, downloading, or
narration-script controls.
| Area | What you can use there |
| --- | --- |
| Selected video | The native video player when the video has a video URL. |
| Sharing row | **Copy share link**, **Copy embed code**, and **Download** when a video URL is available. |
| Narration script | **Intro**, each Step field, and **Outro** multiline fields when the video has an editable script. |
| Script actions | **Save script** when a draft script exists, and **Re-render video** when a video is selected. |
| Viewer bar | **Chapters**, **Captions on**, **Captions off**, and **Download** when the video includes the related chapters or captions. |
| Step markers | **Jump to this step** when an active hotspot has no custom label. A custom hotspot label replaces that default label. |
The project surface can also show an empty project state, an empty video list, a selected video with
no editable script, or no share and embed row when the selected video has no video URL. The public
viewer presents its player only after the video request succeeds. After identifying the available
controls, continue to the review procedure.
## Review a video
A video review is a focused watch of a page walkthrough using its player, chapters, captions, and
interactive step markers. Use the detailed [Review a video](https://atloria-selfdogfood-3577.atloria.app/p/atloria-selfdogfood-3577-BDFvUbEgc3/user/review-a-video) procedure after
you have opened the Videos destination.
**Prerequisites**
- A video is selected.
- The selected video has a video URL if you want to use the player.
**Steps**
1. Select a video from the project video list.
2. Use the native video player controls to start playback.
3. Select a chapter button to seek to that chapter and continue playback from its start.
4. Select **Captions off** or **Captions on** to change the captions display when captions are available.
5. Select an active **Jump to this step** marker to seek to the step it represents.
**Result:** The player follows the selected chapter and playback position, captions use the selected
setting, and an active step marker can move playback to its associated step.
If the surface displays a different message, use the matching branch in the next section.
## When the surface differs
The Videos destination changes its content according to the project and video data available to it.
Use the message on screen to choose the matching branch.
| What appears | What to do |
| --- | --- |
| `No project selected` | Select a project from the header dropdown. |
| `Loading videos…` | Wait for the project video list to finish loading. |
| `Turn your manual into narrated videos` | Select **Generate narrated videos** when that action is available. |
| `Generate narrated videos` | Select **Generate narrated videos** when that action is available on the empty Videos surface. |
| `This video has no editable script.` | Review the video without script editing. |
| `Loading…` | Wait for the public player request to finish. |
| `This video isn’t available.` | Check the public video ID and open the public viewer again. |
| `Could not copy to the clipboard.` | Check the browser clipboard permission before trying the copy action again. |
| `Copied!` | The selected share link or embed code has been copied. |
| `Script saved. Re-render to update the video.` | Select **Re-render video** to refresh the saved narration. |
| `Editing the narration script is a Pro feature. Upgrade to edit.` | Use a plan that permits narration-script editing before selecting **Save script**. |
| `Could not save the script.` | Check the script and try **Save script** again. |
| `Re-render queued — the video will refresh shortly.` | Wait for the video to refresh. |
| `Re-rendering video is a Pro feature. Upgrade to re-render.` | Use a plan that permits video re-rendering before selecting **Re-render video**. |
| `Could not queue a re-render.` | Try **Re-render video** again. |
| A published project share link | Use **Copy share link** for the live page link. |
| An unpublished project share link | Use the standalone video player link returned by **Copy share link** in the sharing row. |
The empty project surface also says `The project dropdown in the header sets the project for every
enterprise surface.` and `Select a project from the header dropdown to view its narrated walkthrough
videos.`
## What to do next
After you identify the surface, continue with the page that matches your next job.
| Next job | Page |
| --- | --- |
| Select and review a narrated video | [Review a video](https://atloria-selfdogfood-3577.atloria.app/p/atloria-selfdogfood-3577-BDFvUbEgc3/user/review-a-video) |
| Look up video fields, actions, and messages | [Video reference](https://atloria-selfdogfood-3577.atloria.app/p/atloria-selfdogfood-3577-BDFvUbEgc3/user/video-reference) |
| Move between application destinations | [Navigation basics](https://atloria-selfdogfood-3577.atloria.app/p/atloria-selfdogfood-3577-BDFvUbEgc3/user/navigation-basics) |
The detailed review, sharing, embedding, script-saving, re-rendering, captions, chapter, and hotspot
actions depend on the video and project data available when you use the surface.
# Review a video
## Review a video
A narrated walkthrough video is an auto-generated recording of a manual page, with a
spoken voiceover and synchronized captions. Open a narrated walkthrough video when you
need to watch one associated with a project, share it, embed it, or download it.
The **Videos** destination opens the project’s video list and its selected-video
surface. The **public player** is the chaptered player for one video.
| If you need to… | Go to |
| --- | --- |
| Open the project’s video list | [Videos overview](https://atloria-selfdogfood-3577.atloria.app/p/atloria-selfdogfood-3577-BDFvUbEgc3/user/videos-overview) |
| Select and review a video | Find and open a video, then select it to review |
| Use a share link, embed code, or download | Find and open a video, then use its actions |
| Read the available video actions | [Video reference](https://atloria-selfdogfood-3577.atloria.app/p/atloria-selfdogfood-3577-BDFvUbEgc3/user/video-reference) |
| Open a public player | Open the public player for the video ID |
## Before you start
You need a signed-in session and a current project before the Videos destination can
load that project’s videos. The project supplies the context for the enterprise video
surface. The public player needs the video ID for the video you want to review.
**Prerequisites**
- Sign in to Atloria.
- Select a project in the header dropdown.
- Have a saved video available in that project if you want to review a player.
- Have the video ID if you are opening the public player directly.
The screen can also open without a selected project or without any videos. In those
cases, use the branch that matches the message on screen rather than looking for a
video player.
## Find and open a video
The **Videos** destination is the signed-in entry to a project’s video list. Use it
when you are starting from the application navigation. Use the public player when you
already have a video ID.
**Steps**
1. Choose how you want to open the video.
| If you have… | Open… |
| --- | --- |
| Access to the application navigation | The **Videos** destination |
| A public video ID | The **public player** for that video ID |
2. If the project’s video list has finished loading, select the video list item you want to review.
**Result:** The selected video opens in the project surface, or the public player opens
the video’s player.
## Understand the video screen
The project surface combines a list of page videos with the selected video’s player,
sharing actions, and script area. The public player contains the player output for one
video.
| Area | What you use it for |
| --- | --- |
| Video list | Select a video. Each item shows its page slug, locale, and status. |
| Player | Watch the selected video when a video URL is available. |
| Share row | Copy a share link, copy embed code, or download the video. |
| Script area | Edit **Intro**, each Step field, and **Outro** when an editable script is available. |
| Public player | Watch one available public video for its video ID. |
The script area has no required marker for **Intro**, Step fields, or **Outro**. It has
no grid, table, or confirmation dialog. The public player has no fields; it displays
the loading state, unavailable state, or chaptered player.
The project surface can show **Narrated videos** while it loads. When loading finishes,
the selected-video area depends on the project’s video list and the selected video’s
available data.
## Review the video
Select a video to watch it and use the actions beside its player.
**Prerequisites**
- The Videos destination shows at least one video.
- The selected video has a video URL for player, share, embed, and download actions.
**Steps**
1. Select the video list item you want to review.
2. Use the player controls to watch the selected video.
3. Choose the goal that matches what you want to do.
| Goal | Control |
| --- | --- |
| Share the video | **Copy share link** |
| Embed the video | **Copy embed code** |
| Download the video | **Download** |
**Result:** The selected video remains open with its player and the available sharing
or download action completed.
## Handle the available video states
The video surface changes according to the project, video, script, and public-player
state. Choose the row that matches what you see.
| What you see | What to do |
| --- | --- |
| **No project selected** | Select a project from the header dropdown, then return to **Videos**. |
| **Loading videos…** | Wait for the video list to finish loading. |
| **Turn your manual into narrated videos** | Use the available generation route: select **🎬 Generate narrated videos** when it is shown, or select **Open project to generate →**. |
| **This video has no editable script.** | Review the player and use the available sharing actions. |
| **Loading…** on the public player | Wait for the public video request to finish. |
| **This video isn’t available.** | Check the video ID or return to the project’s Videos destination. |
**Prerequisites**
- The message or state in the first column is visible.
**Steps**
1. Choose the row that matches the message or state on your screen.
2. Follow the action in that row.
**Result:** The next screen or available video action matches the project, video,
script, or public-player state you selected.
## When a video action fails
Use the exact message on screen to identify the action that needs attention.
| Message | Meaning | What to do |
| --- | --- | --- |
| `Could not copy to the clipboard.` | The copy action did not complete. | Try **Copy share link** or **Copy embed code** again. |
| `Editing the narration script is a Pro feature. Upgrade to edit.` | Script editing is restricted by the plan. | Upgrade to edit the narration script. |
| `Could not save the script.` | The script save did not complete. | Try **Save script** again. |
| `Re-rendering video is a Pro feature. Upgrade to re-render.` | Re-rendering is restricted by the plan. | Upgrade to re-render the video. |
| `Could not queue a re-render.` | The re-render request did not queue. | Try **Re-render video** again. |
| `Script saved. Re-render to update the video.` | The script save completed. | Select **Re-render video** when you are ready to update the video. |
| `Re-render queued — the video will refresh shortly.` | The re-render request was queued. | Wait for the video to refresh. |
| `Loading videos…` | The project video list is loading. | Wait for the list to load. |
| `Loading…` | The public video request is loading. | Wait for the public player to load. |
| `This video isn’t available.` | The public video request did not return an available video. | Check the video ID or return to the Videos destination. |
## What to do next
After reviewing a video, continue with the action details in [Video reference](https://atloria-selfdogfood-3577.atloria.app/p/atloria-selfdogfood-3577-BDFvUbEgc3/user/video-reference)
or return to [Videos overview](https://atloria-selfdogfood-3577.atloria.app/p/atloria-selfdogfood-3577-BDFvUbEgc3/user/videos-overview) for the wider Videos destination and
embedded viewing surface.
Use the project surface for the selected video’s player, sharing row, script area, and
download action. Use the public player for the chaptered player associated with one
video ID.
**Result:** The next video action or the Videos destination is ready.
# Video reference
## Video actions at a glance
The **Videos** surface brings together narrated walkthrough videos for your manual pages.
Use it to play a video, share it, download it, edit its spoken script, or request a
re-render after changing the script.
The page introduces the video workflow in three stages:
| If you need to… | Go to |
|---|---|
| Start generating narrated walkthroughs | **Turn on video** |
| Let Atloria record each page | **Atloria records** |
| Adjust the spoken script and update the result | **Edit & re-render** |
| Find the available actions for an existing video | [Understand the video surface](#understand-the-video-surface) |
| Open and play a video | [Find a video](#find-a-video), then [Review a video](https://atloria-selfdogfood-3577.atloria.app/p/atloria-selfdogfood-3577-BDFvUbEgc3/user/review-a-video) |
| Share or download a video | [Choose and use a video action](#choose-and-use-a-video-action) |
## Before you start
The project selected in the header determines which enterprise surfaces you work with.
The Videos page can be loading, empty, or populated. A selected video can have a player,
sharing and download actions, and an editable script; each area appears only when its required
video data is present.
| What is true | What you see |
|---|---|
| No project is selected | **Videos**, **No project selected**, and a hint telling you that the project dropdown sets the project for every enterprise surface |
| Videos are loading | **Narrated videos** and `Loading videos…` |
| The list is empty | The generation explanation and either **Generate narrated videos** or **Open project to generate** |
| A selected video has a video URL | A video player and distribution actions |
| The project has no published share slug | The share link uses the standalone player, and the page displays `Publish the project for a live-page share link.` |
| A selected video exists | The selected video's editor area |
Use the condition that matches your screen, then continue by finding a video or following
the empty-state path.
## Find a video
Open **Videos** in the Enterprise area. The page landed at `https://atloria.dev/app/enterprise/videos`.
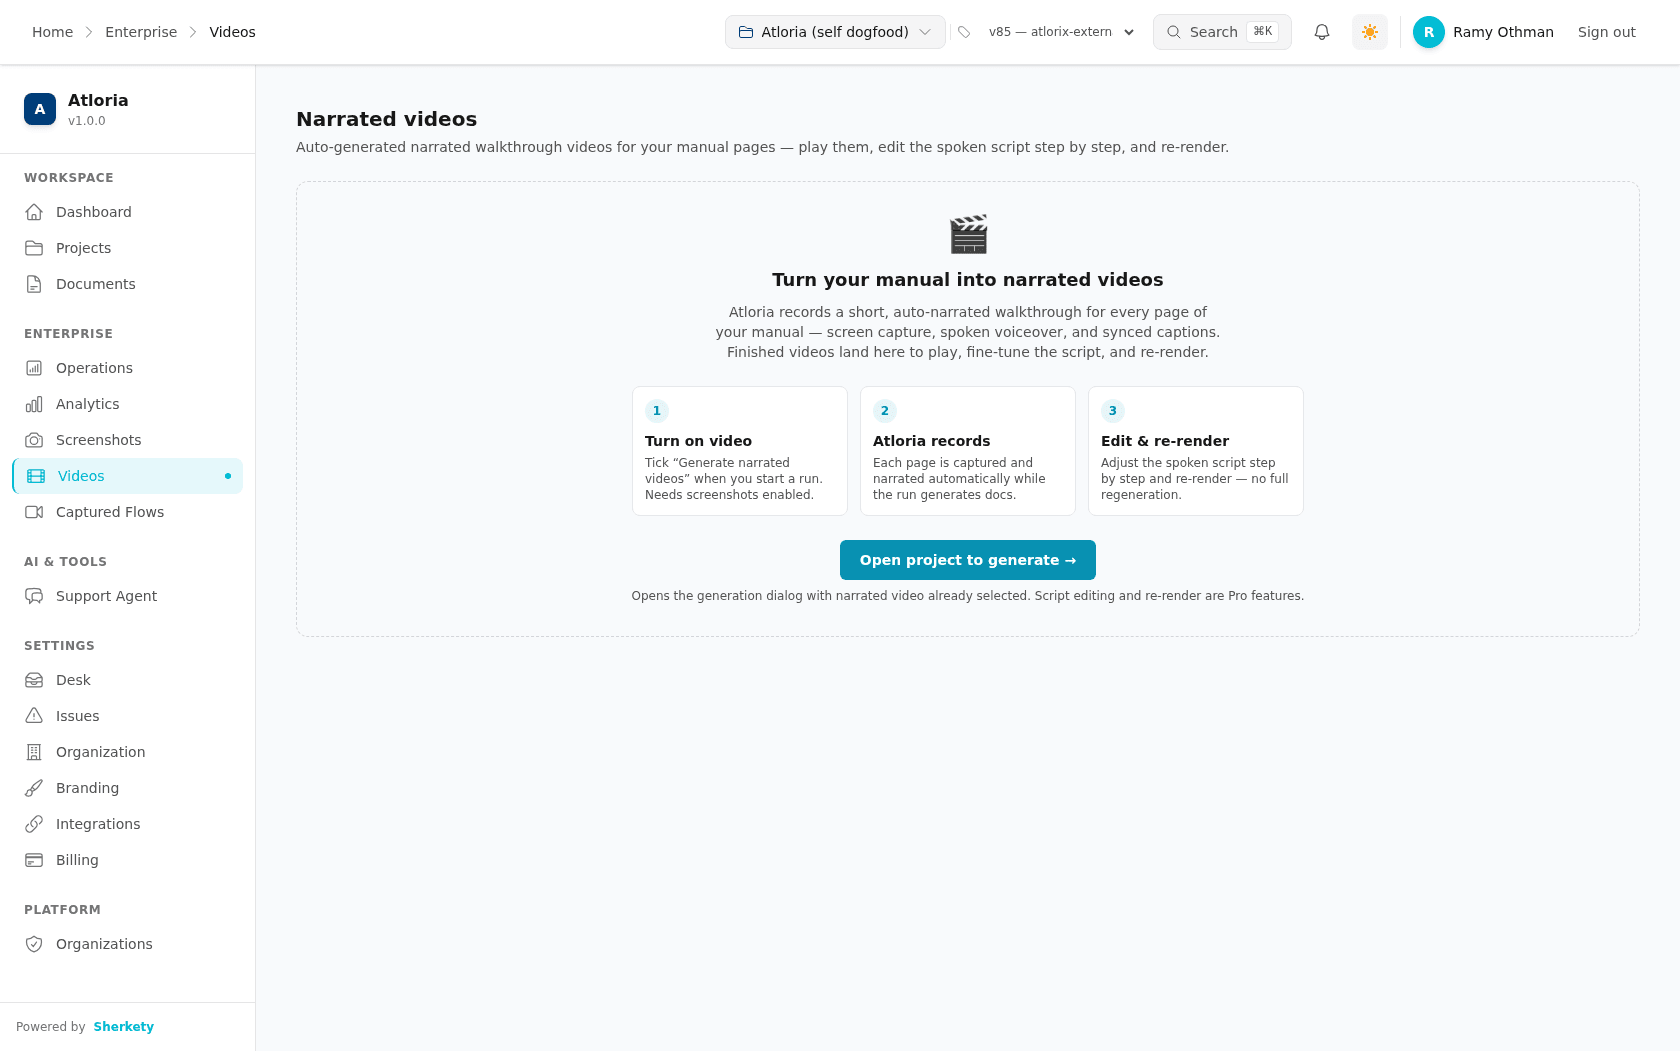
**Prerequisites**
- You have a project selected in the header.
- You know whether you are looking for an existing video or the empty-state generation path.
**Steps**
1. Select **Videos** in the Enterprise area.
2. Choose the path that matches what is on screen.
| What you see | Action |
|---|---|
| A video row | Read its slug and status, then select the row. |
| An empty list | Select **Open project to generate**. |
**Result:** The Videos surface is open with the selected video, or the empty-state
generation path is open.
## Understand the video surface
A video surface is the place where you play a selected walkthrough and work with its
spoken narration. The player and distribution area appear when the selected video has a
video URL. The script area contains one multiline field for **Intro**, one for each
script step in the corresponding script field, and **Outro** when the selected video has an editable
script.
The script fields have no required marker or field-level pattern rule. A video without
an editable script displays `This video has no editable script.` in place of those
fields. The video list uses selectable rows identified by slug and status.
| Surface area | What it contains | When it appears |
|---|---|---|
| Player | Native video controls | The selected video has a video URL |
| Distribution | **Copy share link**, **Copy embed code**, and **Download** | The selected video has a video URL |
| Script | **Intro**, step fields, and **Outro** | The selected video has an editable script |
| Editor actions | **Save script** and **Re-render video** | A selected video exists |
## Choose and use a video action
Use the action that matches the result you need. Sharing and downloading use a selected
video with a player. Editing changes the spoken script, and re-rendering updates the video
from that script. Script editing and re-render are Pro features.
### Share or download a video
**Prerequisites**
- A video is selected.
- The selected video has a player and distribution area.
**Steps**
1. Select one action from the table.
| Goal | Action |
|---|---|
| Share a link | **Copy share link** |
| Embed the video | **Copy embed code** |
| Download the file | **Download** |
**Result:** The selected sharing or download action is complete.
### Edit and save the spoken script
**Prerequisites**
- A video is selected.
- The selected video has an editable script.
**Steps**
1. Enter the opening narration in **Intro**.
2. Enter each step's narration in the corresponding script field.
3. Enter the closing narration in **Outro**.
4. Select **Save script**.
**Result:** The page displays `Script saved. Re-render to update the video.`
### Re-render the video
**Prerequisites**
- A video is selected.
- The script changes have been saved.
**Steps**
1. Select **Re-render video**.
**Result:** The page displays `Re-render queued — the video will refresh shortly.`
## Handle unavailable video actions
The available actions depend on the project and selected video. Use the branch that
matches what is on screen rather than looking for controls that belong to another state.
**Prerequisites**
- The Videos surface is open.
**Steps**
1. Choose the available path in the table that matches the displayed state.
| What you see | Available path |
|---|---|
| **No project selected** | Select a project from the header dropdown. |
| **Turn your manual into narrated videos** | Select **Open project to generate**. |
| `This video has no editable script.` | Use the player or distribution actions that are present. |
| `Publish the project for a live-page share link.` | Use the standalone player link until the project is published. |
| `Could not copy to the clipboard.` | Use the share or embed action again. |
| Script editing is unavailable | Use the available viewing, sharing, or download action. |
**Result:** The available path for the displayed state is clear, from selecting a project
or opening the generation path to using the actions that are present.
If an action displays an error or plan message, continue with the matching message in the
troubleshooting table.
## When a video action goes wrong
Match the message on screen to the action you used.
| Message | What it means | Next action |
|---|---|---|
| `Could not copy to the clipboard.` | The requested text was not copied. | Select **Copy share link** or **Copy embed code** again. |
| `Could not save the script.` | The script save did not complete. | Review the script fields and select **Save script** again. |
| `Could not queue a re-render.` | The re-render request did not enter the queue. | Select **Re-render video** again. |
| `Editing the narration script is a Pro feature. Upgrade to edit.` | Script editing requires Pro. | Use the available video actions or upgrade before editing. |
| `Re-rendering video is a Pro feature. Upgrade to re-render.` | Re-rendering requires Pro. | Use the existing video or upgrade before re-rendering. |
## Continue from the Videos surface
For broader destination context and related surfaces, open [Videos overview](https://atloria-selfdogfood-3577.atloria.app/p/atloria-selfdogfood-3577-BDFvUbEgc3/user/videos-overview).
For the procedure for opening and playing a video, open [Review a video](https://atloria-selfdogfood-3577.atloria.app/p/atloria-selfdogfood-3577-BDFvUbEgc3/user/review-a-video).
# Recorded walkthroughs
A recorded walkthrough is a reusable set of product instructions that you can turn into a
draft manual page. It follows operational work, alongside the other enterprise surfaces that
preserve what happened during documentation work.
| If you need to… | Go to |
|---|---|
| Reach the operational starting point | [Operations overview](https://atloria-selfdogfood-3577.atloria.app/p/atloria-selfdogfood-3577-BDFvUbEgc3/user/operations-overview) |
| Check the project and open the destination | Select a project, then open the destination |
| Understand the list and its empty state | Read the flow list and its empty state |
| Review an existing walkthrough | Open the review page |
| Check available flow actions and states | Read the flow reference |
| Decide what to do after opening the destination | Choose a follow-up action |
## Before you start
**Prerequisites**
- Have access to the application.
- Select a project in the header. The destination uses that project when it loads
the list.
- If no project is selected, the destination displays `No project selected` and the guidance
`Select a project from the header dropdown to record and manage walkthrough flows.`
| Message | When it appears | Guidance |
|---|---|---|
| `The project dropdown in the header sets the project for every enterprise surface.` | No project is selected | Select a project from the header dropdown. |
The list loads only for a selected project and an available signed-in session. While the
list is loading, the destination displays `Loading recorded flows…`. A selected project is
present in the header when the destination opens. Open the destination from the application
navigation to continue.
## Find the destination
Operations is the workspace destination for operational information. The flow destination is
reached from the same navigation group.
### Open the destination
Use this procedure when you are starting from the application navigation.
**Prerequisites**
- Have access to the application.
**Steps**
1. Open **Operations** from the application navigation.
2. Open **Captured Flows** from the enterprise navigation group.
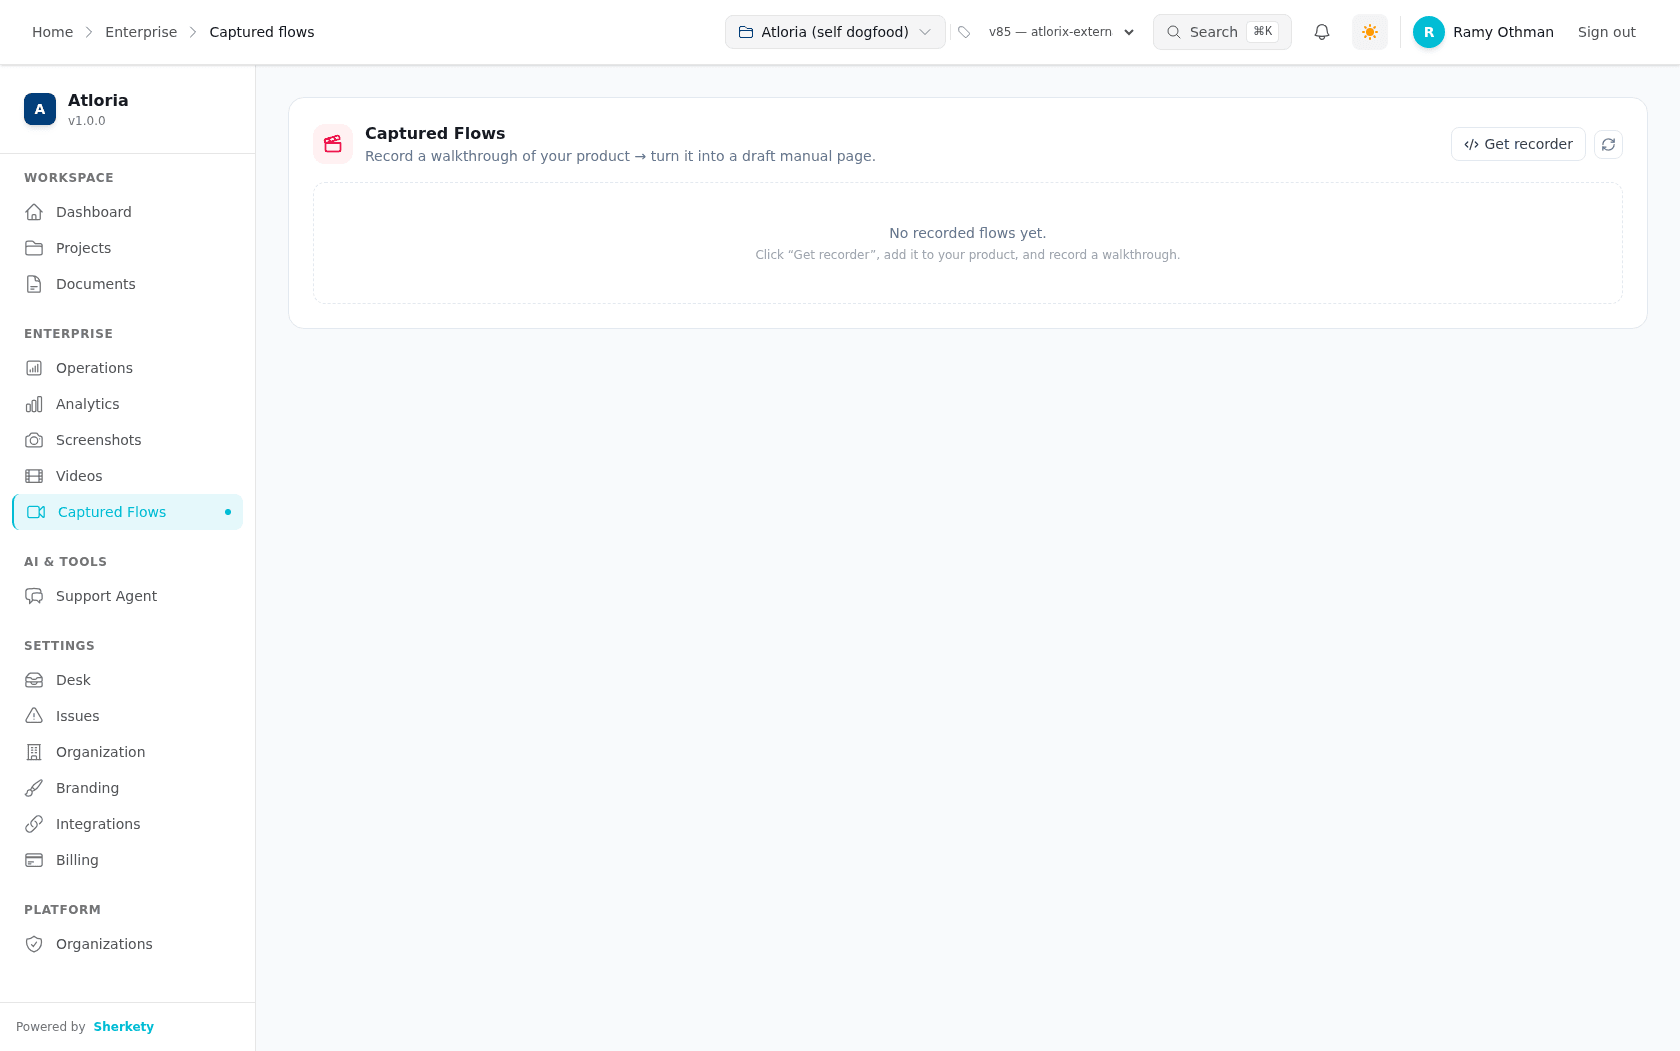
**Result:** The destination opens and is ready to read as a list or empty state.
## Understand the flow list
The flow list organizes each recorded walkthrough as a flow row, with its identity and
starting point visible before you choose a follow-up action.
| Information | What it tells you |
|---|---|
| Flow name | Identifies the recorded walkthrough. |
| Step count | Shows how many steps the walkthrough contains. |
| Starting URL | Shows the URL where the walkthrough begins. |
| Created date | Belongs to the flow data but is not shown in the list. |
The destination can show the following areas and states:
| What you see | What it means |
|---|---|
| **Get recorder** | Opens the recorder instructions. |
| **Refresh** | Reloads the flow list. |
| Empty state | The selected project has no flows in the list. |
| A flow row | A recorded flow is available for review and follow-up actions. |
| Recorder instructions | The script tag, the recorder bookmarklet, and the token note are open. |
| No recorder instructions | The recorder panel is closed. |
When the recorder instructions are open, **Copy** copies the script tag, and **Atloria Recorder**
is the draggable recorder bookmarklet. The instructions also show the note to
replace `YOUR_MEMBER_TOKEN` with a member JWT. The recorder redacts passwords, tokens,
emails, and card numbers before anything is sent.
When no flows are recorded, the destination displays `No recorded flows yet.` and the guidance
`Click “Get recorder”, add it to your product, and record a walkthrough.` With the recorder
instructions closed, the flow rows and their row actions are not shown. The destination is ready
without a visible loading spinner.
Choose a follow-up action when a flow row is available.
## Choose the next step
The actions attached to a flow row depend on whether a recorded flow is available. The
destination explains where to start; detailed work belongs on the review page for the chosen
action.
| If you need to… | Choose |
|---|---|
| Review an existing walkthrough | Open the review page |
| Check the flow's available states and actions | Read the flow reference |
| Return to the operational context | Operations overview |
When a flow row is available, the row can offer **Edit steps**, **Walkthrough**, **Generate
draft page**, and **Delete**. **Edit steps** opens the step editor. **Walkthrough** opens the
guided-tour area. **Generate draft page** creates a draft document. **Delete** asks for
confirmation before removing the recorded flow.
The actions can produce these messages:
| Situation | Message |
|---|---|
| Draft creation succeeds | `Draft page "{title}" created. Find it in your documents (state: DRAFT).` |
| Draft creation fails | `Could not create draft: {error}` |
| Deletion confirmation opens | `Delete this recorded flow?` |
## When loading stops
The message identifies the surface and the state that needs attention.
| Message | Where it appears | What to do |
|---|---|---|
| `Operations failed to load. {error}` | Operations | The Operations overview returned an error. |
| `Loading operations…` | Operations | The Operations overview is still loading. |
| `Could not create draft: {error}` | Flow list | Draft creation returned an error. |
| `Delete this recorded flow?` | Flow list | A deletion confirmation is open. |
These messages distinguish an Operations loading state from a flow action state.
# Recorded walkthroughs
A recorded walkthrough preserves a sequence for inspection, captioning, redaction,
preview, or draft-page generation.
| If you need to… | Go to |
|---|---|
| Review and edit recorded steps | [Review and edit the recorded steps](#review-and-edit-the-recorded-steps) |
| Preview the walkthrough | [Review the walkthrough](#review-the-walkthrough) |
| Follow the downstream documentation work | [Documentation generation lifecycle](https://atloria-selfdogfood-3577.atloria.app/p/atloria-selfdogfood-3577-BDFvUbEgc3/user/documentation-generation-lifecycle) |
## Before you start
Before you start, select the project that contains the flow you want to review. A
recorded flow must already be available. If the flow includes screenshots, those images
are available for redaction review; a step without a screenshot cannot show the redaction
canvas.
**Prerequisites**
- Select a project from the project selector.
- Have a recorded flow available in that project.
- Have the step captions, order, redaction regions, or locales you want to review ready.
- Keep the step list saved before you use **Re-shoot** or **Localize**.
## Open the flow
Use **Captured Flows** to locate a recorded flow and choose its next review action.
**Prerequisites**
- A project is selected.
**Steps**
1. In the main navigation, select **Captured Flows**.
2. Confirm the heading **Captured Flows**.
3. Select **Refresh** to reload the recorded-flow list when needed.
4. Choose the path that matches the list:
| If you see… | Do this |
|---|---|
| **No recorded flows yet.** | Select **Get recorder**, select **Copy** for the script tag, or drag **Atloria Recorder** to the bookmarks bar, then follow `Click “Get recorder”, add it to your product, and record a walkthrough.` |
| A recorded flow | Continue with step 5. |
5. Find the recorded flow you want to review in the list.
6. Select **Edit steps** to inspect or change its recorded steps.
7. Select **Walkthrough** to review the flow as an interactive tour.

**Result:** The selected flow is open in either an editing surface or the walkthrough
surface.
## Review and edit the recorded steps
The step editor is where you review the order and presentation of each recorded step.
Each step can carry a caption and redaction regions; the editor also provides locale
reshoot controls.
**Prerequisites**
- A recorded flow is open.
- The step list has no unsaved edits before you use **Re-shoot** or **Localize**.
**Steps**
1. Select **Edit steps** for the flow.
2. Review the steps in their current order.
3. Select **Move up** or **Move down** to change a step's position.
4. Enter the step text in **Flow caption**.
5. Select **Redact** to open the screenshot area.
6. Drag across a region to add a redaction area.
7. Select an existing redaction area to remove it.
8. Enter the locales in **Locales** as a comma-separated list.
9. Select **Save changes** to save the order, captions, and redaction regions.
10. Select **Re-shoot** after saving when a step needs a new screenshot.
11. Select **Close editor** when you finish reviewing the steps.
The **Locales** field starts with `fr-FR, ar-SA`. Select **Localize** to generate the
localized screenshot set after saving your edits.
After a successful save, the screen shows `Saved. Re-generate the draft to pick up the
new order and captions.` A successful re-shoot message reads `Step`, the step number, an
optional locale in parentheses, and `re-shot.`
After a successful localization, it shows `Localized set generated:` followed by the
screenshot count and locale count.
**Messages**
| Action | Message | Meaning and corrective action |
|---|---|---|
| Save changes | `Saved. Re-generate the draft to pick up the new order and captions.` | The edits are saved. Regenerate the draft when you need the new order and captions. |
| Re-shoot | `Step` followed by the step number and, when applicable, the locale in parentheses, then `re-shot.` | The new screenshot was created for the step. Continue reviewing the step. |
| Localize | `Localized set generated:` followed by the screenshot count and locale count. | The localized screenshot set was generated. Continue reviewing the localized results. |
| Loading | `Loading recorded flows…` — the flow list is loading. | Wait for the list to finish loading. |
| Delete | `Delete this recorded flow?` — the selected flow is ready for deletion confirmation. | Confirm that the selected flow is the one to remove, then select **Delete** only when removal is intended. |
**Result:** The step editor shows the reviewed order and saved captions and redaction
regions. After localization, the screen displays the generated screenshot count and
locale count.
## Review the walkthrough
The walkthrough is an interactive tour of the recorded flow. Use it when you want to
review the sequence as a guided experience rather than inspect step details.
**Prerequisites**
- A recorded flow is open.
**Steps**
1. Select **Walkthrough** for the flow.
2. Review the interactive tour panel and its embed snippet.
3. Choose one review action:
| If you need to… | Do this |
|---|---|
| Copy the embed snippet | Select **Copy**. |
| Preview the walkthrough | Select **Preview tour**, then select **Stop** when the preview is running. |
**Result:** The walkthrough review surface is open, and the preview is either running or
stopped according to the control you selected.
## When review cannot continue
Use the message on screen to choose the corrective action. The conditions below cover
empty flow lists, missing screenshots, unsaved edits, minimum-step protection, and
validation or service failures.
| What you see | What it means | What to do |
|---|---|---|
| `No project selected` | A project has not been selected. | Select a project from the header project selector. |
| `The project dropdown in the header sets the project for every enterprise surface.` | The header project selector controls the selected project. | Select the project that contains the flow. |
| `Select a project from the header dropdown to record and manage walkthrough flows.` | The project-selection prompt is waiting for a choice. | Select a project from the header dropdown. |
| `No recorded flows yet.` | The selected project has no flow row to open. | Select **Get recorder** to open the recorder instructions. |
| `Click “Get recorder”, add it to your product, and record a walkthrough.` | A flow must be recorded before it can be reviewed. | Select **Get recorder**, then record a walkthrough. |
| `No screenshot yet — re-shoot this step first, then mark regions to black out.` | The step has no screenshot for redaction review. | Select **Re-shoot** before marking redaction regions. |
| `A flow must keep at least one step.` | The last remaining step cannot be deleted. | Keep at least one step in the flow. |
| `Save your edits before re-shooting so the recipe matches.` | The step list has unsaved edits. | Select **Save changes**, then select **Re-shoot**. |
| `Save your edits before localizing.` | The step list has unsaved edits. | Select **Save changes**, then select **Localize**. |
| `Enter at least one locale (e.g. fr-FR, ar-SA).` | The **Locales** field contains no locale. | Enter at least one locale, then select **Localize**. |
| `Could not create draft:` followed by error details | Draft-page generation returned an error. | Read the error details, then try again. |
| `Re-shoot failed:` followed by error details | The reshoot request returned an error. | Check the step state and try **Re-shoot** again after saving. |
| `Localize failed:` followed by error details | The localization request returned an error. | Check the locale list and try **Localize** again after saving. |
**Result:** You know which condition stopped the review and which control or correction
to use next.
## Choose what happens next
After reviewing a flow, keep it unchanged, save step edits, or continue to draft-page
generation. Draft generation creates a draft page that you can find in your documents.
**Prerequisites**
- The flow review is complete.
- Save any step changes before continuing.
**Steps**
1. Select **Save changes** if you changed the order, captions, or redaction regions.
2. Select **Generate draft page** to create a draft page from the reviewed flow.
3. Open [Documentation generation lifecycle](https://atloria-selfdogfood-3577.atloria.app/p/atloria-selfdogfood-3577-BDFvUbEgc3/user/documentation-generation-lifecycle) to
continue with the downstream documentation workflow.
When draft generation succeeds, the success message includes the generated draft title
after `Draft page` and continues with `created. Find it in your documents (state: DRAFT).`
If it fails, the screen shows `Could not create draft:` followed by error details.
**Result:** The flow remains reviewed with its saved changes, or a draft page is ready for
the next documentation step.
# Available actions
## States and actions
A recorded walkthrough can be inspected, edited, replayed as a walkthrough, turned into a draft
manual document, or removed from the selected project.
The enterprise destination follows operational, analytics, screenshot, and video work. It uses
the project selected in the header and shows either an empty state or actions for each recorded
flow.
| If you need to… | Go to |
|---|---|
| Check the selected project's list | [Find a flow](#find-and-recognize-a-flow) |
| Get material for recording a walkthrough | [Prepare recorder material](#prepare-recorder-material) |
| Change captions, order, or redactions | [Edit steps and screenshots](#edit-steps-and-screenshots) |
| Preview or embed a walkthrough | [Preview a walkthrough](#preview-a-walkthrough) |
| Create a draft manual document or remove a flow | [Generate a draft or remove a flow](#generate-a-draft-or-remove-a-flow) |
## Before you start
**Prerequisites**
| Have this ready | Why it matters |
|---|---|
| A project selected in the header | The destination uses the current project when it loads the flow list. |
| A saved flow | The row actions appear for a recorded flow; an empty project shows `No recorded flows yet.` |
| No unsaved step edits | **Re-shoot** and **Localize** require the current step list to be saved first. |
| At least one step in the flow | The flow must keep at least one step when you edit its steps. |
When no project is selected, the page displays **No project selected** and the message `The project
dropdown in the header sets the project for every enterprise surface.` It also provides the
instruction `Select a project from the header dropdown to record and manage walkthrough flows.`
## Find and recognize a flow
A flow summary identifies a recorded walkthrough before you choose an action. The summary carries
the flow name, its starting URL, and its step count.
**Prerequisites**
- Have access to the application.
- Select a project in the header.
**Steps**
1. Select **Captured Flows** from the enterprise navigation.
2. Select **Refresh** to reload the selected project's flow list.
3. Read the flow name, starting URL, and step count when a flow row is present.
4. Read `No recorded flows yet.` when the selected project has no recorded flows.

While the list is loading, the page displays `Loading recorded flows…`.
**Result:** The page shows either a flow summary, ready for the actions below, or
`No recorded flows yet.`, ready for recorder setup.
## Prepare recorder material
The recorder material lets you add Atloria's recorder to the product you want to walk through.
Opening this panel does not change a recorded flow.
**Prerequisites**
- Have a project selected.
- Open **Captured Flows** from the enterprise navigation.
**Steps**
1. Select **Get recorder**.
2. Read the generated script tag in the recorder panel.
3. Select **Copy** to copy the script tag.
4. Drag **Atloria Recorder** to the browser bookmarks bar when you want to use the bookmarklet.
**Result:** The recorder panel remains open with the script tag and the draggable **Atloria
Recorder** link available. When a saved flow is available, continue with the flow action you need.
## Edit steps and screenshots
The step editor is the place to refine a saved flow before you use its steps in a walkthrough or
draft. It lets you change captions and order, mark image regions for redaction, re-shoot a step,
and create localized screenshots.
**Prerequisites**
- Have a recorded flow row available.
- Keep the flow at one or more steps; the editor cannot save an empty step list.
- Save edits before selecting **Re-shoot** or **Localize**.
**Steps**
1. Select **Edit steps** on the recorded flow.
2. Enter the wording for a step in its caption field.
3. Choose one step-list action:
| If you need to… | Select |
|---|---|
| Move the step earlier in the list | **Move up** |
| Move the step later in the list | **Move down** |
| Open the redaction editor | **Redact** |
4. Drag across the screenshot to add a redaction region.
5. Select an existing redaction region to remove it.
6. Select **Save changes**.
7. Choose one saved-flow action:
| If you need to… | Select |
|---|---|
| Request screenshots for one or more locales | **Localize** |
| Recapture one step screenshot | **Re-shoot** |
| Leave the step editor | **Close editor** |
Enter one or more comma-separated locale values before selecting **Localize**. Select
**Re-shoot** only after saving the current edits.
**Result:** The step editor shows the saved order, captions, and redaction choices; a successful
save displays `Saved. Re-generate the draft to pick up the new order and captions.`
## Preview a walkthrough
A walkthrough is an in-product guided tour. Use the walkthrough panel to preview it on the current
page or copy the embed snippet for a product page.
**Prerequisites**
- Have a recorded flow row available.
- Keep the flow's step list saved before starting the preview.
**Steps**
1. Select **Walkthrough** on the recorded flow.
2. Select **Preview tour**.
3. Select **Stop** when you finish checking the preview.
4. Select **Copy** in the walkthrough panel to copy the tour embed snippet.
**Result:** The walkthrough panel shows the interactive-tour controls; **Stop** is shown while
the preview is active, and **Preview tour** is shown when it is not active.
## Generate a draft or remove a flow
These choices have different outcomes: generating a draft creates a draft manual document, while
deleting removes it after confirmation.
**Prerequisites**
- Have a recorded flow row available.
- Choose the action that matches your intended outcome before selecting the control.
**Steps**
1. Choose one outcome:
| If you need to… | Select |
|---|---|
| Keep the flow and create a manual draft | **Generate draft page** |
| Remove the recorded flow | **Delete** |
2. Open [Documents overview](https://atloria-selfdogfood-3577.atloria.app/p/atloria-selfdogfood-3577-BDFvUbEgc3/user/documents-overview) when you selected **Generate draft page**.
3. Check the confirmation `Delete this recorded flow?` when you selected **Delete**.
**Result:** Draft generation leaves a draft document in the documents area; deletion removes the
recorded flow after the confirmation step.
## When an action fails
Use the exact message on screen to choose the corrective action.
| What you see | What it means | What to do |
|---|---|---|
| `No project selected` | The destination has no current project. | Select a project from the header dropdown. |
| `The project dropdown in the header sets the project for every enterprise surface.` | The destination needs a project selected in the header. | Select a project from the header dropdown, then open **Captured Flows**. |
| `Loading recorded flows…` | The selected project's flow list is loading. | Wait for the list to finish loading, then select **Refresh** if the list does not appear. |
| `Delete this recorded flow?` | The destination is asking you to confirm flow deletion. | Confirm only when you intend to remove the recorded flow. |
| `Flow not found` | The selected flow is no longer available. | Return to **Captured Flows** and select **Refresh**. |
| `You do not have access to this project` | The selected project is not available to you. | Select a project you can access, then open **Captured Flows**. |
| `A flow must keep at least one step.` | The step list is empty. | Keep at least one step, then select **Save changes**. |
| `Save your edits before re-shooting so the recipe matches.` | The step list has unsaved edits. | Select **Save changes**, then select **Re-shoot**. |
| `Save your edits before localizing.` | The step list has unsaved edits. | Select **Save changes**, then select **Localize**. |
| `Enter at least one locale (e.g. fr-FR, ar-SA).` | The locale field contains no usable value. | Enter at least one locale, then select **Localize**. |
The destination also displays `Saved. Re-generate the draft to pick up the new order and captions.`
after a successful step-list save.
## What happens next
After you review or refine a flow, choose the next action based on the outcome you need.
| If you need to… | Continue with… |
|---|---|
| Refine the recorded steps | **Edit steps**, then **Save changes** |
| Check the flow as a guided tour | **Walkthrough**, then **Preview tour** |
| Put the flow into a manual draft | **Generate draft page**, then [Documents overview](https://atloria-selfdogfood-3577.atloria.app/p/atloria-selfdogfood-3577-BDFvUbEgc3/user/documents-overview) |
| Delete the recording | **Delete**, then confirm `Delete this recorded flow?` |
# Desk overview
## What Desk is for
Desk is the project support work hub for finding queues, reviewing threads, and choosing a
linked action. A queue groups work by the response or follow-up needed; a thread is the support
work item you open before choosing what to do next.
| If you need to… | Go to |
|---|---|
| Understand the Desk workspace | Before you start, then Understand the Desk screen |
| Find work waiting for a response | Find Desk and choose a queue |
| Triage or act on a work item | [Work from Desk](https://atloria-selfdogfood-3577.atloria.app/p/atloria-selfdogfood-3577-BDFvUbEgc3/user/work-from-desk) |
| Understand states and transitions | [Desk states and actions](https://atloria-selfdogfood-3577.atloria.app/p/atloria-selfdogfood-3577-BDFvUbEgc3/user/desk-states-and-actions) |
| Move between application destinations | [Navigation basics](https://atloria-selfdogfood-3577.atloria.app/p/atloria-selfdogfood-3577-BDFvUbEgc3/user/navigation-basics) |
| Get help with a product question | [Getting help](https://atloria-selfdogfood-3577.atloria.app/p/atloria-selfdogfood-3577-BDFvUbEgc3/user/getting-help) |
## Before you start
Prerequisites
- Have a project selected. Without one, the page uses the no-project state instead of the Desk
workspace.
- Have the information you need for the work item in front of you. The Desk uses a reply
composer, a Docs Copilot question field for the documentation assistant, and a duplicate-target
ticket field when those areas are available.
- Expect the queues, counts, thread rows, SLA indicators, knowledge-gap cards, customer fields,
and enabled controls to depend on the project data and account setup available to you.
The reply composer accepts Markdown. In internal-note mode it uses the placeholder
`Internal note — only your team sees this…`; otherwise it uses `Reply to the customer… (Markdown
supported)`. The Docs Copilot question field uses `Ask the docs…`. The duplicate dialog accepts a
numeric ticket value and does not submit a non-positive or non-numeric value.
When ready, continue to Find Desk and choose a queue.
## Find Desk and choose a queue
Desk is the destination for the project's support work. Select the **Desk** navigation entry, then
choose the queue that matches the work you need to review.
Prerequisites
- Have a project selected.
- Know whether you are looking for a first response, a next response, investigation, customer
waiting, paused work, completed work, your work, or unassigned work.
Steps
1. Select the **Desk** navigation entry.
2. Select one queue from the table.
| If you need to… | Select |
|---|---|
| Work on fresh work awaiting a first response | **Needs first response** |
| Work on a thread awaiting the next response | **Needs next response** |
| Review work being investigated | **Investigating** |
| Review work waiting for the customer | **Waiting for customer** |
| Review work paused for later | **Paused for later** |
| Review work completed today | **Done today** |
| Review fresh triage work | **Triage** |
| Review your threads | **Your threads** |
| Review unassigned work | **Unassigned** |
**Result:** The selected queue is the work list you use for the next review.
Continue to Understand the Desk screen to identify the areas used for that queue.
## Understand the Desk screen
The Desk screen is organized around selecting work, opening a thread, and choosing the next
action. The queue area provides the queue choices; the thread list provides work rows; the open
thread area provides the conversation and composer; and the context area provides **Docs Copilot**,
**Customer**, and **Activity**.
Use the following areas to orient yourself:
| Area | What to look for |
|---|---|
| Queue area | Queue names and their counts. |
| Thread list | A work row with its title or description, type, response-time countdown when one appears, origin, relative time, and comment count. |
| Open thread area | The thread title and number, timeline, reply composer, and status choices. |
| Context area | **Docs Copilot**, **Customer**, and **Activity** tabs. |
| Reply composer | A multiline field for a reply or an internal note. |
| Docs Copilot question field | A single-line question field with the placeholder `Ask the docs…`. |
| Duplicate dialog | A numeric ticket field with the placeholder `Ticket # (e.g. 13)`. |
When the selected queue is **Triage**, the list includes the triage shortcut row with the keys
`1`, `2`, `3`, and `H`. When a thread is open, the context tabs and thread actions become
relevant to that thread. A non-empty reply enables the reply actions; an empty reply or an active
send keeps those actions unavailable.
After identifying the area you need, continue to Choose what to do next.
## Choose what to do next
Use this decision table after you select a queue or open a thread. Each option points to the
action that matches the work you are trying to complete.
| If you need to… | Use |
|---|---|
| Select a work item | Select the thread row. |
| Add an internal-only note | **Internal note** |
| Check Markdown before sending | **Preview** |
| Return from preview to editing | **Write** |
| Send a customer reply | **Send** |
| Send a reply and complete the thread | **Send & done** |
| Move the thread to investigation | **Investigating** in the status bar |
| Wait for the customer | **Waiting for customer** in the status bar |
| Pause the thread | **Paused** in the status bar, then choose a snooze option |
| Complete the thread | **Done** in the status bar |
| Wake paused work | **Wake now** |
| Reopen completed work | **Reopen** |
| Merge a duplicate thread | **Merge into ticket** in the duplicate dialog |
| Ask the documentation assistant a question | Enter a question in the Docs Copilot field and use its send control |
| Add a completed copilot answer to the reply | **Add to composer** |
| Review customer details | **Customer** |
| Review the activity history | **Activity** |
| Review a cited source | Select its source entry, then **Back** to return to the answer |
Prerequisites
- Open the thread before using thread-specific actions.
- Enter reply text before using **Send**, **Send & done**, or **Preview**.
- Enter a ticket number before using **Merge into ticket**.
Steps
1. Choose the row in the table that matches the work you need to complete.
2. Select the named control in that row.
**Result:** The relevant Desk action, status choice, context tab, or linked procedure is ready
for the work item.
For the detailed triage and work-item procedure, continue to [Work from Desk](https://atloria-selfdogfood-3577.atloria.app/p/atloria-selfdogfood-3577-BDFvUbEgc3/user/work-from-desk).
For state changes and their lifecycle meaning, continue to
[Desk states and actions](https://atloria-selfdogfood-3577.atloria.app/p/atloria-selfdogfood-3577-BDFvUbEgc3/user/desk-states-and-actions).
If the page instead shows an empty or conditional state, continue to Handle empty and conditional
states.
## Handle empty and conditional states
The page can take different paths depending on the selected project, queue contents, open thread,
thread type, email availability, and current thread state. Use the condition that matches what is
on screen.
| When… | The page uses or offers… |
|---|---|
| No project is selected | `No project selected`; `Pick a project from the switcher to open the Desk.`; `The Desk shows one project’s support threads at a time.` |
| A queue has no threads and no knowledge-gap cards | `Nothing here`; `New threads land in Triage and Needs first response.`; `This queue is clear.` |
| No thread is open | `No thread open` |
| A thread has no reporter email and internal-note mode is off | `No email on file — the customer can only see this on their tracking page.` |
| The queue is **Triage** | The triage shortcut row and its queue-specific actions. |
| The queue is **Triage** or **Needs first response** and gap proposals exist | Knowledge-gap cards after the first three thread rows, including **Draft with AI** when available. |
| The thread type is `QUESTION` | The Docs Copilot automatic-question path when its service is available. |
| The copilot answer includes a `SRC` source | The source-preview warning `Code/internal source — review before sharing with the customer.` |
| The thread state is paused | **Wake now** |
| The thread state is done | **Reopen** |
Steps
1. Use the matching row to follow the offered action or message.
**Result:** You are using the queue, empty state, thread state, or conditional action that
matches the current Desk situation.
If an action does not respond as expected, continue to When Desk does not respond as expected.
## When Desk does not respond as expected
Use the exact message shown to choose the next step. The messages below cover empty states,
missing customer contact information, Docs Copilot, and duplicate handling.
| Message | What to do |
|---|---|
| `No project selected` | Use the project switcher before opening Desk. |
| `Pick a project from the switcher to open the Desk.` | Select a project, then return to Desk. |
| `The Desk shows one project’s support threads at a time.` | Continue after selecting the project whose work you need. |
| `Nothing here` | Choose another queue if you need to review different work. |
| `New threads land in Triage and Needs first response.` | Check `Triage` or `Needs first response` for new work. |
| `This queue is clear.` | Continue with another queue or another task. |
| `No thread open` | Select a thread row before using thread-specific actions. |
| `No email on file — the customer can only see this on their tracking page.` | Use an internal note when the response must stay with your team, or follow the product's tracking-page process. |
| `Copilot needs the docs index — generate docs first.` | Stop the copilot request and continue to [Documentation generation lifecycle](https://atloria-selfdogfood-3577.atloria.app/p/atloria-selfdogfood-3577-BDFvUbEgc3/user/documentation-generation-lifecycle). |
| `Couldn’t load this page preview.` | Return to the copilot answer with `Back` and continue without the preview. |
| `Drafts only — nothing sends without you.` | Review a draft before using a reply control. |
| `Open a thread to see context here.` | Select a thread before using the context area. |
| `Mark #ATL-{ticketNumber} as duplicate` | Enter the canonical ticket number in the duplicate dialog. |
| `Closes this thread with a pointer into the canonical one — the full thread stays readable.` | Confirm that the target ticket is the canonical thread before selecting `Merge into ticket`. |
If the Desk page does not open, start with [Getting help](https://atloria-selfdogfood-3577.atloria.app/p/atloria-selfdogfood-3577-BDFvUbEgc3/user/getting-help). For supported
recovery paths, continue to [Common issues and solutions](https://atloria-selfdogfood-3577.atloria.app/p/atloria-selfdogfood-3577-BDFvUbEgc3/user/common-issues-and-solutions).
When the message is resolved, continue to Continue with the right Desk procedure.
## Continue with the right Desk procedure
Desk is the starting point for choosing work, not a replacement for each focused procedure. After
you identify the queue, thread, and intended action, continue with the page that owns that job.
| Continue when you need to… | Page |
|---|---|
| Triage and act on work items | [Work from Desk](https://atloria-selfdogfood-3577.atloria.app/p/atloria-selfdogfood-3577-BDFvUbEgc3/user/work-from-desk) |
| Understand states and actions | [Desk states and actions](https://atloria-selfdogfood-3577.atloria.app/p/atloria-selfdogfood-3577-BDFvUbEgc3/user/desk-states-and-actions) |
| Move between application destinations | [Navigation basics](https://atloria-selfdogfood-3577.atloria.app/p/atloria-selfdogfood-3577-BDFvUbEgc3/user/navigation-basics) |
| Route a question or request for help | [Getting help](https://atloria-selfdogfood-3577.atloria.app/p/atloria-selfdogfood-3577-BDFvUbEgc3/user/getting-help) |
| Recover from a supported common problem | [Common issues and solutions](https://atloria-selfdogfood-3577.atloria.app/p/atloria-selfdogfood-3577-BDFvUbEgc3/user/common-issues-and-solutions) |
**Result:** You have a queue-based starting point and a focused next page for the action or state
you need to handle.
# Work from Desk
## What the Desk is for
A support thread is a record of a customer's request and the team's replies and actions. The Desk
is the work hub for triaging and acting on support threads. Use it when you need to sort incoming
work, take ownership, move a thread through its working states, or respond to the customer.
Desk work is organised into queues and views. A queue is a list of threads grouped by their
working state; a view is a list grouped by how you need to work. The available states include
**Needs first response**, **Needs next response**, **Investigating**, **Waiting for customer**,
**Paused**, and **Done**. The available views include **Triage**, **Your threads**, and
**Unassigned**.
| If you need to… | Go to |
|---|---|
| Review newly arriving work | **Triage** |
| Find work waiting for a first response | **Needs first response** |
| Find work waiting for the next response | **Needs next response** |
| Continue work assigned to you | **Your threads** |
| Pick up work without an assignee | **Unassigned** |
| Review the lifecycle and action meanings | [Desk states and actions](https://atloria-selfdogfood-3577.atloria.app/p/atloria-selfdogfood-3577-BDFvUbEgc3/user/desk-states-and-actions) |
| Learn where Desk sits among the application destinations | [Desk overview](https://atloria-selfdogfood-3577.atloria.app/p/atloria-selfdogfood-3577-BDFvUbEgc3/user/desk-overview) |
## Before you start
Desk works one selected project's support threads at a time. Select the project you need before
you begin. The Desk page also uses the selected bucket—the queue or view you choose—to determine
which work list and related knowledge-gap content to request.
**Prerequisites**
- Have a project selected in the project switcher.
- Know whether you are looking for new triage work, your own threads, unassigned work, or a
state-specific queue.
- Have the thread information you need before replying or adding an internal note.
If no project is selected, the page presents the following message:
`No project selected`
It also presents:
`Pick a project from the switcher to open the Desk.`
and:
`The Desk shows one project’s support threads at a time.`
The selected bucket controls whether knowledge-gap cards are requested. A knowledge-gap card marks
a recurring resolved topic that has no documentation page. The cards are requested for **Triage**
and **Needs first response**. The Copilot rail is the area for documentation and thread context;
it depends on an open thread, and its documentation content depends on the available thread and
documentation context.
## Find and open a work item
A work item is a support thread that you select from a Desk queue so you can review its history
and take the next action.
**Prerequisites**
- Select the project whose work you want to handle.
**Steps**
1. Select one of the following queues or views:
| If you need to… | Select |
|---|---|
| Review work awaiting triage | **Triage** |
| Find a first response to send | **Needs first response** |
| Find a later response to send | **Needs next response** |
| Review work being investigated | **Investigating** |
| Review customer-waiting work | **Waiting for customer** |
| Review postponed work | **Paused for later** |
| Review work completed today | **Done today** |
| Review threads assigned to you | **Your threads** |
| Review threads without an assignee | **Unassigned** |
2. Select the work-item row in the thread list.
**Result:** The selected work item is open for triage, status changes, replies, internal notes, or
documentation assistance.
## Understand the Desk screen
The Desk screen brings the work list, the open thread, and supporting context into one workspace.
The left rail contains queues and views. The middle list contains thread rows. The open-thread
pane contains the conversation, composer, and status bar. The right rail contains **Docs Copilot**,
**Customer**, and **Activity** tabs when a thread is open.
The composer is the area where you write a customer reply or internal note. The thread pane also
includes these controls:
| Area | Controls or content |
|---|---|
| Composer | **Internal note**, **Attach**, **Preview** or **Write**, **Send**, **Send & done** |
| Status bar | **Investigating**, **Waiting for customer**, **Paused**, **Done**, **Wake now**, **Reopen** |
| Copilot rail | **Docs Copilot**, **Customer**, **Activity**, **Ask** |
| Knowledge-gap card | **Draft with AI** or **Draft doc from this cluster →** |
| Dialogs and previews | **Cancel**, **Merge into ticket**, and **Back** |
The **Attach** control is disabled and marked as coming soon. The Desk screen does not provide a
native search field, filter field, or grid-column surface. Use the queues and views in the left
rail to choose the work list.
## Triage and act on the work item
Triage is the work of deciding who handles a thread, what status it needs, and whether it belongs
with another thread. The available actions include accepting, investigating, waiting, snoozing,
waking, completing, reopening, and declining a thread.
### Change a thread status
Use this procedure when the open thread needs a different working state.
**Prerequisites**
- Open the work item you want to update.
**Steps**
1. In the status bar, select the action that matches what you need to do:
| If you need to… | Select |
|---|---|
| Start investigating the thread | **Investigating** |
| Wait for the customer | **Waiting for customer** |
| Postpone the thread | **Paused** |
| Complete the thread | **Done** |
| Return a paused thread to active work | **Wake now** |
| Return a done thread to active work | **Reopen** |
**Result:** The status bar reflects the selected working state.
### Snooze a work item
Use snoozing when the thread should leave the immediate queue and return at a later time.
**Prerequisites**
- Open the work item you want to postpone.
**Steps**
1. Select **Paused** in the status bar.
2. Select one of the available return times:
| If you want the thread to return… | Select |
|---|---|
| In one hour | **1 hour** |
| Tomorrow morning | **Tomorrow 9:00** |
| Next week | **Next week** |
**Result:** The work item is paused for the selected return time.
### Mark a work item as a duplicate
Use the duplicate route when the open thread belongs with an existing canonical ticket. The
canonical ticket is the existing thread that remains as the main record.
**Prerequisites**
- Open the duplicate thread.
- Know the positive ticket number of the canonical thread.
**Steps**
1. In the **Triage** view, press `2` to open the duplicate dialog.
2. Enter the canonical ticket number in **Ticket # (e.g. 13)**.
3. Select **Merge into ticket**.
**Result:** The duplicate thread is closed with a pointer to the canonical thread, while the full
thread remains readable.
## Reply, add an internal note, or use Copilot
An open thread gives you three response paths: write to the customer, write an internal note for
your team, or ask documentation questions in **Docs Copilot** before preparing a reply.
### Send a customer reply
Use a customer reply when the text belongs in the customer's conversation.
**Prerequisites**
- Open the thread you want to answer.
- Have the reply text ready.
**Steps**
1. Enter the reply in the composer with the placeholder `Reply to the customer… (Markdown supported)`.
2. Optional: select **Preview** to review the formatted reply.
3. Select **Send**.
**Result:** The reply is submitted to the open thread.
### Add an internal note
An internal note is a message for your team rather than a customer reply.
**Prerequisites**
- Open the thread you want to annotate.
**Steps**
1. Select **Internal note**.
2. Enter the note in the composer with the placeholder `Internal note — only your team sees this…`.
3. Select **Send**.
**Result:** The note is submitted as an internal thread message.
### Ask Docs Copilot
Use **Docs Copilot** when you need documentation help while working on an open thread. It lets you
ask a documentation question and review the returned material before adding it to a reply.
**Prerequisites**
- Open a thread.
- Have a question about the work item or the documentation.
**Steps**
1. Select **Docs Copilot**.
2. Enter your question in `Ask the docs…`.
3. Select **Ask**.
4. Select **Add to composer** when the answer is suitable for the draft.
5. Select **Back** to return from a source preview.
**Result:** The selected Copilot content is available in the reply draft for your review.
## When the work item cannot be acted on
Use the message on screen to choose the next safe action. Empty states describe where work is
available; warnings describe a condition on the open thread; Copilot messages describe a
documentation or preview problem.
| What you see | What it means | What to do |
|---|---|---|
| `Nothing here` | The selected queue has no displayed work. | Select another queue or view. |
| `New threads land in Triage and Needs first response.` | New threads are directed to those queues. | Select **Triage** or **Needs first response**. |
| `This queue is clear.` | No selectable row is available in the selected queue. | Select another queue or view. |
| `No thread open` | Thread-specific controls remain unavailable until you select a row. | Select a row from the thread list. |
| `No email on file — the customer can only see this on their tracking page.` | The open thread has no reporter email and the composer is not in internal-note mode. | Use an internal note or continue only when the tracking-page visibility is intended. |
| `Copilot asks the customer’s question automatically…` | Copilot is preparing the customer's question. | Wait for the Copilot response. |
| `No automatic question is started for this thread type — ask the docs anything about this ticket below.` | This thread type does not start an automatic Copilot question. | Enter a question in `Ask the docs…`. |
| `Copilot needs the docs index — generate docs first.` | Copilot needs a documentation index before it can answer. | Generate the documentation index, then ask again. |
| `Couldn’t load this page preview.` | The selected source preview did not load. | Select **Back** and continue from the Copilot answer. |
| `Code/internal source — review before sharing with the customer.` | The source is internal material. | Review it before adding content to a customer reply. |
| `Keyboard shortcuts` | The shortcut map is open. | Press `?` to close the map. |
## What happens next
After you act on a thread, continue from the state shown in the status bar. For the full meaning
of each state and action, open [Desk states and actions](https://atloria-selfdogfood-3577.atloria.app/p/atloria-selfdogfood-3577-BDFvUbEgc3/user/desk-states-and-actions).
If you need to move to another application destination, use [Navigation basics](https://atloria-selfdogfood-3577.atloria.app/p/atloria-selfdogfood-3577-BDFvUbEgc3/user/navigation-basics).
For product questions or support routing, use [Getting help](https://atloria-selfdogfood-3577.atloria.app/p/atloria-selfdogfood-3577-BDFvUbEgc3/user/getting-help).
**Result:** You know which Desk state to review next and where to continue when the work leaves
this page.
# Desk states and actions
## Overview
Desk is the work queue for triage and follow-up. Use it to move support threads
through the Desk lifecycle and choose the next action for each thread.
A support thread is a customer conversation that you triage, answer, pause,
complete, or reopen. A queue groups threads by work state, ownership, or triage
status.
An internal note is a message for your team attached to a support thread.
The lifecycle states are `Needs first response`, `Needs next response`,
`Investigating`, `Waiting for customer`, `Paused for later`, and `Done`.
| If you need to… | Go to |
|---|---|
| Choose the queue that contains the work | [Find and open the work](#find-and-open-the-work) |
| Understand the current state and available controls | [Understand the thread state and available actions](#understand-the-thread-state-and-available-actions) |
| Reply, add an internal note, or change the state | [Change state and respond](#change-state-and-respond) |
| Handle triage, snoozing, duplicates, or shortcuts | [Handle state and thread variations](#handle-state-and-thread-variations) |
| Review the Desk surface and its queues | [Desk overview](https://atloria-selfdogfood-3577.atloria.app/p/atloria-selfdogfood-3577-BDFvUbEgc3/user/desk-overview) |
| Work through a Desk item | [Work from Desk](https://atloria-selfdogfood-3577.atloria.app/p/atloria-selfdogfood-3577-BDFvUbEgc3/user/work-from-desk) |
## Prerequisites — what must be in place for this to go smoothly
Before changing a Desk thread, select the project whose support threads you need
to work on. A thread selection later gives you the detail, composer, state controls,
and context tabs for that thread.
Collect the reply or **Internal note** text you want to enter before you start. If the
thread is a `Question`, the documentation assistant can ask the customer's
question automatically. If the thread has no reporter email, the page displays
this warning when you are not writing an **Internal note**:
`No email on file — the customer can only see this on their tracking page.`
The available action depends on the thread state. A paused thread has `Wake now`,
and a done thread has `Reopen`. Select the project before finding the thread you
want to change.
## Find and open the work
A Desk queue is a group of support threads selected by work state, ownership, or
triage status. Use the queue that matches the work you want to handle.
**Prerequisites**
- You have selected a project.
- You know whether you need a triage, response, ownership, or completion queue.
**Steps**
1. Open **Desk**.
2. Select the queue that matches your work:
| If you need to… | Select |
|---|---|
| Work on new, unowned items | **Triage** |
| Work on threads assigned to you | **Your threads** |
| Work on items without an assignee | **Unassigned** |
| Find threads awaiting a first reply | **Needs first response** |
| Find threads awaiting the next reply | **Needs next response** |
| Find active investigation work | **Investigating** |
| Find threads waiting for the customer | **Waiting for customer** |
| Find threads paused for later | **Paused for later** |
| Find threads completed today | **Done today** |
3. Select the thread row you want to handle.
4. Open the selected thread's detail.
If the selected queue has no available thread, the page shows `Nothing here` and
`New threads land in Triage and Needs first response.`
**Result:** The thread detail is open, with its current state, conversation, and
available actions on screen. You can now identify the state and choose an action.
## Understand the thread state and available actions
The open thread's detail surface combines the conversation, reply composer, state
bar, and context tabs. Use it to identify the current state before changing it.
The composer includes these fields and actions:
| Area | What you use it for |
|---|---|
| Reply body | Enter a customer reply in Markdown. |
| Internal note body | Enter a note for your team when internal-note mode is active. |
| Duplicate ticket number | Enter the positive ticket number of the canonical thread. |
| Copilot question | Ask the documentation assistant a question. |
| **Internal note** | Switch between a customer reply and an internal note. |
| **Preview** | Preview the Markdown draft; select **Write** to return to editing. |
| **Send** | Send the reply. |
| **Send & done** | Send the reply and mark the thread done. |
| **Attach** | Attachment control; it is disabled. |
The context tabs are **Docs Copilot**, **Customer**, and **Activity**. Docs Copilot
is the documentation assistant, Customer provides customer context, and Activity
provides the thread's activity history.
The state bar presents `Investigating`, `Waiting for customer`, `Paused`, and
`Done` as state choices. A paused thread also presents **Wake now**; a done thread
also presents **Reopen**. A thread in `Needs first response` or `Needs next
response` displays its derived state as a non-clickable current label.
## Change state and respond
Changing a state tells the Desk how the thread is being handled. Replying records
the customer-facing response; an internal note records information for your team.
**Prerequisites**
- You have opened the thread you want to handle.
- You have the reply or internal note text ready.
- For a duplicate action, you have the positive ticket number of the canonical thread.
**Steps**
1. Select the state action that matches the work:
| If you need to… | Select |
|---|---|
| Take the thread for yourself | Press `A`. |
| Investigate the thread | **Investigating** |
| Wait for the customer | **Waiting for customer** |
| Pause the thread | **Paused** |
| Complete the thread | **Done** |
| Wake a paused thread | **Wake now** |
| Reopen a completed thread | **Reopen** |
2. Choose what you need to write:
| If you need to… | Use |
|---|---|
| Send a customer-facing response | **Reply body** |
| Record information for your team | **Internal note** |
3. Enter the text in the selected field.
4. Select **Preview** when you need to check the rendered Markdown.
5. Select **Write** to return from the preview to the composer.
6. Select the send action that matches the result you need:
| If you need to… | Select |
|---|---|
| Send the reply and keep the thread open | **Send** |
| Send the reply and mark the thread done | **Send & done** |
7. If a knowledge-gap card offers **Draft with AI**, select it to start a document
draft for that gap.
8. When the Copilot answer is ready, select **Add to composer** to place it in the
reply draft.
**Result:** The selected reply, note, state action, or document draft is shown in
the corresponding Desk surface. Use the variation that matches the thread's state
or triage route when a special path is needed.
## Handle state and thread variations
Triage is the starting view for fresh, unowned work. Paused and done threads use
different follow-up actions, and a duplicate thread requires a canonical ticket
number before it can be merged.
**Prerequisites**
- You have opened the relevant thread.
- For a triage action, the thread is in `Triage`.
- For a wake action, the thread is paused.
- For a reopen action, the thread is done.
**Steps**
1. Choose the applicable route:
| If you need to… | Action |
|---|---|
| Accept triage work and assign it to yourself | Press `1` or `A`. |
| Mark the thread as a duplicate | Press `2`. |
| Decline triage work | Press `3`. |
| Snooze triage or thread work | Press `H` or `Z`. |
| Complete thread work | Press `E` or select **Done**. |
| Focus the composer | Press `R`. |
| Toggle an internal note | Press `N` or select **Internal note**. |
| Focus Docs Copilot | Press `D`. |
| Send a reply | Press `⌘⏎` or select **Send**. |
| Send a reply and complete the thread | Press `⌘⇧⏎` or select **Send & done**. |
| Open the shortcut map | Press `?`. |
2. If you are snoozing the thread, choose when to resume it:
| If you need to… | Select |
|---|---|
| Resume the thread in one hour | **1 hour** |
| Resume the thread tomorrow morning | **Tomorrow 9:00** |
| Resume the thread next week | **Next week** |
3. For a duplicate, enter the canonical ticket number in the duplicate ticket
number field.
4. Choose what to do with the dialog:
| If you need to… | Select |
|---|---|
| Merge the thread into the canonical ticket | **Merge into ticket** |
| Leave the duplicate dialog without merging | **Cancel** |
5. If the thread has no reporter email, select **Internal note** when the message
must not be customer-facing.
When the knowledge-gap condition applies, the card appears in `Triage` or `Needs
first response` after the first three thread rows. Select **Draft with AI** on the
card to start the document draft.
**Result:** The selected variation is handled with its matching state action,
snooze choice, duplicate dialog, knowledge-gap action, or shortcut. The thread is
ready for the recovery guidance or next-queue guidance below.
## When an action does not complete
The Desk provides messages for empty states, missing customer contact information,
Copilot failures, preview failures, and duplicate handling.
| What you see | What to do |
|---|---|
| `No project selected` | Select a project from the switcher before opening Desk work. |
| `No thread open` | Select and open a thread from a queue. |
| `Nothing here` | Select another queue, or wait for new work in `Triage` and `Needs first response`. |
| `New threads land in Triage and Needs first response.` | Look in **Triage** or **Needs first response** for new threads. |
| `No email on file — the customer can only see this on their tracking page.` | Select **Internal note** when the customer must not receive the response. |
| `Copilot needs the docs index — generate docs first.` | Generate the documentation index before using Copilot. |
| `Couldn’t load this page preview.` | Return to the answer or draft and continue without the page preview. |
| `Mark #ATL- as duplicate` | Enter the canonical ticket number in the duplicate ticket number field, then select **Merge into ticket**. |
| `Closes this thread with a pointer into the canonical one — the full thread stays readable.` | Confirm that the canonical ticket number is correct before merging. |
## Know what happens next
A changed thread remains in a queue only while it matches that queue's state or
ownership rule. Accepting, declining, or snoozing fresh triage work removes it from
the triage view; a state change can move it to another queue.
After completing an action, continue in [Work from Desk](https://atloria-selfdogfood-3577.atloria.app/p/atloria-selfdogfood-3577-BDFvUbEgc3/user/work-from-desk) for
the broader triage procedure. Use [Desk overview](https://atloria-selfdogfood-3577.atloria.app/p/atloria-selfdogfood-3577-BDFvUbEgc3/user/desk-overview) when you need
the work-hub orientation again.
**Result:** The thread is in the queue that matches its resulting state or
ownership, and you know which Desk page to use for the next task.
# Issues overview
## What Issues is for
Issues is the recovery and exception destination for work that needs attention after the primary
work is complete. Use it to review reported issues, see their current status, and choose between
the full issue list and the board view.
| If you need to… | Go to |
|---|---|
| See the issue statistics and move to another Issues view | The Issues destination |
| Search, filter, group, or update issues in a list | [Review and filter issues](#review-and-filter-issues) |
| See issues arranged on boards | [Open an Issues view](#open-an-issues-view), then **Boards** |
| Open and work with one issue | [Work with an issue](https://atloria-selfdogfood-3577.atloria.app/p/atloria-selfdogfood-3577-BDFvUbEgc3/user/work-with-an-issue) |
| Set up or maintain a board | [Manage issue boards](https://atloria-selfdogfood-3577.atloria.app/p/atloria-selfdogfood-3577-BDFvUbEgc3/user/manage-issue-boards) |
| Understand statuses and recovery | [Issue states and recovery](https://atloria-selfdogfood-3577.atloria.app/p/atloria-selfdogfood-3577-BDFvUbEgc3/user/issue-states-and-recovery) |
Before you select a view, make sure the required project context is in place.
## Before you start
The Issues pages work in the context of a selected project. Select a project before you review
statistics, search the issue list, or view boards. If no project is selected, the page presents
the message `No project selected` and the instruction `Pick a project from the switcher to see its reported issues.`
The list and board views use the same project context. This keeps the issues and boards you review
together instead of mixing information from different projects.
With a project selected, continue to the Issues destination and choose the view that matches your
work.
## Open an Issues view
The Issues destination provides the starting point for the two working views: All Issues and
Boards.
**Prerequisites**
- You have a project selected.
- You are on the Issues destination.
**Steps**
1. Select one of these controls:
| If you need to… | Select |
|---|---|
| Review issues in a searchable list | **All issues** |
| See issues arranged by board columns | **Boards** |
2. On either view, select **All Issues** or **Boards** in the Issues view tabs to switch views.
**Result:** The selected Issues view is on screen.
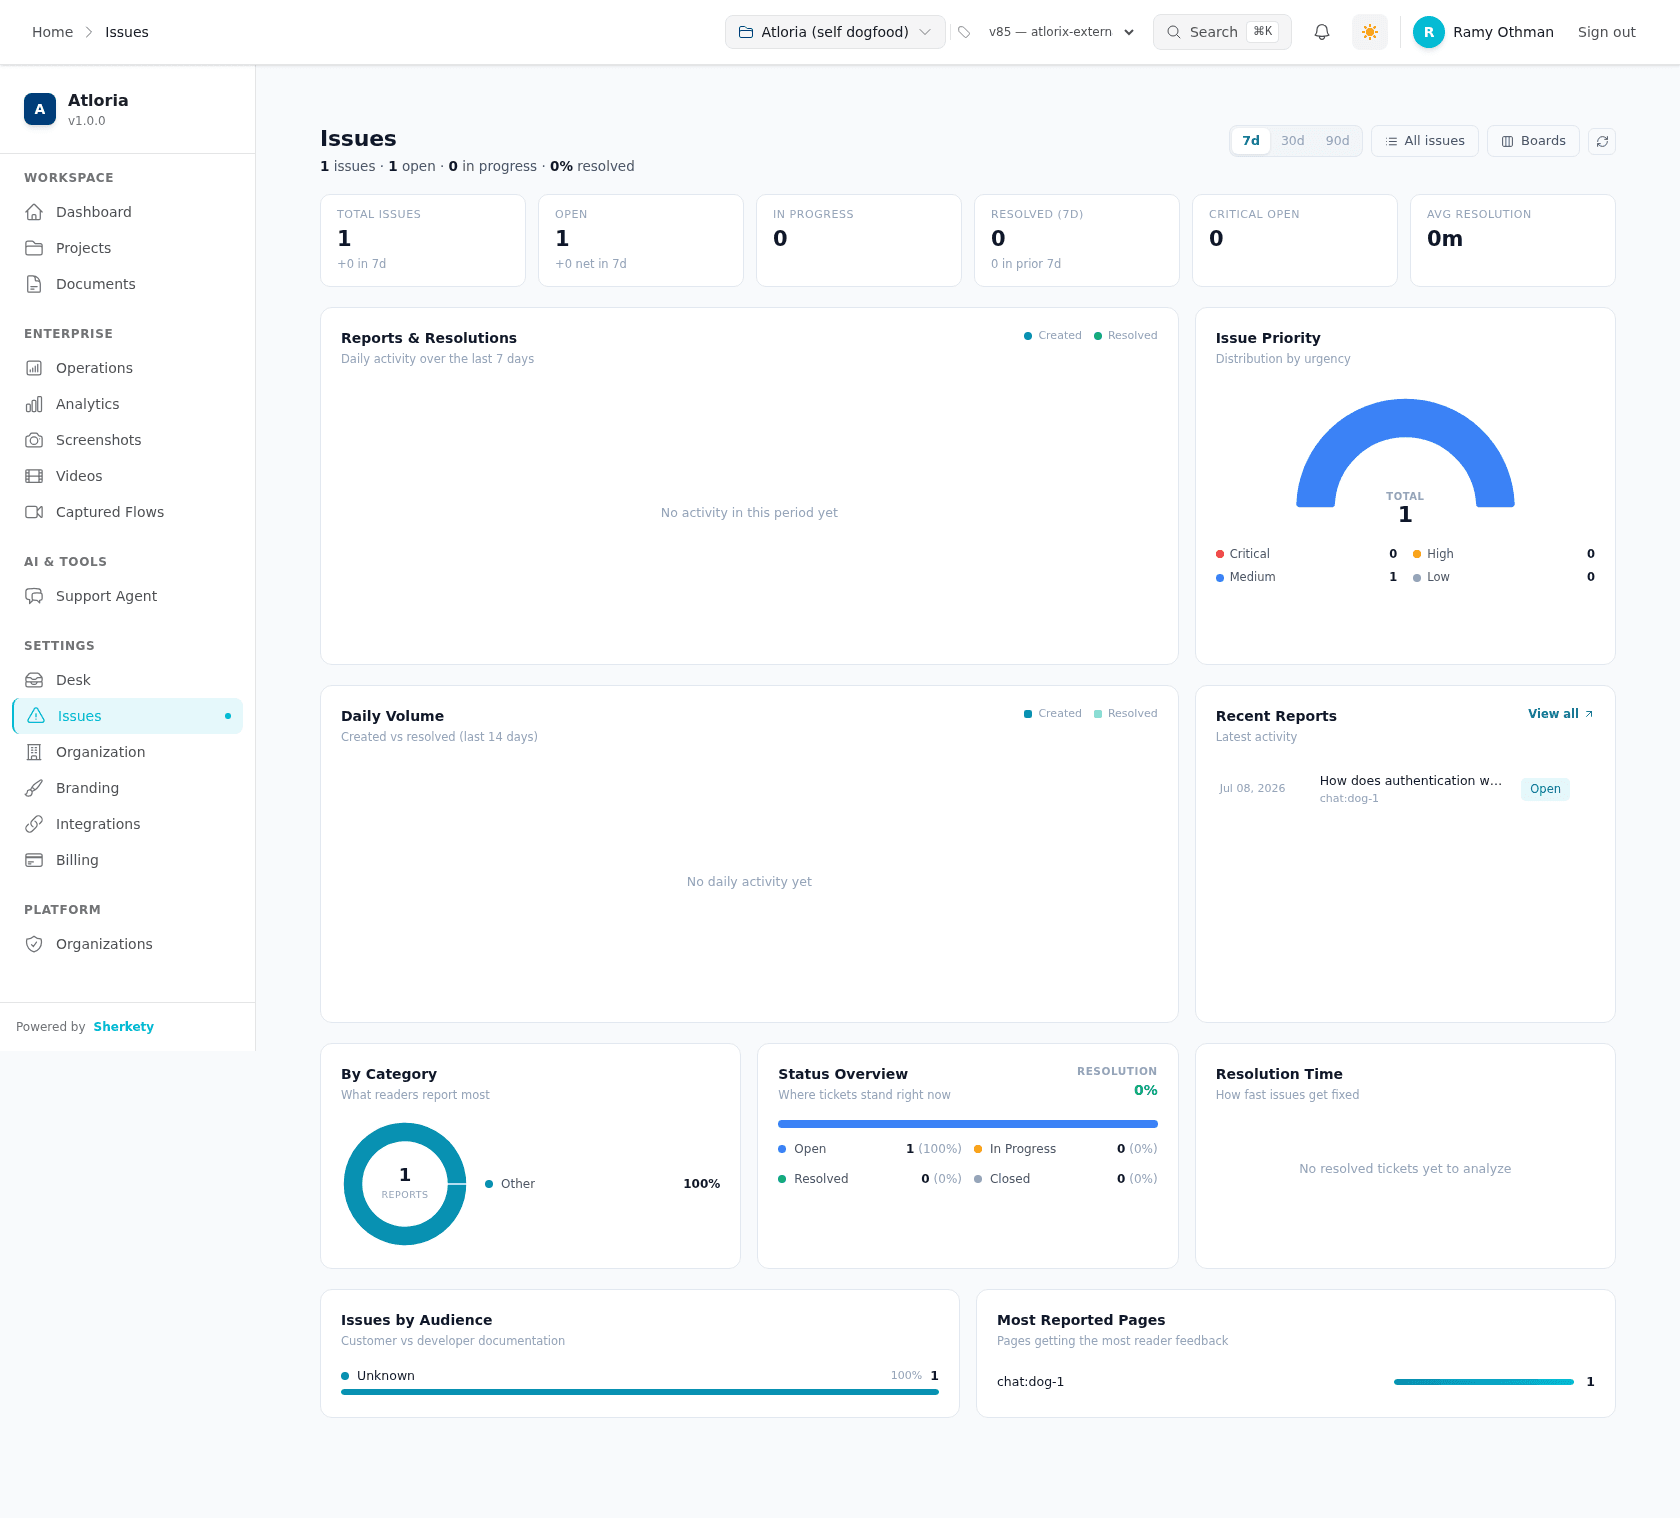
## Understand the Issues views
The Issues destination is the summary view for the selected project. It combines an issue summary
with links to the two working views. **All Issues** is the searchable list; **Boards** presents
issues through board views.
The summary offers these time-range choices:
| Control | What it changes |
|---|---|
| **7d** | The statistics period covers 7 days. |
| **30d** | The statistics period covers 30 days. |
| **90d** | The statistics period covers 90 days. |
Select **Refresh** to reload the statistics and issue data. Select **View all** in the recent
reports area to open the full issue list.
The All Issues view includes the list controls and the issue table. Its filters are **Category**,
**Type**, **Priority**, **Sort**, and **Group**. It also includes **Row density**, the **Search
issues…** field, and **Per page** when pagination is shown. The list can also show the status
choices **All**, **Open**, **In Progress**, **Resolved**, and **Closed**.
The Boards view includes the board cards and a status filter for issues held on boards. Select
**New board** to open the board-creation dialog, or select **Board options** on a board card to
open **Edit board**, **Duplicate**, or **Delete board**. Board setup and maintenance are covered
in [Manage issue boards](https://atloria-selfdogfood-3577.atloria.app/p/atloria-selfdogfood-3577-BDFvUbEgc3/user/manage-issue-boards).
Use the All Issues list when you need to locate or organize a report.
## Review and filter issues
Use All Issues when you need to locate a report, narrow the list, or organize the visible results.
**Prerequisites**
- You have a project selected.
- You have opened All Issues.
**Steps**
1. Select **All Issues** in the Issues view tabs if another Issues view is open.
2. Choose the filter or list arrangement that matches your question:
| If you need to… | Use |
|---|---|
| Narrow results by classification | **Category**, **Type**, or `Priority` |
| Change the order of results | **Sort** |
| Arrange results into groups | **Group** |
| Change the amount of row detail shown | **Row density** |
3. Enter a term in **Search issues…** to search the visible issue data.
4. Select a status in the status filter: **All**, **Open**, **In Progress**, **Resolved**, or
**Closed**.
5. If active filters appear, select **Clear all** to remove the filters and search value.
6. If the results span more than one page, choose a value in **Per page** and use the pagination
controls to move through the results.
7. If you select one or more issues, choose **Mark In Progress**, **Resolve**, or **Close** to
apply that status to the selected issues.
**Result:** All Issues shows the list narrowed or organized according to your selected filters,
search, grouping, density, and page settings.
If the list has no records, it shows `No issues yet`. If your selected filters return no records, it
shows `No issues match your filters`.
## Choose what to do next
After you choose an Issues view, continue with the task that matches what you need to accomplish.
**Steps**
1. Select the next destination:
| If you need to… | Select or open |
|---|---|
| Inspect or update one issue | [Work with an issue](https://atloria-selfdogfood-3577.atloria.app/p/atloria-selfdogfood-3577-BDFvUbEgc3/user/work-with-an-issue) |
| Create, edit, duplicate, delete, or organize a board | [Manage issue boards](https://atloria-selfdogfood-3577.atloria.app/p/atloria-selfdogfood-3577-BDFvUbEgc3/user/manage-issue-boards) |
| Learn what an issue status means or how recovery works | [Issue states and recovery](https://atloria-selfdogfood-3577.atloria.app/p/atloria-selfdogfood-3577-BDFvUbEgc3/user/issue-states-and-recovery) |
2. Select the control that matches your current view:
| If you are on… | Select |
|---|---|
| All Issues | **Boards** to move to board work, or **Back to Statistics** to return to the Issues summary |
| Boards | **Back to Statistics** to return to the Issues summary |
**Result:** You are on the Issues page that matches the work you need to do next.
When board actions produce a message, the product uses these messages:
| Situation | Message |
|---|---|
| A board is created | `Board created` |
| A board is duplicated | `Board duplicated` |
| Board settings are saved | `Board updated` |
| A board is restored | `Board restored` |
| A deleted board can be restored | `Undo` |
| Board creation cannot be completed | `Could not create the board. Try again.` |
| Board deletion cannot be completed | `Could not delete the board.` |
| Board settings cannot be saved | `Could not save` |
If the Boards view has no boards, it shows `No boards yet`. If the selected status has no matching
boards, it shows `Nothing matches`.
# Work with an issue
## What an issue record is
An issue record is a report about a documentation problem that the team can review,
update, discuss, and move through its status journey.
Internal teams use the record to coordinate work after a reader reports a problem.
| If you need to… | Go to… |
|---|---|
| Find an existing issue | [Find and open an issue](#find-and-open-an-issue) |
| Understand the record before changing it | [Read the issue record](#read-the-issue-record) |
| Change triage details or reply | [Update and respond to an issue](#update-and-respond-to-an-issue) |
| Add an issue to a board or filter the list | [Handle boards, filters, and status branches](#handle-boards-filters-and-status-branches) |
| Resolve an error or empty state | [When an issue action does not work](#when-an-issue-action-does-not-work) |
| Continue after a status change | [Know what happens next](#know-what-happens-next) |
| Review the Issues destination and its views | [Issues overview](https://atloria-selfdogfood-3577.atloria.app/p/atloria-selfdogfood-3577-BDFvUbEgc3/user/issues-overview) |
| Manage boards | [Manage issue boards](https://atloria-selfdogfood-3577.atloria.app/p/atloria-selfdogfood-3577-BDFvUbEgc3/user/manage-issue-boards) |
| Review status recovery | [Issue states and recovery](https://atloria-selfdogfood-3577.atloria.app/p/atloria-selfdogfood-3577-BDFvUbEgc3/user/issue-states-and-recovery) |
## Before you start
**Prerequisites**
| Have this ready | Why it matters |
|---|---|
| Access to the project that contains the issue | Issues are scoped to a project. |
| The issue information you need to review | The record route requires an existing issue identifier. |
| A saved issue record | The record page is opened from the list of existing issues. |
| The change or response you need to make | The available work includes triage updates, description editing, replies, internal notes, and closure choices. |
The record and list screens declare no required-field marker.
The record screen also has no confirmation dialog before its status, description, assignee,
priority, comment, close, or board actions.
## Find and open an issue
The **All Issues** view is the list for finding an existing issue and opening its record.
**Prerequisites**
- You have access to the project containing the issue.
- You know enough about the issue to recognise its row.
**Steps**
1. Open the **All Issues** view.
2. Select **All**, Open, In Progress, Resolved, or Closed, or choose **Category**, **Type**, Priority, Sort, or Group as applicable.
| If you need to… | Choose… |
|---|---|
| Narrow by status | **All**, **Open**, **In Progress**, **Resolved**, or **Closed** |
| Filter by issue details | **Category**, **Type**, Priority, Sort, or Group |
| Search by text | **Search issues…** |
3. Select the issue row to open its record.
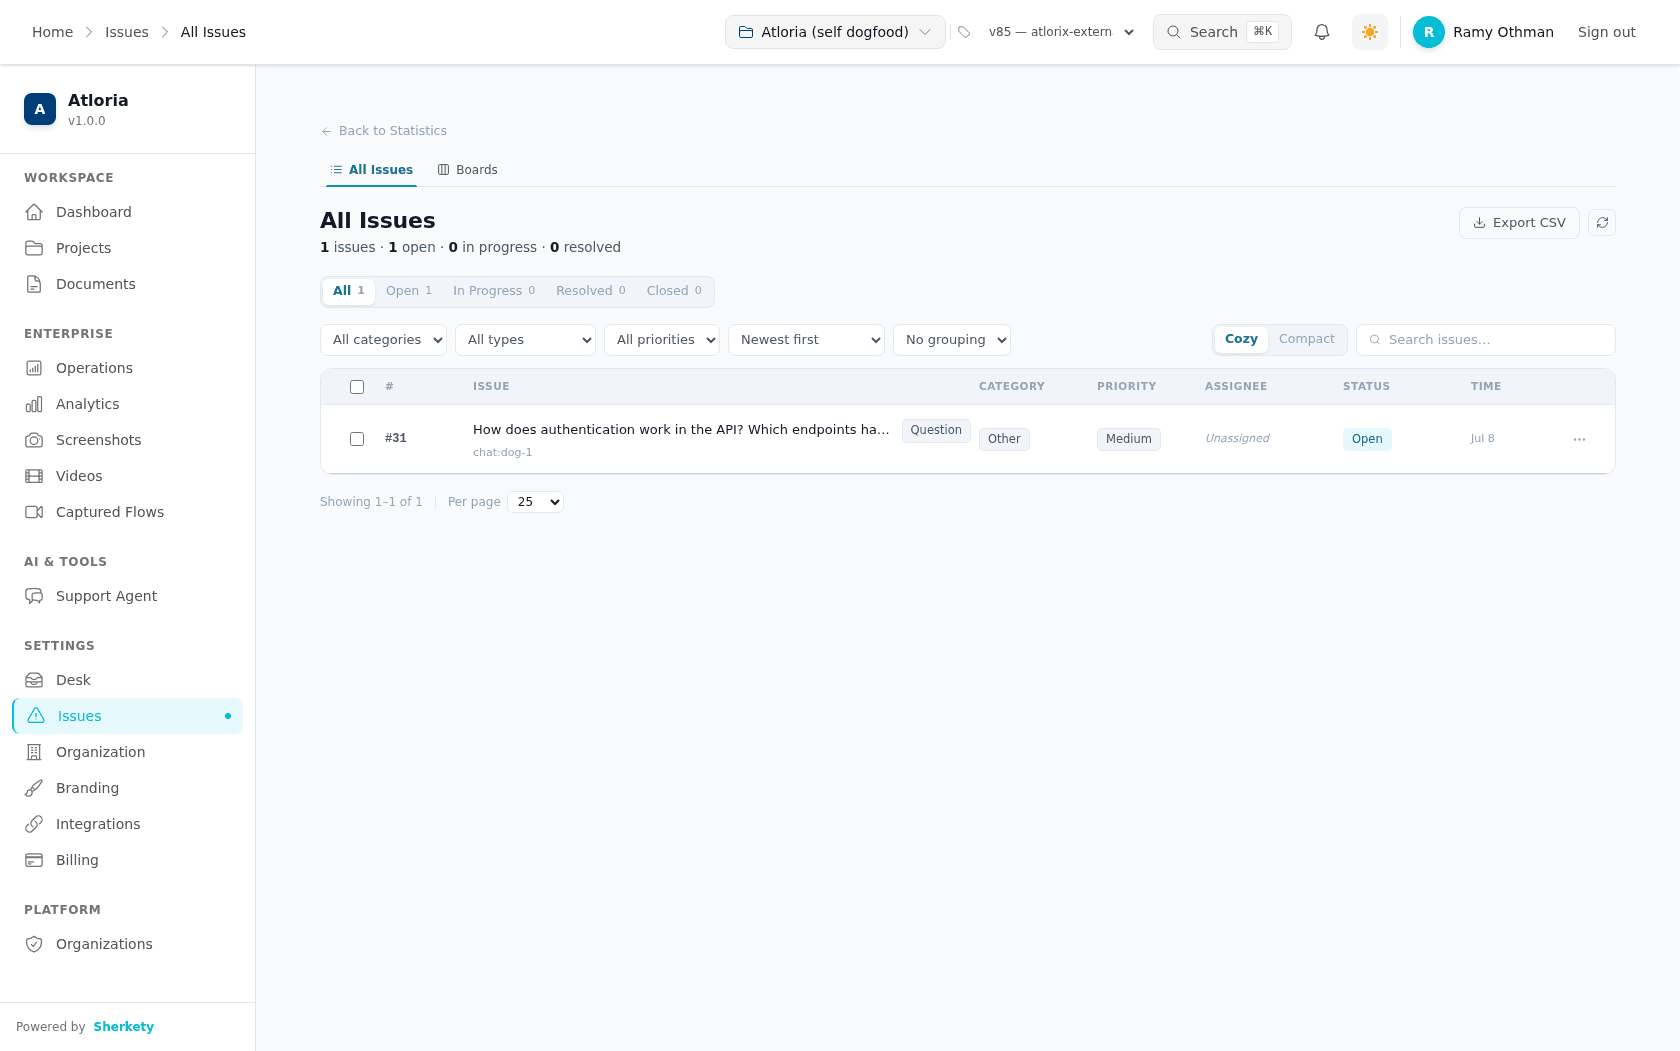
**Result:** The issue record opens.
## Read the issue record
An issue record brings the report, its current handling details, and its activity into one place.
The top of the record identifies the report and shows its current status, priority, type, and
category.
The record also shows the reporter, assignee, reported time, reported page, and **Status Journey**.
| Area | What you can read or change |
|---|---|
| **What the reader said** | The issue description; use **Show more** or **Show less** to change how much text is visible, and **Edit** to open the editor. |
| Activity Timeline | Comments, status changes, and assignments; use **All**, **Comments**, or **Updates** to filter the timeline. |
| **Manage** | **Status**, **Priority**, and **Assignee**. |
| **Details** | Type, Category, and Reporter. |
| **Environment** | Browser, scroll position, and **Open reported page** when reported environment data exists. |
| **Close Issue** | **Fixed**, **Duplicate**, **Won't Fix**, and **Not Reproducible** when the issue is not **Closed**. |
| Comment composer | **Public reply** or **Internal**, followed by **Send reply** or **Add note**. |
The record's **Status** options are Open, In Progress, Waiting on customer, Paused,
Resolved, and Closed.
Its **Priority** options are **Critical**, **High**, **Medium**, and **Low**.
The **Assignee** list includes **Unassigned** and member options.
The record shows **Start Working** when its status is **Open**, **Mark as Resolved** when its
status is **In Progress**, **Close as Fixed** when its status is **Resolved**, and **Reopen Issue**
when its status is **Closed**.
## Update and respond to an issue
Updating an issue keeps its triage details and conversation together so the next person can see
what has happened.
### Change triage details
**Prerequisites**
- You have opened the issue record.
- You know the new status, priority, or assignee to apply.
**Steps**
1. In **Status**, choose Open, In Progress, Waiting on customer, Paused, Resolved, or Closed.
2. In **Priority**, choose **Critical**, **High**, **Medium**, or **Low**.
3. In **Assignee**, choose **Unassigned** or a member option.
4. Follow the status-specific action that appears: select **Start Working**, **Mark as Resolved**, **Close as Fixed**, or **Reopen Issue**.
**Result:** The selected issue detail is submitted for update, and the record is fetched again.
When the update succeeds, the message is `Assignee updated` for an assignee change or the
capitalized field name followed by `updated` for another field.
### Edit the description
**Prerequisites**
- You have opened the issue record.
- You have the corrected description ready.
**Steps**
1. Select **Edit** in **What the reader said**.
2. Enter the corrected description in the text area.
3. Select **Save**.
4. Select **Cancel** instead when you want to discard the edit.
**Result:** The description editor closes; a changed description is submitted, while **Cancel**
discards the edit.
### Send a reply or add an internal note
**Prerequisites**
- You have opened the issue record.
- You have the message ready.
**Steps**
1. Choose the comment visibility that matches the audience.
| If the message is for… | Select… |
|---|---|
| The reporter | **Public reply** |
| The team | **Internal** |
2. Enter the message in the comment box.
3. Select **Send reply** or **Add note** according to the message visibility.
| Visibility | Select… |
|---|---|
| Public reply | **Send reply** |
| Internal | **Add note** |
**Result:** The comment is submitted and the timeline is fetched again.
The success message is `Comment added`.
## Handle boards, filters, and status branches
These choices let you work with the issue in the list or coordinate it on a board without changing
the issue's meaning.
### Choose a list view
**Prerequisites**
- You are in the **All Issues** view.
**Steps**
1. Choose **Category**, **Type**, Priority, Sort, Group, **Cozy**, **Compact**, or Per page as applicable.
| If you need to… | Choose… |
|---|---|
| Filter by category | **All categories**, **Incorrect**, **Outdated**, **Missing info**, **Unclear**, **Broken link**, **Code broken**, **Typo**, or **Other** in **Category** |
| Filter by type | **All types**, **Doc issue**, **Question**, **Bug**, **Feature request**, or **Other** in **Type** |
| Filter by priority | **All priorities**, **Critical**, **High**, **Medium**, or **Low** in **Priority** |
| Sort the list | **Newest first**, **Oldest first**, **Priority (high first)**, or **Recently updated** in **Sort** |
| Group the list | No grouping, Status, Priority, or Category in Group |
| Change row density | **Cozy** or **Compact** |
| Change page size | **10**, **25**, **50**, or **100** in **Per page** |
**Result:** The list is displayed using the selected status, filters, order, grouping, density,
and page size.
### Add an issue to a board
**Prerequisites**
- You have opened an issue record or selected issues in the list.
- You have a board available to choose.
**Steps**
1. Select **Add to Board**.
2. Enter a board name in **Search boards...** when you need to narrow the board list.
3. Select the board name for the action you need.
| Board state | What selecting the board name does |
|---|---|
| The issue is not on the board | Adds the issue or selected issues to the board |
| The issue is already on the board | Removes the issue from the board |
**Result:** The issue is added to or removed from the selected board.
The confirmation names the selected board.
## When an issue action does not work
Use the message or empty state on screen to identify the next action.
Successful updates use `Assignee updated` for an assignee change and the capitalized field name
followed by `updated` for other field changes.
Board confirmations read `Added issue(s) to ""` or
`Removed from ""`.
| What you see | What it means | What to do |
|---|---|---|
| `Update failed` | The field update did not complete. | Check the selected value and try the field update again. |
| `Assignee updated` | The assignee update completed. | Continue with the issue record. |
| ` updated` | Another field update completed; the message uses the field name with its first letter capitalized, followed by `updated`. | Continue with the issue record. |
| `Issue closed` | The close action completed. | Continue with the issue record. |
| `Close failed` | The close action did not complete. | Choose a close reason again. |
| `Failed to add comment` | The comment submission did not complete. | Check the comment text and submit it again. |
| `Added issue(s) to ""` | The issue or selected issues were added to the selected board. | Continue with the issue record or board work. |
| `Removed from ""` | The issue was removed from the selected board. | Continue with the issue record or board work. |
| `Couldn't add to board` | Adding the issue to the board did not complete. | Choose the board again. |
| `Couldn't remove` | Removing the issue from the board did not complete. | Choose the board again. |
| Board-add error | The app may show an error message or the fallback `Couldn't add to board`. | Follow the message shown on screen and retry the board action. |
| Board-removal error | The app may show an error message or the fallback `Couldn't remove`. | Follow the message shown on screen and retry the board action. |
| `Issue not found` | The requested issue record is unavailable. | Select **Back to Issues**, then use the list to choose an issue. |
| `No comments yet` | The selected timeline view has no comments. | Select **All** or add a reply. |
| `No updates yet` | The selected timeline view has no updates. | Select **All** or change the issue. |
| `No activity yet` | The selected timeline view has no activity. | Select **All** or add a reply. |
| `No boards match` | The board search has no matching result. | Change the text in **Search boards...**. |
| `No boards yet` | No board is available in the picker. | Close the picker and continue with the issue record. |
| `No issues yet` | The list contains no issues. | Check the selected project and list view. |
| `No issues match your filters` | The current list filters return no issues. | Select **Clear all**. |
## Know what happens next
An issue moves through **Open**, **In Progress**, **Resolved**, and **Closed** as the team works
through it.
The status-specific actions show the next available move on the record: **Start Working**,
**Mark as Resolved**, **Close as Fixed**, or **Reopen Issue**.
When the issue needs board coordination, continue with [Manage issue boards](https://atloria-selfdogfood-3577.atloria.app/p/atloria-selfdogfood-3577-BDFvUbEgc3/user/manage-issue-boards).
For status meanings and recovery, continue with [Issue states and recovery](https://atloria-selfdogfood-3577.atloria.app/p/atloria-selfdogfood-3577-BDFvUbEgc3/user/issue-states-and-recovery).
For general help routing, continue with [Getting help](https://atloria-selfdogfood-3577.atloria.app/p/atloria-selfdogfood-3577-BDFvUbEgc3/user/getting-help).
# Manage issue boards
## Issue boards at a glance
An issue board is a visual work area where issues appear as cards in columns. You use
it to arrange board columns, place existing issues, and manage the board record from the
Issues area.
| If you need to… | Go to… |
| --- | --- |
| See the Issues destination and its Boards view | [Issues overview](https://atloria-selfdogfood-3577.atloria.app/p/atloria-selfdogfood-3577-BDFvUbEgc3/user/issues-overview) |
| Open an existing board | [Find and open a board](#find-and-open-a-board) |
| Start a board from a standard layout | [Create or duplicate a board](#create-or-duplicate-a-board) |
| Change the board name, description, color, or columns | [Configure the board and its columns](#configure-the-board-and-its-columns) |
| Add, filter, or move issues | [Add, filter, and move issues on a board](#add-filter-and-move-issues-on-a-board) |
| Work on one issue after finding it on a board | [Work with an issue](https://atloria-selfdogfood-3577.atloria.app/p/atloria-selfdogfood-3577-BDFvUbEgc3/user/work-with-an-issue) |
| Review issue status and recovery guidance | [Issue states and recovery](https://atloria-selfdogfood-3577.atloria.app/p/atloria-selfdogfood-3577-BDFvUbEgc3/user/issue-states-and-recovery) |
| Move between application destinations | [Navigation basics](https://atloria-selfdogfood-3577.atloria.app/p/atloria-selfdogfood-3577-BDFvUbEgc3/user/navigation-basics) |
When you create a board, choose one of three templates: **Default**, **Simple**, or
**Empty**. The board record then gives you access to its columns and issue cards.
## Before you start
You need a selected project before the Boards view can load its boards. Sign in to the
application.
If no project is selected, the page shows `No project selected` and
`Pick a project from the switcher to see its boards.`
## Find and open a board
A board card is the list entry for one saved board. Open it when you want to work with
that board's columns and issue cards.
**Prerequisites**
- Select the project whose issue boards you want to use.
- Sign in to the application.
**Steps**
1. In the Issues area, open the Boards view.
2. Optional: Select **Refresh** to request the current board list again.
3. Choose the next action.
| If you want to… | Select… |
| --- | --- |
| start when the list shows `No boards yet` | **Create board**; the create-board dialog opens |
| create a board from a populated list | **New board**; the create-board dialog opens |
| open a board that is already listed | the board card; the board record opens |
4. If the board record is open, optionally select **All Boards** to return to the board
list.
**Result:** The create-board dialog is open after you select **Create board** or
**New board**, or the selected board record is open after you select its board card.
## Create or duplicate a board
Creating a board starts a new board record. Duplicating copies an existing board's
columns and cards into a new board, so use duplication when you want to preserve an
existing board arrangement.
### Create a board
**Prerequisites**
| Starting state | Entry action |
| --- | --- |
| The create dialog is already open after selecting **Create board** or **New board** | Begin with step 1. |
| The Boards view is open | Select **New board**, then begin with step 1. |
**Steps**
1. In **Name**, enter the board name.
2. In **Description**, enter an optional description.
3. In **Color**, select a color preset.
4. In **Start with template**, select one of the following options.
| If you want to… | Select… |
| --- | --- |
| Use the four-column starting layout | **Default** |
| Use the three-column starting layout | **Simple** |
| Add your own columns from the beginning | **Empty** |
5. If you selected **Default** or **Simple**, select **Add all current open issues to this
board** when the board should begin with the project's current open issues.
6. Select **Create board**.
The dialog uses `Name` as a required field and limits it to 80 characters. **Description**
is optional and limited to 500 characters. **Add all current open issues to this board**
is available for **Default** and **Simple**, not **Empty**.
After a successful creation, the application displays `Board created` and opens the new
board record.
**Result:** The new board record opens with the selected template and optional open issues.
### Duplicate a board
**Prerequisites**
- Open the board list.
- Know which saved board you want to copy.
**Steps**
1. On the board card, open **Board options**.
2. Select **Duplicate**.
3. In **Name**, review the pre-filled copy name and edit it if needed.
4. In **Description**, enter an optional description.
5. In **Color**, select a color preset.
6. Choose the next action.
| If you want to… | Select… |
| --- | --- |
| create the duplicate | **Duplicate board** |
| close the dialog without duplicating | **Cancel** |
Duplicate mode does not show **Start with template** or
**Add all current open issues to this board**. A successful duplication displays
`Board duplicated` and opens the new board record.
If creation fails, the dialog can display `Could not create the board. Try again.`
**Result:** A new board copy opens, or the dialog closes without changing the board list.
## Configure the board and its columns
Board settings control the board record itself. Columns control how issues are grouped
and which issue status a column represents.
### Update board details
**Prerequisites**
- Open the board record or the board card's options menu.
- Have a new board name ready when you change the name; the field is required for saving.
**Steps**
1. On the board card, select **Board options**.
2. Select **Edit board**.
3. In **General**, edit **Name**, **Description**, or **Color**.
4. Choose the next action.
| If you want to… | Select… |
| --- | --- |
| save the board details | **Save changes** |
| manage the board columns | **Columns** |
The **Name** field is required and accepts up to 80 characters. **Description** is
optional and accepts up to 500 characters. A successful save displays `Board updated`.
**Result:** The board settings close after the details are updated, or the **Columns**
tab opens for column management.
### Add or edit a column
**Prerequisites**
- Open **Board settings** on a board record.
- Select **Columns**.
**Steps**
1. Choose how to open the editor.
| If you want to… | Open the editor with… |
| --- | --- |
| create a new column | **Add column** |
| edit an existing column | the existing column, which opens **Edit column** |
2. In **Name**, enter the column name.
3. In **Maps to status**, select one of **Open**, **In Progress**, **Resolved**,
**Closed**, or **None**.
4. In **Color**, select a color preset.
5. In **WIP limit**, enter a limit, or leave it blank for no limit.
6. Choose the final action.
| If you are… | Select… |
| --- | --- |
| creating a column | **Add column** |
| editing a column | **Save** |
The column name is required and limited to 60 characters. A WIP limit is optional; an
entered value has a minimum of 1. **None** is a purely organizational column mapping
that does not change issue status. A successful action displays `Column added` or
`Column updated`.
**Result:** The column list shows the new or updated column.
### Reorder or remove columns
**Prerequisites**
- Open **Board settings** and select **Columns**.
**Steps**
1. Drag a column to its new position.
2. Select a column to open its editor.
3. Select **Delete column**.
4. When other columns exist, choose the destination column for its cards.
5. Select **Delete**.
6. Select **Done** when you finish column management.
When the column has other columns available, the confirmation asks where its cards go.
When it is the last column, the confirmation says `This is the last column on the board —
delete the board instead if you want to remove everything.` and **Delete** is disabled.
A successful removal displays `Column deleted`. If saving or deleting fails, the editor
can display `Could not save the column.` or `Could not delete the column.`
**Result:** The board shows the saved column order, or the column is removed and its cards
are handled according to the selected destination.
## Add, filter, and move issues on a board
Issues appear as cards on the board. Use **Add Issues** to place existing issues on the
board, **Filter** to narrow the cards shown, and drag cards between columns to change
their board position.
### Add existing issues
**Prerequisites**
- Open a board record with at least one destination column.
- Know which existing issues you want to place on the board.
**Steps**
1. Select **Add Issues**.
2. In **Search issues...**, enter search text when you want to narrow the list.
3. In the status filter, select **Any status**, **Open**, **In Progress**, **Resolved**,
or **Closed**.
4. In the priority filter, select **Any priority**, **Critical**, **High**, **Medium**,
or **Low**.
5. Select the checkbox beside each issue to add, or select **Select all visible**.
6. In **Add to column**, select the destination column.
7. Select **Add issue** or **Add issues**, according to the number of selected issues.
The **Add to column** choices come from the board's saved column names. The first column
in board order is selected when the dialog opens. If no issues match, the dialog displays
`No issues to add`.
After a successful addition, the application displays `Added issue(s) to the board`.
If the addition fails, it can display `Couldn't add issues`.
**Result:** The selected issues appear in the chosen board column.
### Filter the board cards
**Prerequisites**
- Open a board record with cards available to filter.
**Steps**
1. Select **Filter**.
2. In **Filter cards**, choose values under **Priority**.
3. When the board contains matching values, choose values under **Category**,
**Assignee**, or **Audience**.
4. Under **Reporter email**, select **Any**, **Has email**, or **No email**.
5. Select **Reset** to remove the choices in the filter panel, or select **Clear all**
from the active-filter strip.
The **Category**, **Assignee**, and **Audience** sections appear when the board has
matching values. **Priority** and **Reporter email** are always available in the filter
panel. Active choices appear in the filter strip and can be removed individually.
**Result:** The board shows only the cards that match the selected filters.
### Move a card between columns
**Prerequisites**
- Open a board record with an issue card and at least one destination column.
**Steps**
1. Drag the issue card to its destination column.
2. When the destination is at its WIP limit, review the confirmation prompt
` is at its WIP limit (). Add anyway?`.
3. Confirm the move when you want to add the card despite the limit.
If the move fails, the application can display `Couldn't move the card — please try again.`
**Result:** The card appears in its destination column, or it remains in its original
column when the WIP-limit confirmation is declined.
## When a board action goes wrong
Use this table to match the exact message to the action you were taking.
| What you see | What it means | What to do |
| --- | --- | --- |
| `No project selected` | The board screen has no selected project. | Pick a project from the project switcher, then reopen Boards. |
| `No boards yet` | The selected project has no boards in the list. | Select **Create board**. |
| `Nothing matches` | No board has an issue in the selected status filter. | Select **Clear filter**. |
| `No issues to add` | No issue matches the current add-issue search and filters. | Change **Search issues...**, the status filter, or the priority filter. |
| `Delete board?` | The board-delete confirmation is open. | Select **Cancel** to keep the board, or select **Delete board** to remove the board view. |
| `The issues themselves stay on your project — only the board view is deleted.` | Deleting a board removes its board view, not its issues. | Delete the board only when you want to remove that view. |
| `You can undo this for the next 30 days.` | The deleted board can be restored during that period. | Select **Undo** in the deletion notification when you want to restore it. |
| `Could not create the board. Try again.` | Board creation did not complete. | Review the board details and select **Create board** again. |
| `Could not save` | Board settings could not be saved. | Review the board details and select **Save changes** again. |
| `Could not save the column.` | Column creation or editing could not be saved. | Review the column details and select **Save** or **Add column** again. |
| `Could not delete the column.` | Column deletion did not complete. | Review the destination-column choice and select **Delete** again. |
| `Couldn't add issues` | The selected issues were not added. | Review the destination in **Add to column** and try again. |
| `Couldn't move the card — please try again.` | The card move did not complete. | Return the card to its intended column and try the move again. |
| `Couldn't restore — try the boards index` | The restore action did not complete. | Open the Boards list and try the restore action there. |
## Continue with the board's issues
After you finish board maintenance, continue with the individual issue represented by a
card or review the issue's status guidance. Creating a board opens its new board record,
and deleting a board leaves the issues on the project even though the board view is gone.
| Continue with… | Read… |
| --- | --- |
| An individual issue record | [Work with an issue](https://atloria-selfdogfood-3577.atloria.app/p/atloria-selfdogfood-3577-BDFvUbEgc3/user/work-with-an-issue) |
| Issue statuses and recovery | [Issue states and recovery](https://atloria-selfdogfood-3577.atloria.app/p/atloria-selfdogfood-3577-BDFvUbEgc3/user/issue-states-and-recovery) |
| The Issues destination and board entry point | [Issues overview](https://atloria-selfdogfood-3577.atloria.app/p/atloria-selfdogfood-3577-BDFvUbEgc3/user/issues-overview) |
# Issue states and recovery
## Issue status and recovery
An issue is a report about a problem with published documentation, such as incorrect information,
outdated content, or a broken link. Atloria turns the report into a ticket that can be assigned,
tracked, and managed from the Issues dashboard.
The product-defined status choices include `Open`, `In Progress`, `Resolved`, and `Closed`. It also
provides `Waiting on customer` and `Paused` for work that remains at the In Progress point
in the journey.
```mermaid
stateDiagram-v2
Open --> InProgress: Start Working
InProgress --> Resolved: Mark as Resolved
Resolved --> Closed: Close as Fixed
Closed --> Open: Reopen Issue
```
| If you need to… | Go to |
|---|---|
| Find the Issues destination or choose a view | [Issues overview](https://atloria-selfdogfood-3577.atloria.app/p/atloria-selfdogfood-3577-BDFvUbEgc3/user/issues-overview) |
| Open and work with one issue | [Work with an issue](https://atloria-selfdogfood-3577.atloria.app/p/atloria-selfdogfood-3577-BDFvUbEgc3/user/work-with-an-issue) |
| Understand the controls and status flow on this page | [Understand the issue screen](#understand-the-issue-screen) |
| Change, close, or reopen an issue | [Change status and recover an issue](#change-status-and-recover-an-issue) |
| Filter activity, add a comment, or use a board | [Handle comments, boards, and status branches](#handle-comments-boards-and-status-branches) |
| Diagnose an update or empty-state message | [When an update does not work](#when-an-update-does-not-work) |
| Set up or maintain an issue board | [Manage issue boards](https://atloria-selfdogfood-3577.atloria.app/p/atloria-selfdogfood-3577-BDFvUbEgc3/user/manage-issue-boards) |
## Before you start
Issues are project-scoped reports. Select the project whose issues you need to review before you
open the Issues destination.
| Have this ready | Why it matters |
|---|---|
| The correct project | The dashboard, issue list, and boards use one project context. |
| An existing issue to review | The recovery controls operate on an issue record reached from the list. |
| The status, priority, or assignee change you need to make | Each corresponding control updates the record when its value changes. |
| The reason for closing an issue, if you are closing it | The close choices record whether the issue was fixed, duplicated, not reproducible, or will not be fixed. |
There is no separate save control for **Status**, **Priority**, or **Assignee**. Changing one of
these controls invokes its update action immediately.
With these items ready, open the Issues destination and find the issue you need to review.
## Find and open an issue
The Issues destination is the project-scoped entry point for reviewing reported issues. The full
list is the place to select an existing issue before you use its recovery controls.
**Prerequisites**
- You have selected the project that owns the issue.
- You know enough about the report to recognise it in the issue list.
**Steps**
1. Open the **Issues** destination.
2. Select **All issues** in the overview header.
3. Select the issue you need to review from the list.
**Result:** The selected issue record is on screen, with its status and recovery controls available.
## Understand the issue screen
The issue record brings the report, its current state, its history, and its recovery actions into one
working surface. The overview screen provides the statistics period and navigation to the list and
boards.
The main controls on the overview are:
| If you need to… | Select |
|---|---|
| Change the statistics period to seven days | **7d** |
| Change the statistics period to 30 days | **30d** |
| Change the statistics period to 90 days | **90d** |
| Open the complete issue list | **All issues** |
| Open issues arranged on boards | **Boards** |
| Reload the statistics and issue data | **Refresh** |
| Open the full issue list from recent reports | **View all** |
On the issue record, the fields and controls are arranged as follows:
| Area | What you use there |
|---|---|
| Issue identity | **What the reader said**, the report description, reporter, reported date, and page. |
| Status and management | **Status**, **Priority**, and **Assignee**. |
| Status journey | The current position across `Open`, `In Progress`, `Resolved`, and `Closed`. |
| Activity Timeline | **All**, **Comments**, or **Updates**. |
| Comment composer | `Reply to the reporter…` or `Jot an internal note…`, with **Public reply** or **Internal** visibility. |
| Close Issue | **Fixed**, **Duplicate**, **Won't Fix**, and **Not Reproducible**. |
| Supporting context | **Environment**, **On Boards**, and **Related Issues** when their conditions are met. |
The product-defined **Priority** choices are `Critical`, `High`, `Medium`, and `Low`.
`Waiting on customer` and `Paused` appear at the In Progress point in the status journey, while
keeping their own labels. The **Close Issue** area appears for every status except `Closed`.

Use **Status** to change the status, or choose a named option in **Close Issue** to close the issue.
## Change status and recover an issue
Use the status journey when an issue is moving through normal recovery, and use a close reason when
the issue has reached a final outcome.
**Prerequisites**
- You have opened the issue record.
- You know the next status or the reason the issue is being closed.
**Steps**
1. Read the current position in **Status Journey**.
2. Select the action that matches the current status:
| Current status | Select | Outcome |
|---|---|---|
| `Open` | **Start Working** | Moves the issue to `In Progress`. |
| `In Progress` | **Mark as Resolved** | Moves the issue to `Resolved`. |
| `Resolved` | **Close as Fixed** | Closes the issue with the **Fixed** reason. |
| `Closed` | **Reopen Issue** | Moves the issue back to `Open`. |
3. Select **Status** to choose a different status, or select **Fixed**, **Duplicate**, **Won't Fix**,
or **Not Reproducible** in **Close Issue**.
4. Read the status or close result on the record. A status change displays `Status updated`, a priority
change displays `Priority updated`, and an assignee change displays `Assignee updated`. A failed
update raises `Update failed`. A successful close raises `Issue closed`; a failed close raises
`Close failed`.
**Result:** The issue shows the selected recovery state or close reason, and the corresponding result
message appears.
When the issue needs supporting coordination rather than a status change, continue with the timeline,
comment, board, or assignment controls.
## Handle comments, boards, and status branches
Comments, board placement, and activity filters support recovery work without replacing the issue's
status. Use them when the next action depends on a customer reply, internal coordination, or a record
of what changed.
**Prerequisites**
- You have opened the issue record.
- You know whether the comment is for the reporter or for the team.
**Steps**
1. When work is waiting for a response or paused internally, read **Status Journey** and use the
**Status** choice that matches `Waiting on customer` or `Paused`.
2. In **Activity Timeline**, select one filter:
| If you need to see… | Select |
|---|---|
| Comments and status activity together | **All** |
| Comments only | **Comments** |
| Status and assignment changes | **Updates** |
3. Select **Reply** to move to the comment composer.
4. Choose the visibility that matches the audience:
| If the note is for… | Select |
|---|---|
| The reporter | **Public reply** |
| The team only | **Internal** |
5. Enter the comment in `Reply to the reporter…` or `Jot an internal note…`.
6. Select **Send reply** for a public reply or **Add note** for an internal note. A successful
comment raises `Comment added`; a failed comment raises `Failed to add comment`.
7. Select **Add to Board** when the issue also needs board coordination.
8. In the board picker, enter a board name in **Search boards...**, then select the matching board.
9. To assign the issue to yourself, select **Assign to me**. If you are already assigned, select
**Unassign me** instead.
**Result:** The timeline shows the selected activity view, the comment uses the selected visibility,
and the issue is available on the selected board or assigned according to your choice.
## When an update does not work
Use the message text on screen to identify which recovery action needs attention. The issue record also
uses empty-state messages when the selected timeline or board list has no items.
| What appears | What to do |
|---|---|
| `Update failed` | Check the current status, then retry the status, priority, or assignee change. |
| `Close failed` | Confirm that the issue is not already `Closed`, then retry the close choice. |
| `Failed to add comment` | Check the comment text and its visibility, then retry the comment. |
| `Added issue(s) to ""` | The issue was added to the displayed board name and issue count. |
| ``API error message, or `Couldn't add to board` `` | Check the board search and try the board action again. |
| `Removed from ""` | The issue was removed from the displayed board name. |
| ``API error message, or `Couldn't remove` `` | Check the board entry, then retry removing it. |
| `No activity yet` | Select **All** and use the status or comment controls to begin the issue history. |
| `No comments yet` | Select **All** or add a comment when you have the appropriate text. |
| `No updates yet` | Select **All** or change the issue status or assignment. |
| `No boards match` | Change the text in **Search boards...**. |
| `No boards yet` | Use the board-management path to create or maintain a board. |
The **Environment**, **On Boards**, **Related Issues**, and **Closed as** areas depend on the issue's
current information. If the relevant information is not present, continue with the status and recovery
controls that are on screen.
If an update still needs attention after these checks, continue with the next support path.
## What happens next
After a recovery action, the issue remains part of the Issues workflow: it can be reviewed in the list,
worked from its record, or coordinated through a board. A public tracking page lets reporters see the
issue status, public comments, and timeline without signing in.
| If you need to… | Continue with |
|---|---|
| Review the issue list and its views | [Issues overview](https://atloria-selfdogfood-3577.atloria.app/p/atloria-selfdogfood-3577-BDFvUbEgc3/user/issues-overview) |
| Continue working on the record | [Work with an issue](https://atloria-selfdogfood-3577.atloria.app/p/atloria-selfdogfood-3577-BDFvUbEgc3/user/work-with-an-issue) |
| Create or maintain the board used for coordination | [Manage issue boards](https://atloria-selfdogfood-3577.atloria.app/p/atloria-selfdogfood-3577-BDFvUbEgc3/user/manage-issue-boards) |
| Resolve a broader application problem | [Common issues and solutions](https://atloria-selfdogfood-3577.atloria.app/p/atloria-selfdogfood-3577-BDFvUbEgc3/user/common-issues-and-solutions) |
| Get help with a problem that remains | [Getting help](https://atloria-selfdogfood-3577.atloria.app/p/atloria-selfdogfood-3577-BDFvUbEgc3/user/getting-help) |
# Users & Permissions overview
Users & Permissions is the administrative access surface for reaching user and
membership work. Use this page to orient yourself, then continue to the page that
matches your goal.
| If you need to… | Go to |
|---|---|
| Understand the administrative access surface | [Users & Permissions overview](#users--permissions-overview) |
| Reach the Users & Permissions page | [Reach Users & Permissions](#reach-users--permissions) |
| Understand what the current page contains | [Understand the current surface](#understand-the-current-surface) |
| Manage users, roles, or access control | [Manage users](https://atloria-selfdogfood-3577.atloria.app/p/atloria-selfdogfood-3577-BDFvUbEgc3/user/manage-users) |
| Manage membership from organization settings | [Organization overview](https://atloria-selfdogfood-3577.atloria.app/p/atloria-selfdogfood-3577-BDFvUbEgc3/user/organization-overview) |
## Users & Permissions overview
The Users & Permissions page is the place to start when you need administrative
access information. It currently presents a placeholder for user management and
directs membership work to organization settings.
The page identifies the area with the subtitle `Manage users, roles, and access control`.
Its status message is `Coming soon`. The page also states:
`User management functionality is currently under development. This page will allow you to manage users, assign roles, and control access permissions.`
The Admin Dashboard is the administrative hub for these entry points.
When no signed-in user name is available, the Admin Dashboard uses the subtitle
`Central hub for system administration and management`.
## Before you start
Before opening this surface, decide whether you need orientation or membership
management. Use Users & Permissions for orientation. Use [Organization overview](https://atloria-selfdogfood-3577.atloria.app/p/atloria-selfdogfood-3577-BDFvUbEgc3/user/organization-overview)
for membership management.
The page displays this guidance:
`Until then, manage membership from your organization settings.`
## Reach Users & Permissions
Use this procedure when you need to open the Users & Permissions page from the
administrative hub.
**Prerequisites**
- You are on the Admin Dashboard.
**Steps**
1. Choose the entry point that matches where you are working.
| If you are… | Select |
|---|---|
| In the administrative list | **Users & Permissions** |
| Using the quick actions | **Add New User** |
2. On the Users & Permissions page, confirm that the heading is **Users & Permissions**.
The page displays `Coming soon` and the message `Until then, manage membership from your organization settings.`
**Result:** The Users & Permissions page is open.
## Understand the current surface
The current surface is a status page rather than an editable user list. It shows
the **Users & Permissions** heading, the subtitle `Manage users, roles, and access control`,
and the status message `Coming soon`.
| What you see | What it tells you |
|---|---|
| `User management functionality is currently under development. This page will allow you to manage users, assign roles, and control access permissions.` | User management is presented as a future function of this page. |
| **Search⌘K** | Opens the command palette. |
| **Switch to dark mode** | Changes the display mode. |
| **Sign out** | Ends the current session. |
The page does not present an editable user list, role selector, permission
selector, save control, labelled form field, or grid. The next page for user-management
work is [Manage users](https://atloria-selfdogfood-3577.atloria.app/p/atloria-selfdogfood-3577-BDFvUbEgc3/user/manage-users). The organization-settings destination is
[Organization overview](https://atloria-selfdogfood-3577.atloria.app/p/atloria-selfdogfood-3577-BDFvUbEgc3/user/organization-overview).
# Manage users
## Manage users
The **Users & Permissions** surface is intended for managing users, assigning roles, and
controlling access permissions. The page subtitle is `Manage users, roles, and access control`.
Open **Users & Permissions** to reach the page.
| If you need to… | Go to |
|---|---|
| Check the current user-management availability | Before you start |
| Understand the wider access-control area | [Users & Permissions overview](https://atloria-selfdogfood-3577.atloria.app/p/atloria-selfdogfood-3577-BDFvUbEgc3/user/users-and-permissions-overview) |
| Manage membership from organization settings | [Manage organization access](https://atloria-selfdogfood-3577.atloria.app/p/atloria-selfdogfood-3577-BDFvUbEgc3/user/manage-organization-access) |
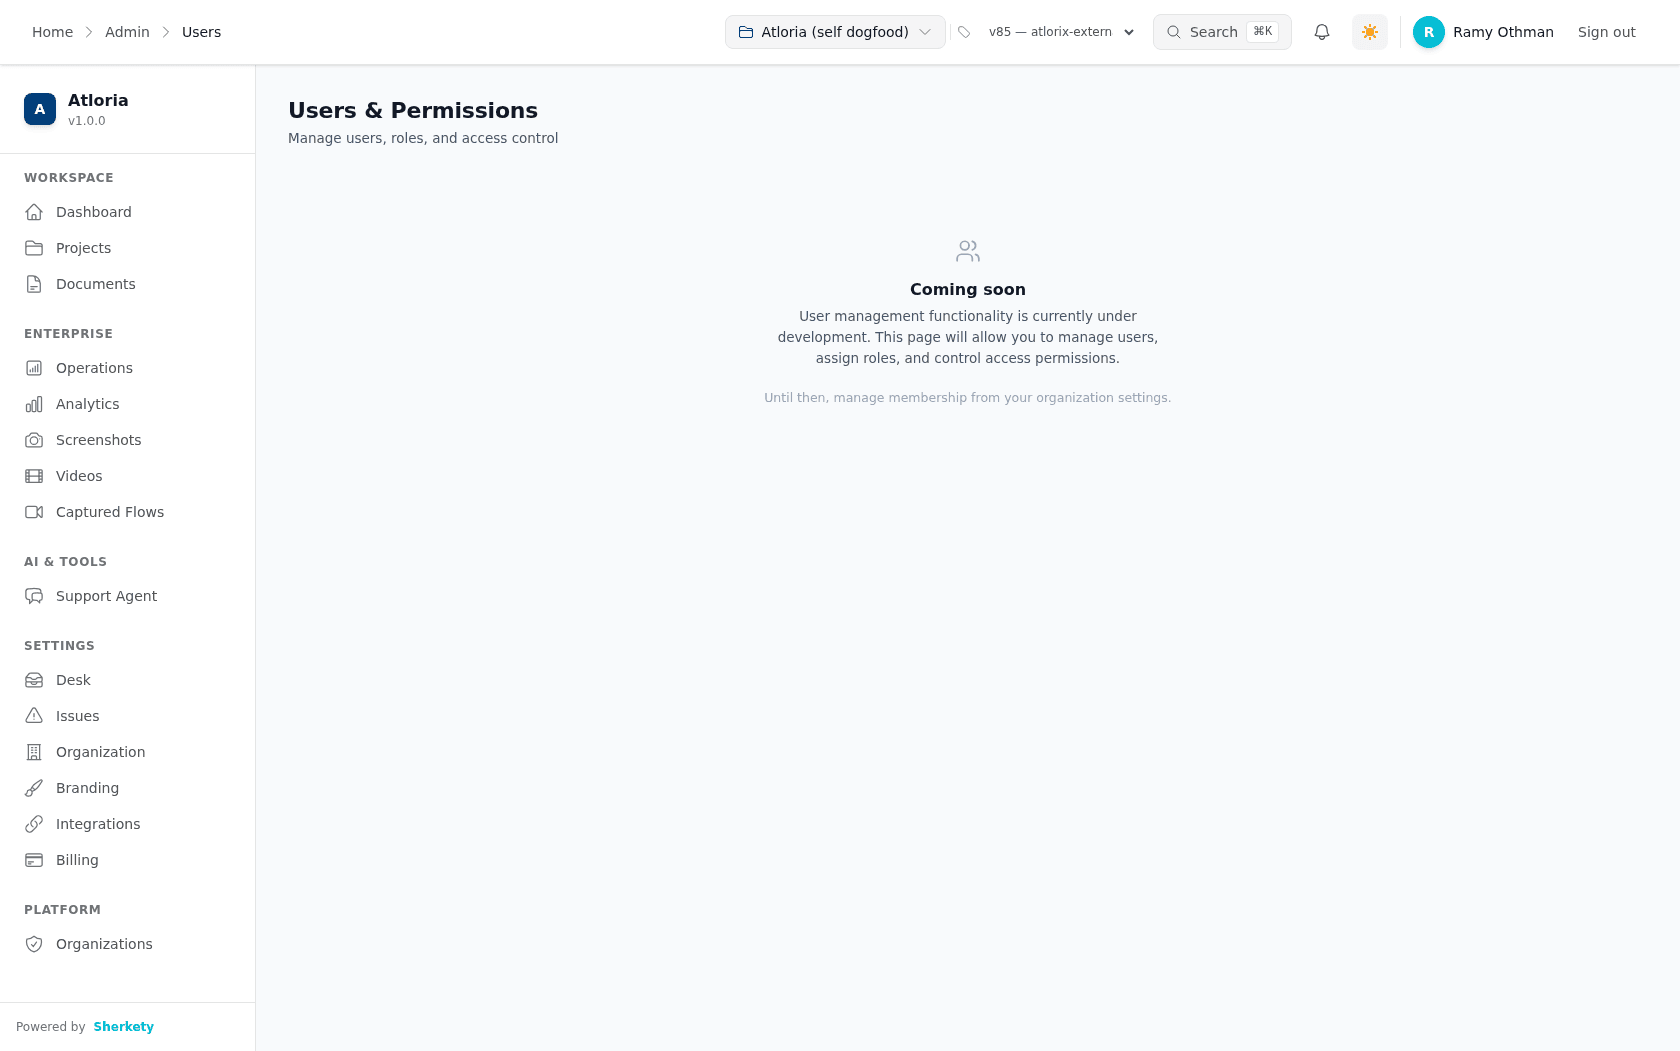
## Before you start
Once the page is open, check its status before looking for user-management actions. The page presents
an informational status rather than a user-management form: **Coming soon** appears above
the message "User management functionality is currently under development. This page will allow you to manage users, assign roles, and control access permissions." The page also displays the hint
"Until then, manage membership from your organization settings."
The page contains no user-entry fields, role-assignment controls, access-permission controls, or
user-management actions. Its content appears together without an additional condition, and the
page shows its title, body, and hint together.
The surrounding shell provides these controls:
| Control | What you can see |
|---|---|
| **Search⌘K** | Title **Open command palette** |
| **Notifications** | The button displays the value `9+` |
| **Switch to dark mode** | The button has no visible text |
| **Sign out** | Text label |
**Result:** The **Users & Permissions** page is open, with the **Coming soon** status and its current
membership-management hint visible.
# Security and audit information
## Security and audit information
The audit trail is the activity list that records who did what, when, for the project you
select. Use this page when you need to review project activity or export the activity list.
Who did what, when — the full audit trail for the selected project.
| If you need to… | Go to |
| --- | --- |
| Choose the project whose activity you need to review | [Before you start](#before-you-start) |
| Reach the audit page | [Open the audit surface](#open-the-audit-surface) |
| Identify filters, columns, and export controls | [Understand the audit screen](#understand-the-audit-screen) |
| Filter, inspect, page through, or export events | [Review and export audit information](#review-and-export-audit-information) |
| Interpret an empty or changing result | [Handle empty and changing audit results](#handle-empty-and-changing-audit-results) |
| Review the broader security and audit surfaces | [Security & Audit overview](https://atloria-selfdogfood-3577.atloria.app/p/atloria-selfdogfood-3577-BDFvUbEgc3/user/security-and-audit-overview) |
| Review related audit information | [Audit reference](https://atloria-selfdogfood-3577.atloria.app/p/atloria-selfdogfood-3577-BDFvUbEgc3/user/audit-reference) |
## Before you start
Select one project before reviewing its audit trail. This page is intended for administrators.
**Prerequisites**
- Know which project you need to review.
- Have access to the administrator area.
**Steps**
1. In the header dropdown, select the project whose activity you need to review.
If no project is selected, the page displays the title `Select a project`, the hint
`The audit trail is scoped to one project at a time.`, and the instruction
`Choose a project from the header dropdown to view its audit log.`
**Result:** The audit page is ready to show activity for the selected project.
## Open the audit surface
The Security & Audit page is the administrator entry point for reviewing activity for a
selected project.
**Prerequisites**
- Know which project you need to review.
**Steps**
1. Open the Security & Audit page.
**Result:** The `Security & Audit` page opens.
## Understand the audit screen
The audit screen combines an action filter, an event table, pagination, and a CSV export
control.
| Area | What you use it for |
| --- | --- |
| **Action filter** | Narrow the activity list to one action option. |
| **When** | See when an event occurred. |
| **User** | See which user is associated with an event. |
| **Action** | See the action recorded for an event. |
| **Details** | Read the event description. |
| `Showing – of events` | See the current result range and total. |
| **Previous** and **Next** | Move between result pages when those controls are available. |
| **Export CSV** | Request a CSV copy of the audit information. |
The **Action filter** is available after a project is selected. Its options are:
| Option | Use |
| --- | --- |
| `All Actions` | Show all available actions. |
| `version.published` | Filter for version-published events. |
| `document.updated` | Filter for document-updated events. |
| `document.edited` | Filter for document-edited events. |
| `webhook.received` | Filter for webhook-received events. |
| `version.reviewed` | Filter for version-reviewed events. |
| `export.downloaded` | Filter for export-downloaded events. |
| `schedule.triggered` | Filter for schedule-triggered events. |
## Review and export audit information
Use this procedure to narrow the activity list, inspect an event, move through the results,
or request a CSV export.
**Prerequisites**
- A project is selected.
- Audit events are available for the project when you need to inspect a row or use pagination.
**Steps**
1. In **Action filter**, select the option that matches the activity you need to review.
Use the following options:
| If you need to review… | Select |
| --- | --- |
| Every available action | `All Actions` |
| A published version | `version.published` |
| An updated document | `document.updated` |
| An edited document | `document.edited` |
| A received webhook | `webhook.received` |
| A reviewed version | `version.reviewed` |
| A downloaded export | `export.downloaded` |
| A triggered schedule | `schedule.triggered` |
2. When `Loading audit events…` appears, wait for the audit list to finish loading.
3. Select the audit row you want to inspect.
The row expands to show its metadata.
4. Select **Previous** or **Next**:
| If you need to… | Select |
| --- | --- |
| Return to preceding events | **Previous** |
| Continue to later events | **Next** |
5. Select **Export CSV** to request a CSV copy of the audit information.
While the request is being prepared, the control displays `Exporting…`.
**Result:** The page shows the selected activity, expanded metadata, another result page, or
the exporting state, depending on the action you took.
## Handle empty and changing audit results
The audit page changes its content when the project selection, loading state, event count, or
result position changes.
| What you see | What it means |
| --- | --- |
| `Select a project` | No project is selected. |
| `Loading audit events…` | The page is loading the audit list. |
| `No audit events found` | The selected project has no events in the current result. |
| **Previous** | Earlier results are available. |
| **Next** | More results remain after the current page. |
**Prerequisites**
- You have opened the audit page.
**Steps**
1. Read the message displayed in the audit content area.
2. Follow the action for the message you see:
| If you see… | Do this |
| --- | --- |
| `Select a project` | Select a project from the header dropdown. |
| `Loading audit events…` | When Loading audit events… appears, wait for the audit list to finish loading. |
| `No audit events found` | Read `Events appear here as soon as anything is published, edited, or exported.` |
| **Previous** | Select **Previous** to return to earlier results. |
| **Next** | Select **Next** to continue to later results. |
**Result:** The page displays the project audit list, the current empty state, or the result
page you selected.
## When the audit query fails
If the audit query fails, the page clears the event list and total without displaying an
error message.
| What you see | What it means | What to do |
| --- | --- | --- |
| The event list is empty and no error text appears | The audit query returned no usable event list. | Check the selected project and retry the review. |
| No validation, confirmation, or error message appears | No validation, confirmation, or error message appears for this outcome. | Continue with the information displayed on the page. |
**Result:** The page remains on the audit surface with no event list or total displayed.
## Continue from audit review
After reviewing the selected project's audit trail, continue with the related security or
audit material that matches your next question.
| If you need to… | Go to |
| --- | --- |
| Review the broader security and audit surfaces | [Security & Audit overview](https://atloria-selfdogfood-3577.atloria.app/p/atloria-selfdogfood-3577-BDFvUbEgc3/user/security-and-audit-overview) |
| Review related audit information | [Audit reference](https://atloria-selfdogfood-3577.atloria.app/p/atloria-selfdogfood-3577-BDFvUbEgc3/user/audit-reference) |
| Review security information as a task | [Review security information](https://atloria-selfdogfood-3577.atloria.app/p/atloria-selfdogfood-3577-BDFvUbEgc3/user/review-security-information) |
**Result:** You have the audit information for the selected project and a related page for
the next review task.
# Organization administration
## Organization administration at a glance
Organization administration is where you manage the organization’s members and audiences. An
audience is a group you use to target manuals and help content at specific reader groups. This topic sits in the
Administrative Guide’s Organizations area, alongside organization access management and
organization audit information.
| If you need to… | Go to |
| --- | --- |
| Invite a team member | [Invite a team member](#invite-a-team-member) |
| Create or maintain an audience | [Create and manage audiences](#create-and-manage-audiences) |
| Manage single sign-on or provisioning | [Manage organization access](https://atloria-selfdogfood-3577.atloria.app/p/atloria-selfdogfood-3577-BDFvUbEgc3/user/manage-organization-access) |
| Review organization activity | [Organization audit](https://atloria-selfdogfood-3577.atloria.app/p/atloria-selfdogfood-3577-BDFvUbEgc3/user/organization-audit) |
| Learn how to reach settings | [Navigation basics](https://atloria-selfdogfood-3577.atloria.app/p/atloria-selfdogfood-3577-BDFvUbEgc3/user/navigation-basics) |
| Personalize workspace presentation | [Personalizing your workspace](https://atloria-selfdogfood-3577.atloria.app/p/atloria-selfdogfood-3577-BDFvUbEgc3/user/personalizing-your-workspace) |
| Manage user accounts | [Manage users](https://atloria-selfdogfood-3577.atloria.app/p/atloria-selfdogfood-3577-BDFvUbEgc3/user/manage-users) |
| Review document access | [Document access reference](https://atloria-selfdogfood-3577.atloria.app/p/atloria-selfdogfood-3577-BDFvUbEgc3/user/document-access-reference) |
| Review security information | [Security and audit access](https://atloria-selfdogfood-3577.atloria.app/p/atloria-selfdogfood-3577-BDFvUbEgc3/user/security-and-audit-access) |
## Prerequisites for organization administration
Before you start, have the email address for the person you want to invite and decide which
Invite role option to assign. The invitation form starts with `CONTRIBUTOR` as its selected role.
> **Note:** The invitation form starts with `CONTRIBUTOR`. Choose another Invite role option before
> selecting **Send invite** when that is the role you need.
When you create an audience in **Settings audiences**, the initial color is `#3B82F6` and the
initial icon is `📄`. When you create one in **Audiences**, the initial color is `#3B82F6` and the
initial icon is `users`.
## Find the organization administration screens
Use this procedure to reach the organization and audience administration screens.
**Steps**
1. In the application navigation, select **Organization**.
2. From organization administration, open the audience settings surface when you need to create,
edit, or delete audiences.
3. Open **Audiences** when you need to view built-in standard audiences and organization-specific
custom audiences.
**Result:** The organization administration screen or the audience screen you selected is open.
## Understand the organization screens
The organization settings screen combines an invitation form with a member list. The invitation
form contains an email field and an Invite role choice. The member list can show each member’s
name, email, role, status, and joined date.
The audience screens use forms for audience details and lists for existing audiences. Use the
following fields when you create or edit an audience:
| Screen | Field | Type | Required |
| --- | --- | --- | --- |
| Organization settings | **Invite email** | Email input | Yes |
| Organization settings | **Invite role** | Select | No required marker |
| Settings audiences | **Name** | Text input | Yes |
| Settings audiences | **Slug** | Text input | Yes |
| Settings audiences | **Color** | Color and text inputs | No required marker |
| Settings audiences | **Icon (emoji)** | Text input | Yes |
| Settings audiences | **Description (optional)** | Textarea | No required marker |
| Audiences | **Name** | Text input | No required marker |
| Audiences | **Slug** | Text input | No required marker |
| Audiences | **Color** | Color and text inputs | No required marker |
| Audiences | **Icon** | Text input | No required marker |
| Audiences | **Description (optional)** | Textarea | No required marker |
## Invite a team member
Use the organization invitation form to add a person to the organization with a selected role.
**Prerequisites**
- Have the person’s email address.
- Decide whether the person needs `viewer`, `contributor`, `maintainer`, or `admin`.
**Steps**
1. Enter the person’s email address in **Invite email**.
2. Choose one option in **Invite role**: `viewer`, `contributor`, `maintainer`, or `admin`.
3. Select **Send invite**.
The invitation request can produce these messages:
| Message | What to do |
| --- | --- |
| `Only admins and maintainers can invite members.` | Ask an administrator or maintainer to send the invitation. |
| “Invite failed.” | Review the invitation details and try **Send invite** again. |
| `Request failed — please try again.` | Try **Send invite** again. |
**Result:** The invitation confirmation reads "Invitation sent to {email} — they'll get an email with a join link."
## Create and manage audiences
Use the audience controls to maintain reader groups for documentation targeting. **Settings
audiences** provides the create, edit, and delete controls; **Audiences** separates built-in
standard audiences from organization-specific custom audiences.
**Prerequisites**
- Decide the audience name, slug, color, icon, and description.
- For **Settings audiences**, use lowercase letters, numbers, and hyphens in **Slug**.
**Steps**
1. Choose the task you are doing:
| If you want to… | First action |
| --- | --- |
| Create an audience | Select **New audience**. |
| Edit an existing custom audience | Select its edit action. |
| Delete an existing custom audience | Select **Delete** in **Settings audiences**. |
| Cancel the audience form | Select **Cancel**. |
### Create an audience
1. Enter the audience name in **Name**.
2. Enter the audience identifier in **Slug**.
3. Set the audience color in **Color**.
4. Enter the audience symbol in **Icon (emoji)** or **Icon**, depending on the screen.
5. Enter supporting text in **Description (optional)** when needed.
6. Choose the completion action for the work you are doing:
| If you are creating an audience in… | Select |
| --- | --- |
| **Settings audiences** | **Create audience** |
| **Audiences** | **Create** |
**Result:** The new audience is submitted from the selected audience screen.
### Edit an audience
1. Enter the updated audience name in **Name**.
2. Enter the updated audience identifier in **Slug**.
3. Set the updated audience color in **Color**.
4. Enter the updated audience symbol in **Icon (emoji)** or **Icon**, depending on the screen.
5. Enter updated supporting text in **Description (optional)** when needed.
6. Choose the completion action for the work you are doing:
| If you are editing an audience in… | Select |
| --- | --- |
| **Settings audiences** | **Save changes** |
| **Audiences** | **Update** |
**Result:** The updated audience is submitted from the selected audience screen.
### Delete an audience
1. In the confirmation modal, read "Are you sure you want to delete the audience "{name}"? This action cannot be undone."
2. Select **Delete** to confirm.
**Result:** The deletion confirmation has been completed.
### Cancel the audience form
1. Select **Cancel** to close the audience form without submitting it.
**Result:** The audience form closes without submission.
The **Slug** in **Settings audiences** is converted to lowercase letters and hyphens as you
change **Name**. Standard audiences are built in and cannot be modified or deleted.
**Result:** The audience list shows the audience with its name, slug, color, and type. A custom
audience can be edited or deleted from its row.
## Handle audience and member variations
The organization screens change what you can do according to the data returned and the action’s
result.
| What you see | What it means | What to do |
| --- | --- | --- |
| A loading indicator in the member area | The member list is being retrieved | Wait for the member list or its error message. |
| A bad note in the member area | Member loading returned an error | Read the displayed error and correct the access or request problem. |
| No member rows | No organization members are returned | Use the invitation form to invite a team member. |
| A loading indicator on **Audiences** | The audience list is being retrieved | Wait for the audience list or its error message. |
| **Audiences failed to load.** | Audience loading returned an error | Read the displayed error and retry the page action. |
| Standard audiences | Built-in audiences are listed | Use them as listed; their edit and delete actions are not available. |
| **No custom audiences** | The organization has no custom audience rows | Select **New audience** to create one. |
| A create or edit modal | The audience form is open | Complete the fields and choose **Create audience**, **Create**, **Save changes**, or **Update**. |
| A delete confirmation modal | Deletion is awaiting confirmation | Read the confirmation and choose **Delete** or **Cancel**. |
The audience settings surface can also show these messages when its requests fail: "Failed to load audiences", "Operation failed", and "Delete failed".
**Result:** You know whether to wait, retry the page action, invite a team member, create an audience,
or continue to a dedicated administration screen.
## Continue with access or audit administration
Use this procedure to continue from organization settings to the dedicated administration screens.
**Steps**
1. From organization settings, select one of these controls:
| If you need to… | Select |
| --- | --- |
| Continue to access configuration | **Single Sign-On** |
| Continue to provisioning configuration | **Provisioning (SCIM)** |
| Review organization audit information | **Audit Log** |
**Result:** The selected access, provisioning, or audit screen opens.
# Manage organization access
## Organization provisioning and SSO
Organization access settings connect your identity provider to Atloria. Use
SCIM provisioning to synchronize users and their access, or use SAML single
sign-on to let members sign in through your identity provider.
| If you need to… | Go to |
|---|---|
| Connect an identity provider, create a SCIM token, or map groups to roles | [Configure SCIM provisioning](#configure-scim-provisioning) |
| Import SAML metadata, map attributes, or save SSO settings | [Configure SAML single sign-on](#configure-saml-single-sign-on) |
| Resolve a plan, permission, or configuration message | [Resolve access configuration messages](#resolve-access-configuration-messages) |
| Review organization activity after changing access | [Organization audit](https://atloria-selfdogfood-3577.atloria.app/p/atloria-selfdogfood-3577-BDFvUbEgc3/user/organization-audit) |
## Before you start
Both provisioning and SSO are Business-plan features. You also need to be an
organization admin to manage either configuration. Have your identity
provider's connection details ready before you begin.
| Prepare | What to have ready |
|---|---|
| Access | An organization-admin account |
| Plan | A Business plan |
| SCIM connection | The identity provider you are connecting and the group names you want to map |
| SSO connection | The IdP Entity ID (Issuer), IdP SSO URL (HTTP-Redirect), and IdP signing certificate |
| SAML attributes | The assertion attribute names or claim URIs for `email`, `name`, `firstName`, `lastName`, and `groups` |
| Domain policy | The email domains that may be provisioned, if you want to restrict provisioning by domain |
If you do not have the required plan, the provisioning page shows
`SCIM provisioning is a Business-plan feature` and the SSO page shows
`SSO is a Business-plan feature`. If you are not an organization admin, the
pages show the corresponding permission message in [Resolve access
configuration messages](#resolve-access-configuration-messages).
## Open the organization access settings
Use this procedure to open the surface for the access method you need.
Prerequisites
- You have an organization-admin account.
- You know whether you are configuring SCIM provisioning or SAML single sign-on.
Steps
1. Open the organization settings, then choose the provisioning surface for SCIM
provisioning or the SSO surface for SAML single sign-on.
**Result:** The selected organization access settings surface opens.
## Configure SCIM provisioning
Use this surface to connect the provider, create its access token, and map
provider groups to Atloria roles.
Prerequisites
- You have an organization-admin account on a Business plan.
- You have the identity-provider setup details and the provider group names.
Steps
1. In **Identity provider**, choose one option.
| If you are connecting… | Choose |
|---|---|
| Okta | **Okta** |
| Microsoft Entra | **Microsoft Entra** |
The instructions below **Identity provider** change to match your choice.
2. In **Token label (e.g. Okta production)**, enter a label for the token.
3. Select **Generate token**.
4. Select **Copy** beside the displayed SCIM value, then select **I've saved it**
after you have stored the token in your identity provider.
The token notice says `Copy your SCIM token now`. The token is shown for this
one-time copy step.
5. In **IdP group name (e.g. atloria-admins)**, enter the provider group to map.
6. In **role**, choose the role to grant to members of that group.
| To grant… | Choose |
|---|---|
| Viewer access | **Viewer** |
| Contributor access | **Contributor** |
| Maintainer access | **Maintainer** |
| Administrator access | **Admin** |
7. Select **Add mapping**.
8. To manage an existing entry, use the applicable action.
| If you need to… | Select |
|---|---|
| Revoke an active SCIM token | **Revoke** |
| Remove a group-to-role mapping | **Remove** |
**Result:** The selected provider instructions, token connection details, and
group-to-role mapping are shown on the provisioning surface.
## Configure SAML single sign-on
Use this surface to import or enter provider metadata, map attributes, set
just-in-time provisioning defaults, and save the configuration.
Prerequisites
- You have an organization-admin account on a Business plan.
- You have the provider metadata URL or XML, or the values for the manual SSO
fields.
- You have the IdP signing certificate when you are preparing to enable SSO.
Steps
1. Choose the metadata source you have, then use the matching alternative.
| If you have… | Enter it in… | Then select… |
|---|---|---|
| A metadata URL | **Import from IdP metadata — URL** | **Parse URL** |
| Metadata XML | **metadata XML** | **Parse XML** |
2. Review the values in **IdP Entity ID (Issuer)** and
**IdP SSO URL (HTTP-Redirect)**.
3. Enter the provider certificate in **IdP signing certificate**.
4. In the Attribute mapping section, enter the assertion attribute name or claim URI for
each field.
| Field | Value to enter |
|---|---|
| **email** | The provider's email attribute or claim URI |
| **name** | The provider's name attribute or claim URI |
| **firstName** | The provider's first-name attribute or claim URI |
| **lastName** | The provider's last-name attribute or claim URI |
| **groups** | The provider's group attribute or claim URI |
5. To fill a standard mapping, select **Okta preset** or **Entra preset**.
6. In **Default role for new users**, choose one option.
| New users receive… | Choose |
|---|---|
| Viewer access | **VIEWER** |
| Contributor access | **CONTRIBUTOR** |
| Maintainer access | **MAINTAINER** |
| Administrator access | **ADMIN** |
7. In **Allowed email domains**, enter a domain and select **Add**. Repeat for
each domain you want to allow. Select **Remove ** on a domain chip to
remove it.
8. Complete the remaining SSO actions in this order.
| Order | Action | Condition |
|---|---|---|
| 1 | Select **Test SSO login**. | Test the identity-provider connection before enabling or enforcing SSO. |
| 2 | Select **Enable SSO** or **Disable SSO**. | **Enable SSO** is available when the certificate and SSO URL are present; use **Disable SSO** when SSO is enabled. |
| 3 | Select **Save configuration**. | Save the SSO URL, entity ID, attribute mappings, default role, allowed domains, and entered certificate. |
| 4 | Select **Enforce SSO** or **Stop enforcing**. | Select **Enforce SSO** after a successful test; select **Stop enforcing** to allow password sign-in again. |
**Result:** The SAML configuration is saved, and the connection status shows the
available SSO and enforcement actions.
## Handle access configuration branches
The surface changes what it shows according to your plan, permissions, saved
configuration, and the provider you selected.
| When… | Use this path |
|---|---|
| You choose **Okta** in **Identity provider** | Follow the Okta setup instructions. |
| You choose **Microsoft Entra** in **Identity provider** | Follow the Entra setup instructions. |
| The provisioning list has no token | Select **Generate token** to create the connection token. |
| The provisioning list has no group mappings | Enter a group and select **Add mapping**. |
| A new token is displayed | Select **Copy**, store it in the identity provider, and select **I've saved it**. |
| SSO settings are still loading | Wait for the SSO settings surface to finish loading. |
| No successful SSO test exists and SSO is not enforced | Run **Test SSO login** before selecting **Enforce SSO**. |
| The certificate or SSO URL is absent | Complete those fields before selecting **Enable SSO**. |
| SSO is enabled | Select **Disable SSO** to turn it off. |
| SSO is not enabled | Select **Enable SSO** to turn it on. |
## Resolve access configuration messages
Use the message on screen to choose the next action.
| Message | What to do |
|---|---|
| `No tokens yet — generate one to connect your IdP.` | Enter a token label and select **Generate token**. |
| `No group mappings.` | Enter an IdP group name, choose a **role**, and select **Add mapping**. |
| `Copy your SCIM token now` | Select **Copy**, store the token in the identity provider, and select **I've saved it**. |
| `Only organization admins can manage provisioning.` | Sign in with an organization-admin account. |
| `SCIM provisioning is a Business-plan feature` | Use a Business plan before configuring provisioning. |
| `Only organization admins can manage SSO.` | Sign in with an organization-admin account. |
| `SSO is a Business-plan feature` | Use a Business plan before configuring SSO. |
| `Loading SSO settings…` | Wait for the SSO settings to load. |
| `SSO test succeeded — the IdP returned a valid assertion.` | Continue with the SSO configuration or select **Enforce SSO**. |
| `Metadata parsed. Review the values below, then Save.` | Review the imported values, then select **Save configuration**. |
| `Run a successful SSO test to unlock enforcement.` | Select **Test SSO login**, then select **Enforce SSO** after the test succeeds. |
## After configuring organization access
Review the values shown after you save. Provisioning displays token status,
last-used time, sync counts, last sync, recent provisioning activity, and group
mappings. SSO displays service-provider details, connection status, the last
test result, and whether SSO is enabled or disabled.
For organization context, see [Organization overview](https://atloria-selfdogfood-3577.atloria.app/p/atloria-selfdogfood-3577-BDFvUbEgc3/user/organization-overview).
For activity review, see [Organization audit](https://atloria-selfdogfood-3577.atloria.app/p/atloria-selfdogfood-3577-BDFvUbEgc3/user/organization-audit).
# Organization audit
## Organization audit overview
An organization audit log is a record of actions across all projects in the organization.
Use it when you need to review organization-wide activity rather than the history of one
project.
| If you need to… | Go to |
| --- | --- |
| Understand the audit surface and its filters | [Understand the audit screen](#understand-the-audit-screen) |
| Narrow the event list and inspect details | [Filter and inspect audit events](#filter-and-inspect-audit-events) |
| Save a copy of the organization audit information | [Export organization audit events](#export-organization-audit-events) |
| Resolve an empty, loading, or access-error state | [Handle empty, loading, and access-error states](#handle-empty-loading-and-access-error-states) |
| Review organization settings | [Organization overview](https://atloria-selfdogfood-3577.atloria.app/p/atloria-selfdogfood-3577-BDFvUbEgc3/user/organization-overview) |
| Manage organization provisioning or SSO | [Manage organization access](https://atloria-selfdogfood-3577.atloria.app/p/atloria-selfdogfood-3577-BDFvUbEgc3/user/manage-organization-access) |
| Review project-level changes and audit information | [Project changes and audit](https://atloria-selfdogfood-3577.atloria.app/p/atloria-selfdogfood-3577-BDFvUbEgc3/user/project-changes-and-audit) |
| Review broader security and audit information | [Security & Audit overview](https://atloria-selfdogfood-3577.atloria.app/p/atloria-selfdogfood-3577-BDFvUbEgc3/user/security-and-audit-overview) |
| Find related audit records | [Audit reference](https://atloria-selfdogfood-3577.atloria.app/p/atloria-selfdogfood-3577-BDFvUbEgc3/user/audit-reference) |
## Before you review the audit log
The organization audit page loads its filters and events for a signed-in permitted session.
Access is limited to administrators and maintainers.
Prerequisites
- Sign in with an administrator or maintainer role.
- Use a permitted session for the organization.
If access is refused, the page displays `Only admins and maintainers can view the organization
audit log.` If the audit request fails for another reason, it displays `Could not load the audit
log.`
With a permitted session in place, continue by opening the organization audit log.
## Open the organization audit log
Open this view when you need to review actions across projects instead of working on a project
record.
Prerequisites
- Complete the prerequisites in [Before you review the audit log](#before-you-review-the-audit-log).
Steps
1. Open the organization settings area.
2. Select **Audit Log**.
3. Confirm that **Audit Log** is the active organization-settings section.
The **Members** destination belongs to the [Organization overview](https://atloria-selfdogfood-3577.atloria.app/p/atloria-selfdogfood-3577-BDFvUbEgc3/user/organization-overview)
page. Use that page for organization settings and member information.
**Result:** The organization-wide audit log is open, with its filters and event review area
available when the audit request loads.
## Understand the audit screen
The audit screen combines filters, an event table, expandable metadata, and pagination so you
can review activity across the organization in one place. An audit event is one recorded action;
metadata is the additional information attached to that event.
| Area | What you use it for |
| --- | --- |
| **All Actions** | Choose an action category; additional action values come from the audit facets. |
| **All Actors** | Choose an actor; actor choices come from the audit facets. |
| **All Projects** | Choose a project; project choices come from the project list. |
| **Start date** | Set the beginning of the date range. |
| **End date** | Set the end of the date range. |
| Event table | Review time, actor, action, project, entity, and details. |
| Metadata details | Expand an event row to read its metadata. |
| Pagination | Move through results when the loaded event count is greater than zero. |
The organization view includes the project filter and both date fields. The event table can show
up to 50 events per page. When no events are returned, the empty state says `No audit events`.
The page does not require a filter value before you review the list.
Use these controls to narrow the list and inspect its events.
## Filter and inspect audit events
Use this procedure when you need to focus the organization audit list on a particular action,
actor, project, or date range.
Prerequisites
- Open the organization audit log.
- Have at least one available filter value when you want to narrow the list.
Steps
1. Select an action from **All Actions**.
2. Select an actor from **All Actors**.
3. Select a project from **All Projects**.
4. Enter a beginning date in **Start date**.
5. Enter an ending date in **End date**.
6. Review the event rows returned for the selected filters.
7. Select an event row to expand its metadata details.
8. Select the row again to collapse its metadata details.
9. Select **Previous** to move to the preceding result page when one is available.
10. Select **Next** to move to the following result page when one is available.
Changing a filter returns the result list to its first page. **Previous** is unavailable on the
first page, and **Next** is unavailable on the final page.
**Result:** The list shows the audit events for the selected filters, and the selected event's
metadata is expanded or collapsed as requested.
After reviewing the list, continue to [Export organization audit events](#export-organization-audit-events)
when you need a file copy.
## Export organization audit events
Use an export when you need a file copy of the organization audit log outside the on-screen
table. The page offers CSV and JSON formats.
Prerequisites
- Open the organization audit log.
- Confirm that the audit page is available for your role.
Steps
1. Select the format you need:
| If you need… | Select |
| --- | --- |
| A comma-separated copy | Select **Export CSV**. |
| A structured data copy | Select **Export JSON**. |
If an export request fails, the page displays `Export failed`.
**Result:** The selected export control requests the corresponding file format for the
organization audit information.
## Handle empty, loading, and access-error states
The audit page uses distinct messages for loading, an empty result, denied access, and a general
load failure.
| What you see | What it means | What to do |
| --- | --- | --- |
| `Loading...` | The audit request is still being processed. | Wait for the audit result. |
| `No audit events` | The current result is empty. | Change the filters or date range and review the result again. |
| `Only admins and maintainers can view the organization audit log.` | Your role cannot view this organization-wide list. | Sign in with an administrator or maintainer role. |
| `Could not load the audit log.` | The audit request could not load the list. | Check the page again after the audit service is available. |
| `Export failed` | The selected export request failed. | Retry the export. |
When the audit request sets an error, the error note appears instead of the audit table.
**Result:** You can distinguish a loading state, an empty list, a permissions response, a load
failure, and an export failure before choosing the next action.
## Continue to related audit information
Use [Project changes and audit](https://atloria-selfdogfood-3577.atloria.app/p/atloria-selfdogfood-3577-BDFvUbEgc3/user/project-changes-and-audit) when you need the history for one
project. Use [Security
& Audit overview](https://atloria-selfdogfood-3577.atloria.app/p/atloria-selfdogfood-3577-BDFvUbEgc3/user/security-and-audit-overview) or [Audit reference](https://atloria-selfdogfood-3577.atloria.app/p/atloria-selfdogfood-3577-BDFvUbEgc3/user/audit-reference)
for broader administrative audit information. [Organization overview](https://atloria-selfdogfood-3577.atloria.app/p/atloria-selfdogfood-3577-BDFvUbEgc3/user/organization-overview)
provides the organization settings context, while [Manage organization access](https://atloria-selfdogfood-3577.atloria.app/p/atloria-selfdogfood-3577-BDFvUbEgc3/user/manage-organization-access)
covers organization provisioning and SSO.
# Administer documents
Document administration is the work of maintaining document records, their categories, their list
order, and the way you reach each record in a project. A document record is an item in the project's
documentation list, and a category groups records so your team can find them. Use administration
when you need to organize existing documentation or maintain those categories.
The Documents workspace is the project area where these records are listed and organized.
| If you need to… | Go to |
|---|---|
| Find an existing document record | [Find a document record](#find-a-document-record) |
| Understand the list, categories, views, and dialogs | [Understand the Documents screen](#understand-the-documents-screen) |
| Filter, reorder, or change categories | [Organize document records and categories](#organize-document-records-and-categories) |
| Create or edit document content | [Create and edit a document](https://atloria-selfdogfood-3577.atloria.app/p/atloria-selfdogfood-3577-BDFvUbEgc3/user/create-and-edit-a-document) |
| Review document states and actions | [Document changes](https://atloria-selfdogfood-3577.atloria.app/p/atloria-selfdogfood-3577-BDFvUbEgc3/user/document-changes) |
| Manage document access | [Document access reference](https://atloria-selfdogfood-3577.atloria.app/p/atloria-selfdogfood-3577-BDFvUbEgc3/user/document-access-reference) |
| Recover from an administrative problem | [Document administration troubleshooting](https://atloria-selfdogfood-3577.atloria.app/p/atloria-selfdogfood-3577-BDFvUbEgc3/user/document-administration-troubleshooting) |
## Before you start
Before you administer documents, select the project you want to manage and sign in. Document
loading requires both a project and a signed-in session. The category area appears only after
a project is selected. Have the saved document or category you need to manage in mind before you
begin.
| Have this ready | Why it matters |
|---|---|
| The project that contains the documents | The Documents list and category area use the selected project. |
| A saved document record or category to manage | The available list, category, and record actions depend on the returned project data. |
| A signed-in session | Document and category loading waits for an authenticated session. |
The current project, version, category, document values, and permissions depend on the account and
project you are using. With the project selected and the record or category in mind, continue to
[Find a document record](#find-a-document-record).
## Find a document record
Find an existing document record when you need to open it rather than create or edit its content.
**Prerequisites**
- You have selected a project.
- You know enough of the document title or category to narrow the list.
**Steps**
1. Open the Documents destination for the selected project.
2. To search by text, enter a value in **Search documents**.
3. To narrow the document type, select one of **All**, **Manual**, or **Generated**.
4. To narrow the document status, select one of **All**, **Draft**, **Published**, or **Archived**.
5. To narrow the category, select **All Documents** or a category in the category area.
6. Select the document record you need from the filtered list.
**Result:** The selected document record is open for the next document task.
## Understand the Documents screen
The Documents screen combines a document list with category navigation. The list can use cards or
rows, and category administration opens in dialogs.
The main areas are:
| Area | What it contains |
|---|---|
| Document list | Search, type and status filters, sorting, view selection, document cards or rows, and pagination. |
| Category area | **Categories**, category search, **All Documents**, project categories, and **Add Category**. |
| Version selector | **Version**, when the selected project has one or more versions. |
| Order controls | **Edit order** and drag-and-drop ordering when a project is selected. |
| Category dialogs | **Create Category**, **Edit Category**, and **Delete Category** dialogs. |
In list view, the row headers are Document, **Type**, **Status**, **Category**, and **Updated**.
In card view, documents appear as cards instead of rows.
When you create or edit a category, the dialog contains **Name**, **Slug**, **Description**,
**Icon**, and **Color**. **Name** and **Slug** are required. **Description** is optional. In create
mode, entering a name generates a lowercase slug with spaces replaced by hyphens and other
characters removed.
## Organize document records and categories
Organizing documents means narrowing the list, choosing how it is displayed, changing its order,
and maintaining categories.
### Filter and change the list
**Prerequisites**
- You have selected a project.
- The Documents list is open.
**Steps**
1. Enter text in **Search documents** when you need a text match.
2. When search text is present, select **Clear search** to remove it.
3. Select a document type from **All**, **Manual**, or **Generated**.
4. Select a document status from **All**, **Draft**, **Published**, or **Archived**.
5. When the version selector is available, select a value in **Version**.
6. In the Documents list, select the sorting control beside the view-selection control.
7. Select a display mode in the view toggle.
8. Select **Clear** in the category filter indicator to remove the selected category.
9. Use **Previous page**, a page number, or **Next page** to move through the list.
**Result:** The Documents list shows the records using the selected filters, sort, view, and
category selection.
### Reorder documents or categories
**Prerequisites**
- You have selected a project.
- The documents or categories you want to reorder are visible.
**Steps**
1. Select **Edit order**.
2. Use drag and drop to reorder documents within a category, or to reorder categories and documents
when no category is selected.
3. Select **Exit edit mode** when the order is correct.
**Result:** The Documents screen returns to its normal list view with edit-order mode closed.
### Create or edit a category
**Prerequisites**
- You have selected a project.
- The category area is visible.
**Steps**
1. Select **Add Category** to open **Create Category**.
2. Enter the category name in **Name**.
3. Review the generated value in **Slug**.
4. Enter a value in **Description**, if needed.
5. Select an option in **Icon**.
6. Select an option in **Color**.
7. Choose the category action in this table:
| Goal | Action |
|---|---|
| Create a category | Select **Create**. |
| Edit a category | Select its **Edit category** control, update the fields, and select **Save**. |
8. Select **Cancel** to close either dialog without saving.
**Result:** The category dialog closes after the create or edit action, and the category area can be
refreshed with the updated category.
### Delete a category or document
**Prerequisites**
- You have selected the category or document to remove.
- You have checked that the removal is intended.
**Steps**
1. Choose the removal path in this table:
| Goal | Action |
|---|---|
| Delete a category | Select the category's **Delete category** control. |
| Delete a document | Select the document's **Delete Document** control. |
2. Read the confirmation in the path you selected:
| Goal | Action |
|---|---|
| Delete a category | Read `All documents in this category will be moved to "Uncategorized". Subcategories will also be deleted.` |
| Delete a document | Read the document confirmation dialog. |
3. Choose the confirmation action in this table:
| Goal | Action |
|---|---|
| Keep the category | Select **Cancel**. |
| Confirm the category deletion | Select **Delete**. |
| Confirm the document deletion | Follow the document confirmation dialog and select its **Delete Document** control. |
**Result:** The selected delete operation is either cancelled or confirmed from its dialog.
## Handle different document-list states
The Documents screen changes its available areas according to the selected project, category,
version, filters, and edit-order mode.
| If you need to… | Use this path |
|---|---|
| View documents for a project | Select a project first; the category area then becomes available. |
| View all project documents | Select **All Documents**. |
| Work within one category | Select that category; the list receives the category filter. |
| Work with a non-active version | Read the version notice, then switch to the active version in **Version**. |
| See why no records are listed | Check whether a search, type, or status filter is active; the empty state changes when a search is present. |
| Change ordering | Select **Edit order**; the list changes to the sortable ordering surface. |
**Prerequisites**
- You are on the Documents screen.
**Steps**
1. Select the path that matches your goal in the table above.
**Result:** The Documents screen shows the list or ordering state that matches your selection.
If no project is selected, the category area displays `No project selected` and
`Select a project to view categories`. The page also prompts with
“Select a project to view documents”.
## When document administration goes wrong
Use the exact message on screen to choose the applicable response. Do not repeat a destructive
action when the message identifies a failed request.
| What you see | Meaning and next action |
|---|---|
| `Loading...` | The category area is loading. Wait for the category list to appear. |
| `Loading document…` | The document record is loading. Wait for the record result. |
| `Document failed to load.` | The record did not load. Use [Document administration troubleshooting](https://atloria-selfdogfood-3577.atloria.app/p/atloria-selfdogfood-3577-BDFvUbEgc3/user/document-administration-troubleshooting). |
| `No categories yet.` | The project has no categories in the category area. Use **Add Category** if you need one. |
| `No matches.` | The category search has no matching category. Change the category search value. |
| `Failed to save category` | The category save request failed. Review the category values and try the save again. |
| `Failed to delete category` | The category deletion request failed. Check that the category remains selected before trying again. |
| `Failed to delete document:` | The document deletion request failed. Check that the record remains in the list before trying again. |
| `Failed to reorder documents. Please try again.` | The document reorder request failed. Check the displayed order before trying again. |
| `Failed to reorder categories. Please try again.` | The category reorder request failed. Check the displayed category order before trying again. |
| `All documents in this category will be moved to "Uncategorized". Subcategories will also be deleted.` | This is the category deletion warning. Select **Cancel** to keep the category, or **Delete** to confirm the operation. |
The `Unauthorized` reload handling belongs to the document detail loading flow. Viewer-rendered
chapter, command-palette, viewport, annotation, and screenshot messages belong to the document
viewer rather than document administration.
## What to do next
After you finish an administrative change, continue with the task that matches what you need to
do next:
| Next need | Page |
|---|---|
| Create a document or edit its content | [Create and edit a document](https://atloria-selfdogfood-3577.atloria.app/p/atloria-selfdogfood-3577-BDFvUbEgc3/user/create-and-edit-a-document) |
| Review document states and actions | [Document changes](https://atloria-selfdogfood-3577.atloria.app/p/atloria-selfdogfood-3577-BDFvUbEgc3/user/document-changes) |
| Manage document access | [Document access reference](https://atloria-selfdogfood-3577.atloria.app/p/atloria-selfdogfood-3577-BDFvUbEgc3/user/document-access-reference) |
| Resolve an administrative issue | [Document administration troubleshooting](https://atloria-selfdogfood-3577.atloria.app/p/atloria-selfdogfood-3577-BDFvUbEgc3/user/document-administration-troubleshooting) |
The document record remains the hand-off point for content work and document-specific actions.
# Document access reference
## Document access in organization administration
Organization administration is the place to manage the people and organization-level services
that support access to documentation. This page covers the organization settings page: its
invitation controls and links to organization access services.
Project document access modes and share links belong to [Configure Branding](https://atloria-selfdogfood-3577.atloria.app/p/atloria-selfdogfood-3577-BDFvUbEgc3/user/configure-branding),
not to this organization surface.
| If you need to… | Go to |
| --- | --- |
| Prepare the session and invitation details | [What must be in place](#what-must-be-in-place) |
| Identify the organization access links and invitation choices | [Find and understand the organization controls](#find-and-understand-the-organization-controls) |
| Invite a team member | [Invite a team member](#invite-a-team-member) |
| Diagnose a failed member load or invitation | [When invitation or loading goes wrong](#when-invitation-or-loading-goes-wrong) |
| Configure organization SSO or provisioning | [Manage organization access](https://atloria-selfdogfood-3577.atloria.app/p/atloria-selfdogfood-3577-BDFvUbEgc3/user/manage-organization-access) |
Start with the session, organization context, and invitation details you need before using these
controls.
## What must be in place
Before using the organization controls, have an authenticated session with an organization
context. The member request does not run without an access token and organization ID. For an
invitation, have the recipient's email address ready. `Invite role` is the selector for the
invitation role; its choices are `Viewer`, `Contributor`, `Maintainer`, and `Admin`.
| Before you start | Why it matters |
| --- | --- |
| An access token | Member loading and invitation submission stop without one. |
| An organization ID | The member request and invitation are scoped to the organization. |
| The recipient's email address | `Invite email` is required before you can send the invitation. |
| `Invite role` | Choose `Viewer`, `Contributor`, `Maintainer`, or `Admin`. |
With these prerequisites in place, locate the organization controls.
## Find and understand the organization controls
The organization surface combines invitation controls with organization access links and a member
list. Open the organization settings page to reach it. The header links take you to organization
services; the invitation form contains `Invite email`, `Invite role`, and `Send invite`;
the member area shows loading, error, or table content according to the member request.
| If you need to… | Use this control or area |
| --- | --- |
| Configure organization single sign-on | `Single Sign-On` |
| Configure organization provisioning | `Provisioning (SCIM)` |
| Review organization audit information | `Audit Log` |
| Enter the invite recipient | `Invite email` |
| Choose the invite recipient's role | `Invite role`; choose `Viewer`, `Contributor`, `Maintainer`, or `Admin` |
| Send the invitation | `Send invite` |
While the invitation is being sent, `Send invite` is disabled and its label changes to
`Sending…`. While members are loading, the member area shows `Loading members…`. When members
load successfully and the list is non-empty, the member table contains `Name`, `Email`,
`Role`, `Status`, and `Joined`. With the controls identified, continue to the invitation
procedure.
## Invite a team member
An invitation submits a recipient's email address with a selected role.
Prerequisites
- You have an access token and organization ID.
- You have the recipient's email address.
- You have a role choice from `Invite role`.
Steps
1. Enter the recipient's email address in `Invite email`.
2. In `Invite role`, choose `Viewer`, `Contributor`, `Maintainer`, or `Admin`.
| Choose |
| --- |
| `Viewer` |
| `Contributor` |
| `Maintainer` |
| `Admin` |
3. Select `Send invite`.
Result: The page shows `Invitation sent to {email} — they'll get an email with a join link.`
## When invitation or loading goes wrong
Use the message on screen to identify whether the problem occurred while loading members, checking
permission, receiving the invitation response, or reaching the service.
| What you see | What it means | What to do |
| --- | --- | --- |
| Could not load members, followed by the server status in parentheses | The member request was rejected. | Check the organization context and try again. |
| `Only admins and maintainers can invite members.` | The current role cannot invite members. | Ask an administrator or maintainer to send the invitation. |
| Invite failed, followed by the server status in parentheses | The invitation response returned an error without the authorization message. | Check the invitation details and try again. |
| `Request failed — please try again.` | The invitation request did not complete. | Try the invitation again. |
| `Loading members…` | The member list is still loading. | Wait for the member area to finish loading. |
When the member request fails, the error appears in the member area. When members load with a
non-empty list, the member table appears instead.
# Document administration troubleshooting
Use this page to find a document or category, recover an unexpected list state, and maintain
categories or document order in the Documents area.
## Document administration troubleshooting
Document administration is the work of finding and organizing documentation records, then recovering
the list when filters, versions, categories, or access conditions change what you see.
Use the Documents area to manage and organize documentation.
A category is a group of documents in the selected project.
Document order is the arrangement of records in the ordering surface.
| If you need to… | Go to |
|---|---|
| Find a document or category | [Find the document or category involved](#find-the-document-or-category-involved) |
| Recover an empty, filtered, or unavailable list | [Recover from an unexpected list state](#recover-from-an-unexpected-list-state) |
| Create, edit, delete, or reorder categories | [Maintain categories and document order](#maintain-categories-and-document-order) |
| Manage the document record itself | [Administer documents](https://atloria-selfdogfood-3577.atloria.app/p/atloria-selfdogfood-3577-BDFvUbEgc3/user/administer-documents) |
| Edit document content | [Create and edit a document](https://atloria-selfdogfood-3577.atloria.app/p/atloria-selfdogfood-3577-BDFvUbEgc3/user/create-and-edit-a-document) |
| Review document access | [Document access reference](https://atloria-selfdogfood-3577.atloria.app/p/atloria-selfdogfood-3577-BDFvUbEgc3/user/document-access-reference) |
| Match a message to broader help | [General error messages](https://atloria-selfdogfood-3577.atloria.app/p/atloria-selfdogfood-3577-BDFvUbEgc3/user/general-error-messages) |
| Find cross-surface recovery guidance | [Common issues and solutions](https://atloria-selfdogfood-3577.atloria.app/p/atloria-selfdogfood-3577-BDFvUbEgc3/user/common-issues-and-solutions) |
## Before you start
**Prerequisites**
| Have this ready | Why it matters |
|---|---|
| A selected project | Documents and categories load only when a project is available. |
| An authenticated session | Document and category data loads after authentication is available. |
| The document title, category name, or list condition you are investigating | These details help you choose the right search, filter, or recovery path. |
If no project is selected, the category area displays `No project selected` and
`Select a project to view categories`. The Documents area displays `Select a project to view documents`.
If the session is unauthenticated, the category area displays `Authentication required`.
## Find the document or category involved
A document list is the working list of documentation records; use its search, filters, category
selection, sort order, and view choice to narrow the list before changing anything.
**Prerequisites**
- Have a selected project and an authenticated session.
**Steps**
1. Open the Documents area.
2. Enter search text in **Search documents...**.
3. Select **Clear search** when it appears and you want to remove the search text.
4. Choose the list options that match what you need to find.
| If you need to… | Select or enter |
|---|---|
| Include every document type | **All** in the type filters |
| Find manually maintained documents | **Manual** |
| Find generated documents | **Generated** |
| Include every document status | **All** in the status filters |
| Find draft work | **Draft** |
| Find published documentation | **Published** |
| Find archived documentation | **Archived** |
| Include every category | **All Documents** |
| Find one category | Enter its name in **Category search** in **Categories** |
| Switch between available document versions | **Version** |
| Scan document cards | Card view with the **View toggle** |
| Read column headers | List view with the **View toggle** |
| Return to the previous results page | **Previous page** |
| Open a specific results page | The page number |
| Move to the next results page | **Next page** |
5. Use the **Sort control** to change the order of the list.
6. In list view, read the headers **Document**, **Type**, **Status**, **Category**, and **Updated**
to identify the record and its current list information.
**Result:** The list is narrowed to the document or category you need to inspect, and list view
shows the document, type, status, category, and updated columns.
## Recover from an unexpected list state
The list can change because a search, filter, category, project, or version changes the records being
shown. Check the visible condition before treating an empty or changed list as lost documentation.
**Prerequisites**
- Have the affected project or category in mind.
**Steps**
1. Check the active filters and document count above the list.
2. If the list is empty after a search, remove the search text with **Clear search**.
3. If the list is still empty, select **All** in the type filters.
4. Select **All** in the status filters.
5. If the category list is empty, read the message `No categories yet.`.
6. If a category search returns nothing, read the message `No matches.`.
7. If no project is selected, return to the project selector before using the category area.
8. If a non-active version is selected, use the **Version** selector to switch to the active version.
9. If the page is in order-editing mode, select **Exit edit mode** to return to the document list.
10. If **New Document** is not available, continue with the list and category controls that are
present on the page.
| What you see | What it means | Next action |
|---|---|---|
| `No project selected` | A project is not available to the page. | Return to the project selector before using categories or document data. |
| `No categories yet.` | The selected project has no categories in the category area. | Work from **All Documents** or create a category if **Add Category** is available. |
| `No matches.` | The category search does not match a category. | Clear the category search or use **All Documents**. |
| A `Draft`, `Deprecated`, or `Archived` version notice | The selected version is not active. | Switch to the active version above the notice. |
| **Exit edit mode** | The page is showing the sortable ordering surface. | Return to the normal document list. |
**Result:** You have either restored the intended list context or identified the project, category,
version, or edit-order condition that explains the list.
## Maintain categories and document order
Use the ordering surface to arrange the selected project's records.
**Prerequisites**
- Have a selected project.
- Confirm that the list itself is showing the intended project and category context.
### Create a category
**Steps**
1. Select **Add Category** to open the category form.
2. Enter the category name in **Name \***.
3. Review **Slug \*** after entering the name.
4. Enter an optional value in **Description**.
5. Select an option under **Icon**.
6. Select an option under **Color**.
7. Select **Create** to create the category.
The create form generates **Slug** from **Name** by converting the name to lowercase, replacing
spaces with hyphens, and removing characters other than letters, numbers, and hyphens.
**Result:** The category form closes after the category is created.
### Cancel a category change
**Steps**
1. In the category form, select **Cancel**.
**Result:** The category form closes without saving the change.
### Edit a category
**Steps**
1. Select **Edit category** on the category row.
2. Enter the category name in **Name \***.
3. Review the value in **Slug \***.
4. Enter the category description in **Description**.
5. Select an option under **Icon**.
6. Select an option under **Color**.
7. Select **Save** to save the category changes.
**Result:** The category form closes after the category is updated.
### Reorder categories or documents
**Steps**
1. Select **Edit order**.
2. In the category area, use **Drag to reorder** to move a category.
3. In the ordering surface, drag a document to its required position.
4. Select **Exit edit mode** when the ordering is complete.
**Result:** The page returns to the normal document list with the revised ordering request completed.
### Review category deletion
**Warning:** Deleting a category moves all documents in it to `Uncategorized` and also deletes its
subcategories.
**Steps**
1. Select **Delete category** on the category row.
2. Read the confirmation message: `All documents in this category will be moved to "Uncategorized". Subcategories will also be deleted.`
3. Select **Cancel** to keep the category and its organization.
4. Select **Delete** only when moving the documents and deleting the subcategories is intended.
**Result:** **Cancel** closes the dialog without confirming the deletion; **Delete** confirms the
category deletion.
## When recovery does not work
Use the exact message on screen to choose the next safe diagnostic action. Do not repeat a destructive
operation when the message does not change.
| Message | What it means | Next action |
|---|---|---|
| `Authentication required` | The category area cannot load for the current session. | Use an authenticated session before reopening the Documents area. |
| `Loading...` | The category area is loading. | Wait for the category list to finish loading. |
| `Failed to delete category` | The category deletion request failed. | Keep the category context and use [Common issues and solutions](https://atloria-selfdogfood-3577.atloria.app/p/atloria-selfdogfood-3577-BDFvUbEgc3/user/common-issues-and-solutions) for the next diagnostic path. |
| **Delete Document** | The document delete dialog's confirmation control. | Match a failed request to the document deletion message below. |
| `Failed to delete document:` | The document deletion request failed. Text after the colon gives the returned reason; when no reason is returned, the message ends with `Unknown error`. | Do not repeat the deletion until the returned reason is understood. |
| `Failed to reorder documents. Please try again.` | The document ordering request failed. | Leave the list in its current order and retry only after checking the ordering context. |
| `Failed to reorder categories. Please try again.` | The category ordering request failed. | Leave the category order unchanged and retry only after checking the project context. |
| `Failed to save category` | The category save failed without a more specific message. | Keep the form values and use [General error messages](https://atloria-selfdogfood-3577.atloria.app/p/atloria-selfdogfood-3577-BDFvUbEgc3/user/general-error-messages) for broader diagnosis. |
The **Delete Document** control belongs to the document delete dialog. A failure from that control
uses the document deletion message in the table above.
The category edit and delete controls appear on category-row hover. The category drag handle appears
in edit-order mode. The Documents list shows **New Document** only when that action is available to
the list. These conditions explain why a control can be absent without changing the document list.
**Result:** You have the exact failure message, have avoided repeating a destructive action, and have
the appropriate broader help page for the next diagnostic step.
## What to do next
Use the next page according to the work that remains:
| If the next task is to… | Continue with |
|---|---|
| Manage the full document record | [Administer documents](https://atloria-selfdogfood-3577.atloria.app/p/atloria-selfdogfood-3577-BDFvUbEgc3/user/administer-documents) |
| Edit document content | [Create and edit a document](https://atloria-selfdogfood-3577.atloria.app/p/atloria-selfdogfood-3577-BDFvUbEgc3/user/create-and-edit-a-document) |
| Review document changes | [Document changes](https://atloria-selfdogfood-3577.atloria.app/p/atloria-selfdogfood-3577-BDFvUbEgc3/user/document-changes) |
| Review access controls | [Document access reference](https://atloria-selfdogfood-3577.atloria.app/p/atloria-selfdogfood-3577-BDFvUbEgc3/user/document-access-reference) |
| Diagnose a general application message | [General error messages](https://atloria-selfdogfood-3577.atloria.app/p/atloria-selfdogfood-3577-BDFvUbEgc3/user/general-error-messages) |
| Resolve a cross-surface problem | [Common issues and solutions](https://atloria-selfdogfood-3577.atloria.app/p/atloria-selfdogfood-3577-BDFvUbEgc3/user/common-issues-and-solutions) |
# Administer projects
Use this page to find a project, review its administrative surface, change project
settings, and handle project removal.
## Projects administration
A project is the administrative container for the organization's documentation work.
Project administration brings together the project list and the settings for an existing
project.
| If you need to… | Go to |
|---|---|
| Find, filter, sort, create, or open a project | [Find and open a project](#find-and-open-a-project) |
| Review the list columns and project settings | [Understand the project surface](#understand-the-project-surface) |
| Change project details or generation settings | [Update project settings](#update-project-settings) |
| Remove a project | [Delete a project](#delete-a-project) |
| Resolve a loading, empty, or error message | [When project administration goes wrong](#when-project-administration-goes-wrong) |
| Continue to related project work | [Continue after project administration](#continue-after-project-administration) |
| Create a new project | [Create a project](https://atloria-selfdogfood-3577.atloria.app/p/atloria-selfdogfood-3577-BDFvUbEgc3/user/create-a-project) |
| Manage broader project settings | [Manage project settings](https://atloria-selfdogfood-3577.atloria.app/p/atloria-selfdogfood-3577-BDFvUbEgc3/user/manage-project-settings) |
| Review project administration and audit information | [Project administration reference](https://atloria-selfdogfood-3577.atloria.app/p/atloria-selfdogfood-3577-BDFvUbEgc3/user/project-administration-reference) |
## Before you start
You need an existing project before you can open its detail settings. The project detail
route uses a project identifier, so start from the project list when you do not have the
project already open.
Project settings do not have a required marker or a required validation pattern.
## Find and open a project
The project list is where you choose an existing project or start project creation. Use
the filters to narrow the list before opening a row.
**Prerequisites**
- You are on the project list.
**Steps**
1. In **Search projects…**, enter part of the project name or description.
2. In the first filter, choose a status, or in the second filter, choose a sort order.
| If you need to… | Control | Select |
|---|---|---|
| Include every status | Status | **All statuses** |
| Show active projects | Status | **Active** |
| Show draft projects | Status | **Draft** |
| Show published projects | Status | **Published** |
| Show archived projects | Status | **Archived** |
| See the most recently updated projects first | Sort | **Last updated** |
| Sort names from A to Z | Sort | **Name A–Z** |
| Sort names from Z to A | Sort | **Name Z–A** |
| Sort by creation date | Sort | **Date created** |
3. Select the project row to open that project.
4. Select **New project** when you need to create a project instead of opening an
existing one.
**Result:** The selected project opens, or the **New project** route opens for project
creation. If the filters return no rows, the list shows `Nothing matches` and
`No project matches …` for the current search or status selection.
## Understand the project surface
The project surface has a list for finding records and a settings view for maintaining
one selected project. The list columns are **Project**, **Source**, **Docs**,
**Categories**, **Status**, and **Updated**.
The settings view groups project information, publishing information, documentation
generation, and retention settings. **Project Name**, **Description**, **Slug**,
**Repository URL**, and **Default Branch** are in the basic project information area.
**Site URL (for screenshots)** is also a project setting. **Manual Style** and
**Let documentation create records in this application** are in documentation generation
settings. Retention uses **Auto-archive after (days)**, **Auto-delete archived after
(days)**, and **Keep minimum versions**.
When the settings view is active, the page shows **Project Settings**. A published
project with a public URL can also show a **Published URL** area with **Copy** and
**Open**. The Site URL field appears after its configuration has loaded.
## Update project settings
Use project settings when you need to maintain the project's identity, source
repository, documentation style, documentation write permission, or retention policy.
**Prerequisites**
- You have opened the project settings view.
- You know the project values you want to maintain.
**Steps**
1. In **Project Name**, **Description**, or **Slug**, enter the new value.
2. In **Repository URL**, enter the source repository address.
3. In **Default Branch**, enter the branch used for documentation generation.
4. In **Manual Style**, select one of **Enterprise**, **Mid-market**, **Corporate**, or
**SaaS**.
5. Select **Let documentation create records in this application** when the project
setting needs to be enabled.
6. In the retention fields, enter values for **Auto-archive after (days)**,
**Auto-delete archived after (days)**, and **Keep minimum versions**.
7. Select **Save Retention Policy**.
The project name, description, and slug save after a one-second delay when their values
change. **Repository URL** and **Default Branch** also save after a one-second delay.
The retention action is disabled while it is saving.
**Result:** The page reports `Saved` after a successful automatic or retention save. While
an automatic save is in progress it reports `Saving…`; after a changed value that has not
saved it reports `Unsaved changes`.
## Delete a project
Deleting a project is a destructive branch. The confirmation dialog shows
`This action is permanent and cannot be undone`. It requires the exact project name
before **Delete Project** becomes available.
**Prerequisites**
- You have opened the project list.
- The project row you intend to remove is visible.
**Steps**
1. In the project row, select the delete icon action for that project.
2. Read the **Delete Project** dialog before confirming the removal.
3. In the confirmation text input, enter the exact project name shown in the dialog.
4. Choose the outcome you need.
| If you need to… | Select |
|---|---|
| Leave the project unchanged | **Cancel** |
| Remove the project after the exact-name match | **Delete Project** |
If the entered text does not match, the dialog shows `Name doesn't match` and the delete
action remains unavailable. During removal, the action shows `Deleting...`.
**Result:** **Cancel** closes the dialog without removing the project. A matching
confirmation starts project removal.
## When project administration goes wrong
Use the message on screen to choose the next action. The list and project detail view
have separate loading and error states.
| What you see | What it means | What to do |
|---|---|---|
| `Loading projects…` | The project list is loading. | Wait for the project list to finish loading. |
| `Projects failed to load.` | The project list could not load. | Retry the project-list request. |
| `No projects yet` | No projects are currently in the list. | Select **New project** to open project creation. |
| `Nothing matches` | The current search or status filter returns no rows. | Clear **Search projects…** or choose **All statuses**. |
| `No project matches …` | The current search or status selection returns no project. | Change the search text or status selection. |
| `Loading project…` | The selected project is loading. | Wait for the project detail view to finish loading. |
| `Project failed to load.` | The project detail view could not load. | Check that you opened the intended project from the list. |
| `Project not found` | The project detail view has no project to display. | Return to the project list and open the project again. |
## Continue after project administration
After you finish project administration, continue with the task that matches your next
goal.
**Prerequisites**
- You have finished the project-list or project-settings task you started.
**Steps**
1. Select **Audit trail →** to review project audit information.
2. In a project with a public URL, select **Copy** to copy the URL.
3. In the same public URL area, select **Open** to open the URL in a new window.
4. Continue with [Manage project settings](https://atloria-selfdogfood-3577.atloria.app/p/atloria-selfdogfood-3577-BDFvUbEgc3/user/manage-project-settings) for broader
project settings work.
5. Continue with [Project administration reference](https://atloria-selfdogfood-3577.atloria.app/p/atloria-selfdogfood-3577-BDFvUbEgc3/user/project-administration-reference)
for project administration and audit information.
6. Continue with [Projects overview](https://atloria-selfdogfood-3577.atloria.app/p/atloria-selfdogfood-3577-BDFvUbEgc3/user/projects-overview) for the wider project
workspace.
After **Copy**, the button label changes to `Copied!` temporarily.
**Result:** You are on the audit surface, have the public URL available, or have moved to
the related project page for the next task.
# Project settings administration
## Choose the right project setting
Project settings control project operation. A snippet is a reusable content block that can be
referenced from a page. A webhook is a project trigger for documentation work. Scheduled regeneration
is documentation work set to run on a chosen schedule.
| If you need to… | Go to |
|---|---|
| Create, edit, or remove reusable content | [Maintain reusable snippets](#maintain-reusable-snippets) |
| Choose webhook triggers or a regeneration schedule | [Configure webhooks and scheduled regeneration](#configure-webhooks-and-scheduled-regeneration) |
| Understand fields, options, and conditional areas | [Understand the settings surfaces](#understand-the-settings-surfaces) |
| Resolve a validation or save problem | [Handle conditional areas and errors](#handle-conditional-areas-and-errors) |
| Continue with other project-level settings | [Manage project settings](https://atloria-selfdogfood-3577.atloria.app/p/atloria-selfdogfood-3577-BDFvUbEgc3/user/manage-project-settings) |
| Locate the project workspace | [Projects overview](https://atloria-selfdogfood-3577.atloria.app/p/atloria-selfdogfood-3577-BDFvUbEgc3/user/projects-overview) |
## Before you start
Project settings apply to the open project. No listed field is marked as required.
**Prerequisites**
- Open the project workspace before selecting its settings.
With the project workspace open, continue to Find the project settings.
## Find the project settings
Project settings are the project-level surfaces where you maintain reusable content or configure
automation that affects documentation work.
1. From **Projects**, open the project and select **Settings**.
2. Select **Snippets** to maintain reusable content.
3. Select **Webhooks & Triggers** to configure triggers and scheduled regeneration.
**Result:** You are on the settings surface for the project operation you need to manage.
## Understand the settings surfaces
The snippets surface combines a list of saved snippets with an editor that opens when you create or
edit one. The webhook surface starts with an expandable **Webhooks & Triggers** panel and can contain
URL, trigger, schedule, delivery, and save areas.
### Snippets
| Area | What you use it for | When it appears |
|---|---|---|
| Snippet table | Review the snippet's name, title, and saved text | When one or more snippets exist |
| Editor | Enter **Name (reference key)**, **Title (optional)**, and **Content (markdown)** | When you create or edit a snippet |
| Reference status | Check whether an existing snippet is used by pages | When reference data has been loaded for an existing snippet |
When the list is loading, the page shows `Loading snippets…`. When no snippets exist and the editor
is closed, it shows `No snippets yet` and `Create one to reuse content across pages.`
### Webhooks & Triggers
Select the **Webhooks & Triggers** panel header to open or close its settings body. When it is open,
the following areas can appear:
| Area | What it contains | When it appears |
|---|---|---|
| Webhook URLs | Provider URLs, a secret readout, and copy or generate controls | When URL data exists |
| Trigger on | **Tag creation**, **Push to branch**, **tag pattern**, **branch pattern**, and **GitHub/GitLab release** | When trigger configuration exists |
| Scheduled regeneration | **Enable scheduled regeneration**, **Cron expression**, and **Timezone** | When trigger configuration exists; the selects appear when scheduled regeneration is enabled |
| Recent webhook deliveries | **Time**, **Provider**, **Event**, **Status**, and **Result** | When recent delivery records exist |
| Save area | **Save configuration** | When the settings body is open |
The **Cron expression** options are `Select schedule...`, `Weekly (Mon 8am)`, `Bi-weekly (1st &
15th)`, `Monthly (1st at 8am)`, and `Custom cron`. The **Timezone** options are `UTC`, `Eastern
(ET)`, `Central (CT)`, `Mountain (MT)`, `Pacific (PT)`, `London (GMT)`, `Berlin (CET)`, and `Dubai
(GST)`.
Choose the procedure that matches the setting you need to change.
## Maintain reusable snippets
Use this procedure when you need to create, revise, cancel, or remove a snippet.
**Prerequisites**
- From **Projects**, open the project and select **Settings**.
- Select **Snippets**.
- Have the reference key, optional title, and markdown content ready when creating or editing a
snippet.
**Steps**
1. Choose the operation you need:
| If you need to… | Select |
|---|---|
| Create a snippet | **New snippet** |
| Open an existing snippet | **Edit ``** |
| Remove an existing snippet | **Delete ``** |
2. If you selected **Delete ``**, confirm the browser prompt displaying
`Delete snippet ""?`. Confirming **Delete ``** completes the
deletion path; skip steps 3–7.
3. If you selected **New snippet** or **Edit ``**, enter the value in
**Name (reference key)**.
4. If you selected **New snippet** or **Edit ``**, enter a title in
**Title (optional)** when the snippet needs one.
5. If you selected **New snippet** or **Edit ``**, enter the reusable markdown content
in **Content (markdown)**.
6. If you selected **New snippet** or **Edit ``**, choose one path:
| If you need to… | Select |
|---|---|
| Save a new or edited snippet | **Save** |
| Leave the editor without saving the current changes | **Cancel** |
7. If you selected **Edit ``**, review its reference status: the page can show
`Not referenced by any page yet.` or `Referenced by: `.
**Result:** The editor closes after a successful create or update and the snippet list reloads; a
successful removal reloads the list, while **Cancel** closes the editor without saving.
## Configure webhooks and scheduled regeneration
Use this procedure to set trigger conditions, choose a schedule, review delivery information, and
save the configuration.
**Prerequisites**
- From **Projects**, open the project and select **Settings**.
- Select **Webhooks & Triggers**.
- Have the desired trigger conditions and schedule ready.
**Steps**
1. Select the **Webhooks & Triggers** panel header to open the settings body.
2. Review the provider URL shown in **Webhook URLs**.
3. In **Webhook URLs**, select the copy icon beside the provider URL when you need to copy it.
4. In **Trigger on**, select the trigger options that apply: **Tag creation**, **Push to branch**,
or **GitHub/GitLab release**.
5. Enter the matching value in **tag pattern** or **branch pattern** when you use the corresponding
trigger.
6. Select **Enable scheduled regeneration** when the project needs a recurring schedule.
7. Choose a value from **Cron expression**.
8. Choose a value from **Timezone**.
9. Review **Recent webhook deliveries** when delivery records are available.
10. Select **Save configuration**.
11. Choose one path for the secret:
| If you need to… | Select |
|---|---|
| Generate a replacement secret | **Generate new webhook secret** |
| Copy a generated secret | **Copy webhook secret** |
**Result:** The selected trigger and schedule values are sent as the project configuration, and the
secret controls update or copy the secret when used.
If a message appears, continue to Handle conditional areas and errors.
## Handle conditional areas and errors
Use the message on screen to decide whether to correct an entry, confirm a destructive action, or
retry the operation.
| What you see | What it means | What to do |
|---|---|---|
| `Name must be a slug: lowercase letters/digits, then letters/digits/hyphen/underscore (max 64 chars).` | The snippet name does not meet the accepted format. | Correct **Name (reference key)** and select **Save** again. |
| `Delete snippet ""?` | The page is asking you to confirm deletion. | Confirm the browser prompt only when you intend to remove the snippet. |
| `Save failed` after saving a snippet | The snippet save did not complete. | Correct the entry if needed and select **Save** again. |
| `Delete failed` after deleting a snippet | The snippet removal did not complete. | Return to the snippet list and retry the delete action. |
| `New secret generated. Copy it now — it won't be shown again.` | A new webhook secret was generated. | Select **Copy webhook secret** before leaving the settings surface. |
| `Failed` after generating a secret | Secret generation did not complete. | Retry **Generate new webhook secret**. |
| `Save failed` after saving webhook configuration | The webhook configuration save did not complete. | Review the trigger and schedule values, then select **Save configuration** again. |
## Know what happens next
After you select **Save**, a saved snippet is created or updated and the list reloads. After deletion,
the list reloads. After you select **Save configuration**, the webhook settings are saved. Continue with
[Manage project settings](https://atloria-selfdogfood-3577.atloria.app/p/atloria-selfdogfood-3577-BDFvUbEgc3/user/manage-project-settings) for other project-level settings, or return
to [Projects overview](https://atloria-selfdogfood-3577.atloria.app/p/atloria-selfdogfood-3577-BDFvUbEgc3/user/projects-overview) to choose another project workspace.
# Project administration reference
## Project audit information
Project audit information is a chronological record of actions associated with one project.
Use it when you need to review what happened in the project, inspect event details, or request a
CSV copy of the audit information.
| If you need to… | Go to |
|---|---|
| Review the event count and table | [Read and filter audit events](#read-and-filter-audit-events) |
| Filter the recorded actions | [Read and filter audit events](#read-and-filter-audit-events) |
| Request a CSV copy | [Export audit information](#export-audit-information) |
| Understand an empty result or an unavailable result | [Handle empty or unavailable audit results](#handle-empty-or-unavailable-audit-results) |
| Review project changes and related audit information | [Project changes and audit](https://atloria-selfdogfood-3577.atloria.app/p/atloria-selfdogfood-3577-BDFvUbEgc3/user/project-changes-and-audit) |
| Review organization-wide audit information | [Organization audit](https://atloria-selfdogfood-3577.atloria.app/p/atloria-selfdogfood-3577-BDFvUbEgc3/user/organization-audit) |
| Understand the wider project workspace | [Projects overview](https://atloria-selfdogfood-3577.atloria.app/p/atloria-selfdogfood-3577-BDFvUbEgc3/user/projects-overview) |
## Before you start
Have the project you want to review available in the application. Project audit information is tied to a
project-specific page, so start with the project you want to inspect rather than an organization-wide
audit view. You are ready to find the project's audit page.
## Find a project's audit information
Use the project-specific audit page when you need the history for one project.
**Prerequisites**
- You know which project you need to review.
- You can open that project's audit page.
**Steps**
1. Open the audit page for the project you are reviewing.
2. Confirm that the page heading is `Audit Trail`.
**Result:** The project's audit information is open, with its event count, action filter, and audit
table visible.
## Read and filter audit events
An audit event is one recorded action associated with the project. The audit page shows the event
count and presents each returned event through its time, actor, action, entity, and details.
Event metadata is the full detail attached to an audit event and appears when you open that event's
details.
The page displays these columns:
| What you need to read | Where it appears |
|---|---|
| When the event occurred | Time |
| Who performed the action | Actor |
| What action was recorded | Action |
| Which entity the action concerns | Entity |
| A short event summary | Details |
The page also shows `0 events` when no events are returned and shows `No audit events` in the empty
state.
**Prerequisites**
- The project's audit page is open.
**Steps**
1. Read the event count below `Audit Trail`.
2. Select **All Actions** to open the action choices.
3. Choose the action you want to review.
4. Read the five table columns: Time, Actor, Action, Entity, and Details.
5. Select an event row to open its metadata details when an event row is present.
6. Select the same event row again to close its metadata details.
7. When pagination is present, choose one of these alternatives:
| If you want to… | Select |
|---|---|
| View the preceding page | **Previous** |
| View the following page | **Next** |
Changing the action filter resets the page to the first page and loads the audit query again. When
the page is loading, it displays `Loading...`. When the query returns no rows, it displays
`No audit events` instead of event rows.
**Result:** The audit table shows the selected action and its available event details. When more
than one page of events is available, the page shows the current range and total event count and
provides **Previous** and **Next**.
## Export audit information
The project audit page can request a CSV copy of the project's audit information from its header.
**Prerequisites**
- The project's audit page is open.
**Steps**
1. Select **Export CSV** in the audit page header.
**Result:** The application requests a CSV export for the project.
## Handle empty or unavailable audit results
The audit page distinguishes an empty audit result from a table containing event rows. It also
shows pagination only when the returned event count is greater than zero.
| What you see | What it means |
|---|---|---|
| `No audit events` | The project has no rows in the returned audit result |
| No event row | No event details are available to open |
| No **Previous** or **Next** | Pagination is not available for the current result |
| `Export failed` | The CSV export request failed |
## What to do next
Use the related pages according to the information you need next:
| If you need to… | Continue with |
|---|---|
| Review change requests and their related project activity | [Project changes and audit](https://atloria-selfdogfood-3577.atloria.app/p/atloria-selfdogfood-3577-BDFvUbEgc3/user/project-changes-and-audit) |
| Manage projects from the administrative project area | [Administer projects](https://atloria-selfdogfood-3577.atloria.app/p/atloria-selfdogfood-3577-BDFvUbEgc3/user/administer-projects) |
| Manage project-level settings | [Project settings administration](https://atloria-selfdogfood-3577.atloria.app/p/atloria-selfdogfood-3577-BDFvUbEgc3/user/project-settings-administration) |
| Review audit information across the organization | [Organization audit](https://atloria-selfdogfood-3577.atloria.app/p/atloria-selfdogfood-3577-BDFvUbEgc3/user/organization-audit) |
# Administer operations
Use the Operations screen to review administrative activity, generation performance, AI usage,
credits, chat deflection, recent jobs, queues, and manual-insight signals.
## Operations monitoring
Operations is the administrative monitoring surface for work the platform is processing and the
signals that help you decide what to review next. Use it when you need a current view of job
activity, AI spend, credits, chat answers, deflection, queue health, or manual-insight gaps.
Manual insights are lists of weak pages, topic gaps, and coverage gaps that help you decide what
documentation work to review next.
> Note: The Operations screen is read-only. Use the monitoring information to decide which
> reference or analytics page to review next.
| If you need to… | Go to |
|---|---|
| Open the monitoring surface | [Open the Operations screen](#open-the-operations-screen) |
| Identify the tables and optional areas | [Understand the monitoring surface](#understand-the-monitoring-surface) |
| Review the current operational information | [Review operations and manual insights](#review-operations-and-manual-insights) |
| Interpret a loading, error, or empty message | [When monitoring does not load](#when-monitoring-does-not-load) |
| Interpret documented job statuses | [Documentation job status reference](https://atloria-selfdogfood-3577.atloria.app/p/atloria-selfdogfood-3577-BDFvUbEgc3/user/documentation-job-status-reference) |
| Continue with administrative measurement work | [Administer analytics](https://atloria-selfdogfood-3577.atloria.app/p/atloria-selfdogfood-3577-BDFvUbEgc3/user/administer-analytics) |
| Review combined operational and analytics reference information | [Operations and analytics reference](https://atloria-selfdogfood-3577.atloria.app/p/atloria-selfdogfood-3577-BDFvUbEgc3/user/operations-and-analytics-reference) |
## Before you start
**Prerequisites**
- Have an authenticated session with an access token.
- Have permission to open **Operations**.
- Allow the operations request to return before reviewing the statistics and tables.
- If you need manual insights, have at least one project available.
- If more than one project is available, be ready to choose the project whose insights you want to review.
The operations request does not start without an access token. The manual-insights panel returns no
content when there are no projects and no error, and it requests insights after a project is selected.
## Open the Operations screen
Select **Operations** from the application navigation to open the administrative monitoring view.
**Prerequisites**
- Have an authenticated session.
**Steps**
1. Select **Operations** from the application navigation.
2. Confirm that the statistics and tables appear.
3. Confirm that **Operations** is the page heading.

**Result:** The Operations monitoring screen is open.
## Understand the monitoring surface
With the screen open, the page groups operational information into statistics, attention signals, manual insights, an
AI-spend table, a recent-jobs table, and an optional queue area. The available areas depend on the
returned operations and project information.
| Area | What to review |
|---|---|
| Statistics | Generation success, AI spend (actual), Credits, and Deflection rate |
| Attention signals | Escalations, Chat refusals, 👎 answers, and search misses |
| Manual insights | Weak pages, Topic gaps, and Coverage gaps |
| AI-spend table | **Model**, **Operation**, **Calls**, **Tokens**, and **Cost** |
| Recent-jobs table | **When**, **Status**, **Stage**, **Docs**, **Duration**, and **Error** |
| Queue area | Queue lanes with waiting, active, failed, and delayed counts |
The recent-jobs table uses **Status**, **Stage**, **Docs**, **Duration**, and **Error** to help you
review the work represented by each row. The AI-spend table uses **Model**, **Operation**, **Calls**,
**Tokens**, and **Cost** to help you review usage by model and operation.
The manual-insights area can include a project selector and **Draft page** links. The project
selector lists the project names returned for your organization when more than one project is
available. A **Draft page** link can appear beside a weak-page row, a topic-gap row, or a coverage-gap
sample.
The page also records global controls including **Open command palette**, **Notifications**, and
**Switch to dark mode**. These controls are separate from the operations monitoring information.
## Review operations and manual insights
Use this procedure to review the information currently available on the Operations screen.
**Prerequisites**
- Have opened the Operations screen.
- Have confirmed that the statistics and tables appear.
**Steps**
1. Review Generation success, AI spend (actual), Credits, and Deflection rate.
2. Review the **AI spend by model** table.
3. Read the **Model**, **Operation**, **Calls**, **Tokens**, and **Cost** columns.
4. Review the **Recent jobs** table.
5. Read the **When**, **Status**, **Stage**, **Docs**, **Duration**, and **Error** columns.
6. Review each area that appears:
| If you see… | Review… |
|---|---|
| **Queues** | The waiting, active, failed, and delayed counts for each lane. |
| Needs attention | Escalations, Chat refusals, 👎 answers, and search misses. |
| Manual insights | Weak pages, Topic gaps, and Coverage gaps. |
| A **Draft page** link beside an insight row | Select **Draft page**. |
**Result:** The available operational statistics, tables, queue information, and manual-insight rows
are reviewed without changing operational data.
## Handle conditional monitoring areas
The Operations screen changes according to the information returned for the current session and
selected project. Use the following choices while reviewing the screen.
| If you see… | Review… |
|---|---|
| Operations information | The statistics, AI-spend table, recent-jobs table, and any optional areas. |
| **Needs attention** | **Escalations**, **Chat refusals**, **👎 answers**, and search misses. |
| **Queues** | The waiting, active, failed, and delayed counts for each queue lane. |
| More than one project | The project selector and the insights for the selected project. |
| No weak-page rows | `No weak pages — nice.` |
| No topic-gap rows | `No gaps in the last 7 days.` |
| No coverage-gap data | `No code snapshot for this project yet.` |
| No rows in an attention list | `Nothing — clean week.` |
| No AI-spend rows | `No AI usage in the last 7 days.` |
If the project selector is available, choose the project whose insight information you need. The
insights request is made for the selected project.
**Steps**
1. In the project selector, choose the project you need to review.
2. Confirm that the manual-insight lists appear.
3. Review the lists that appear.
**Result:** The manual-insight area reflects the selected project.
## When monitoring does not load
Use the message on screen to identify which part of the monitoring surface needs attention.
| What you see | Meaning | What to do |
|---|---|---|
| `Loading operations…` | Operations information is still loading. | Wait for the operations information to appear. |
| `Operations failed to load.` | The operations request failed. | Review the error text shown with the message, then retry the screen. |
| `Loading insights…` | Manual insights are still loading for the selected project. | Wait for the insight lists to appear. |
| `Insights failed to load.` | The manual-insights request failed. | Review the error text shown with the message, then retry the selected project. |
| `Nothing — clean week.` | An attention list has no rows. | Continue reviewing the other available monitoring areas. |
| `No AI usage in the last 7 days.` | The AI-spend table has no rows for the displayed period. | Continue reviewing the remaining statistics and tables. |
| `No weak pages — nice.` | The weak-pages list has no rows. | Continue with the other manual-insight lists. |
| `No gaps in the last 7 days.` | The topic-gaps list has no rows for the displayed period. | Continue with the other manual-insight lists. |
| `No code snapshot for this project yet.` | Coverage-gap data is unavailable for the selected project. | Continue reviewing the available operations information. |
## Know what to review next
After reviewing the monitoring information, continue to the page that explains the status or
measurement work you need next. The Operations screen does not provide a save, confirmation, or
stage-changing action for the information it displays.
For status meanings, continue with [Documentation job status reference](https://atloria-selfdogfood-3577.atloria.app/p/atloria-selfdogfood-3577-BDFvUbEgc3/user/documentation-job-status-reference).
For administrative measurement work, continue with [Administer analytics](https://atloria-selfdogfood-3577.atloria.app/p/atloria-selfdogfood-3577-BDFvUbEgc3/user/administer-analytics).
For combined operational and analytics status information, continue with
[Operations and analytics reference](https://atloria-selfdogfood-3577.atloria.app/p/atloria-selfdogfood-3577-BDFvUbEgc3/user/operations-and-analytics-reference).
**Result:** You have a documented next page for status interpretation, administrative analytics,
or combined operations-and-analytics reference information.
# Administer analytics
Use Analytics, the workspace for reviewing published-document activity, to inspect audit
activity, manage tracked work, and prepare analytics or documentation exports for a project.
## Analytics administration at a glance
Analytics administration is the work of reviewing how published documentation is used and
controlling the reports and exports that support that review. Use it after operational work has
been performed and published documentation has activity to measure. The Analytics area follows
Operations in the application flow: Operations carries out documentation work, and Analytics
measures its results.
Analytics brings together four jobs:
| If you need to… | Go to |
|---|---|
| Review measures and content activity | [Understand the analytics screen](#understand-the-analytics-screen) |
| Review recorded activity or tracked work | [Review analytics and audit activity](#review-analytics-and-audit-activity) |
| Create an export or scheduled report | [Export analytics and manage scheduled reports](#export-analytics-and-manage-scheduled-reports) |
| Respond to an empty or conditional area | [Handle conditional and empty analytics states](#handle-conditional-and-empty-analytics-states) |
| Recover from a load or save problem | [When analytics administration goes wrong](#when-analytics-administration-goes-wrong) |
| Read project-level measurements | [Read project analytics](https://atloria-selfdogfood-3577.atloria.app/p/atloria-selfdogfood-3577-BDFvUbEgc3/user/read-project-analytics) |
| Read the wider Analytics area | [Analytics overview](https://atloria-selfdogfood-3577.atloria.app/p/atloria-selfdogfood-3577-BDFvUbEgc3/user/analytics-overview) |
The Dashboard presents measures such as Page views, Unique visitors, Avg time on page, Avg
scroll depth, Bounce rate, and Searches. It also presents a comparison with the prior period.
## Before you start
Analytics uses one project context at a time. Select the project whose published documentation
you want to review before you inspect measures or prepare an export.
**Prerequisites**
- Select a project in the application header.
- Have access to the authenticated workspace.
- Know whether you are reviewing activity, managing tracked work, or preparing a report.
If no project is selected, the page presents **Select a project** and asks you to choose a
project from the header dropdown.
## Find Analytics
Use this procedure to reach the enterprise Analytics screen from the application navigation.
**Prerequisites**
- A project is selected.
- You are in the authenticated workspace.
**Steps**
1. In the main navigation, select **Analytics**.
2. Confirm that the page heading is **Analytics**.
**Result:** The Analytics screen opens with the Dashboard section ready for review.
## Understand the analytics screen
The screen opens on **Dashboard**. Dashboard shows zero values when the selected project has no
values in the current view.
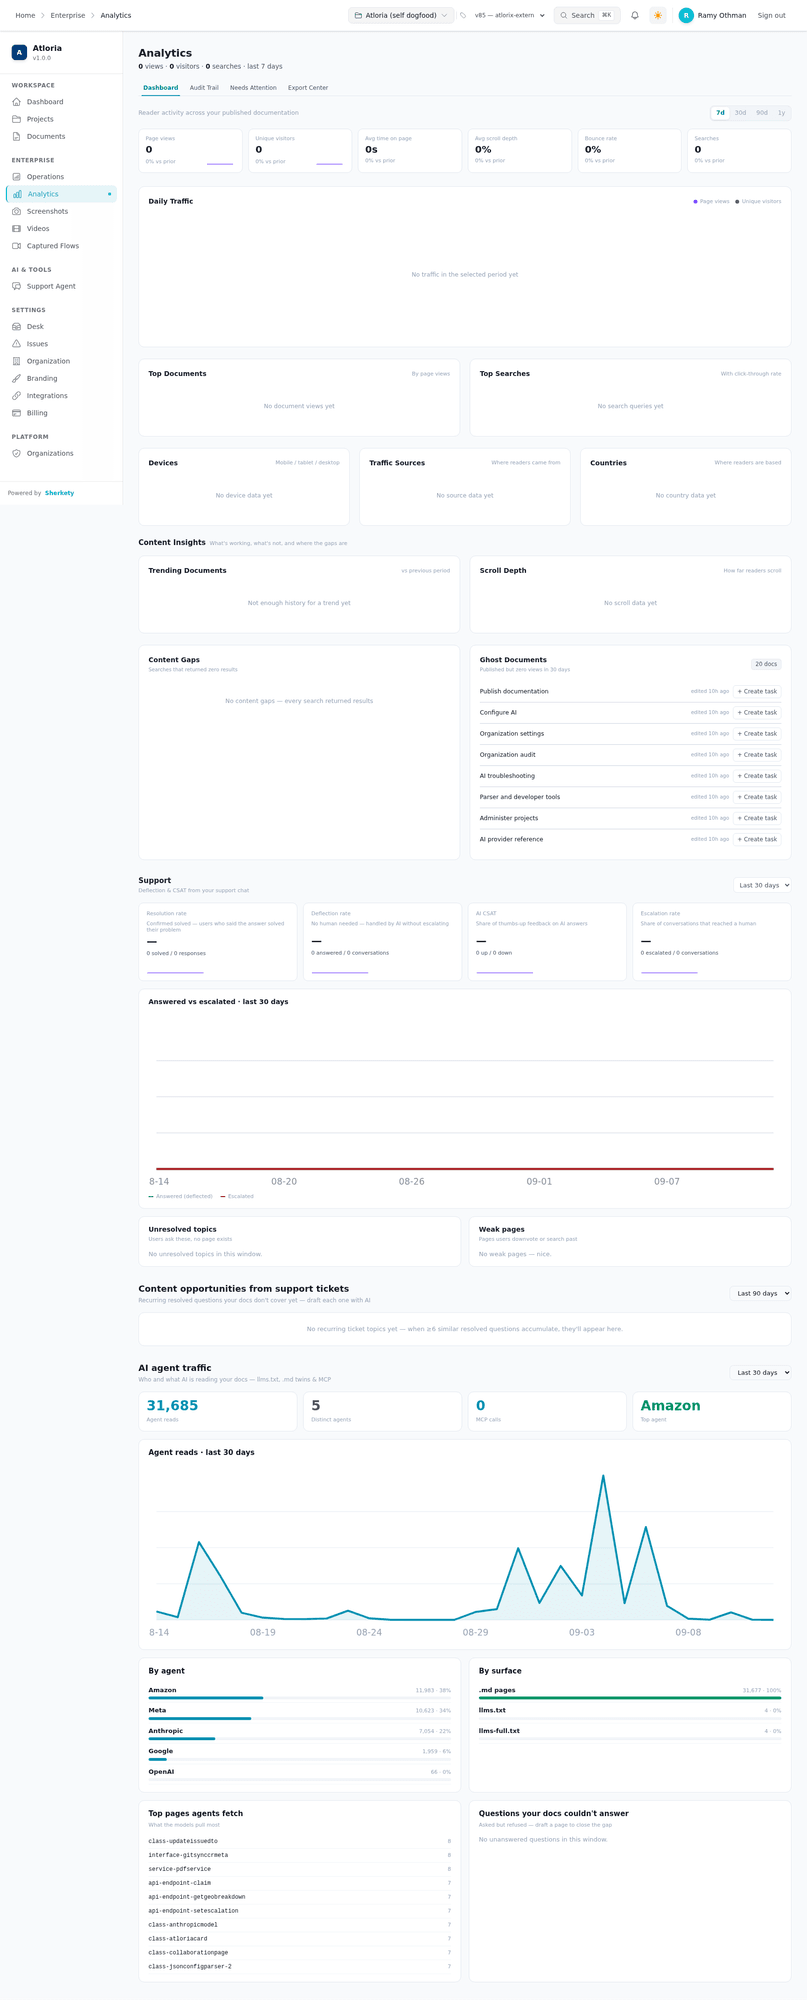
| Section | Use it to… | Main controls or information |
|---|---|---|
| **Dashboard** | Review published-document activity and content insights | `7d`, `30d`, `90d`, `1y`; Page views; Unique visitors; Avg time on page; Avg scroll depth; Bounce rate; Searches |
| **Audit Trail** | Review recorded activity | Action filter, audit rows, Details, pagination, Export CSV, Export JSON |
| **Needs Attention** | Review tracked work and reader feedback | Task queue, status filter, assignee filter, Resolve, Dismiss, Reader feedback |
| **Export Center** | Prepare analytics and documentation outputs | Analytics Reports, Scheduled reports, Recent exports, Documentation Exports |
The Dashboard period controls are `7d`, `30d`, `90d`, and `1y`. The Dashboard also includes
content insights and embedded support, ticket-content, and agent-traffic areas.
The Audit Trail uses the columns When, User, Action, and Details, with an expandable row area.
Its action choices include All Actions, version.published, document.updated, document.edited,
webhook.received, version.reviewed, export.downloaded, and schedule.triggered.
The Export Center contains an immediate export area, scheduled reports, recent exports, and
documentation export cards for Markdown Archive, Static HTML Site, and PDF Document.
## Review analytics and audit activity
Use this procedure when you need to change the Dashboard period, inspect audit activity, or
filter tracked work without creating a report.
**Prerequisites**
- A project is selected.
- The Analytics screen is open.
**Steps**
1. Select the section that matches the review you need.
| If you need to… | Select |
|---|---|
| Review measures and content activity | **Dashboard** |
| Review recorded activity | **Audit Trail** |
| Review tracked work and reader feedback | **Needs Attention** |
| Dashboard reports a load problem | **Retry** |
2. If you selected **Dashboard**, select **7d**, **30d**, **90d**, or **1y**.
3. If you selected **Audit Trail**, choose an action from the action filter: **All Actions**,
**version.published**, **document.updated**, **document.edited**, **webhook.received**,
**version.reviewed**, **export.downloaded**, or **schedule.triggered**.
4. If you selected **Audit Trail**, select **Export CSV** to download the audit data as CSV.
5. If you selected **Audit Trail**, select **Export JSON** to download the audit data as JSON.
6. If you selected **Needs Attention**, choose a task status from the status filter: **All
statuses**, **Open**, **In progress**, **Resolved**, or **Dismissed**.
7. If you selected **Needs Attention**, choose an assignee from the assignee filter: **All
assignees**, **Unassigned**, or a listed member.
8. For an active task, select **Resolve** or **Dismiss** when that is the outcome you need.
**Result:** The selected review area shows the period, action filter, task filter, or task status
you chose.
## Export analytics and manage scheduled reports
Use this procedure to create an immediate analytics export, maintain a scheduled report, or
download documentation for a selected version.
**Prerequisites**
- A project is selected.
- The Analytics screen is open.
- For documentation exports, a documentation version is available to select.
### Create an immediate analytics export
1. Select **Export Center**.
2. Under **Export now**, choose a configuration using this table.
| If you need… | Format | Period | Table |
|---|---|---|---|
| A PDF for the most recent week | **PDF** | **Last 7 days** | — |
| A PDF for the most recent month | **PDF** | **Last 30 days** | — |
| A PDF for the most recent quarter | **PDF** | **Last 90 days** | — |
| A PDF for the previous year | **PDF** | **Last year** | — |
| CSV page-view rows | **CSV** | one period above | **Page views** |
| CSV search rows | **CSV** | one period above | **Search queries** |
3. Select **Download**.
**Result:** The selected analytics export downloads, and the export history is refreshed.
### Create or update a scheduled report
1. Under **Scheduled reports**, select **+ New report**.
2. In **Name**, enter a name for the report.
3. In **Frequency**, choose a schedule using this table.
| If the report should run… | Select |
|---|---|
| Every day | **Daily** |
| On a day each week | **Weekly** |
| On a day each month | **Monthly** |
4. In **Time (UTC)**, select the hour at which the report runs.
5. If you selected **Weekly**, choose a day in **Day of week**.
6. If you selected **Monthly**, choose a day in **Day of month**.
7. In **Format**, select **PDF** or **CSV**.
8. In **Period (days)**, select **7**, **30**, or **90**.
9. In **Recipients (comma or space separated)**, enter at least one recipient email address.
10. Select **Create report**.
11. Choose a saved-report action using this table.
| If you want to… | Do this | Result |
|---|---|---|
| Update the report | Select **Edit**, change the report fields, and select **Save changes**. | The scheduled report is updated with the changed fields. |
| Run the report immediately | Select **Run now**. | The scheduled report run is requested. |
| Remove the report | Select **Delete**, then, in the confirmation prompt, select the option that confirms removal. | The report is removed after confirmation. |
| Keep the report | Select **Delete**, then dismiss the confirmation prompt. | The report remains scheduled. |
**Result:** The scheduled report is created or updated with its selected frequency, time,
format, period, and recipients.
### Download documentation
1. In **Documentation version**, select the documentation version.
2. Choose a documentation output using this table.
| If you need… | Select |
|---|---|
| A Markdown archive | **Download .zip** in **Markdown Archive** |
| A static HTML site | **Download .zip** in **Static HTML Site** |
| A PDF document | the PDF Document options |
3. For a PDF document, choose whether to include **Table of Contents** and **Cover Page**.
4. For a PDF document, select **A4** or **Letter**.
5. Select **Generate PDF**.
**Result:** The selected documentation export starts for the selected version.
## Handle conditional and empty analytics states
Analytics changes the controls it shows according to the choice you make and the data available
for the selected project.
**Prerequisites**
- The Analytics screen is open.
**Steps**
1. Choose the branch that matches the current screen using this table.
| If you see… | Do this |
|---|---|
| The export format is **CSV** | Use **Table** and choose **Page views** or **Search queries**. |
| The report frequency is **Weekly** | Use **Day of week**. |
| The report frequency is **Monthly** | Use **Day of month**. |
| An active task | Use **Resolve** or **Dismiss**. |
| No scheduled reports yet | Select **+ New report** to open the report form. |
| No audit events | Change the audit action filter or return to **Dashboard**. |
| No project selected | Select a project in the header before using **Analytics**. |
| No versions | Select another project or create a documentation version before using **Documentation Exports**. |
| No audit or report rows | Review the selected filter and period before acting on the empty area. |
**Result:** The available control matches the current Analytics state.
## When analytics administration goes wrong
Use this table when Analytics does not display the expected data or a report cannot be saved.
| What you see | What it means | What to do |
|---|---|---|
| **Analytics couldn't be loaded.** | The overview request did not return the expected data. | Select **Retry** and wait for the Dashboard to reload. |
| A report cannot be saved without a name | The report name is required by the save action. | Enter a value in **Name**, then select **Create report** or **Save changes**. |
| A report cannot be saved without a recipient | At least one recipient email is required by the save action. | Enter an address in **Recipients (comma or space separated)**, then save the report. |
| A scheduled report is not listed | The scheduled-report list has no matching row to act on. | Review the selected project and return to Scheduled reports. |
| Audit activity is not listed | No audit event matches the current filter. | Choose **All Actions** or another action in the Audit Trail filter. |
Use [Getting help](https://atloria-selfdogfood-3577.atloria.app/p/atloria-selfdogfood-3577-BDFvUbEgc3/user/getting-help) when the available recovery action does not resolve the
problem.
## What to do next
After reviewing or administering analytics, choose the next page by the work you need to do:
- Read detailed project measurements in [Read project analytics](https://atloria-selfdogfood-3577.atloria.app/p/atloria-selfdogfood-3577-BDFvUbEgc3/user/read-project-analytics).
- Review the broader analytics concepts and surfaces in [Analytics overview](https://atloria-selfdogfood-3577.atloria.app/p/atloria-selfdogfood-3577-BDFvUbEgc3/user/analytics-overview).
- Use [Analytics reference](https://atloria-selfdogfood-3577.atloria.app/p/atloria-selfdogfood-3577-BDFvUbEgc3/user/analytics-reference) for export and scheduled-report reference
information.
- Review related administrative status information in
[Operations and analytics reference](https://atloria-selfdogfood-3577.atloria.app/p/atloria-selfdogfood-3577-BDFvUbEgc3/user/operations-and-analytics-reference).
- If the available recovery path does not resolve the problem, use [Getting help](https://atloria-selfdogfood-3577.atloria.app/p/atloria-selfdogfood-3577-BDFvUbEgc3/user/getting-help).
# Operations and analytics reference
Use this page to review operational status and documentation analytics, then choose the
appropriate report or follow-up action.
## Operations and analytics at a glance
Administrative analytics measures how readers use published documentation. Operations brings
together the status information used to review recent documentation work. Use this reference
after work has run and before you move to a reporting or administrative follow-up.
| If you need to… | Go to |
|---|---|
| Check reader activity, searches, documents, or content gaps | [Review status and measurements](#review-status-and-measurements) |
| Check operational loading, errors, jobs, or queues | [Review status and measurements](#review-status-and-measurements) |
| Download analytics or documentation output | [Export analytics and schedule reports](#export-analytics-and-schedule-reports) |
| Create or maintain an automatic report | [Export analytics and schedule reports](#export-analytics-and-schedule-reports) |
| Resolve an empty state or failed load | [Handle empty states and errors](#handle-empty-states-and-errors) |
| Read the procedure for administrative operations | [Administer operations](https://atloria-selfdogfood-3577.atloria.app/p/atloria-selfdogfood-3577-BDFvUbEgc3/user/administer-operations) |
| Read the procedure for administrative analytics | [Administer analytics](https://atloria-selfdogfood-3577.atloria.app/p/atloria-selfdogfood-3577-BDFvUbEgc3/user/administer-analytics) |
| Understand the analytics workspace | [Analytics overview](https://atloria-selfdogfood-3577.atloria.app/p/atloria-selfdogfood-3577-BDFvUbEgc3/user/analytics-overview) |
| Inspect project measurements | [Read project analytics](https://atloria-selfdogfood-3577.atloria.app/p/atloria-selfdogfood-3577-BDFvUbEgc3/user/read-project-analytics) |
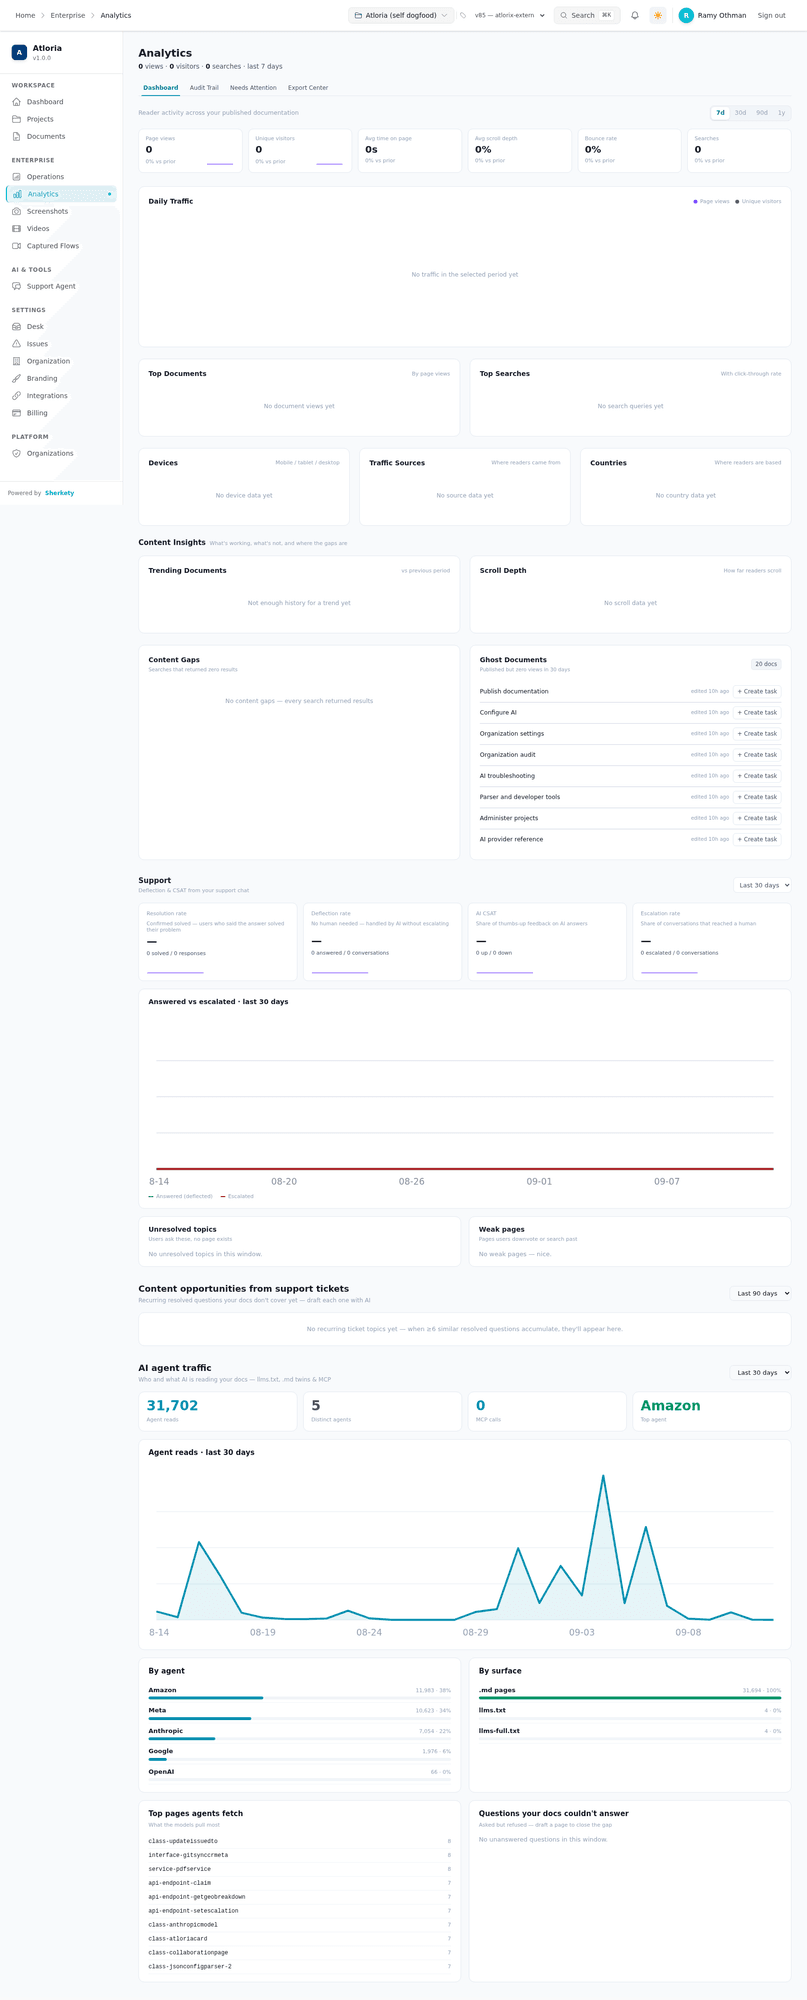
## Prerequisites for a useful review
**Prerequisites**
- Sign in before opening the analytics or operations route.
- Select a project before reviewing project analytics. Without a selected project, the page shows
`Select a project` and the message `Analytics covers the published docs of one project at a time.`
- Wait for the page to finish loading before interpreting its numbers, tables, or optional areas.
Analytics values, project names, report options based on saved versions, and optional sections
depend on the information available to your organization when the page loads.
## Open the review surface
Use this procedure when you need to reach the review surface from a saved link, bookmark, or
navigation entry.
**Prerequisites**
- Sign in.
- Decide whether you need operational status or project analytics.
**Steps**
1. Open the route that matches your task.
| If you need to… | Open |
|---|---|
| Review operational status | **Operations** |
| Review analytics for the current project | **Analytics** |
2. If the analytics page asks you to choose a project, select a project from the project
selector in the application header.
**Result:** The applicable operations or analytics surface is open.
## Review status and measurements
Use the selected view to inspect reader activity or current documentation work.
### Review analytics
**Prerequisites**
- Open **Analytics** with a selected project.
**Steps**
1. Select **Dashboard** to review the main measurements.
2. Select the period that answers your question.
| If you need to review… | Select |
|---|---|
| The most recent week | **7d** |
| The most recent 30 days | **30d** |
| The most recent 90 days | **90d** |
| The most recent year | **1y** |
3. Read Page views, Unique visitors, Avg time on page, Avg scroll depth, Bounce rate, and
Searches in the measurement row.
4. Select **Audit Trail** to review recorded activity.
5. In **Audit action**, select the activity category you need.
| If you need to review… | Select |
|---|---|
| Every recorded activity | `All Actions` |
6. Select **Needs Attention** to review tracked work and reader feedback.
**Result:** The selected analytics view displays the measurements, lists, or empty state for the
chosen period.
### Review operational status
**Prerequisites**
- Open **Operations** with a signed-in session.
**Steps**
1. Read the statistics at the top of the page.
2. Review **AI spend by model** for model, operation, calls, tokens, and cost.
3. Review **Recent jobs** for when each job ran, its status, stage, document count, duration,
and error.
4. Review **Queues** when the section appears.
**Result:** The operations page displays the current statistics and the available job, model,
and queue information.
## Export analytics and schedule reports
Use **Export Center** when you need a file for immediate analysis, a scheduled summary, or a
documentation package.
### Download an analytics export
**Prerequisites**
- Open analytics with a selected project.
**Steps**
1. Select **Export Center**.
2. In **Period**, select one of the available periods.
| Period | Meaning |
|---|---|
| `Last 7 days` | The most recent seven days |
| `Last 30 days` | The most recent 30 days; this is the initial choice |
| `Last 90 days` | The most recent 90 days |
| `Last year` | The most recent year |
3. In **Format**, select `PDF` or `CSV`.
4. If you selected `CSV`, use **Table** to select `Page views` or `Search queries`.
5. Select **Download**.
**Result:** The export request is submitted with the selected period, format, and table.
### Create or update a scheduled report
**Prerequisites**
- Open **Export Center**.
- Have a report name and at least one recipient email address ready.
**Steps**
1. In **Scheduled reports**, select **+ New report**.
2. In **Name**, enter the name for the report.
3. In **Frequency**, select one option.
| If the report should run… | Select |
|---|---|
| Every day | `Daily` |
| Every week | `Weekly`; this is the initial choice |
| Every month | `Monthly` |
4. In **Time (UTC)**, select one of the hourly choices from `00:00` through `23:00`.
The initial choice is `09:00`.
5. If **Frequency** is `Weekly`, select a **Day of week** from `Monday` through `Sunday`.
The initial choice is `Monday`.
6. If **Frequency** is `Monthly`, select a **Day of month** from `1` through `28`.
The initial choice is `1`.
7. In **Format**, select `PDF` or `CSV`. The initial choice is `PDF`.
8. In **Period (days)**, select `7`, `30`, or `90`. The initial choice is `30`.
**Result:** The scheduled-report form contains the report name, schedule, format, period, and
recipient area.
### Finish a scheduled report
**Prerequisites**
- The scheduled-report form is open, or an existing report is listed.
**Steps**
1. In **Recipients (comma or space separated)**, enter at least one recipient email address.
2. Select **Create report** for a new report.
3. For an existing report, choose the action that matches your goal.
| If you need to… | Select and then… |
|---|---|
| Update the report | Select **Edit**. Update the report name, schedule, or recipient list as needed. Select **Save changes**. |
| Run the report | Select **Run now**. |
| Remove the report | Select **Delete**. |
**Result:** A successful new report shows `Scheduled report created`. A successful edit shows
`Scheduled report updated`. A successful removal shows `Scheduled report deleted`.
### Download documentation
**Prerequisites**
- Open **Export Center**.
- Have at least one documentation version available.
**Steps**
1. In **Documentation Exports**, select the documentation version.
| If the version list contains… | The choice appears as… |
|---|---|
| A version number | `Version` followed by the version number |
| A name but no version number | `Version` followed by the name |
| Neither a version number nor a name | `Version` followed by the first six characters of the ID |
| No returned versions | `No versions` |
2. Select **Download .zip** under **Markdown Archive** for an MDX ZIP archive.
3. Select **Download .zip** under **Static HTML Site** for an offline HTML site.
4. Under **PDF Document**, select or clear **Table of Contents**.
5. Under **PDF Document**, select or clear **Cover Page**.
6. Under **PDF Document**, select `A4` or `Letter`.
7. Select **Generate PDF**.
**Result:** The selected documentation export is submitted in the chosen format.
## Handle empty states and errors
Use the message on screen to choose the next action. The same surface can show a loading state,
an empty state, or an error depending on the data available when it opens.
| What you see | What it means | What to do |
|---|---|---|
| `Select a project` | No project is selected for analytics | Select a project in the application header. |
| `Analytics covers the published docs of one project at a time.` | Analytics is scoped to one project | Select the project whose published documentation you need to review. |
| `Analytics couldn't be loaded.` | The analytics request failed | Select **Retry**. |
| `No audit events` | The current audit filter has no events | Change the **Audit action** filter or wait for an event matching it. |
| `Nothing recorded for this filter yet.` | No event matches the current filter | Change the filter and review the audit list again. |
| `Loading audit events…` | Audit results are still loading | Wait for the audit list to finish loading. |
| `Please enter a name for the report` | The report name is blank | Enter a name in **Name**. |
| `Please add at least one recipient email` | No recipient address was entered | Enter an address in **Recipients (comma or space separated)**. |
| `Update failed` | A task update did not complete | Review the task and submit the update again. |
| `Failed to export audit log` | The audit export did not complete | Retry the export from **Export CSV** or **Export JSON**. |
| `No scheduled reports yet. Create one to receive automatic email summaries.` | No scheduled report exists | Select **+ New report**. |
| `No exports yet` | No export history is available | Use **Download** or one of the documentation export controls. |
| `No feedback yet` | No reader ratings are available | Review the dashboard again after published documentation receives ratings. |
| `Loading operations…` | Operational data is still loading | Wait for the operations page to finish loading. |
| `Operations failed to load.` | The operations request failed | Open the operations route again. |
If you remain on the sign-in form after submitting credentials, check the sign-in details and
whether the service is reachable.
## Continue from the review
Use the result of the review to choose the next page:
| After the review, you need to… | Continue with |
|---|---|
| Understand the Operations hub | [Operations overview](https://atloria-selfdogfood-3577.atloria.app/p/atloria-selfdogfood-3577-BDFvUbEgc3/user/operations-overview) |
| Administer operational monitoring | [Administer operations](https://atloria-selfdogfood-3577.atloria.app/p/atloria-selfdogfood-3577-BDFvUbEgc3/user/administer-operations) |
| Understand the analytics workspace | [Analytics overview](https://atloria-selfdogfood-3577.atloria.app/p/atloria-selfdogfood-3577-BDFvUbEgc3/user/analytics-overview) |
| Inspect project analytics | [Read project analytics](https://atloria-selfdogfood-3577.atloria.app/p/atloria-selfdogfood-3577-BDFvUbEgc3/user/read-project-analytics) |
| Review analytics sections and exports | [Analytics reference](https://atloria-selfdogfood-3577.atloria.app/p/atloria-selfdogfood-3577-BDFvUbEgc3/user/analytics-reference) |
| Review completed operational work | [Job History](https://atloria-selfdogfood-3577.atloria.app/p/atloria-selfdogfood-3577-BDFvUbEgc3/user/job-history) |
| Review documentation job statuses | [Documentation job status reference](https://atloria-selfdogfood-3577.atloria.app/p/atloria-selfdogfood-3577-BDFvUbEgc3/user/documentation-job-status-reference) |
| Resolve a general application error | [General error messages](https://atloria-selfdogfood-3577.atloria.app/p/atloria-selfdogfood-3577-BDFvUbEgc3/user/general-error-messages) |
The review ends with the selected measurement, status, export, or report result on screen. The
linked page owns the next task when the next action changes configuration or operational work.
# AI configuration overview
Use this page to understand the AI configuration area, review the AI workspace, and choose the
next page for configuring or referring to AI settings.
## AI configuration and workspace overview
AI Configuration is the administrative area for the provider and response settings used by
AI-supported documentation work. The AI workspace is the **AI Assistant** area for suggestions,
content-quality and readability analysis, summaries, and key points.
| If you need to… | Go to |
|---|---|
| Understand the page before using an AI surface | [Before you start](#before-you-start) |
| Find the two AI destinations | [Find the AI surfaces](#find-the-ai-surfaces) |
| Identify tabs, fields, and controls | [Understand the AI configuration screen](#understand-the-ai-configuration-screen) |
| Configure providers or response settings | [Configure AI](https://atloria-selfdogfood-3577.atloria.app/p/atloria-selfdogfood-3577-BDFvUbEgc3/user/configure-ai) |
| Review provider, usage, history, and settings details | [AI configuration reference](https://atloria-selfdogfood-3577.atloria.app/p/atloria-selfdogfood-3577-BDFvUbEgc3/user/ai-configuration-reference) |
| Move between application destinations | [Navigation basics](https://atloria-selfdogfood-3577.atloria.app/p/atloria-selfdogfood-3577-BDFvUbEgc3/user/navigation-basics) |
| Resolve an issue that the AI pages do not explain | [Getting help](https://atloria-selfdogfood-3577.atloria.app/p/atloria-selfdogfood-3577-BDFvUbEgc3/user/getting-help) |
The provider choices are the available AI services. The provider list includes Azure and direct
provider variants, and the settings page uses one selected provider as the default for AI
operations.
**Result:** You know whether you need the AI configuration area or the AI workspace, and which
section or related page to open next.
## Before you start
Use AI settings to control the application’s AI services and use the workspace for documentation
assistance.
**Prerequisites**
- Decide whether you need to change a provider or response setting, review usage, review request
history, or use the workspace.
- Keep the settings in the browser where you use them. The settings are stored locally and are
merged with the default values when the page loads.
No required markers are declared for the AI configuration controls. The initial settings are
`azure-claude`, `2000`, `0.7`, enabled streaming, and enabled auto-save when no stored values
override them.
**Result:** You know the purpose of the destination, the task you want to perform, and the local
settings behaviour before you open a control.
## Find the AI surfaces
Choose the destination that matches the work you need to do.
**Steps**
1. Open the destination that matches your task.
| If you need to… | Open |
|---|---|
| Configure providers, review usage or history, or manage settings | [AI Configuration](#understand-the-ai-configuration-screen) |
| Open the AI workspace | [AI Assistant](#choose-what-to-do-next) |
2. If the AI Configuration page displays `404`, use [Getting help](https://atloria-selfdogfood-3577.atloria.app/p/atloria-selfdogfood-3577-BDFvUbEgc3/user/getting-help) before
continuing.
A `404` page means that the destination is unavailable.
**Result:** You are at the selected AI destination, or you have the returned page state to use when
choosing the next support step.
## Understand the AI configuration screen
The AI configuration screen groups provider selection, usage, request history, advanced response
settings, and settings backup under four tabs.
| Tab | Use it to… |
|---|---|
| **Providers** | Choose the default provider and test an available provider connection. |
| **Usage** | Review current-billing-month usage. |
| **History** | Review recent AI requests, filter them, sort them, and refresh the list. |
| **Settings** | Adjust response parameters, feature switches, and settings backup. |
The **History** tab provides these choices:
| Control | Choices |
|---|---|
| **Status filter** | `All`, `Success`, `Error` |
| **Sort by** | `Time`, `Duration`, `Tokens` |
The **Settings** tab provides these fields and controls:
| Field or control | What it changes |
|---|---|
| **Max Tokens** | The maximum generated-token value; the range is `100` to `4000` in steps of `100`. |
| **Temperature** | Response randomness; the range is `0` to `1` in steps of `0.1`. |
| **Enable Streaming** | Whether responses stream in real time. |
| **Auto-Save Settings** | Whether changes save automatically to local storage. |
| **📥 Export Settings** | Downloads the settings as a JSON file. |
| **📤 Import Settings** | Selects a `.json` settings file for import. |
| **🔄 Reset to Defaults** | Restores the default settings and removes stored settings. |
Provider cards show a radio choice for the default provider and **Test Connection**. The connection
control is available only for an available provider and is disabled while that provider is being
tested. The provider cards can show `● Available` or `● Unavailable`, followed by `✓ Test Passed`
or `✗ Test Failed` after a connection test.
**Result:** You can identify the tab, field, choice, or backup control that matches your task.
## Configure or review AI
Use this procedure when you need to change a setting, inspect usage or history, test a provider, or
back up the settings.
**Prerequisites**
- Open [AI Configuration](#understand-the-ai-configuration-screen).
- Know which provider, response setting, review list, or backup action you need.
**Steps**
1. Select the tab for the task you need.
| If you need to… | Select |
|---|---|
| Choose a default provider or test a connection | **Providers** |
| Review current-billing-month totals | **Usage** |
| Review, filter, sort, or reload requests | **History** |
| Change response settings or back up settings | **Settings** |
2. Complete the task for the tab you selected.
| If you need to… | Action |
|---|---|
| Set the default provider | On **Providers**, select the provider radio choice. |
| Test an available provider | On **Providers**, select **Test Connection**. The card displays `✓ Test Passed` or `✗ Test Failed`. |
| Filter or sort request history | On **History**, choose `All`, `Success`, or `Error` from **Status filter**, or choose `Time`, `Duration`, or `Tokens` from **Sort by**. |
| Reload request history | On **History**, select **🔄 Refresh**. |
| Change response settings | On **Settings**, change **Max Tokens**, **Temperature**, **Enable Streaming**, or **Auto-Save Settings**. The values are stored in the browser. |
| Back up or restore settings | On **Settings**, select **📥 Export Settings**, **📤 Import Settings**, or **🔄 Reset to Defaults**. |
3. Confirm that the selected provider, response setting, review list, or backup result appears on
screen.
**Result:** The selected provider, response settings, review list, or backup result is on screen.
## Handle the available AI states
Each tab answers a different review question, and the content changes with the available provider,
usage, and request data.
| When you are looking for… | The page shows… |
|---|---|
| Providers | Provider configuration. |
| Current-billing-month usage | Usage totals, or `No AI usage recorded this month` when no usage is present. |
| Recent requests | Request history, or `No request history found.` when no rows are present. |
| Advanced response settings | The settings manager. |
| Providers but none are returned | `No AI providers configured.` |
| Usage while it loads | `Loading usage…` |
Request history can first show loading placeholders under **Request History**. Provider cards show
`● Available` or `● Unavailable` for availability.
**Result:** You can match the visible state to the tab or data condition that produced it.
## When AI configuration goes wrong
Use the message on screen to choose the corrective route. The AI workspace is currently presented
as **Coming soon**, and it has no editable workspace fields or assistant action to select.
| What you see | What to do |
|---|---|
| `AI settings failed to load.` | Return to [AI Configuration](#understand-the-ai-configuration-screen) and use [Getting help](https://atloria-selfdogfood-3577.atloria.app/p/atloria-selfdogfood-3577-BDFvUbEgc3/user/getting-help) if the page still does not load. |
| `Failed to import settings:` followed by the import error | Select a JSON settings file and repeat **📤 Import Settings**. |
| `✗ Test Failed` | Check the provider configuration, then select **Test Connection** again. |
| The AI Configuration page reads `404` | Use [Getting help](https://atloria-selfdogfood-3577.atloria.app/p/atloria-selfdogfood-3577-BDFvUbEgc3/user/getting-help) for destination access assistance. |
| The AI Assistant page reads `Coming soon` | Use [Configure AI](https://atloria-selfdogfood-3577.atloria.app/p/atloria-selfdogfood-3577-BDFvUbEgc3/user/configure-ai) for available configuration work. |
**Result:** You have a message-specific next action and a support route for a page that does not
load.
## Choose what to do next
The AI configuration area handles provider selection, response settings, usage review, request
history, and local settings backup. The AI workspace currently displays **AI Assistant** and
**Coming soon** with no editable workspace fields or assistant actions.
| If you need to… | Go to |
|---|---|
| Change providers, response settings, or local settings backup | [Configure AI](https://atloria-selfdogfood-3577.atloria.app/p/atloria-selfdogfood-3577-BDFvUbEgc3/user/configure-ai) |
| Check provider names, fields, options, and messages | [AI configuration reference](https://atloria-selfdogfood-3577.atloria.app/p/atloria-selfdogfood-3577-BDFvUbEgc3/user/ai-configuration-reference) |
| Move between application areas | [Navigation basics](https://atloria-selfdogfood-3577.atloria.app/p/atloria-selfdogfood-3577-BDFvUbEgc3/user/navigation-basics) |
| Get help with a route or message | [Getting help](https://atloria-selfdogfood-3577.atloria.app/p/atloria-selfdogfood-3577-BDFvUbEgc3/user/getting-help) |
| Understand why there is no prompt or workspace action here | Continue with the configuration or reference page above. |
**Result:** You have a named next page for configuration, reference, navigation, or support.
# Configure AI
## AI configuration at a glance
AI Configuration controls the AI provider and response preferences used by Atloria's AI
documentation engine. The surface lets you choose a default provider, set response length and
randomness, control streaming, and save a copy of the settings.
| If you need to… | Go to |
|---|---|
| Choose which provider handles AI operations | [Configure the provider and AI settings](#configure-the-provider-and-ai-settings) |
| Adjust response length or randomness | [Configure the provider and AI settings](#configure-the-provider-and-ai-settings) |
| Understand the tabs and available controls | [Understand the configuration surface](#understand-the-configuration-surface) |
| Recover from an unavailable provider or import failure | [When configuration goes wrong](#when-configuration-goes-wrong) |
| Read the wider AI Configuration reference | [AI configuration reference](https://atloria-selfdogfood-3577.atloria.app/p/atloria-selfdogfood-3577-BDFvUbEgc3/user/ai-configuration-reference) |
| Read the wider AI workspace overview | [AI Configuration overview](https://atloria-selfdogfood-3577.atloria.app/p/atloria-selfdogfood-3577-BDFvUbEgc3/user/ai-configuration-overview) |
## Before you start
Before changing a setting, have access to the AI Configuration route and know which provider your
organization intends to use.
Prerequisites
- Know the provider you want to make the default.
- Have the JSON settings file available if you plan to import settings.
- Be ready to check the provider's availability before testing its connection.
The provider list and the initial setting values depend on the environment and the saved browser
settings. Check the values shown on screen before changing them.
## Open AI Configuration
Use the AI settings route to reach the configuration surface.
Prerequisites
- You have access to the Atloria application.
Steps
1. Open **AI Configuration** in Atloria.
**Result:** The AI Configuration surface is open.
## Understand the configuration surface
AI Configuration groups provider selection and advanced response preferences into separate tabs.
The tabs are:
| If you need to… | Select |
|---|---|
| Choose or test an AI provider | **Providers** |
| View current-month AI usage | **Usage** |
| Review recent AI requests | **History** |
| Change response preferences or manage settings files | **Settings** |
The **Providers** tab shows one provider choice for each provider returned to the surface. The
selected choice is the default provider. Each provider also has a **Test Connection** control; that
control is disabled while the provider is unavailable or while its test is running.
The **Settings** tab contains these controls:
| Control | What it changes |
|---|---|
| **Max Tokens** | The maximum number of tokens generated in a response. |
| **Temperature** | The randomness of AI responses. |
| **Enable Streaming** | Whether responses stream in real time. |
| **Auto-Save Settings** | Whether changes are saved automatically to browser storage. |
| **📥 Export Settings** | Downloads the current settings as JSON. |
| **📤 Import Settings** | Opens a file chooser for a JSON settings file. |
| **🔄 Reset to Defaults** | Replaces the current settings with the default settings. |
`Prompts` is not one of the available tabs. The page does not provide required markers or
validation rules for these configuration fields, and it does not provide a separate save button.
## Configure the provider and AI settings
Use this procedure when you need to select the provider or change how AI responses are generated.
Prerequisites
- You are on the AI Configuration surface.
- The provider you want to use appears in **Providers**.
Steps
1. Select **Providers**.
2. Select the radio control beside the provider you want to make the default.
3. Select **Test Connection** for that provider.
4. Select **Settings**.
5. Set **Max Tokens** within the displayed range from `100` to `4000` in increments of `100`.
6. Set **Temperature** within the displayed range from `0` to `1` in increments of `0.1`.
7. Select or clear **Enable Streaming**.
8. Select or clear **Auto-Save Settings**.
Changes are saved to browser storage when you change a setting; no separate save control is
provided.
**Result:** The selected provider and the changed response preferences remain displayed on the
configuration surface.
## Handle provider and settings branches
The provider branch you see depends on the provider list and its availability. The settings branch
you see depends on whether an imported file can be read as JSON.
| If you see… | Do this |
|---|---|
| `No AI providers configured.` and `Please configure your environment variables.` | Arrange for the required provider configuration, then return to **Providers**. |
| `● Unavailable` | Choose an available provider before selecting **Test Connection**. |
| `Testing...` | Wait for the test to finish. |
| `● Available` | The provider is available for testing. |
| `✓ Test Passed` | Continue with the provider as the default choice if it is the provider you need. |
| `✗ Test Failed` | Choose another available provider or correct the provider configuration before trying again. |
| A settings file is ready to use | Select **📤 Import Settings**, then choose the JSON file. |
| You need to discard the current settings | Select **🔄 Reset to Defaults**. |
**Result:** The surface displays the provider state or import/reset outcome associated with the
action you selected. If a message indicates an error, use the troubleshooting table next.
## When configuration goes wrong
Use the message on screen to choose the matching recovery action.
| What you see | Meaning | What to do |
|---|---|---|
| `Failed to import settings:` | The error detail follows this fixed text. | Select **📤 Import Settings** and choose a valid JSON settings file. |
| `Invalid settings file` | The selected file could not be parsed as settings JSON. | Select **📤 Import Settings** and choose a valid JSON settings file. |
| `Failed to read file` | The file could not be read. | Select **📤 Import Settings** and choose a readable JSON settings file. |
| `Failed to load AI settings:` | The browser could not load saved AI settings. | Reload the AI Configuration surface. |
| `Failed to save AI settings:` | The browser could not save the changed AI settings. | Retry the change on the AI Configuration surface. |
| `Failed to reset AI settings:` | The browser could not reset the saved AI settings. | Retry **🔄 Reset to Defaults**. |
The route can also display `404` instead of the configuration surface. In that case, the AI
configuration controls are not available on the screen.
**Result:** You have matched the message on screen to its recovery action and can confirm the
configuration outcome in the next section.
## After you configure AI
After changing a setting, check the selected provider and displayed values on the **Settings**
tab. Use **📥 Export Settings** if you need a portable copy of the browser-stored settings.
For related guidance, continue to [AI Configuration overview](https://atloria-selfdogfood-3577.atloria.app/p/atloria-selfdogfood-3577-BDFvUbEgc3/user/ai-configuration-overview) or
[AI configuration reference](https://atloria-selfdogfood-3577.atloria.app/p/atloria-selfdogfood-3577-BDFvUbEgc3/user/ai-configuration-reference).
**Result:** The configuration surface shows the provider and response preferences you selected.
# AI configuration reference
## AI configuration at a glance
AI configuration is the set of settings used by the AI documentation engine.
An AI provider is the service you choose for AI operations. Use AI configuration to adjust how AI
responses are generated.
**AI Configuration** is the administration area for these settings.
| If you need to… | Go to… |
| --- | --- |
| Open the settings surface and identify its areas | [Open AI settings](#open-ai-settings) |
| Choose or test the provider used for AI operations | [Choose and test an AI provider](#choose-and-test-an-ai-provider) |
| Change response length, randomness, streaming, or automatic saving | [Adjust advanced AI settings](#adjust-advanced-ai-settings) |
| Follow the complete configuration procedure | [Configure AI](https://atloria-selfdogfood-3577.atloria.app/p/atloria-selfdogfood-3577-BDFvUbEgc3/user/configure-ai) |
| Understand the wider AI workspace | [AI Configuration overview](https://atloria-selfdogfood-3577.atloria.app/p/atloria-selfdogfood-3577-BDFvUbEgc3/user/ai-configuration-overview) |
## Before you start
The AI settings surface uses the providers returned for your environment and stores settings in
your browser.
**Prerequisites**
- Have a valid `.json` settings file ready if you plan to import settings.
- If you plan to restore settings, use a file that your browser can read.
- If you plan to change settings, note that the current values are read from the browser's
stored settings when they are available.
When no stored settings exist, the default settings are `azure-claude`, `2000` maximum tokens,
`0.7` temperature, streaming enabled, and automatic saving enabled.
| Before you act | What it affects |
| --- | --- |
| A provider returned for your environment | The provider choices shown in the provider area |
| Provider availability | Whether **Test Connection** can be selected |
| Browser storage | Where changed settings are saved |
| A readable `.json` file | Whether **Import Settings** can read settings |
## Open AI settings
The AI settings page is the administration surface where provider, usage, request history, and
advanced settings areas are selected.
**Prerequisites**
- Open AI settings from the administration navigation.
**Steps**
1. Open AI settings from the administration navigation.
2. Select the area that matches the work you need to do.
| If you need to… | Select… |
| --- | --- |
| Choose or test a provider | **Providers** |
| Review current-month AI usage | **Usage** |
| Review request history | **History** |
| Change advanced settings | **Settings** |
**Result:** The selected settings area is displayed.
If the route displays `404`, the AI settings surface has not opened.
## Understand the settings surface
The settings surface groups provider choices separately from advanced response and storage
controls.
| Area | What it contains |
| --- | --- |
| **Providers** | One provider radio control for each provider returned by the environment, its display name, availability status, and **Test Connection** |
| **Settings** | **Max Tokens**, **Temperature**, **Enable Streaming**, **Auto-Save Settings**, **Export Settings**, **Import Settings**, and **Reset to Defaults** |
| **Usage** | Current-month AI usage when that area is selected |
| **History** | AI request history when that area is selected |
The provider area appears when **Providers** is selected. The advanced settings area appears when
**Settings** is selected. The page has no separate save button for advanced settings; each change
is saved to browser storage.
The settings surface has no Prompts area. The available settings areas are **Providers**, **Usage**,
**History**, and **Settings**.
Select **Providers** to choose a provider, or select **Settings** to adjust advanced AI settings.
## Choose and test an AI provider
Use the provider area to make one returned provider the default and to test an available provider.
**Prerequisites**
- Open the **Providers** area.
- At least one provider is returned for your environment if you want to select a provider.
**Steps**
1. Review the provider names and status shown in the provider cards.
| Provider display name | Status or action shown with it |
| --- | --- |
| `Azure Claude (Anthropic)` | `● Available` or `● Unavailable`; **Test Connection** |
| `Azure OpenAI` | `● Available` or `● Unavailable`; **Test Connection** |
| `Claude` | `● Available` or `● Unavailable`; **Test Connection** |
| `OpenAI` | `● Available` or `● Unavailable`; **Test Connection** |
2. Select the radio control beside the provider you want to use as the default.
3. Select **Test Connection** for an available provider.
The control reads `Testing...` while the test is running. A successful test displays
`✓ Test Passed`; an unsuccessful test displays `✗ Test Failed`.
**Result:** The selected provider is the default for AI operations, and the provider card shows
the connection-test result when a test has been run.
If no providers are returned, the provider area displays `No AI providers configured.` and
`Please configure your environment variables.`
## Adjust advanced AI settings
Advanced AI settings control response length, response randomness, streaming, automatic saving,
and local backup and restore actions.
**Prerequisites**
- Open the **Settings** area.
- Have a readable `.json` settings file ready before importing settings.
**Steps**
1. Set **Max Tokens** with the range control.
The permitted range is `100` to `4000`, in increments of `100`. Higher values allow longer
responses but may cost more.
2. Set **Temperature** with the range control.
The permitted range is `0` to `1`, in increments of `0.1`. Lower values are more deterministic;
higher values are more creative.
3. Select or clear **Enable Streaming**.
This controls whether AI responses stream in real time.
4. Select or clear **Auto-Save Settings**.
This controls whether settings changes are saved automatically to local storage.
5. Choose the backup action that matches your goal.
| If you need to… | Select… |
| --- | --- |
| Save the current settings to a file | **Export Settings** |
| Load settings from a JSON file | **Import Settings**, then choose the `.json` file in the file chooser |
| Replace the current settings with the default settings | **Reset to Defaults**, then confirm `azure-claude`, `2000` maximum tokens, `0.7` temperature, streaming enabled, and automatic saving enabled |
**Result:** The selected advanced values are applied, or the settings are exported, imported, or
reset according to the action you selected.
## Handle provider and settings branches
The provider and settings areas change their available path according to the returned provider
list, provider availability, and the action you choose.
**Steps**
1. Choose the path that matches what is on screen.
| If you see… | Follow this path |
| --- | --- |
| `No AI providers configured.` | Configure the environment before selecting a provider. |
| `● Unavailable` | Select an available provider; **Test Connection** is disabled for the unavailable provider. |
| `Testing...` | Wait for the test result before interpreting the provider status. |
| **Import Settings** | Choose a `.json` file when the file chooser opens. |
| **Reset to Defaults** | Use the default settings listed in [Adjust advanced AI settings](#adjust-advanced-ai-settings). |
**Result:** You follow the branch that matches the provider or settings state shown on screen.
## Handle configuration problems
Configuration problems are shown at the point where provider loading, connection testing, or
settings-file handling stops the action.
When provider loading fails, the page displays `AI settings failed to load.` followed by the provider
error message.
| What you see | What it means | What to do |
| --- | --- | --- |
| `AI settings failed to load.` followed by the provider error message | The provider-loading error state replaced the settings page content. | Read the provider error text that follows the message. |
| `✗ Test Failed` | The provider connection test did not pass. | Review the provider's availability before trying the connection test again. |
| A message beginning `Failed to import settings:` appears. | The import action returned an error. | Check the file and try **Import Settings** again. |
| `Invalid settings file` | The selected file could not be parsed as settings. | Select a valid `.json` settings file. |
| `Failed to read file` | The file reader could not read the selected file. | Select a readable `.json` settings file. |
| `404` | The AI settings route did not open the settings surface. | Open AI settings from the administration navigation. |
**Result:** The message identifies whether the problem occurred while loading providers, testing a
provider, importing a file, or reaching the settings route.
## What to do next
After you understand the provider and advanced settings, use the configuration procedure for the
ordered setup task or return to the overview for the wider AI workspace context.
- Continue with [Configure AI](https://atloria-selfdogfood-3577.atloria.app/p/atloria-selfdogfood-3577-BDFvUbEgc3/user/configure-ai) to change the settings in order.
- Read [AI Configuration overview](https://atloria-selfdogfood-3577.atloria.app/p/atloria-selfdogfood-3577-BDFvUbEgc3/user/ai-configuration-overview) for the wider AI configuration
and workspace context.
- Support-agent chat and agent-management controls belong to the separate support-agent surfaces.
The settings note is titled `Settings Storage`. It states that settings are stored locally in the
browser, persist across sessions, and do not sync across devices unless you export and import them
manually.
# System Settings overview
## System Settings at a glance
System Settings is the shared administrative boundary for configuration after the
feature-specific administration areas. The overview page is headed **General settings** and
currently presents an empty state, a page with no settings form to complete.
| If you need to… | Go to |
|---|---|
| Understand the page before selecting a settings area | [Before you start](#before-you-start) |
| See what the overview contains | [Understand the System Settings surface](#understand-the-system-settings-surface) |
| Choose a separate settings area | [Choose the next settings page](#choose-the-next-settings-page) |
| Configure organization settings | [Organization overview](https://atloria-selfdogfood-3577.atloria.app/p/atloria-selfdogfood-3577-BDFvUbEgc3/user/organization-overview) |
| Configure branding | [Configure Branding](https://atloria-selfdogfood-3577.atloria.app/p/atloria-selfdogfood-3577-BDFvUbEgc3/user/configure-branding) |
| Configure integrations | [Configure Integrations](https://atloria-selfdogfood-3577.atloria.app/p/atloria-selfdogfood-3577-BDFvUbEgc3/user/configure-integrations) |
| Configure billing | [Configure Billing](https://atloria-selfdogfood-3577.atloria.app/p/atloria-selfdogfood-3577-BDFvUbEgc3/user/configure-billing) |
| Configure AI settings | [AI Configuration overview](https://atloria-selfdogfood-3577.atloria.app/p/atloria-selfdogfood-3577-BDFvUbEgc3/user/ai-configuration-overview) |
| Manage custom domains | [Manage custom domains](https://atloria-selfdogfood-3577.atloria.app/p/atloria-selfdogfood-3577-BDFvUbEgc3/user/manage-custom-domains) |
## Before you start
You do not need a record, field value, or form submission to use this page.
## Understand the System Settings surface
The page displays an empty-state message:
> `Nothing to configure here yet`
The page presents no configuration controls in these forms:
| Page area | What you do instead |
|---|---|
| Input fields | Choose the separate settings page for the configuration job. |
| Selectors | Choose the separate settings page for the configuration job. |
| Tables or grids | Choose the separate settings page for the configuration job. |
| Named actions or buttons | Choose the separate settings page for the configuration job. |
The empty state also states that profile, notification, and theme preferences are under
development and will land here. Use the settings-page table in the next section to choose the
area for your task.
## Choose the next settings page
Use the separate settings page that matches the work you need to do. The overview directs
organization, billing, AI, and audience settings to their own pages under Settings:
| If you need to… | Go to |
|---|---|
| Manage organization-level administration | [Organization overview](https://atloria-selfdogfood-3577.atloria.app/p/atloria-selfdogfood-3577-BDFvUbEgc3/user/organization-overview) |
| Configure branding | [Configure Branding](https://atloria-selfdogfood-3577.atloria.app/p/atloria-selfdogfood-3577-BDFvUbEgc3/user/configure-branding) |
| Configure integrations | [Configure Integrations](https://atloria-selfdogfood-3577.atloria.app/p/atloria-selfdogfood-3577-BDFvUbEgc3/user/configure-integrations) |
| Configure billing | [Configure Billing](https://atloria-selfdogfood-3577.atloria.app/p/atloria-selfdogfood-3577-BDFvUbEgc3/user/configure-billing) |
| Configure AI | [AI Configuration overview](https://atloria-selfdogfood-3577.atloria.app/p/atloria-selfdogfood-3577-BDFvUbEgc3/user/ai-configuration-overview) |
| Configure audience settings | Use the audience settings page under Settings. |
| Manage custom domains | [Manage custom domains](https://atloria-selfdogfood-3577.atloria.app/p/atloria-selfdogfood-3577-BDFvUbEgc3/user/manage-custom-domains) |
1. In the table above, select the link labelled **Organization overview**, **Configure Branding**,
**Configure Integrations**, **Configure Billing**, **AI Configuration overview**, or **Manage
custom domains**, according to your administrative task.
**Result:** The page for the selected settings area is identified.
The overview also states:
> `Organization, billing, AI, and audience settings each have their own page under Settings.`
# Configure branding
## What branding controls
Branding controls the published documentation appearance for the project you select.
You use it to set the site's identity, media, colors, menu, typography, reader theme, and
white-label presentation. White-label presentation controls Atloria attribution, footer text,
and custom CSS on published pages.
Branding applies per project, so each published site carries its own choices. The settings
affect what readers see on the published documentation rather than the administration
workspace itself.
| If you need to… | Go to |
|---|---|
| Set the site's identity, media, colors, menu, typography, or white-label presentation | Review the branding options |
| Save or discard a branding change | Change and save branding |
| Resolve an unavailable preview, plan-gated option, or failed upload | Handle unavailable or plan-gated options |
| Change broader workspace choices | Personalizing your workspace |
| Manage a custom domain | Manage custom domains |
| Configure connected services | Configure integrations |
| Change subscription settings | Configure billing |
## Before you start
**Prerequisites**
| Have or know this first | Why it matters |
|---|---|
| The project you want to change | The form loads branding for the selected project. |
| Whether the project is published | **Open live preview** is available only when the project has both publication identifiers. |
| The branding choices you want to apply | The page loads the current branding values before you edit them. |
| The subscription access for white-label settings | Some Typography and White-label options are marked **PRO** or **BUSINESS** and can be rejected during save. |
If no project is selected, the page shows **Pick a project to brand** and asks you to choose a
project from the header dropdown before customizing the published documentation.
## Open the branding settings
Open Branding from the project settings to choose the appearance and reader-facing presentation
of published documentation.
**Prerequisites**
You have selected the project whose published documentation you want to change.
**Steps**
1. In the application settings navigation, select **Branding**.
2. Choose the tab that matches the change you need.
| If you need to… | Select |
|---|---|
| Change the site name or tagline | **Site info** |
| Upload a logo or favicon | **Media** |
| Choose a page theme, preset, or colors | **Colors** |
| Choose and customize the header | **Top menu** |
| Choose a font, color mode, reader theme access, or dark-mode logo | **Typography** |
| Control powered-by text, footer text, or custom CSS | **White-label** |
| Manage the project's domain | **Domain** |
| Configure access | **Access** |
| Configure segmentation | **Segmentation** |
| Configure developer settings | **Developers** |
**Result:** The selected branding settings tab is open for the chosen project.
## Review the branding options
Review the options before changing anything. The page groups settings by the part of the
published documentation you want readers to recognize.
| Area | Fields and choices |
|---|---|
| Site identity | **Site name**; **Tagline** |
| Media | **Logo**; **Favicon** |
| Colors | **Page theme**; **Quick presets**; **Primary color**; **Accent color** |
| Header | **Header layout**; **Background**; **Text color**; **Height**; **Border color**; **Border style** |
| Typography and reader theme | **Font**; **Color mode**; **Allow readers to switch theme**; **Dark-mode logo** |
| White-label | **Hide "Generated by Atloria"**; **Custom footer**; **Custom CSS** |
The media area provides upload surfaces for **Logo** and **Favicon**. When an asset is already
present, use **Change** to replace it or **Remove** to clear it. The logo accepts PNG or SVG;
the favicon accepts a 32×32 PNG or ICO and falls back to the logo.
The Colors area provides the following choices. The primary and accent values also have a
color picker and a text input.
| Choice group | Options |
|---|---|
| Page themes | **Atloria**, **Ocean**, **Forest**, **Sunset**, **Slate**, **Midnight**, **Carbon** |
| Quick presets | **Atloria**, **Stripe**, **Linear**, **Vercel**, **Notion**, **Emerald**, **Coral**, **Amber** |
The Top menu area offers **Minimal**, **Classic**, **Sidebar**, and **Developer** layouts.
After choosing a layout, you can adjust **Background**, **Text color**, **Height**, **Border
color**, and **Border style**, then select **Reset to defaults**.
Typography includes a font selector, **Light**, **Dark**, and **Auto** color modes, the
**Allow readers to switch theme** switch, and a **Dark-mode logo** field. White-label settings
include switches or fields for **Hide "Generated by Atloria"**, **Custom footer**, and
**Custom CSS**.
The page also includes a **Live preview** with desktop and mobile preview choices. It shows how
readers see the published documentation.
No field is marked required on this surface. The page uses settings fields and preview areas
rather than a data grid, and the color text inputs have no separate field-level validation
message declared here.
## Change and save branding
Change one or more branding values for the selected project.
**Prerequisites**
You have opened the tab containing the setting you want to change and know the value you want
to use.
The save bar appears when the form differs from its loaded values and contains **Discard** and
**Save changes**. It stays hidden while there are no unsaved changes.
**Steps**
1. Select **Site name**, **Tagline**, or another setting shown on the open tab.
2. Choose the edit that matches the field.
| Edit type | Action |
|---|---|
| Text | Enter the new text. |
| Choice | Select the option you want. |
| Color | Adjust the color picker or enter the color value. |
| Switch | Change the switch setting. |
3. To upload an asset, select **Click or drop to upload**.
4. Choose the image file to upload.
5. If an asset is already present, choose one action.
| Your choice | Action |
|---|---|
| Replace the asset | Select **Change**. |
| Remove the asset | Select **Remove**. |
6. Review the **Live preview** to see the effect of the current values.
7. Choose how to finish the change.
| Your choice | Action |
|---|---|
| Save with the mouse | Select **Save changes** in the sticky save bar. |
| Save with the keyboard | Press `Cmd+S` on macOS or `Ctrl+S` on other systems while the form has unsaved changes. |
| Discard the edits | Select **Discard**. |
**Result:** The page shows `Branding saved` after a successful save. After an upload, it shows
`Logo uploaded` or `Favicon uploaded`; after discarding edits, it shows `Changes discarded`.
## Handle unavailable or plan-gated options
Use the message on screen to choose the next action when publication, subscription access, CSS,
or an upload prevents the requested change.
| What you see | What to do |
|---|---|
| `Project is not published yet` | Publish the project before using **Open live preview**. |
| Some fields require the **PRO** or **BUSINESS** plan | Use a plan that includes the selected white-label option, then save again. |
| `Custom CSS was rejected — see the White-label tab` | Review the CSS on the **White-label** tab and correct it. |
| `err.message` displayed under **Custom CSS** | Read the returned message, correct the CSS it identifies, and save again. |
| The page reports `Save failed:` followed by the returned error, or `unknown error` when no error text is available | Correct the reported save problem and retry **Save changes**. |
| The page reports `Upload failed:` followed by the returned error, or `unknown error` when no error text is available | Check the file and retry the upload. |
When a save returns a plan-required response, the page displays an upgrade hint and the plan
message. When the API rejects custom CSS, the page activates the **White-label** tab and shows
the returned `err.message` below the editor.
## Check the result and continue
Check the published appearance after saving so the project presents the intended identity and
visual style to readers.
**Prerequisites**
The project has been published and the branding values have been saved.
**Steps**
1. Select **Open live preview**.
2. In the preview, review the published documentation appearance.
3. Return to Branding.
4. Choose another settings tab when you need to continue configuring the project.
**Result:** The published documentation preview opens in a new browser tab, and the project
branding remains available from its Branding settings.
# Configure integrations
## Configure integrations
Integrations is the settings area where you connect Atloria to Git providers for repository
imports or open project-specific webhook settings. The Git-provider area requests read-only
access; webhook configuration continues at the project level.
| If you need to… | Go to… |
| --- | --- |
| Connect an account that is not connected | [Connect or re-authorize a Git provider](#connect-or-re-authorize-a-git-provider) |
| Refresh an existing provider authorization | [Connect or re-authorize a Git provider](#connect-or-re-authorize-a-git-provider) |
| Open webhook settings for a project | [Open a project's webhook settings](#open-a-projects-webhook-settings) |
| Understand an empty or loading project list | [Handle provider and project branches](#handle-provider-and-project-branches) |
| Continue with project-level configuration | [Manage project settings](https://atloria-selfdogfood-3577.atloria.app/p/atloria-selfdogfood-3577-BDFvUbEgc3/user/manage-project-settings) |
| Learn how to move around the application | [Navigation basics](https://atloria-selfdogfood-3577.atloria.app/p/atloria-selfdogfood-3577-BDFvUbEgc3/user/navigation-basics) |
## Before you start
You need an active signed-in session to load provider status. For the Webhooks path, you also
need a project available to choose; the project list and its values are loaded when the tab is
opened. This screen does not use a save form.
**Prerequisites**
| Have or know | Why it matters |
| --- | --- |
| A signed-in Atloria session | Provider status loads after a session is available. |
| The Git provider account you want to connect | **Connect** starts that provider's authorization flow. |
| The project whose webhooks you need to manage | **Open webhook settings** becomes available after a project is selected. |
## Open Integrations settings
The Integrations page is the System Settings surface for provider connections and project webhook
entry. Confirm that the page has loaded before choosing a tab.
**Prerequisites**
- You are signed in to Atloria.
**Steps**
1. Open the integrations page.
2. Confirm that the page shows **Git providers** and **Webhooks**.
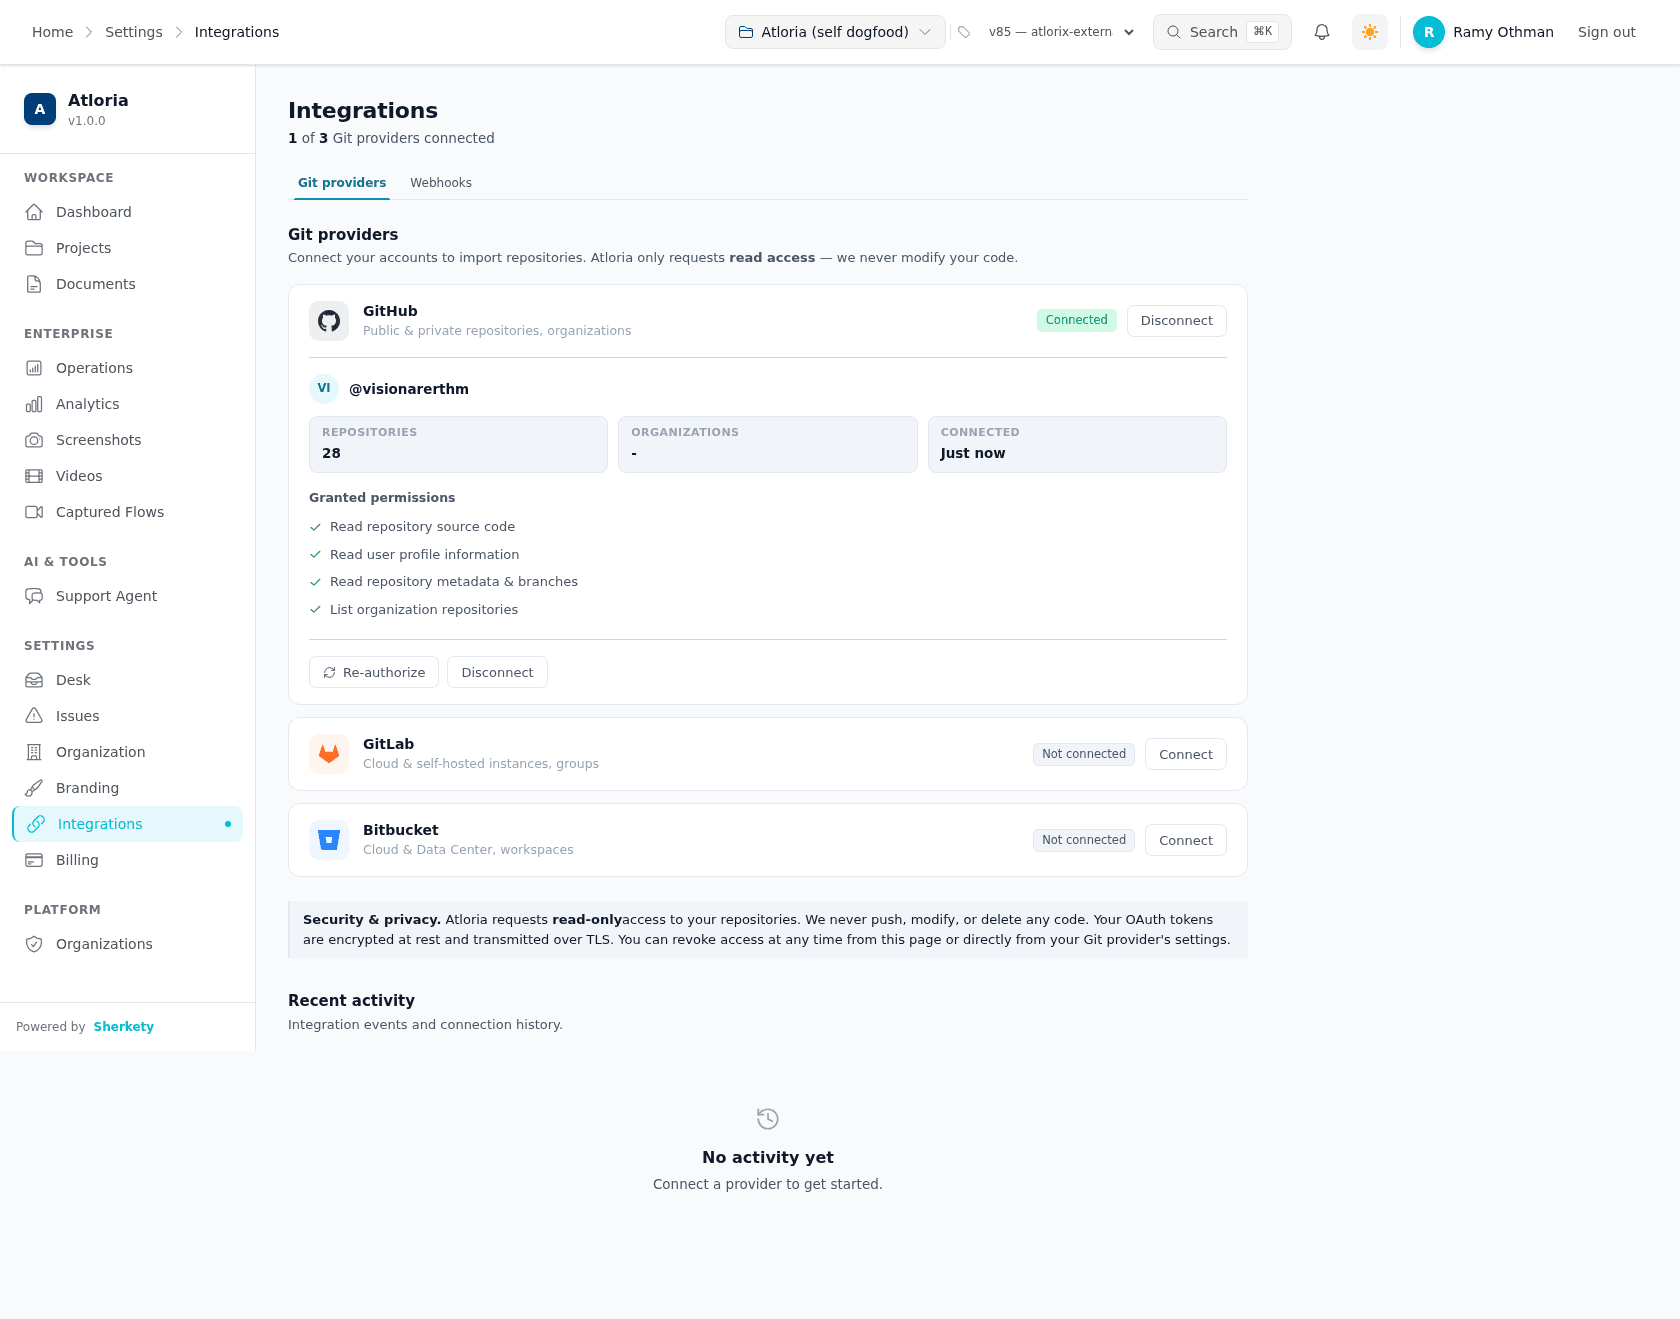
**Result:** The integrations page is open, and you can choose the Git-provider or Webhooks
surface.
## Understand the integration surface
Git providers are the accounts used to import repositories. Webhooks are project-level settings
that provide the destination for Git-triggered documentation updates.
The page has two surfaces:
| Surface | Use it to… |
| --- | --- |
| **Git providers** | Connect, re-authorize, or disconnect GitHub, GitLab, or Bitbucket. |
| **Webhooks** | Choose a project and open its webhook settings. |
On **Git providers**, an unconnected provider shows `Not connected` and **Connect** after its
status has loaded. A connected provider shows `Connected`, the account details, repository and
organization summaries, granted permissions, **Re-authorize**, and **Disconnect**. While status
is loading, provider actions are replaced by a loading indicator.
On **Webhooks**, the project area can show `Loading projects…`,
`No projects yet — create a project first, then configure its webhooks.`, or a project selector.
**Open webhook settings** is available after a project is selected. The
disconnect confirmation includes **Cancel** and **Disconnect**, and warns:
`This will revoke Atloria's access to your account.`
The live page displayed 12 buttons, 0 labelled controls, 0 grid columns, and 1 unlabelled visible
control. The page displayed **Git providers**, **Webhooks**, two **Disconnect** controls, one
**Re-authorize** control, and two **Connect** controls.
## Connect or re-authorize a Git provider
Use a Git-provider connection to make repository source available for import. The page lists
GitHub, GitLab, and Bitbucket; the available action depends on whether the provider is connected.
**Prerequisites**
- You are signed in.
- You know which provider account to authorize.
**Steps**
1. Open the **Git providers** surface.
2. Find the provider you want to use.
3. Choose one action:
| If the provider shows… | Select… |
| --- | --- |
| `Not connected` | **Connect** |
| `Connected` | **Re-authorize** |
4. Complete the provider authorization window that opens.
Atloria requests read-only repository access. It does not push, modify, or delete code, and the
OAuth tokens are encrypted at rest and transmitted over TLS.
**Result:** The provider authorization request is started for the selected Git provider.
## Open a project's webhook settings
Project webhook settings contain the webhook URL, signing secret, regeneration triggers, and
recent deliveries for one project.
**Prerequisites**
- You are signed in.
- At least one project is available in the project list.
**Steps**
1. Open the **Webhooks** surface.
2. Check the project list after it finishes loading.
3. In the project selector, choose the project whose webhook settings you want to manage.
4. Select **Open webhook settings**.
The selector's project values come from the project list loaded by the page. The available
project names depend on that list.
**Result:** The selected project's webhook settings page opens.
## Handle provider and project branches
The page changes its available actions according to provider connection status and project-list
state.
Use the branch matching one of the statuses, messages, or controls listed in the table below.
**Prerequisites**
- You have opened either **Git providers** or **Webhooks**.
**Steps**
1. Use the branch matching one of the statuses, messages, or controls listed in the table below.
| What you see | What to do |
| --- | --- |
| A provider shows `Connected` | Select **Re-authorize** to renew authorization, or **Disconnect** to open its confirmation. |
| A provider shows `Not connected` | Select **Connect**. |
| The provider card is still loading | Wait for provider actions to appear. |
| `Loading projects…` | Wait for the project list to finish loading. |
| `No projects yet — create a project first, then configure its webhooks.` | Create a project before opening project webhook settings. |
| The project selector is visible but no project is selected | Select a project before choosing **Open webhook settings**. |
2. If you opened the disconnect confirmation without intending to continue, select **Cancel**.
**Result:** You have selected the action that matches the provider or project state on screen.
## When integration actions go wrong
Use the visible state and messages to identify where the integration task stopped.
| What you see | What it means | What to do |
| --- | --- | --- |
| `No activity yet` | No integration activity is listed. | Select **Connect** for the provider you want to authorize. |
| `Connect a provider to get started.` | The activity area is waiting for a provider connection. | Return to **Git providers** and select **Connect**. |
| `No projects yet — create a project first, then configure its webhooks.` | No project is available for the Webhooks path. | Create a project before configuring its webhooks. |
| The disconnect confirmation is open | The provider account is about to lose Atloria access. | Select **Cancel** to close the confirmation, or select **Disconnect** to continue. |
## Continue after configuring integrations
Webhook work continues in the selected project's settings. Project webhook details belong to the
project settings surface.
**Prerequisites**
- You have selected a project for webhook configuration, or completed the provider authorization
flow.
**Steps**
1. Choose where to continue:
| If you need to… | Open… |
| --- | --- |
| Continue with project webhooks | [Manage project settings](https://atloria-selfdogfood-3577.atloria.app/p/atloria-selfdogfood-3577-BDFvUbEgc3/user/manage-project-settings) |
| Get navigation help | [Navigation basics](https://atloria-selfdogfood-3577.atloria.app/p/atloria-selfdogfood-3577-BDFvUbEgc3/user/navigation-basics) |
| Get configuration help | [Getting help](https://atloria-selfdogfood-3577.atloria.app/p/atloria-selfdogfood-3577-BDFvUbEgc3/user/getting-help) |
**Result:** You know which settings surface to use next for project webhooks, navigation, or help.
# Configure billing
## What billing settings are for
Billing settings are where you review the subscription plan, remaining
generations, monthly usage, and available subscription actions. Use this page
when you need to manage the subscription or begin an upgrade from System
Settings.
| If you need to… | Go to |
|---|---|
| Open the billing page | [Open billing settings](#open-billing-settings) |
| Review plan and usage information | [Read the billing summary and plans](#read-the-billing-summary-and-plans) |
| Open subscription management or begin an upgrade | [Manage or upgrade the subscription](#manage-or-upgrade-the-subscription) |
| Understand a checkout return | [Handle checkout return states](#handle-checkout-return-states) |
| Resolve a billing error | [When billing actions fail](#when-billing-actions-fail) |
| Review the System Settings area | [System Settings overview](https://atloria-selfdogfood-3577.atloria.app/p/atloria-selfdogfood-3577-BDFvUbEgc3/user/system-settings-overview) |
## Before you start
You must be signed in before billing information can load. The page uses the
current signed-in session to request the billing summary. The billing summary
is the plan, generation, and usage information shown on Billing.
The **Manage subscription** action appears when the billing summary includes a
billing account. Upgrade actions start a checkout request and take you away
from the Billing page.
After signing in, continue to Open billing settings.
## Open billing settings
Use this procedure to reach the Billing page.
Prerequisites
- Sign in to Atloria.
**Steps**
1. Open System Settings.
2. Select **Billing**.
3. Confirm that the Billing page appears.
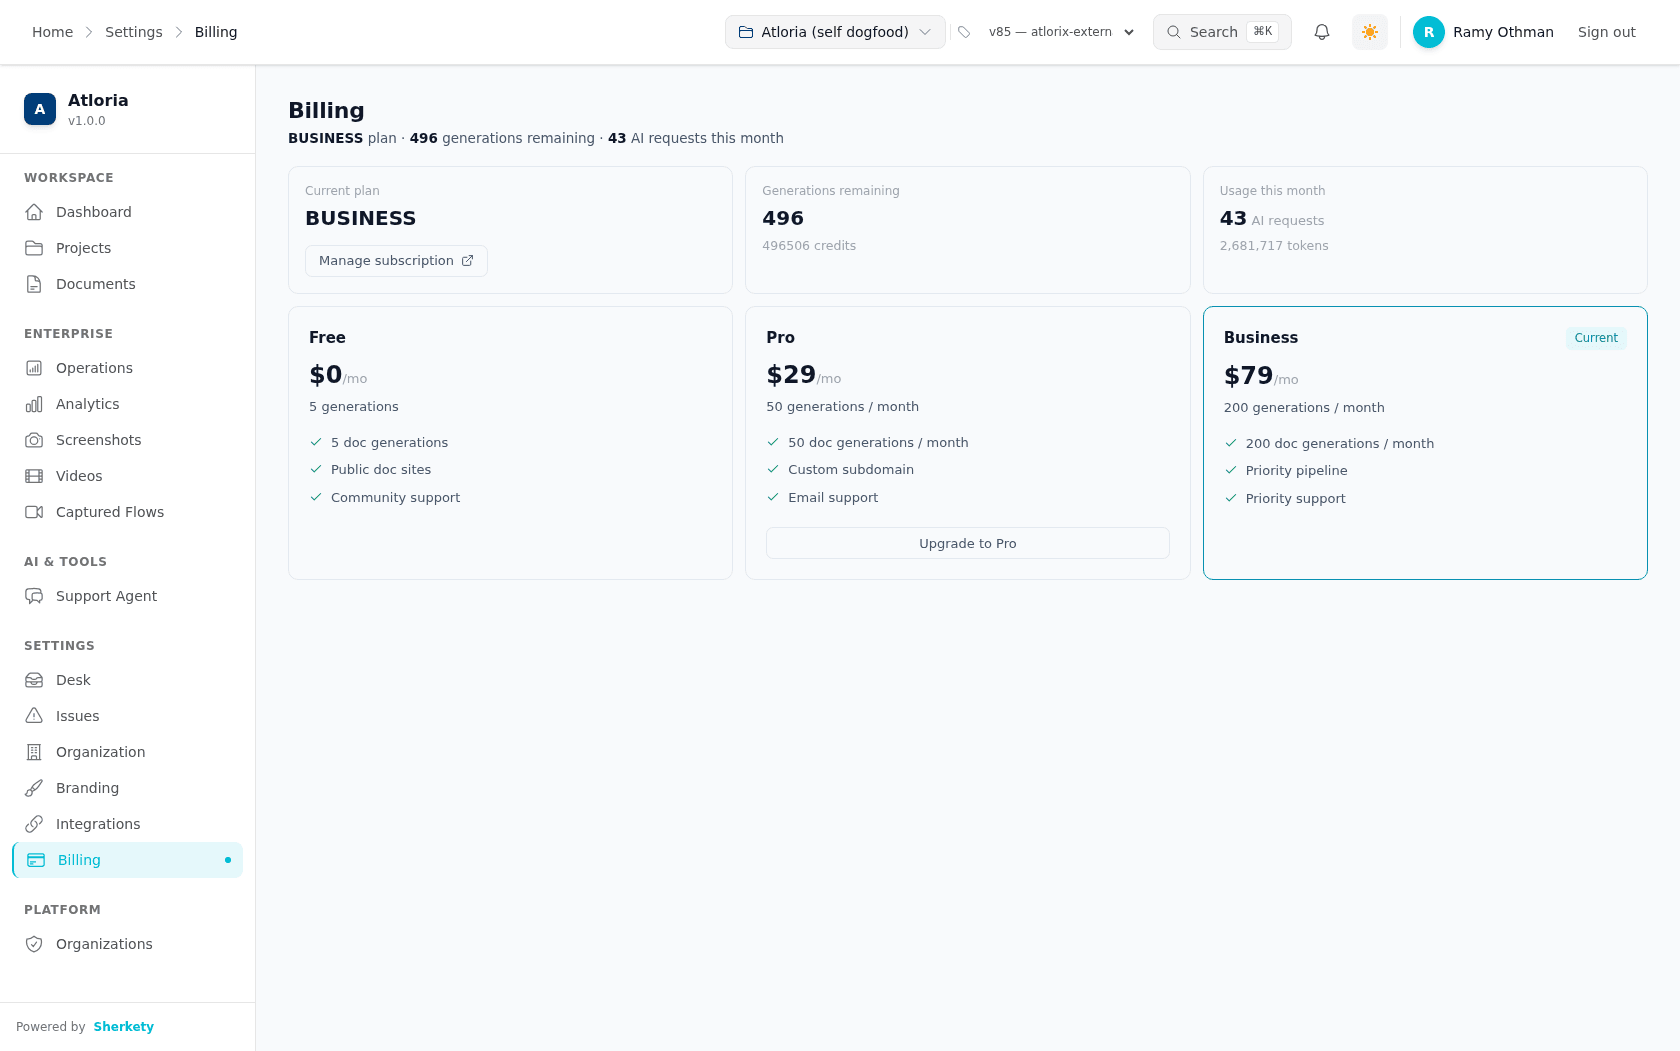
**Result:** The Billing page is open for reviewing the billing summary and plans.
## Read the billing summary and plans
Review the current plan, remaining generations, and this month's AI requests
before choosing a subscription action. The plan cards show the available
subscription choices and the features associated with each choice.
| Area | What you can read |
|---|---|
| Current plan | The plan currently associated with the account. |
| Generations remaining | The number of remaining generations and the credit balance. |
| Usage this month | The number of AI requests and the token total for the month. |
| Free | `$0` and `5 generations`, with public documentation sites and community support. |
| Pro | `$29` per month and `50 generations / month`, with a custom subdomain and email support. |
| Business | `$79` per month and `200 generations / month`, with priority pipeline and priority support. |
The page presents these summaries and plan cards as information to review
before choosing a subscription action. It has no editable billing fields,
tabs, or grids.
When you are ready to change the subscription, continue to Manage or upgrade
the subscription.
## Manage or upgrade the subscription
Use this procedure when you need to open subscription management or begin a
plan upgrade.
Prerequisites
- Sign in to Atloria.
- For subscription management, have a billing account available to the page.
- For an upgrade, have an upgrade action available for the plan you want.
**Steps**
1. Choose one action:
| If you need to… | Select |
|---|---|
| Open subscription management | **Manage subscription** |
| Upgrade to the Pro plan | **Upgrade to Pro** |
| Upgrade to the Business plan | **Upgrade to Business** |
2. Confirm that the billing portal or checkout page opens.
Upgrade actions are disabled while a checkout request is in progress.

**Result:** Subscription management opens in the billing portal, or the
selected upgrade opens checkout.
If checkout returns a status message, continue to Handle checkout return states.
## Handle checkout return states
Checkout returns can show a processing, completed, or cancelled state. The
page also starts checkout automatically when it receives an eligible
`autostart` value and a signed-in session is ready.
| What happens | What appears |
|---|---|
| Checkout returns with success | `Payment received — activating your plan… This usually takes a few seconds.` appears while the page checks for the updated plan. |
| The updated plan is returned | `Your {currentPlan} plan is active and your credits have been added. Welcome aboard!` appears. |
| Checkout returns with cancellation | `Checkout was cancelled — no charge was made. Pick a plan whenever you're ready.` appears. |
| The activation check reaches 20 attempts | The page stops polling and leaves the processing state with a manual refresh hint. |
If a billing action fails, continue to When billing actions fail.
## When billing actions fail
Use the message on screen to identify whether the failure happened while the
summary was loading, checkout was starting, or the billing portal was opening.
| What you see | What it means | What to do |
|---|---|---|
| `Failed to load billing summary` | The billing summary request failed. | Reload the Billing page. |
| `Checkout failed` | Checkout did not return a usable checkout address. | Return to the plan cards and try the upgrade again. |
| `Could not open billing portal` | The billing portal request did not return a usable portal address. | Return to the Billing page and select **Manage subscription** again. |
| `A specific error message` | The action returned more detail about the failure. | Follow the instruction in that message. |
After resolving the failure, return to the relevant billing action and continue
with [What happens next](#what-happens-next).
## What happens next
After you select **Manage subscription**, subscription management continues in
the billing portal. After you select an upgrade action, checkout continues
outside the Billing page and can return to the page with a checkout result.
When a successful checkout has activated the plan, the page displays the
activation message and adds the credits. If activation is still processing,
the page continues checking for the updated plan before it stops polling.
# Custom domain lifecycle
## Understand the custom-domain lifecycle
A custom domain is your own web address for serving published documentation, such as
`docs.yourcompany.com`. The setup stages are **Waiting for DNS**, **Verifying**, **Issuing
certificate**, and **Live**. The other outcomes are **Verification failed**, **Certificate failed**,
**Offline**, and **Removed**.
The lifecycle starts when the domain is connected and DNS records are checked.
```mermaid
stateDiagram-v2
state "Waiting for DNS" as s1
state "Verifying" as s2
state "Issuing certificate" as s3
state "Live" as s4
state "Verification failed" as s5
state "Certificate failed" as s6
state "Offline" as s7
state "Removed" as s8
s1 --> s2: Check now
s2 --> s3: Check now
s3 --> s4: Check now
s5 --> s2: Retry
s6 --> s2: Retry
s7 --> s2: Recover
s4 --> s7: Check now
s4 --> s8: Remove domain
s8 --> s1: Connect domain
```
| If you need to… | Go to |
|---|---|
| Connect a domain or change a subdomain | [Manage custom domains](https://atloria-selfdogfood-3577.atloria.app/p/atloria-selfdogfood-3577-BDFvUbEgc3/user/manage-custom-domains) |
| Open the settings area that contains the Domain tab | [Configure Branding](https://atloria-selfdogfood-3577.atloria.app/p/atloria-selfdogfood-3577-BDFvUbEgc3/user/configure-branding) |
| Understand the full status path | Continue with [Check DNS and respond to the status](#check-dns-and-respond-to-the-status) |
| Find the next action for a displayed status | [Handle each domain-status branch](#handle-each-domain-status-branch) |
## Before you start
**Prerequisites**
- Select the project whose published documentation uses the domain.
- Have access to the DNS provider for the domain. DNS records are the type, name, and value that
the Domain surface displays for the domain.
- Know whether you are checking an existing domain or connecting one for the first time.
- Keep the domain's current status and last check time in view when deciding what to do next.
- Use the exact message shown on screen when a check, retry, or removal does not complete.
The domain surface does not mark its visible controls as required. The page displays the current
domain value, DNS values, registrar, last-check value, and current status when available.
## Open the domain status
The Domain tab is the project-level surface for reading and responding to a custom-domain status.
Use [Manage custom domains](https://atloria-selfdogfood-3577.atloria.app/p/atloria-selfdogfood-3577-BDFvUbEgc3/user/manage-custom-domains) when you need to connect or change an address.
**Prerequisites**
- You have selected a project.
**Steps**
1. Open Branding settings for the selected project.
2. Select **Domain**.
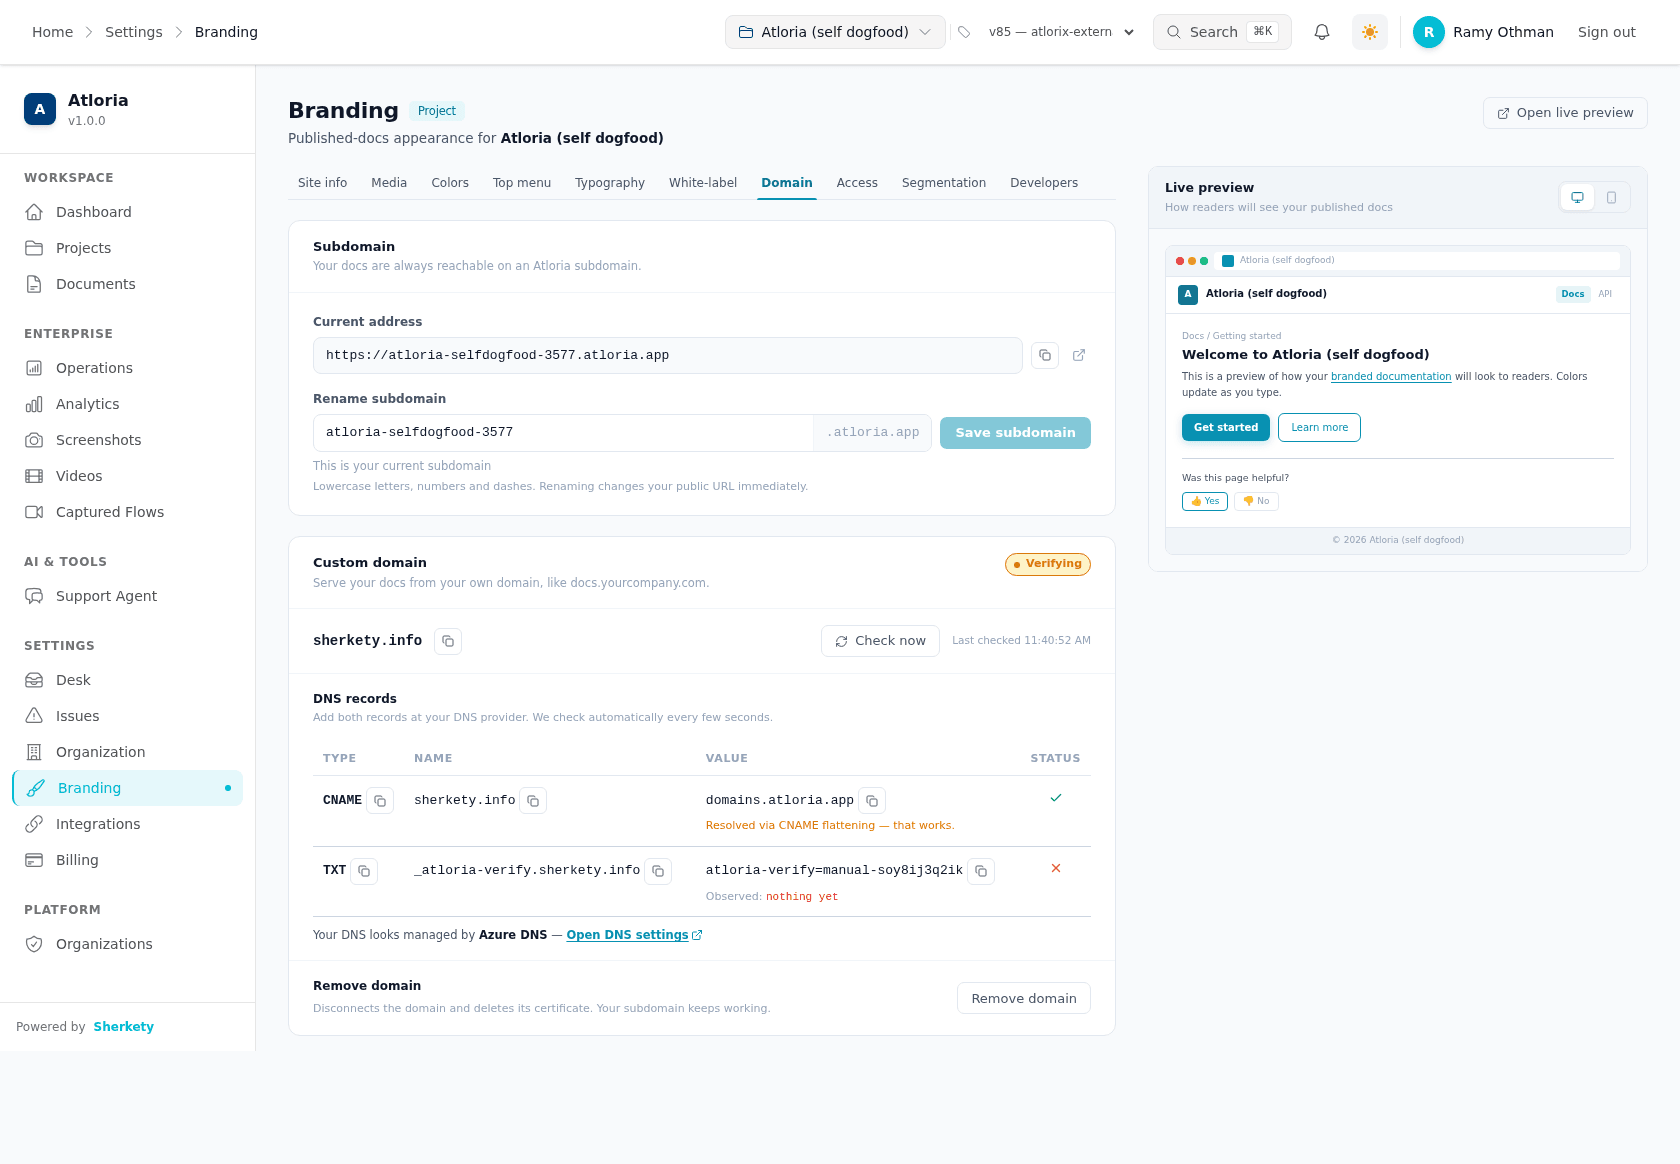
**Result:** The Domain tab opens with the **Subdomain** and **Custom domain** surfaces.
## Read the status surface
The Domain tab puts the project's published-address settings and custom-domain status together.
The **Subdomain** card contains **Current address** and **Rename subdomain**. The **Custom domain**
card contains the domain value and, when a domain is being managed, its DNS records and status
actions.
The visible status information is organised as follows:
| What you need to read | Where to read it |
|---|---|
| The configured address | The value beside **Custom domain** |
| The records to add or inspect | **DNS records** |
| The record kind | **Type** |
| The DNS name | **Name** |
| The required DNS value | **Value** |
| Whether a record check succeeded | **Status** |
| The last check time | **Last checked** |
| A server-side reason for a failed or **Offline** state | **Last error:** |
The surface can show **Check now**, **Retry**, or **Recover** according to the current status.
When the domain is live, it shows **Open** beside the live address. **Remove domain** is in the
danger area. Copy controls are available beside the domain and DNS-record values.
## Check DNS and respond to the status
DNS checking compares the domain's configured records with the records listed in **DNS records**.
The check can move the domain through its lifecycle, and the available action changes when the
status changes.
**Prerequisites**
- The Domain tab is open.
- A custom domain is present in the management panel.
**Steps**
1. Read the expected entries in **DNS records**.
2. Select **Check now**.
3. Choose the action that matches the status shown:
| If the status is… | Select… |
|---|---|
| **Verification failed** or **Certificate failed** | **Retry** |
| **Offline** | **Recover** |
| **Live** | **Open** to open the live documentation address |
4. Read **Type**, **Name**, **Value**, and **Status** again after the check.
**Result:** The panel shows the latest DNS check and the action that applies to the current
domain status.
## Handle each domain-status branch
Each status tells you what is happening to the custom domain and which next action belongs to it.
Use the status chip and the DNS records table together; the DNS table shows the values that need
attention when a check does not succeed.
**Prerequisites**
- The Domain tab is open.
- The custom-domain status is visible.
**Steps**
1. Read the status chip and follow the matching branch:
| Status shown | What it means for your next move |
|---|---|
| **Waiting for DNS** | Add or correct the listed DNS records, then use **Check now**. |
| **Verifying** | Wait for the DNS check to finish and review the displayed records. |
| **Issuing certificate** | Wait for certificate issuance, then review the status again. |
| **Live** | Select **Open** when you need to view the published documentation. |
| **Verification failed** | Correct the DNS records and select **Retry**. |
| **Certificate failed** | Select **Retry** after the certificate problem is ready to be retried. |
| **Offline** | Restore the DNS records and select **Recover**. |
| **Removed** | Reconnect the domain from the setup surface with **Connect domain**. |
**Result:** You have taken the action associated with the displayed status, or the status remains
visible with the DNS information needed for the next check.
## When a check or removal goes wrong
Use the exact message on screen to identify the correction.
**Prerequisites**
- The Domain tab is open.
- The message is visible in the domain surface.
**Steps**
1. Read the exact message shown in the domain surface.
2. Apply the action in the matching row below.
| What you see | What to do |
|---|---|
| `Enter a valid domain, like docs.yourcompany.com` | Enter a domain in the requested format. |
| `Apex domains need ALIAS-capable DNS — we recommend a subdomain like docs.yourcompany.com` | Review the apex-domain warning before continuing. |
| `Could not load your domain settings.` | Select **Try again**. |
| `Try again` | Select **Try again** to retry loading the domain settings. |
| `Observed:` | Compare this value with the expected value in the same DNS-record row. |
| `nothing yet` | Add the listed DNS record, then select **Check now**. |
| `Open DNS settings` | Select **Open DNS settings** when the link is available. |
| `Your docs are live at` | Select **Open** to open the live documentation address. |
| `Readers using this domain will lose access. Remember to also delete the DNS records at your provider.` | Review the consequence and remove the provider's DNS records when you disconnect the domain. |
| `Domain removed` | The domain has been removed; reconnect it from the connect surface with **Connect domain** if needed. |
| `Retry failed` | Review the displayed status and DNS records before trying **Retry** again. |
| `Remove failed` | Review the displayed domain state before trying **Remove domain** again. |
**Result:** You have a message-specific correction to make before repeating the affected action.
## Know what happens next
After a successful DNS check, the domain can continue from **Waiting for DNS** through **Verifying**
and **Issuing certificate** to **Live**. A live domain shows **Your docs are live at** and an
**Open** link. If DNS changes after the domain is live, the status can become **Offline**; restore
the records and select **Recover**.
When you no longer want to serve documentation from the custom domain, select **Remove domain**.
Review the confirmation text before choosing **Yes, remove it** or **Keep domain**. Removing the
domain leaves the project's subdomain working. To configure or reconnect an address, continue
with [Manage custom domains](https://atloria-selfdogfood-3577.atloria.app/p/atloria-selfdogfood-3577-BDFvUbEgc3/user/manage-custom-domains). To return to the wider settings area, use
[System Settings overview](https://atloria-selfdogfood-3577.atloria.app/p/atloria-selfdogfood-3577-BDFvUbEgc3/user/system-settings-overview).
**Result:** The domain is either progressing toward **Live**, available at its published address,
recoverable through **Recover**, or ready to be reconnected after **Removed**.
# Manage custom domains
## Manage a project's published domain
A subdomain gives your documentation an address on Atloria's documentation domain;
your docs are always reachable on an Atloria subdomain.
A custom domain serves the same documentation from a domain you control, such as
`docs.yourcompany.com`. The address moves through DNS and certificate checks before it
becomes live.
`Serve your docs from your own domain, like docs.yourcompany.com.`
| If you need to… | Go to |
| --- | --- |
| Choose or rename the Atloria-hosted address | [Set or rename the subdomain](#set-or-rename-the-subdomain) |
| Connect a domain you control | [Connect a custom domain](#connect-a-custom-domain) |
| Check DNS records or respond to a failed check | [Check DNS and handle domain status](#check-dns-and-handle-domain-status) |
| Disconnect a custom domain | [Remove a custom domain](#remove-a-custom-domain) |
| Read the full progression from DNS setup to removal | [Custom domain lifecycle](https://atloria-selfdogfood-3577.atloria.app/p/atloria-selfdogfood-3577-BDFvUbEgc3/user/custom-domain-lifecycle) |
| Find the wider settings area | [System settings overview](https://atloria-selfdogfood-3577.atloria.app/p/atloria-selfdogfood-3577-BDFvUbEgc3/user/system-settings-overview) |
| Configure the surrounding branding settings | [Configure branding](https://atloria-selfdogfood-3577.atloria.app/p/atloria-selfdogfood-3577-BDFvUbEgc3/user/configure-branding) |
## Before you start
Before changing a published address, select the project whose documentation you want
to publish. Have access to the DNS provider for the custom domain and decide whether you
are changing the Atloria-hosted subdomain or connecting a separate domain.
**Prerequisites**
- Know which project you are changing.
- If you are connecting a custom domain, have access to its DNS settings.
- If a custom domain already exists, be ready to check its records and status in the
management panel.
The current address is shown as text when one exists. The subdomain card also provides
the option to set an address when none exists.
## Open the domain settings
The **Domain** surface is the place where you manage the project's published subdomain
and custom domain. It is a tab in the Branding settings page, not the public address
itself.
**Steps**
1. In **Settings**, select **Branding** for the project.
2. Select **Domain**.

**Result:** The **Subdomain** and **Custom domain** cards are available.
## Understand the domain settings
The **Subdomain** card controls the Atloria-hosted address. The **Custom domain** card
connects a domain you control and, after connection, provides the DNS records and
status actions for that domain.
| Area | What you use it for |
| --- | --- |
| **Current address** | Read the current subdomain address and copy or open it when one exists. |
| **Rename subdomain** | Enter a new lowercase subdomain value using letters, numbers, and dashes. |
| **Custom domain** | Enter the domain you want to connect. |
| **DNS records** | Read the records to add at your DNS provider and their check results. |
| **Remove domain** | Review the consequence of disconnecting the custom domain. |
The custom-domain area changes with the account state. While settings load, a loading
area appears. If loading fails, the page shows `Could not load your domain settings.`
and **Try again**. When no domain is configured, the connection form appears. When a
domain exists, the management panel shows its domain, DNS records, checks, and removal
area.
The DNS table uses the headers **Type**, **Name**, **Value**, and **Status**. Each DNS
value has a **Copy** control. A registrar link appears when the DNS check identifies
one and supplies a settings address.
When a control is working, its label changes to `Connecting…`, `Saving…`, `Checking…`,
or `Removing…` while the request is in progress. A successful copy shows `Copied!`.
## Set or rename the subdomain
Use this procedure when you want documentation to use an Atloria-hosted address. The
value is checked before it can be saved, so a value that is invalid, unchanged, taken,
or reserved does not complete the change.
**Prerequisites**
- Open the **Domain** surface.
- Have the subdomain value you want to use.
**Steps**
1. In **Rename subdomain**, enter a value containing lowercase letters, numbers, and
dashes.
2. Check the message below **Rename subdomain**.
3. Choose the next action for the message shown below **Rename subdomain**.
| Message | Next action |
| --- | --- |
| `Checking availability…` | Wait for the availability result. |
| `Available` | Select **Save subdomain**. |
| `Already taken — choose another` | Enter a different value in **Rename subdomain**. |
| `Reserved — choose another` | Enter a different value in **Rename subdomain**. |
| `Enter a valid subdomain` | Correct the value in **Rename subdomain**. |
| `This is your current subdomain` | Enter a changed value in **Rename subdomain** or keep the current address. |
When a changed value is valid, the page also shows `Docs will be served at` followed by
the proposed address. After a successful save, the page shows `Subdomain updated`. If
the save fails, it shows `Rename failed` followed by the returned reason.
If no subdomain exists, the card shows `No subdomain yet — publish the project to claim one, or set it here.`
**Result:** The page shows `Subdomain updated` and the saved address in **Current
address**, or it leaves you at **Rename subdomain** with the message that explains what
to correct.
## Connect a custom domain
Use this procedure to serve the documentation from a domain you control. The domain
must pass the page's format check before Atloria can start the connection.
**Prerequisites**
- Open the **Domain** surface.
- Have access to the domain's DNS provider.
- Use a full domain such as `docs.yourcompany.com`.
**Steps**
1. In **Custom domain**, enter the domain you want to connect.
2. Select **Connect domain**.
3. Choose the next action for the message shown below **Custom domain**.
| Message | Next action |
| --- | --- |
| `Enter a valid domain, like docs.yourcompany.com` | Correct the value in **Custom domain**, then return to step 2. |
| `Apex domains need ALIAS-capable DNS — we recommend a subdomain like docs.yourcompany.com` | Select **use anyway**, then return to step 2. |
The page may show `Could not connect domain` followed by the returned reason when the
connection is refused. After a connection starts, use the DNS records shown in the
management panel at your DNS provider.
**Result:** The custom domain appears in its management panel with the DNS records to
add and check.
## Check DNS and handle domain status
The management panel is where you compare the records at your DNS provider with the
records required for the connected domain. The page checks automatically every few
seconds while the domain is present, and **Check now** starts an immediate check.
| If you need to… | Select |
| --- | --- |
| Start a manual DNS check | **Check now** |
| Retry a verification or certificate failure | **Retry** |
| Restore a domain shown as unavailable | **Recover** |
| Open the registrar's DNS page | **Open DNS settings** |
| Open a live documentation address | **Open** |
The panel shows **Last checked** with either the check time or `never`. Each record can
show `Observed:` followed by the returned value, or `nothing yet` when no value has been
found. A DNS check can also show `Your DNS looks managed by` followed by the registrar
name and **Open DNS settings**.
**Steps**
1. Read the **Type**, **Name**, and **Value** columns for each required DNS record.
2. Add the displayed records at your DNS provider.
3. Select **Check now** to request an immediate check.
4. If a record has a copy control, select **Copy** for the value you need to add.
5. If the check identifies a registrar and shows **Open DNS settings**, select it to
open the returned DNS settings page.
6. Choose the recovery action shown for the domain.
| Message | Next action |
| --- | --- |
| **Retry** appears after a verification or certificate failure | Select **Retry**. |
| **Recover** appears after the domain becomes unavailable | Select **Recover**. |
7. If the panel shows `Your docs are live at`, select **Open** to open the published
documentation address.
**Result:** The panel shows the latest DNS check, the returned record observations, and
the action that applies to the domain's current condition. When the domain is live, it
shows `Your docs are live at` and **Open**.
## Remove a custom domain
Removing a custom domain disconnects that address and deletes its certificate. The
subdomain continues working, but readers using the removed domain lose access. The
removal area states `Disconnects the domain and deletes its certificate. Your subdomain keeps working.`
> **Caution:** Readers using a removed domain lose access. Delete that domain's DNS
> records at your provider after the removal.
**Prerequisites**
- Open the **Domain** surface with a custom domain configured.
- Confirm that disconnecting the domain is the intended correction rather than checking
or recovering its DNS configuration.
**Steps**
1. Select **Remove domain**.
2. Read the confirmation dialog titled `Remove this domain?`.
3. Choose whether to keep or remove the domain.
| If you want to… | Next action |
| --- | --- |
| Keep the domain | Select **Keep domain**. |
| Remove the domain | Select **Yes, remove it**. |
4. Delete the domain's DNS records at your provider after confirming the removal.
The confirmation dialog says `Readers using this domain will lose access. Remember to also delete the DNS records at your provider.` After removal, the page shows `Domain removed`. If removal fails, it shows `Remove failed` followed by the returned reason.
**Result:** The custom domain is removed and the connection form is available again;
the subdomain remains the address that continues working.
## Know what happens next
After saving a subdomain, use the address shown in **Current address**. After connecting
a custom domain, add the records shown in **DNS records** and check them until the page
shows the live result. If **Retry** or **Recover** appears, use that action and then
check the records again. The full sequence of domain states and outcomes is described
in [Custom domain lifecycle](https://atloria-selfdogfood-3577.atloria.app/p/atloria-selfdogfood-3577-BDFvUbEgc3/user/custom-domain-lifecycle).
| After you… | Continue with… |
| --- | --- |
| Save a subdomain | Read the new address in **Current address**. |
| Connect a custom domain | Add the records in **DNS records**. |
| Run a DNS check | Review **Observed:** values and the **Status** column. |
| Recover or retry | Select **Check now** after the action completes. |
| Remove a domain | Use the connection form if you need to connect another domain. |
**Result:** You have either a saved subdomain, a custom domain progressing through its
checks, a live published address, or a connection form ready for the next domain.
### When a domain action does not complete
| What you see | What to do |
| --- | --- |
| `Enter a valid subdomain` | Correct **Rename subdomain** and use lowercase letters, numbers, and dashes. |
| `Already taken — choose another` | Enter a different value in **Rename subdomain**. |
| `Reserved — choose another` | Enter a different value in **Rename subdomain**. |
| `This is your current subdomain` | Enter a changed value or keep the current address. |
| `Enter a valid domain, like docs.yourcompany.com` | Enter a full domain in **Custom domain**. |
| `Apex domains need ALIAS-capable DNS — we recommend a subdomain like docs.yourcompany.com` | Select **use anyway** only if you intend to continue with the apex domain. |
| `Could not load your domain settings.` | Select **Try again**. |
| `Could not connect domain` followed by a reason | Correct the domain or DNS setup indicated by the returned reason, then select **Connect domain**. |
| `Retry failed` followed by a reason | Review the returned reason and select **Retry** again after correcting the condition. |
| `Last error:` followed by returned text | Use the returned text with the DNS records and the current status to decide whether to check, retry, or recover. |
| `Remove failed` followed by a reason | Review the returned reason before selecting **Remove domain** again. |
The page also uses `Checking availability…`, `Available`, `Subdomain updated`,
`Rename failed`, `Checking…`, `Last checked`, `never`, `Your DNS looks managed by`,
`Observed:`, `nothing yet`, `Your docs are live at`, and `Domain removed` while these
actions are in progress or complete.
# Security and audit overview
## Security and audit information
Security and audit information is available in two scopes: one selected project or the
whole organization. Use the project view when you are checking activity for one selected
project. Use the organization view when you need activity across all projects.
The administrative **Security & Audit** area contains this overview, a detailed security
review, and an audit reference.
| If you need to… | Go to |
|---|---|
| Check activity for one project | [Review security information](https://atloria-selfdogfood-3577.atloria.app/p/atloria-selfdogfood-3577-BDFvUbEgc3/user/review-security-information) |
| Check activity across the organization | [Organization audit](https://atloria-selfdogfood-3577.atloria.app/p/atloria-selfdogfood-3577-BDFvUbEgc3/user/organization-audit) |
| Understand audit records and related administration | [Audit reference](https://atloria-selfdogfood-3577.atloria.app/p/atloria-selfdogfood-3577-BDFvUbEgc3/user/audit-reference) |
| Check who can open the administrative audit surfaces | [Security & Audit access](https://atloria-selfdogfood-3577.atloria.app/p/atloria-selfdogfood-3577-BDFvUbEgc3/user/security-and-audit-access) |
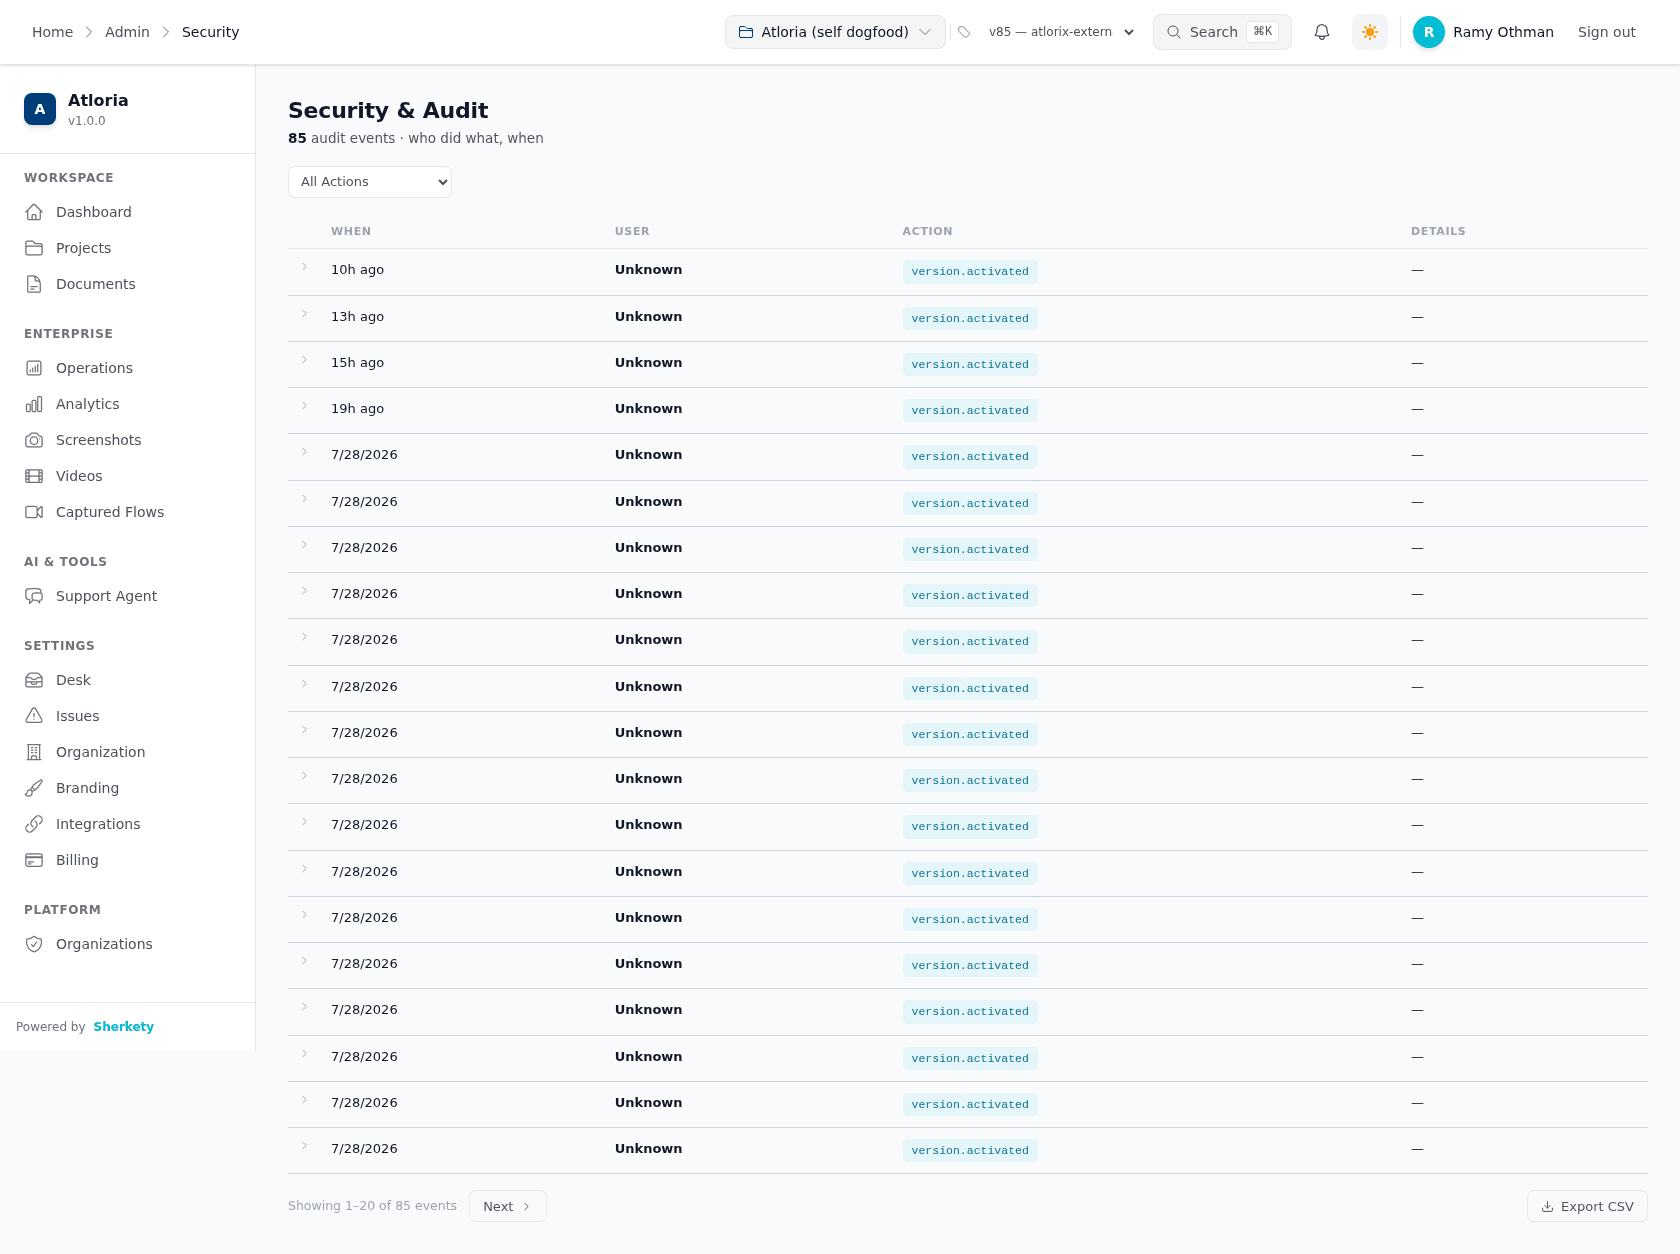
## Before you start
The project audit view needs a selected project and an active signed-in session. The
organization audit view requires administrator or maintainer access. Start with the
organization view when your question concerns more than one project; start with the
project view when you need to trace activity in one project.
| Before you open the surface | What to have ready |
|---|---|
| Project audit | A selected project and an active session |
| Organization audit | Administrator or maintainer access |
| Project-specific review | The project whose activity you need to inspect |
If no project is selected, the project surface displays **Select a project**. Its guidance
states: `The audit trail is scoped to one project at a time.` It also says:
`Choose a project from the header dropdown to view its audit log.`
The project surface provides an action filter. Date, actor, and project filters belong to
the organization audit surface instead.
## Find the audit surface
Use the administrative navigation to choose the scope that matches your question.
**Prerequisites**
- You have administrator access for the administrative area.
- You know whether the activity you need belongs to one project or the whole organization.
**Steps**
1. Open **Security & Audit** from the administrative navigation.
2. Choose the page that matches your question.
| If you need to… | Open |
|---|---|
| Review one selected project's activity | [Review security information](https://atloria-selfdogfood-3577.atloria.app/p/atloria-selfdogfood-3577-BDFvUbEgc3/user/review-security-information) |
| Review activity across all projects | [Organization audit](https://atloria-selfdogfood-3577.atloria.app/p/atloria-selfdogfood-3577-BDFvUbEgc3/user/organization-audit) |
3. On the organization audit surface, select **Members** to return to the organization
settings area.
**Result:** The audit surface for your question is open.
## Review a project's audit information
A project audit log lists events for one selected project. Each row
identifies when the event occurred, the user, the action, and its details.
**Prerequisites**
- A project is selected.
- The project audit surface is open.
**Steps**
1. Open **All Actions** and choose the action family you need to inspect. The list
includes `All Actions`, `version.published`, `document.updated`, `document.edited`,
`webhook.received`, `version.reviewed`, `export.downloaded`, and `schedule.triggered`.
2. Read the event row under the **When**, **User**, **Action**, and **Details** headers.
3. Select the event row to expand its metadata when you need the event's additional detail.
4. Choose one project-audit action from the table.
| If you need to… | Select |
|---|---|
| Move to the preceding page of events | **Previous** |
| Move to the following page of events | **Next** |
| Request a CSV file for the selected project's audit data | **Export CSV** |
**Result:** The project audit table is filtered or inspected, and the available page or
CSV-export control is ready for the next action.
The project surface has four stable table headers: **When**, **User**, **Action**, and
**Details**. The project view also showed **Next** and **Export CSV**, with no event row
expanded on arrival.
## Review organization audit information
The organization audit log brings recorded activity from all projects into one filterable
list. An actor is the person or account associated with an event. Use the filters to narrow
the list before reading individual events.
**Prerequisites**
- You have administrator or maintainer access.
- The organization audit surface is open.
**Steps**
1. Open **All Actions** and choose an action from the available organization action list.
2. Open **All Actors** and choose the actor whose activity you need to inspect.
3. Open **All Projects** and choose the project whose activity you need to inspect.
4. Enter a beginning date in **Start date**.
5. Enter an ending date in **End date**.
6. Read the event row under the **Time**, **Actor**, **Action**, **Project**, **Entity**,
and **Details** headers. **Entity** identifies the record associated with the event.
7. Select an event row to expand its metadata, which contains additional event details.
8. Choose a pagination action from the table.
| If you need to… | Select |
|---|---|
| Move to the preceding page | **Previous** |
| Move to the following page | **Next** |
9. Choose an export format from the table.
| If you need to… | Select |
|---|---|
| Request the organization audit data as CSV | **Export CSV** |
| Request the organization audit data as JSON | **Export JSON** |
**Result:** The organization audit list is narrowed to the criteria you entered, and its
records or export controls are available for the next action.
The organization audit view filters by action, actor, project, start date, and end date and
lists up to 50 events at a time. The project audit view lists up to 20 events at a time.
## Handle empty, loading, and access branches
The audit surfaces use distinct messages for a missing project, loading data, an empty
result, and an access or loading error. Match the message you see to the action in the
table below.
| What you see | What it means | What to do |
|---|---|---|
| `Select a project` | The project audit view has no selected project. | Choose a project from the header dropdown. |
| `Loading audit events…` | The project audit list is loading. | Wait for the list to finish loading. |
| `No audit events found` | The project query returned no events. | Check the selected project and the action filter. |
| `Events appear here as soon as anything is published, edited, or exported.` | The project audit list is empty until an event is recorded. | Check the selected project and the action filter. |
| `Loading...` | The shared audit table is loading. | Wait for the organization list to finish loading. |
| `No audit events` | The shared audit table has no rows to display. | Review the filters and date range. |
| `Only admins and maintainers can view the organization audit log.` | The organization audit request was refused for access reasons. | Sign in with administrator or maintainer access. |
| `Could not load the audit log.` | The organization audit list could not be loaded. | Return to the organization audit surface and try again. |
| `Export failed` | An organization export request failed. | Return to the organization audit surface and try the export again. |
**Result:** You can identify the message on screen and choose the corresponding recovery action.
## Choose the next audit task
The project and organization views answer different questions: one narrows activity to a
selected project, while the other brings activity from all projects together. Continue
with the page that matches the work you need to do.
- For a detailed review of the project security surface, open [Review security
information](https://atloria-selfdogfood-3577.atloria.app/p/atloria-selfdogfood-3577-BDFvUbEgc3/user/review-security-information).
- For organization-wide audit work, open [Organization audit](https://atloria-selfdogfood-3577.atloria.app/p/atloria-selfdogfood-3577-BDFvUbEgc3/user/organization-audit).
- For audit-record definitions and related administrative records, open [Audit
reference](https://atloria-selfdogfood-3577.atloria.app/p/atloria-selfdogfood-3577-BDFvUbEgc3/user/audit-reference).
- For access requirements, open [Security & Audit access](https://atloria-selfdogfood-3577.atloria.app/p/atloria-selfdogfood-3577-BDFvUbEgc3/user/security-and-audit-access).
- For related project history, open [Project changes and audit](https://atloria-selfdogfood-3577.atloria.app/p/atloria-selfdogfood-3577-BDFvUbEgc3/user/project-changes-and-audit).
# Review security information
## Security and audit information
The project audit trail is the record of activity for one selected project. Use it when
you need to review who did what and when, inspect event details, or export the project
audit information.
| If you need to… | Go to… |
|---|---|
| Open the project audit trail | [Open Security & Audit](#open-security--audit) |
| Understand the filter, columns, and controls | [Understand the audit screen](#understand-the-audit-screen) |
| Filter, inspect, page through, or export events | [Review and export audit events](#review-and-export-audit-events) |
| Handle an empty or loading result | [Handle empty, loading, and paging states](#handle-empty-loading-and-paging-states) |
| Review related audit administration | [Security & Audit overview](https://atloria-selfdogfood-3577.atloria.app/p/atloria-selfdogfood-3577-BDFvUbEgc3/user/security-and-audit-overview) or [Audit reference](https://atloria-selfdogfood-3577.atloria.app/p/atloria-selfdogfood-3577-BDFvUbEgc3/user/audit-reference) |
| Review organization-wide audit information | [Organization audit](https://atloria-selfdogfood-3577.atloria.app/p/atloria-selfdogfood-3577-BDFvUbEgc3/user/organization-audit) |
The Security & Audit surface sits alongside Analytics, Audit Trail, Export Center, and
Access Control in the product's enterprise administration areas.
## Before you start
The audit trail is scoped to one project at a time. Select the project whose activity you
want to review before the event list can load.
**Prerequisites**
- You are signed in and can open the **Security & Audit** page.
- A current project is selected in the header.
If no project is selected, the page displays **Select a project**. It also displays
`The audit trail is scoped to one project at a time.` and
`Choose a project from the header dropdown to view its audit log.`
## Open Security & Audit
**Steps**
1. Open the **Security & Audit** entry in the administrative navigation.
2. Confirm that the **Security & Audit** page is open.

**Result:** The **Security & Audit** page is open for the selected project.
## Understand the audit screen
The audit screen combines one action filter with an event list. Each row gives the event
time, user, action, and details; selecting a row opens its metadata.
The screen contains these parts:
| Screen part | What you use it for |
|---|---|
| **Action filter** | Limit the list to one action or return to all actions |
| **When** | Read when the event occurred |
| **User** | Identify the user shown for the event |
| **Action** | Read the recorded action |
| **Details** | Read the event details |
| Event row | Open the event's metadata |
| **Previous** and **Next** | Move through result pages |
| **Export CSV** | Request a CSV copy of the project audit trail |
The **Action filter** offers these choices:
| Choice | Use it to… |
|---|---|
| **All Actions** | Show the list without an action filter |
| `version.published` | Filter for published-version events |
| `document.updated` | Filter for updated-document events |
| `document.edited` | Filter for edited-document events |
| `webhook.received` | Filter for received-webhook events |
| `version.reviewed` | Filter for reviewed-version events |
| `export.downloaded` | Filter for downloaded-export events |
| `schedule.triggered` | Filter for triggered-schedule events |
The page heading is **Security & Audit**. Its summary reads
`Who did what, when — the full audit trail for the selected project`.
While data loads, the page displays `Loading audit events…`. When no events match, it
displays **No audit events found** and
`Events appear here as soon as anything is published, edited, or exported.`
## Review and export audit events
Use this procedure when a project is selected and the audit list is available.
**Prerequisites**
- A project is selected in the header.
- The audit page is open.
**Steps**
1. Select **All Actions** or another choice in **Action filter**.
2. Read the matching event rows under **When**, **User**, **Action**, and **Details**.
3. Select an event row to open its metadata.
4. Choose one available action from the table.
| Choose | When to use it | Result |
|---|---|---|
| **Previous** | When it is visible and you need earlier results | The list moves back 20 events |
| **Next** | When it is visible and you need later results | The list moves forward 20 events |
| **Export CSV** | When you need a CSV copy of the project audit trail | The page requests the project audit CSV |
The filter resets the result offset to zero when you change the selected action. The page
requests the selected action together with a limit of 20 and the current offset.
**Result:** The filtered audit list remains on the Security & Audit page, and selecting
**Export CSV** starts the project audit CSV request.
## Handle empty, loading, and paging states
The page changes its visible content according to the selected project, loading state, and
number of returned events.
| What you see | What it means | What to do |
|---|---|---|
| **Select a project** | No current project is selected | Choose a project from the header dropdown |
| `Loading audit events…` | The project audit request is loading | Wait for the list or empty state |
| **No audit events found** | The current result contains no events | Review the action choice or select another project |
| **When**, **User**, **Action**, and **Details** | The current project has events to review | Read the rows or use the action filter |
| **Previous** | Earlier results are available | Move back one page |
| **Next** | Later results are available | Move forward one page |
This page provides an action filter. Its declared filters do not include actor, project,
start-date, or end-date choices.
**Result:** The page shows the state that matches the current project and result set, with
the applicable review and paging controls visible.
## When review does not complete
Use the visible message to choose the next action.
| What you see | What it means | What to do |
|---|---|---|
| **Select a project** | The page has no current project to query | Choose a project from the header dropdown |
| `Loading audit events…` | The audit request is still loading | Wait for the result state |
| **No audit events found** | No events are available in the current result | Change **Action filter** or select another project |
| **Export CSV** | The page requests a CSV copy of the project audit trail | Select **Export CSV** when you need a copy |
If an audit request fails, the page stays on the audit screen with an empty event list and
no separate error message. The event row remains the way to open its metadata.
## Continue from the audit review
After reviewing the project audit trail, use **Export CSV** when you need a copy of the
project audit information. For the broader administrative context, continue to [Security
& Audit overview](https://atloria-selfdogfood-3577.atloria.app/p/atloria-selfdogfood-3577-BDFvUbEgc3/user/security-and-audit-overview). For related audit information, open
[Audit reference](https://atloria-selfdogfood-3577.atloria.app/p/atloria-selfdogfood-3577-BDFvUbEgc3/user/audit-reference). For organization-wide audit information, open
[Organization audit](https://atloria-selfdogfood-3577.atloria.app/p/atloria-selfdogfood-3577-BDFvUbEgc3/user/organization-audit).
**Result:** You have either completed the project audit review on this page or moved to the
related administrative information for the next part of the review.
# Audit reference
Use the audit views to review recorded activity for one project or across your organization.
## Overview
Audit information records activity associated with a project or organization, including when an
action occurred, who performed it, what action was recorded, and the related entity details.
Use the project view when you are reviewing one selected project's activity. Use the organization
view when you need to review activity across projects.
| If you need to… | Go to |
| --- | --- |
| Review activity for one selected project | [Security and audit access](https://atloria-selfdogfood-3577.atloria.app/p/atloria-selfdogfood-3577-BDFvUbEgc3/user/security-and-audit-access) |
| Review activity across the organization | [Organization audit](https://atloria-selfdogfood-3577.atloria.app/p/atloria-selfdogfood-3577-BDFvUbEgc3/user/organization-audit) |
| Understand empty, loading, or access states | Handle empty, loading, and access states |
| Read the broader security and audit guidance | [Security and audit overview](https://atloria-selfdogfood-3577.atloria.app/p/atloria-selfdogfood-3577-BDFvUbEgc3/user/security-and-audit-overview) |
## Before you start
**Prerequisites**
- Have a project selected before opening the project audit view.
- Use an administrator or maintainer account for the organization audit view.
- Know whether you need project-scoped activity or activity across all projects.
The project view requests events for the selected project. The organization view loads its project
list and event results as you open the page and change filters.
## Find an audit record
An audit record is an entry describing a recorded action, its time, its actor, its entity, and any
available details. Use the project view for one project or the organization view for activity
across projects.
**Prerequisites**
- Have the project selection or account access required by the view you chose.
**Steps**
1. Choose the view that matches the activity you need:
| If you need to… | Open |
| --- | --- |
| Review one project's activity | Project audit view |
| Review activity across the organization | Organization audit view |
2. Select an event row in the audit table.
**Result:** The selected audit view is open, and an available event row can be inspected.
## Review project audit activity
Project audit activity is the recorded history for the project selected in the application
header. The table presents the time, user, action, and details for each event.
**Prerequisites**
- Select a project before opening the project audit view.
**Steps**
1. Open the project audit view.
2. Select **All Actions**.
3. Choose the action you want to review.
4. Read the event row under **When**, **User**, **Action**, and **Details**.
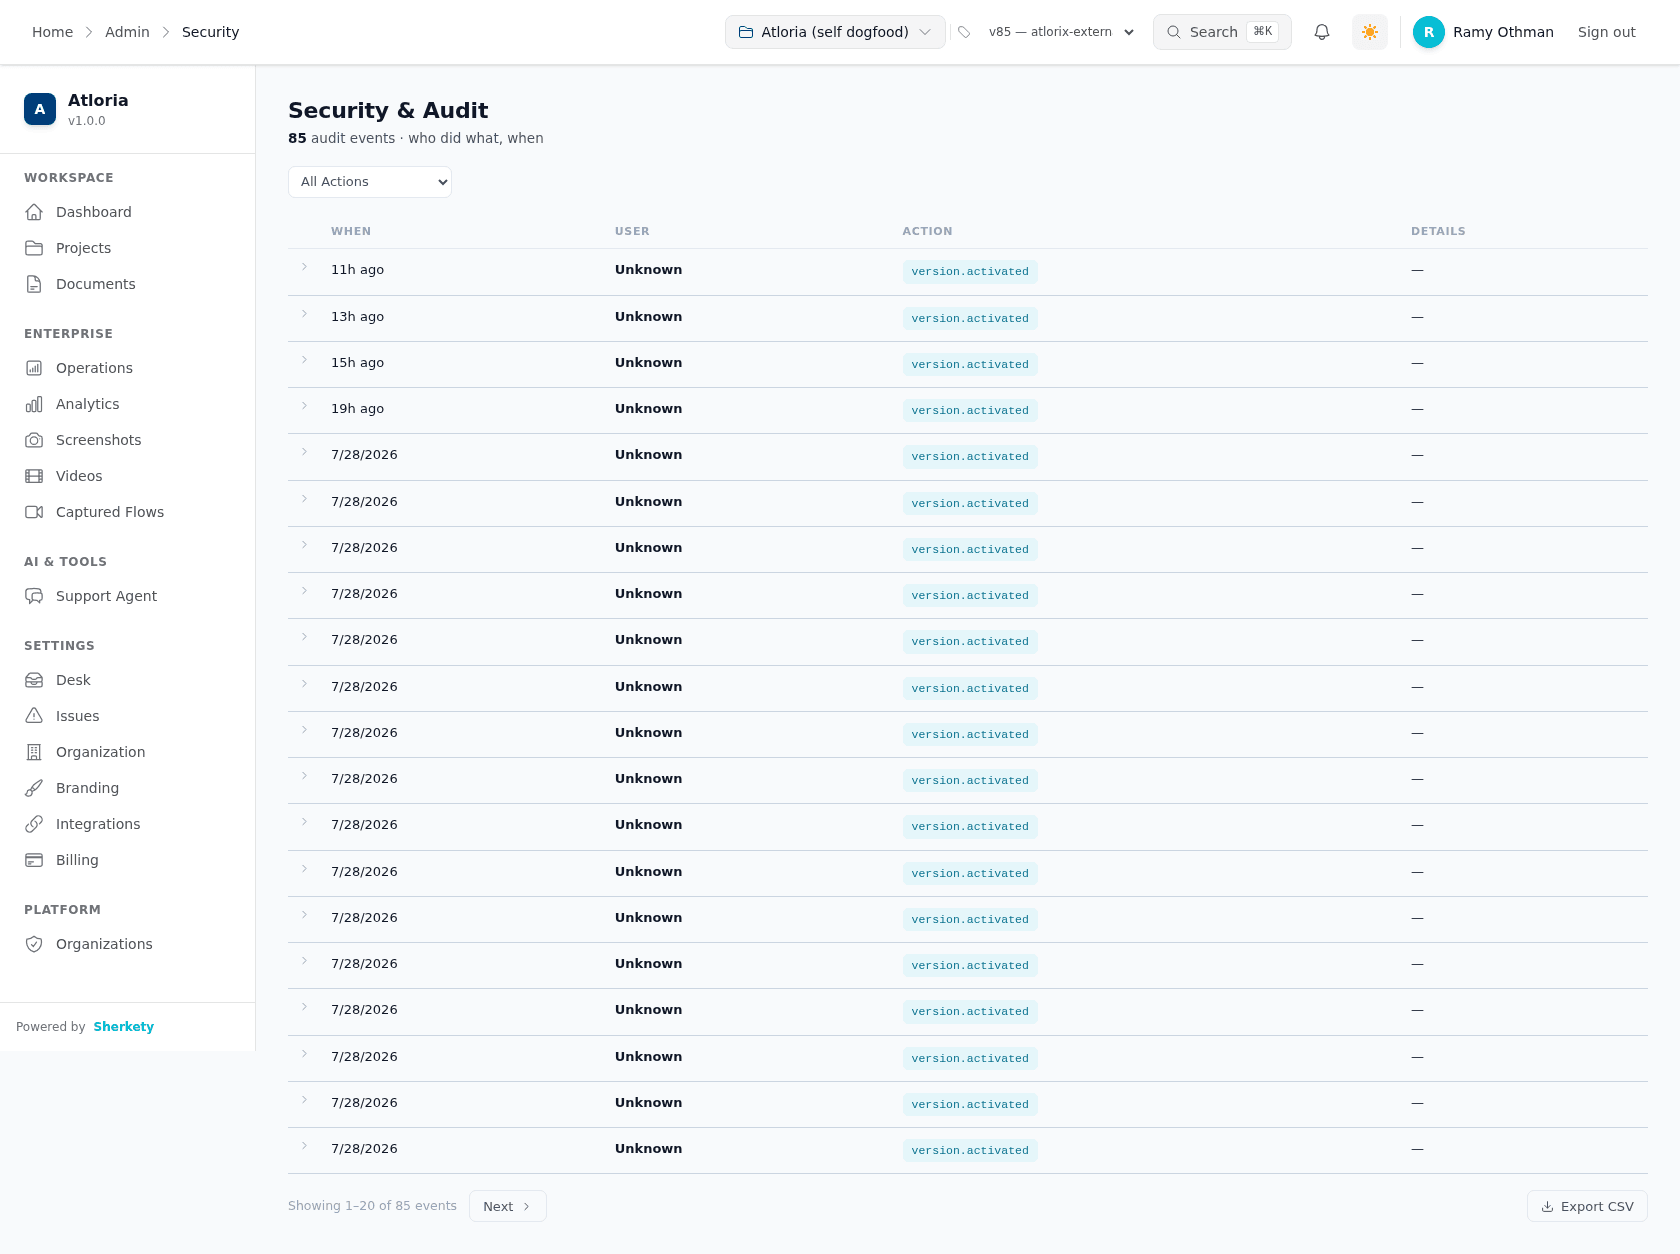
5. Select the event row to expand its details.
6. Select **Export CSV** to download the project audit data.
**Result:** The project audit table is filtered or inspected, and the project audit data is ready
to download as CSV. Continue with organization audit activity when you need a cross-project view.
## Review organization audit activity
Organization audit activity is the recorded history across the organization. Use its filters to
narrow results by action, actor, project, or date, then inspect the matching event details.
**Prerequisites**
- Use an administrator or maintainer account.
**Steps**
1. Open the organization audit view.
2. Select **All Actions**.
3. Choose an action.
4. Select **All Actors**.
5. Choose an actor.
6. Select **All Projects**.
7. Choose a project.
8. Enter a start date in **Start date**.
9. Enter an end date in **End date**.
10. Select an event row to expand its event details.
11. Move through the result pages:
| If you need to… | Select |
| --- | --- |
| Open the earlier result page | **Previous** |
| Open the later result page | **Next** |
12. Choose the export format:
| If you need to… | Select |
| --- | --- |
| Export comma-separated data | **Export CSV** |
| Export structured data | **Export JSON** |
**Result:** The organization audit table shows the filtered activity, the selected event's details,
or the next available result page; the organization data can also be exported in CSV or JSON form.
If a state message appears, identify it in Handle empty, loading, and access states.
## Handle empty, loading, and access states
The audit screens show a distinct message while data loads, when there are no matching events, or
when the organization request is refused. Use the message on screen to identify the state before
continuing.
| What appears | What it means | What to do |
| --- | --- | --- |
| `Select a project` | No project is selected for the project audit view. | Select a project from the application header. |
| `The audit trail is scoped to one project at a time.` | The project audit view covers the selected project. | Continue in the project audit view. |
| `Loading audit events…` | The project audit events are loading. | Wait for the event list to finish loading. |
| `No audit events found` | The project event list is empty. | Review the selected project or change the action filter. |
| `Events appear here as soon as anything is published, edited, or exported.` | The project audit list has no events yet. | Continue in the project audit view after an event is recorded. |
| `Loading...` | The organization event table is loading. | Wait for the organization results to finish loading. |
| `Only admins and maintainers can view the organization audit log.` | The organization audit request returned a permission error. | Open the page with an administrator or maintainer account. |
| `Could not load the audit log.` | The organization audit request failed for another reason. | Use the organization audit page again when the request can be loaded. |
| `Export failed` | The organization export did not complete. | Return to the organization audit view. |
| `No audit events` | The organization table has no rows. | Change the organization filters. |
When organization results exist, the page shows a result range and pagination. **Previous** is
disabled on the first page, and **Next** is disabled on the last page.
**Result:** You can identify whether the page is waiting for results, has no matching events, or
requires a permitted account before continuing to the related audit task.
## Continue from an audit record
After reviewing an audit record, continue with the page that matches the work you need to do.
- For project-scoped access and the project audit entry path, open [Security and audit access](https://atloria-selfdogfood-3577.atloria.app/p/atloria-selfdogfood-3577-BDFvUbEgc3/user/security-and-audit-access).
- For organization-wide audit administration, open [Organization audit](https://atloria-selfdogfood-3577.atloria.app/p/atloria-selfdogfood-3577-BDFvUbEgc3/user/organization-audit).
- For broader security context, open [Security and audit overview](https://atloria-selfdogfood-3577.atloria.app/p/atloria-selfdogfood-3577-BDFvUbEgc3/user/security-and-audit-overview).
The project and organization audit views are separate screens. After inspecting event details or
exporting data, open the related access, organization, or security guidance.
**Result:** You know which related page to open for focused access, organization, or security
guidance.
# Frequently asked questions
## What these answers cover
This page answers common questions about the **Desk** and **Issues** surfaces. Use the
**Desk** when you need to sort and follow support threads. Use **Issues** when you need
to review reported-issue activity, navigate to all issues, or open issue boards.
| If you need to… | Go to |
| --- | --- |
| Choose a support-thread queue or view | [Find the right help surface](#find-the-right-help-surface) |
| Understand a composer, status control, message, or empty state | [Understand what you see](#understand-what-you-see) |
| Recover from a failed reply, transition, merge, or Copilot request | [Handle a problem](#handle-a-problem) |
| Continue to detailed Desk guidance | [Desk overview](https://atloria-selfdogfood-3577.atloria.app/p/atloria-selfdogfood-3577-BDFvUbEgc3/user/desk-overview) |
| Continue to detailed Issues guidance | [Issues overview](https://atloria-selfdogfood-3577.atloria.app/p/atloria-selfdogfood-3577-BDFvUbEgc3/user/issues-overview) or [Issue states and recovery](https://atloria-selfdogfood-3577.atloria.app/p/atloria-selfdogfood-3577-BDFvUbEgc3/user/issue-states-and-recovery) |
| Route a question or support request | [Getting help](https://atloria-selfdogfood-3577.atloria.app/p/atloria-selfdogfood-3577-BDFvUbEgc3/user/getting-help) |
| Read general error guidance | [General error messages](https://atloria-selfdogfood-3577.atloria.app/p/atloria-selfdogfood-3577-BDFvUbEgc3/user/general-error-messages) |
## Before you start
A selected project determines the project context for both surfaces. The Desk page
uses the project context for its support threads, and the Issues page scopes its
statistics to that project.
**Prerequisites**
- Know which project you need to review.
- Decide whether your question concerns support-thread work or reported-issue work.
## Find the right help surface
Open the listed surface and select the control that matches your need.
**Prerequisites**
- Know whether you need a support-thread queue or issue statistics.
- Know the project you want to review.
**Steps**
1. Choose the row that matches your need, then select its next control.
| If you need to… | Surface | Next control |
| --- | --- | --- |
| Work on threads needing an initial reply | Desk | **Needs first response** |
| Work on threads needing another reply | Desk | **Needs next response** |
| Review investigation work | Desk | **Investigating** |
| Review threads waiting for the customer | Desk | **Waiting for customer** |
| Review work paused for later | Desk | **Paused for later** |
| Review threads completed today | Desk | **Done today** |
| Review the triage view | Desk | **Triage** |
| Review your threads | Desk | **Your threads** |
| Review unassigned threads | Desk | **Unassigned** |
| Get documentation assistance | Desk | **Docs Copilot** |
| Review customer information | Desk | **Customer** |
| Review thread activity | Desk | **Activity** |
| Review the seven-day period | Issues | **7d** |
| Review the thirty-day period | Issues | **30d** |
| Review the ninety-day period | Issues | **90d** |
| Open the complete issue list | Issues | **All issues** |
| Open issue boards | Issues | **Boards** |
| Request a fresh statistics view | Issues | **Refresh** |
| Open the complete list from recent reports | Issues | **View all** |
For Desk rows, use the Desk controls shown here.
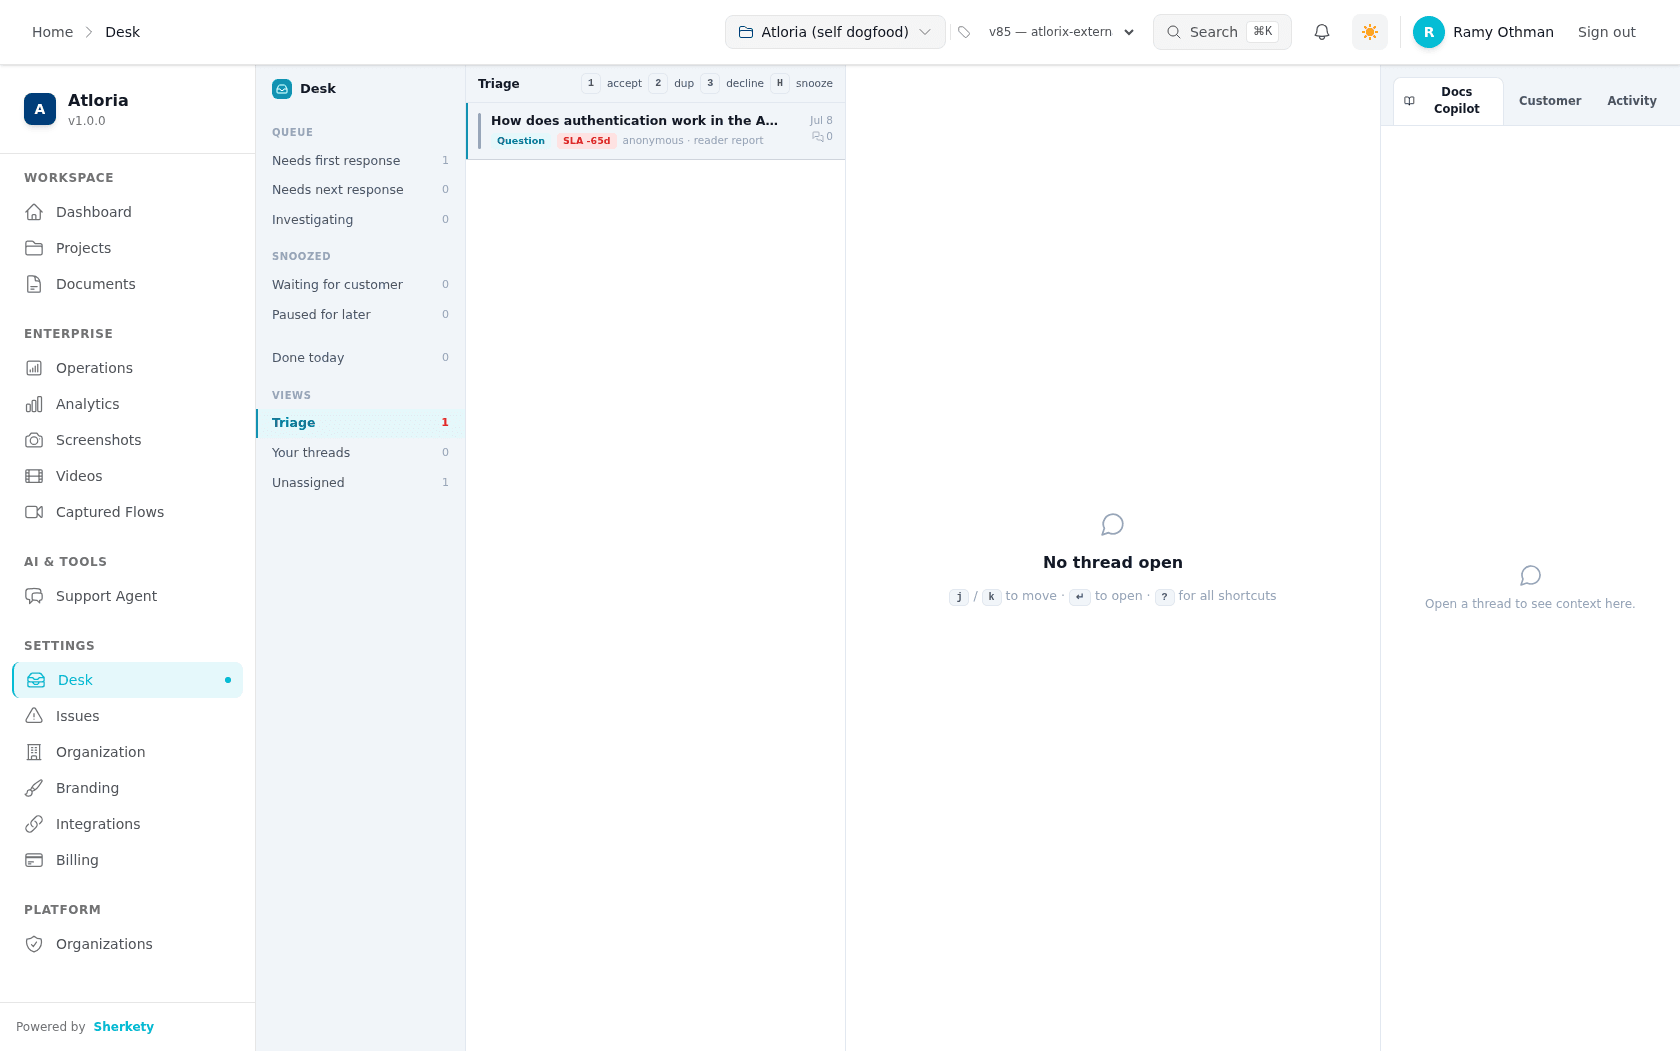
For Issues rows, use the period and destination controls shown here.

**Result:** The selected Desk or Issues surface is on screen with its next control ready.
## Understand what you see
On the Desk, use queue choices, the thread composer, status choices, and supporting
context to decide what to do with a thread. In Issues, use period choices and charts to
summarise reported issues.
The Desk can use a reply composer, an internal-note composer, and a numeric ticket
field for duplicate handling. The Issues surface provides a **Time range** choice with
`7d`, `30d`, and `90d`.
| When you are looking at… | Look for… |
| --- | --- |
| A customer reply | The reply composer and **Send** or **Send & done** |
| A team-only note | **Internal note** |
| A draft preview | **Preview** or **Write** |
| A paused thread | **Wake now** |
| A completed thread | **Reopen** |
| Duplicate handling | **Cancel**, **Merge into ticket**, and the numeric ticket field |
| Documentation assistance | **Ask**, **Add to composer**, or **Draft this article** |
The following conditions change what appears:
- When no project is selected, the Desk can present "No project selected" and
"Pick a project from the switcher to open the Desk."
- When no thread is selected, the Desk can present "No thread open" with keyboard
guidance.
- When no reporter email is available and internal-note mode is off, the Desk can
present "No email on file — the customer can only see this on their tracking page."
- When the composer is empty or sending, **Send** and **Send & done** are disabled.
- When the composer is empty, **Preview** is disabled.
- When a thread is paused, **Wake now** can appear. When a thread is done, **Reopen**
can appear.
- While Issues data is loading, chart areas can show loading placeholders. Empty chart
messages depend on the returned data.
- When no project is selected, Issues can present "No project selected" and
"Pick a project from the switcher to see its reported issues."
| If the chart has no matching data… | Message |
| --- | --- |
| The selected period has no activity | "No activity in this period yet" |
| The daily chart has no activity | "No daily activity yet" |
| No category data is available | "No category data yet" |
| No audience data is available | "No audience data yet" |
| No reported-page data is available | "No reported pages yet" |
**Attach** is disabled on the Desk.
When a message blocks the next action, use [Handle a problem](#handle-a-problem).
## Handle a problem
Use the message on screen to choose the recovery route. A failed reply can restore the
draft, a failed Desk action can revert the local thread state, and a failed duplicate
merge or Copilot request can report an error instead of completing the action.
| If the screen presents… | What to do |
| --- | --- |
| "Reply failed — restored your draft" | Review the restored draft and retry the reply. |
| "Duplicate merge failed" | Review the duplicate target and retry the merge. |
| "The action could not be completed and was reverted." | Review the thread and retry the action. |
| "Ask failed" | Review the Copilot question and retry it. |
| "Draft failed" | Retry the article draft request. |
**Prerequisites**
- Know which action produced the message.
- Keep the original reply text available when retrying a reply.
**Steps**
1. Read the complete message on screen.
2. Use the message text on screen to choose the matching row in the recovery table.
3. Follow that row’s recovery instruction.
4. If the action still does not complete, open Common issues and solutions or Getting
help.
**Result:** You have either retried the relevant action or moved to the detailed
recovery path for the problem.
## Choose what to do next
Use the destination controls when the answer points beyond the current statistics
surface. **All issues**, **Boards**, and **View all** are the visible Issues routes for
continuing issue work.
**Steps**
1. Choose the next destination that matches your work.
| If you need to… | Select or open |
| --- | --- |
| Continue with the complete issue list | **All issues** |
| Continue with issue boards | **Boards** |
| Continue from a recent-reports area | **View all** |
| Continue detailed Desk work | [Desk overview](https://atloria-selfdogfood-3577.atloria.app/p/atloria-selfdogfood-3577-BDFvUbEgc3/user/desk-overview) |
| Continue detailed issue recovery | [Issue states and recovery](https://atloria-selfdogfood-3577.atloria.app/p/atloria-selfdogfood-3577-BDFvUbEgc3/user/issue-states-and-recovery) |
| Read general error guidance | [General error messages](https://atloria-selfdogfood-3577.atloria.app/p/atloria-selfdogfood-3577-BDFvUbEgc3/user/general-error-messages) |
| Route a product question or support request | [Getting help](https://atloria-selfdogfood-3577.atloria.app/p/atloria-selfdogfood-3577-BDFvUbEgc3/user/getting-help) |
**Result:** You are on the destination that owns the next detailed task or recovery
question.
# General error messages
Use this page to recognize a general error, understand its message, and choose the
next supported action.
## Overview
General error messages explain why a screen cannot complete an operation or load its
content. Use this page when a dashboard, document, or operations task stops.
| If you need to… | Go to |
| --- | --- |
| Identify the type of error | [Understand the error state](#understand-the-error-state) |
| Reach the affected screen | [Find the error](#find-the-error) |
| Choose a recovery action | [Recover from a common error](#recover-from-a-common-error) |
| Distinguish similar messages | [Handle error branches](#handle-error-branches) |
| Continue after recovery fails | [When recovery does not work](#when-recovery-does-not-work) |
| Continue with document or operations work | [Documents overview](https://atloria-selfdogfood-3577.atloria.app/p/atloria-selfdogfood-3577-BDFvUbEgc3/user/documents-overview) or [Operations overview](https://atloria-selfdogfood-3577.atloria.app/p/atloria-selfdogfood-3577-BDFvUbEgc3/user/operations-overview) |
An error can appear as an inline message, a compact message, or a modal message.
## Before you start
Identify the screen where the error appears and the operation that failed.
The dashboard page header and project table are available after the screen loads. If
signing in leaves you on the sign-in form, reach the requested screen before following
the recovery steps on this page.
## Find the error
Use this procedure when you need to locate the message before choosing a recovery
action.
**Prerequisites**
- Know whether the problem is on the dashboard, documents, or operations screen.
**Steps**
1. Open the affected screen.
2. Read the error title and description.
3. Read the hint below the description when one appears.
4. Note the exact message before selecting a recovery action.
**Result:** The error message and the screen where it appears are identified.
## Understand the error state
An error state explains a failed load or operation and provides the next available
action.
| Error-state part | What it provides |
| --- | --- |
| Error text | Shows the returned error text or a standard message for the failed request. |
| Display style | Uses an inline state for most document errors, a compact state for category-fetch failures, or a modal state for a missing project. |
| Dismissal action | **Dismiss** is available when the modal supplies a dismissal action. |
| Navigation action | **Go to Projects** is available for a `Project not found` message. |
| Missing project versus another failed request | A missing project uses the modal state; another documents request failure uses the inline state. |
On the dashboard, the visible table headers are **Project**, **Docs**, **Categories**,
and **Updated**. The stable product-level controls visible there include **Search⌘K**,
**Sign out**, **Get Started →**, **GitHubConnected**, **GitLab**, **Bitbucket**,
**Create without a repository**, and the icon-only **Switch to dark mode** control.
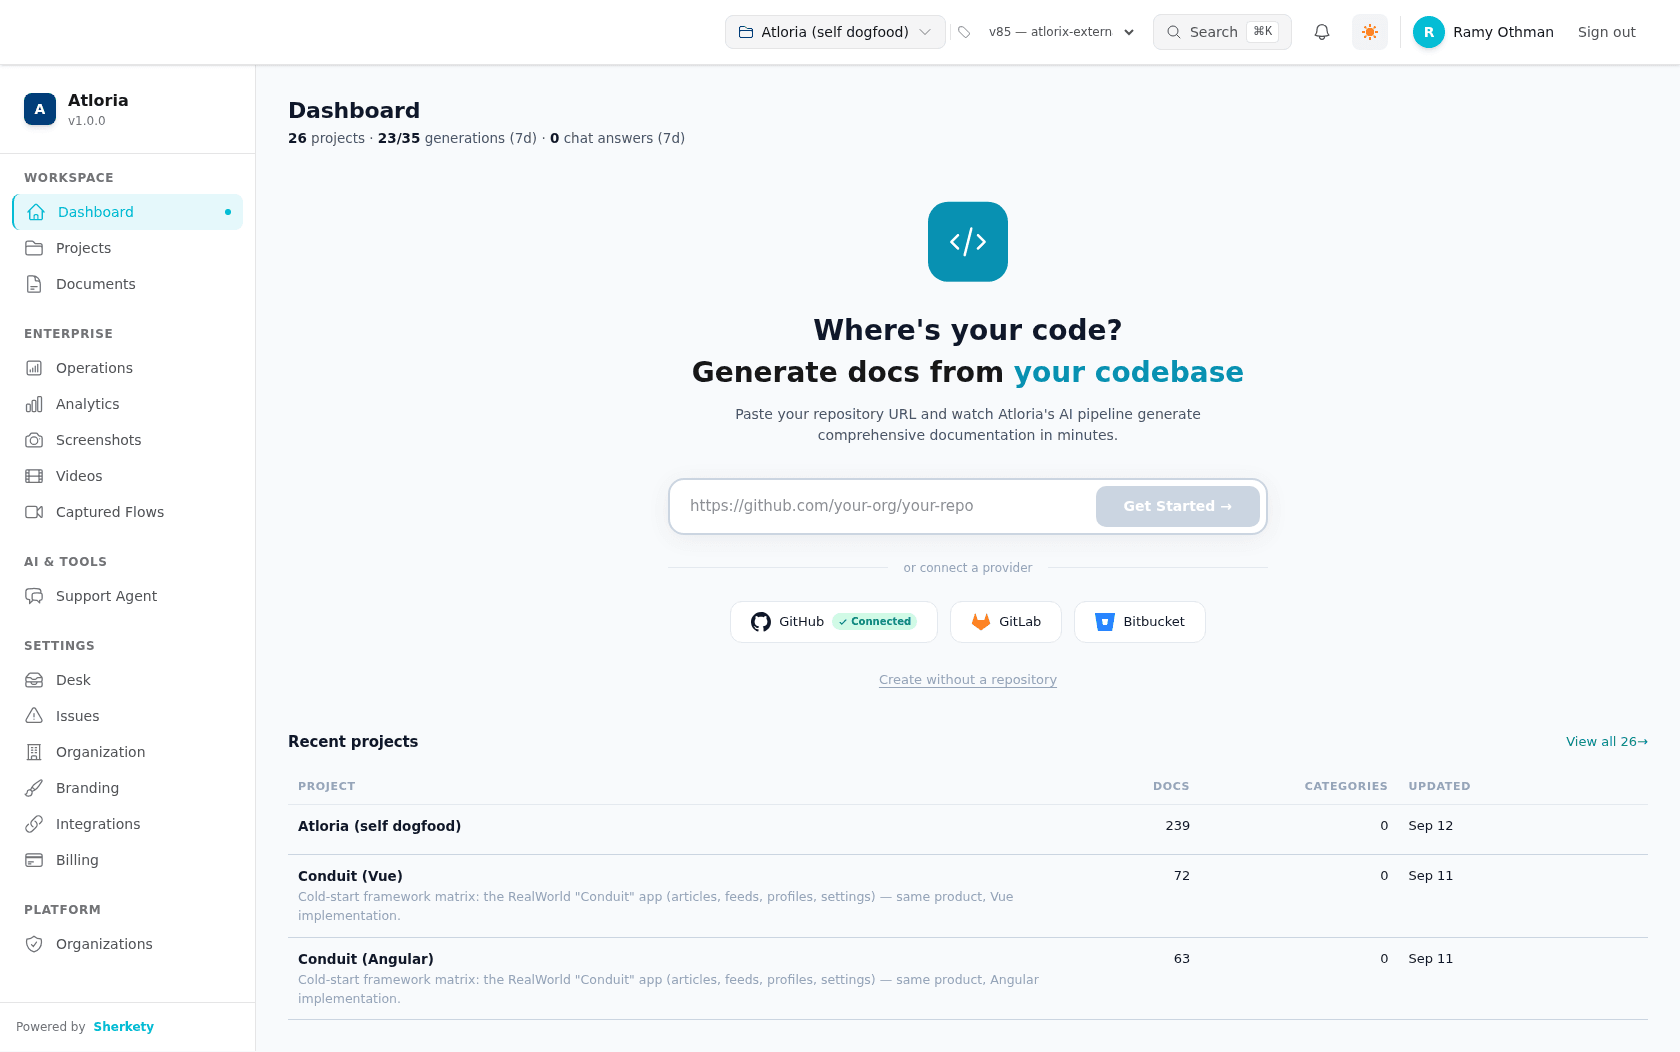
## Recover from a common error
Use this procedure after you have read the complete error message.
**Prerequisites**
- Have the affected screen open.
- Have the complete error title, description, and hint in view.
**Steps**
1. Follow the action in the row that matches the exact error message.
| If the message is… | Then… |
| --- | --- |
| `Project not found` | Read the hint and select **Go to Projects**. |
| `Access denied` | Read the hint to log out and back in, or contact your administrator. |
| `Connection error` | Check your internet connection and refresh the page. |
| `7-day activity unavailable` | Continue the current dashboard task using the information that remains available. |
| Another message | Record the exact message, then use [When recovery does not work](#when-recovery-does-not-work). |
**Result:** You have followed the action associated with the displayed message.
## Handle error branches
Use the message itself to distinguish the branch. Similar-looking failures have
different next actions.
| What you see | What it means | Next action |
| --- | --- | --- |
| `Project not found` | The selected project may have been deleted or access may have changed. | Read the hint and select **Go to Projects**. |
| `Access denied` | You do not have permission to access the resource. | Log out and back in, or contact your administrator. |
| `Not found` | The requested resource does not exist or has been removed. | Record the exact message and use [When recovery does not work](#when-recovery-does-not-work). |
| `Connection error` | The application cannot connect to the server. | Check your internet connection and refresh the page. |
| `Authentication required` | The category request requires authentication. | Sign in before returning to the category list. |
| `Failed to load categories` | The category list could not be loaded. | Retry the category list from the documents screen. |
| `Operations failed to load.` | The operations request failed. | Record the returned message and use [When recovery does not work](#when-recovery-does-not-work). |
Category creation and editing use their own modal surface. The category modal displays
`Failed to save category` when its save request fails.
**Result:** The displayed message is matched to one error branch and its next action.
## When recovery does not work
Use this troubleshooting table when the first recovery action does not resolve the
message. Quote the message exactly when you report the problem.
| Message | What to do |
| --- | --- |
| `Something went wrong` | Record the unexpected error text shown with the message. |
| `An unexpected error occurred.` | Record the message exactly and use [Getting help](https://atloria-selfdogfood-3577.atloria.app/p/atloria-selfdogfood-3577-BDFvUbEgc3/user/getting-help). |
| `The selected project may have been deleted or you no longer have access to it.` | Read the `Project not found` hint and select **Go to Projects**. |
| `Please select an existing project from the dropdown in the top header to continue.` | Select an existing project from the top-header project dropdown. |
| `You don't have permission to access this resource.` | Log out and back in, or contact your administrator. |
| `Try logging out and back in, or contact your administrator.` | Follow the displayed hint. |
| `The resource you're looking for doesn't exist or has been removed.` | Record the resource and the exact message, then use [Getting help](https://atloria-selfdogfood-3577.atloria.app/p/atloria-selfdogfood-3577-BDFvUbEgc3/user/getting-help). |
| `Unable to connect to the server. Please check your internet connection.` | Check your internet connection. |
| `Make sure the API server is running and try refreshing the page.` | Refresh the page after checking the connection. |
| `Failed to load categories` | Retry the category list from the documents screen. |
| `Failed to save category` | Retry the category save from the category modal. |
| `Failed to delete document: ` | Record the complete message, including the returned detail. |
| `Failed to reorder documents. Please try again.` | Try the document reorder operation again. |
| `Failed to reorder categories. Please try again.` | Try the category reorder operation again. |
| `Operations failed to load.` | Record the returned message and use [Getting help](https://atloria-selfdogfood-3577.atloria.app/p/atloria-selfdogfood-3577-BDFvUbEgc3/user/getting-help). |
| `7-day activity unavailable` | Continue with the available dashboard work and record the unavailable summary. |
| `Authentication required` | Sign in before returning to the category list. |
| `Loading...` | Wait for the category list to finish loading before selecting a category. |
**Result:** You have a precise message and a documented next action for support or
another attempt.
## Know what to do next
After you complete the recovery action, continue with the work that was interrupted.
For document work, see [Documents overview](https://atloria-selfdogfood-3577.atloria.app/p/atloria-selfdogfood-3577-BDFvUbEgc3/user/documents-overview). For operational
information, see [Operations overview](https://atloria-selfdogfood-3577.atloria.app/p/atloria-selfdogfood-3577-BDFvUbEgc3/user/operations-overview). For unresolved
problems, see [Getting help](https://atloria-selfdogfood-3577.atloria.app/p/atloria-selfdogfood-3577-BDFvUbEgc3/user/getting-help) or [Common issues and solutions](https://atloria-selfdogfood-3577.atloria.app/p/atloria-selfdogfood-3577-BDFvUbEgc3/user/common-issues-and-solutions).
After resolving an error, continue in the screen where it appeared unless the message
directs you elsewhere.
**Result:** You know whether to retry the operation, continue in the affected area, or
seek help with the exact message.
## Related
- [Getting help](https://atloria-selfdogfood-3577.atloria.app/p/atloria-selfdogfood-3577-BDFvUbEgc3/user/getting-help).
- [Common issues and solutions](https://atloria-selfdogfood-3577.atloria.app/p/atloria-selfdogfood-3577-BDFvUbEgc3/user/common-issues-and-solutions).
- [Documents overview](https://atloria-selfdogfood-3577.atloria.app/p/atloria-selfdogfood-3577-BDFvUbEgc3/user/documents-overview).
- [Operations overview](https://atloria-selfdogfood-3577.atloria.app/p/atloria-selfdogfood-3577-BDFvUbEgc3/user/operations-overview).
# Common issues and solutions
Common issues are problems that need diagnosis or a supported recovery action. Use **Issues** for
reported problems and their statistics, and use **Desk** for triage and follow-up work. **Issues**
is the recovery and exception path after the primary work is complete; **Desk** is the work queue
for deciding what needs attention next.
| If you need to… | Go to |
|---|---|
| Review issue statistics or open the complete issue list | [Issues overview](https://atloria-selfdogfood-3577.atloria.app/p/atloria-selfdogfood-3577-BDFvUbEgc3/user/issues-overview) |
| Work with one issue record | [Work with an issue](https://atloria-selfdogfood-3577.atloria.app/p/atloria-selfdogfood-3577-BDFvUbEgc3/user/work-with-an-issue) |
| Manage issue boards | [Manage issue boards](https://atloria-selfdogfood-3577.atloria.app/p/atloria-selfdogfood-3577-BDFvUbEgc3/user/manage-issue-boards) |
| Understand issue states and recovery | [Issue states and recovery](https://atloria-selfdogfood-3577.atloria.app/p/atloria-selfdogfood-3577-BDFvUbEgc3/user/issue-states-and-recovery) |
| Review Desk queues and their purpose | [Desk overview](https://atloria-selfdogfood-3577.atloria.app/p/atloria-selfdogfood-3577-BDFvUbEgc3/user/desk-overview) |
| Triage and act on a Desk thread | [Work from Desk](https://atloria-selfdogfood-3577.atloria.app/p/atloria-selfdogfood-3577-BDFvUbEgc3/user/work-from-desk) |
| Understand Desk states and actions | [Desk states and actions](https://atloria-selfdogfood-3577.atloria.app/p/atloria-selfdogfood-3577-BDFvUbEgc3/user/desk-states-and-actions) |
| Prepare the project context | [Before you start](#before-you-start) |
| Find the right recovery view on this page | [Find the recovery surface](#find-the-recovery-surface) |
| Identify the controls before choosing an action | [Understand the recovery screen](#understand-the-recovery-screen) |
| Triage a support thread | [Recover a thread from Desk](#recover-a-thread-from-desk) |
| Diagnose an unsuccessful action | [When recovery goes wrong](#when-recovery-goes-wrong) |
| Route an unresolved product question or issue | [Getting help](https://atloria-selfdogfood-3577.atloria.app/p/atloria-selfdogfood-3577-BDFvUbEgc3/user/getting-help) |
## Before you start
Before you begin, select the project whose issues or support threads you need to review. Issue data
and Desk threads are scoped to the selected project. The Issues destination has no record-entry form;
it provides statistics and links to **All issues** and **Boards**.
| Have this ready | Why it matters |
|---|---|
| The project that owns the issue or thread | The Issues overview and Desk work from one project context. |
| The problem you need to investigate | The issue list, board view, or Desk queue gives you the place to continue. |
| The recovery action you intend to take | Desk actions can reply, add a team-only message, snooze, or change a thread state. |
If no project is selected, Issues shows `No project selected` with `Pick a project from the
switcher to see its reported issues.` Desk shows `No project selected` with `Pick a project from
the switcher to open the Desk.`
## Find the recovery surface
The Issues overview is the project-scoped starting point for reported issues. Desk is the project-
scoped starting point for support threads that need triage or follow-up.
**Prerequisites**
- You have selected the project that owns the work.
- You know whether you need an issue list, a board view, or a Desk queue.
**Steps**
1. Open the **Issues** or **Desk** destination.
2. Choose the view that matches what you need to do:
| If you need to… | Select |
|---|---|
| Open the complete issue list | **All issues** |
| Open issues arranged on boards | **Boards** |
| Open the complete issue list from Recent Reports | **View all** |
| Review threads needing a first response | **Needs first response** |
| Review threads needing the next response | **Needs next response** |
| Review work being investigated | **Investigating** |
| Review threads waiting for the customer | **Waiting for customer** |
| Review work paused for later | **Paused for later** |
| Review work completed today | **Done today** |
| Review your threads | **Your threads** |
| Review threads without an assignee | **Unassigned** |
**Result:** The selected issue view or Desk queue is on screen.
## Understand the recovery screen
The Issues overview gives you a reporting period, statistics, and routes into issue lists and
boards. Desk gives you queues, a thread list, and a thread workspace with reply and state controls.
On Issues, **Time range** offers these reporting periods:
| If you need to review… | Select |
|---|---|
| The last seven days | **7d** |
| The last 30 days | **30d** |
| The last 90 days | **90d** |
**Refresh** reloads the chart and issue data. The overview can show `No activity in this period yet`,
`No daily activity yet`, `No priority data yet`, `No resolved tickets yet to analyze`, `Reported issues will appear here.`, `No category data yet`, `No audience data yet`, or `No reported pages yet` when
the corresponding area has no data.

The Issues overview presents 13 buttons, including the reporting-period and navigation controls
described above. One visible control has no label.
In Desk, the thread workspace contains a Reply composer and an Internal note mode. **Internal note**
keeps the note for your team. **Preview** changes to **Write** while the message preview is open.
With an empty composer, **Preview** and the send controls are disabled. The reply actions become
available after text is entered; **Send & done** marks the thread done. **Attach** is disabled.
If no thread is open, Desk shows `No thread open` with keyboard guidance. A thread can show these
state controls: **Investigating**, **Waiting for customer**, **Paused**, and **Done**. A paused
thread can show **Wake now**; a completed thread can show **Reopen**.
The next recovery procedure begins after you open a thread from the selected Desk queue.
## Recover a thread from Desk
A Desk thread is a support item that you triage, communicate about, and move through a follow-up
state. Use the queue that matches the work, then apply the action that matches the thread's current
condition.
**Prerequisites**
- You have selected a Desk queue.
- You have opened the thread you need to handle.
- You know whether your message is for the customer or your team.
**Steps**
1. Select the Desk queue identified in [Find the recovery surface](#find-the-recovery-surface).
2. Select the thread in the list to open its workspace.
3. Choose the action that matches your purpose:
| If you need to… | Select |
|---|---|
| Add a message for your team | **Internal note** |
| Check the customer-facing formatting before sending | **Preview** |
| Return from the preview to editing | **Write** |
| Send a customer reply | **Send** |
| Send a reply and finish the thread | **Send & done** |
| Move the thread into investigation | **Investigating** |
| Mark that you are waiting for the customer | **Waiting for customer** |
| Pause the thread for later | **Paused** |
| Mark the thread done | **Done** |
| Wake a paused thread | **Wake now** |
| Reopen a completed thread | **Reopen** |
4. If you select **Paused**, choose a snooze time from the menu:
| If you want to resume… | Select |
|---|---|
| In one hour | **1 hour** |
| Tomorrow morning | **Tomorrow 9:00** |
| Next week | **Next week** |
5. Choose the duplicate-dialog outcome:
| If you need to… | Action |
|---|---|
| Mark the current thread as a duplicate | Enter a positive number in `Ticket # (e.g. 13)`, then select **Merge into ticket**. |
| Leave the duplicate action without merging | Select **Cancel**. |
**Result:** The thread remains in Desk with the selected queue or state, and a completed duplicate
merge removes the duplicate thread from the current list.
## Handle common branches
Use the branch that matches what is on screen instead of repeating an action that does not apply.
**Prerequisites**
- You have opened Issues or Desk.
- You can read the empty-state, warning, or state label shown on the screen.
**Steps**
1. If the screen shows **No project selected**, select a project from the switcher and return to the
Issues or Desk destination.
2. If Desk shows `No thread open`, select a thread from the list before using thread controls.
3. If Desk shows `Nothing here`, choose another queue; new threads land in **Triage** and **Needs
first response**.
4. Select **Internal note** or **Send** when the thread shows `No email on file — the customer can only see this on their tracking page.`:
| If the message is for… | Select |
|---|---|
| Your team only | **Internal note** |
| The customer | Review the thread, then select **Send** |
5. If a paused thread shows **Wake now**, select it when work can resume.
6. If a completed thread shows **Reopen**, select it when the work needs to continue.
7. If a knowledge-gap card appears in **Triage** or **Needs first response**, select the **Draft with AI**
control.
**Result:** The branch-specific control or alternate queue is on screen, and the thread remains in a
state that matches the work you need to do.
## When recovery goes wrong
Use the exact message on screen to decide whether to retry, restore a draft, or continue in the
detailed issue procedure.
| What appears | What to do |
|---|---|
| The action fails and the thread returns to its previous state | Confirm the previous state, then retry the action when the thread is ready. |
| `Reply failed — restored your draft` | Check the draft and retry **Send** or **Send & done** when the thread is ready. |
| `Duplicate merge failed` | Check the ticket number in `Ticket # (e.g. 13)`, then retry **Merge into ticket**. |
| `Draft failed` | Return to the knowledge-gap card and retry **Draft with AI**. |
| `No activity in this period yet` | Select another time range or select **Refresh**. |
| `No reported pages yet` | Select **Refresh**, then review the issue views when page reports are available. |
| `Update failed` | Follow [Work with an issue](https://atloria-selfdogfood-3577.atloria.app/p/atloria-selfdogfood-3577-BDFvUbEgc3/user/work-with-an-issue) to review the issue record's update controls. |
| `Close failed` | Follow [Work with an issue](https://atloria-selfdogfood-3577.atloria.app/p/atloria-selfdogfood-3577-BDFvUbEgc3/user/work-with-an-issue) to review the issue's close controls. |
| `Failed to add comment` | Follow [Work with an issue](https://atloria-selfdogfood-3577.atloria.app/p/atloria-selfdogfood-3577-BDFvUbEgc3/user/work-with-an-issue) to review the comment text and retry. |
| `Could not remove` | Follow [Manage issue boards](https://atloria-selfdogfood-3577.atloria.app/p/atloria-selfdogfood-3577-BDFvUbEgc3/user/manage-issue-boards) to review the board action. |
For a failed draft, the recovery message is `Draft failed fallback; the server message replaces it when present`.
If the Issues overview remains in a loading or empty state, select **Refresh**.
## Continue after recovery
After you diagnose the issue, continue with the page that owns the next action. A Desk recovery ends
with the thread's selected state. A completed duplicate merge displays a confirmation that the
source thread was merged into the selected ticket.
| If you need to… | Continue with |
|---|---|
| Understand the Issues overview and its views | [Issues overview](https://atloria-selfdogfood-3577.atloria.app/p/atloria-selfdogfood-3577-BDFvUbEgc3/user/issues-overview) |
| Work with one issue record | [Work with an issue](https://atloria-selfdogfood-3577.atloria.app/p/atloria-selfdogfood-3577-BDFvUbEgc3/user/work-with-an-issue) |
| Manage issue boards | [Manage issue boards](https://atloria-selfdogfood-3577.atloria.app/p/atloria-selfdogfood-3577-BDFvUbEgc3/user/manage-issue-boards) |
| Understand issue states and recovery | [Issue states and recovery](https://atloria-selfdogfood-3577.atloria.app/p/atloria-selfdogfood-3577-BDFvUbEgc3/user/issue-states-and-recovery) |
| Review the Desk work hub | [Desk overview](https://atloria-selfdogfood-3577.atloria.app/p/atloria-selfdogfood-3577-BDFvUbEgc3/user/desk-overview) |
| Work from Desk | [Work from Desk](https://atloria-selfdogfood-3577.atloria.app/p/atloria-selfdogfood-3577-BDFvUbEgc3/user/work-from-desk) |
| Understand Desk states and actions | [Desk states and actions](https://atloria-selfdogfood-3577.atloria.app/p/atloria-selfdogfood-3577-BDFvUbEgc3/user/desk-states-and-actions) |
| Get help with a problem that remains | [Getting help](https://atloria-selfdogfood-3577.atloria.app/p/atloria-selfdogfood-3577-BDFvUbEgc3/user/getting-help) |
| Check common product questions | [FAQ](https://atloria-selfdogfood-3577.atloria.app/p/atloria-selfdogfood-3577-BDFvUbEgc3/user/faq) |
**Result:** You are at the detailed issue, board, Desk, or help page for the next recovery action.